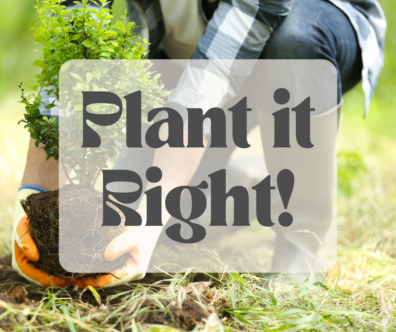
 Make a Plan
Put the right plant in the right place. Place plants in the right environment, with proper sun exposure, soil pH, drainage, and water.
Consider:
- plant hardiness
- the eventual height and space requirement for each mature plant
- foliage color and texture
- flower color and bloom times
Prepare the Soil
For perennial gardens, soil preparation is the key. Soil testing is helpful when starting a new garden on an unfamiliar site or when expanding an existing garden. The best time to prepare the soil is in the fall before spring planting. Be sure to prepare the entire planting area, not just the holes dug for each plant.
- Remove weeds and dig thoroughly, loosening the soil to at least 12 inches.
- Spread 3 to 4 inches of organic material across the soil surface and dig it in well. Commercial compost, homemade compost, chopped or composted leaves, composted sawdust, fine bark, and composted manure make good amendments.
- The planting site should be well-drained or plan to use plants that are suitable for damp conditions.
Preparing the Hole
- Dig the planting hole wide enough to completely spread out the roots without crowding or bending but not deeper than the root system.
- Remove any plant roots or grass clumps from the soil that will be used to backfill the hole.
- Roughen the sides of the hole if they appear slick.
Preparing the Plant
Bareroot Plants:
- Cut back damaged or any badly kinked roots, making a clean cut. Soak the roots in water for 1-2 hours (never longer than 6 hours).
- Place the plant on a cone of soil and gently spread the roots outward. It should be placed in the hole to the level where it was growing in the nursery.
Balled and Burlapped Plants:
- Place the ball in the planting hole with the top of the ball even with the soil surface or slightly higher.
- Remove the burlap along with all rope, string, or twine tying materials. If the root ball is too large and heavy or threatens to break apart, cut off ties and as much burlap as possible.
- Clean cut all damaged roots.
For Potted Plants:
- Ensure the soil in the pot is moist, then tip the pot on its side and gently press on the pot to loosen the plant. Remove the container even if it is a papier-mâché pot or a peat pot.
- Carefully spread the roots away from the soil mass. If roots are circling, make six to eight vertical slashes in the root ball and spread the roots out. If circling roots are very woody, “butterfly” the root ball by driving a shovel straight through the bottom third to half of the root mass, creating two flaps of the bottom portion of the root ball and then make vertical slashes in the top half.
- Place the prepared root ball in the planting hole with the surface of the root ball level with the soil surface or slightly higher.
Remember: Planting too high results in plants drying out and planting too low invites crown rots. Some perennials such as bleeding heart, iris, and peony need shallow planting in order to flower properly.
Replacing the Soil
- Backfill using the native soil that was dug out of the hole. If you wish, mix a slow-release fertilizer with the backfill soil but do not amend it further.
- Ensure that only soil goes back into the hole. No large rocks, sticks, clumps of grass, or leaves.
- Push soil around the roots in the hole to remove air pockets without disturbing root arrangement.
- Construct a basin around the periphery of the planting hole to hold water and adjust the soil so that water drains away from the immediate trunk area.
Finishing Up
- Water the plant immediately to settle the soil and eliminate any air pockets. Add more soil if necessary.
- If using compost or mulch, apply no more than 2-3 inches to the top of the soil in a circle at least as wide as the roots, but not touching the stem.
Remember: A recently transplanted plant needs special attention throughout its first year. Some plants may also require some extra protection to prevent winter injury.
Walla Walla County WSU Extension Bulletin # 213 5/08
Sources: EM8742 Sustainable Gardening; MISC0337 Plant it Right: Restoration Planting Techniques; EB1505 Planting Landscape Plants.