Maple sugaring is a fun, sustainable way to engage with forests and a great opportunity to spend time outdoors during the winter months. At the hobby scale, it can be a solo activity, or an opportunity to get the whole family or neighborhood involved. Bigleaf maple syrup is a unique, local forest product that can be used in a wide variety of foods and drinks. A little can go a long way, so it’s worth the effort!
For most people in the Pacific Northwest, sugaring is a new concept. This page provides the basic skills and knowledge needed for someone with limited or no experience to start tapping, but can also provide valuable insights to seasoned hobbyists.
If you want to learn more about large-scale and/or commercial operations, check out the Commercial Producers page.
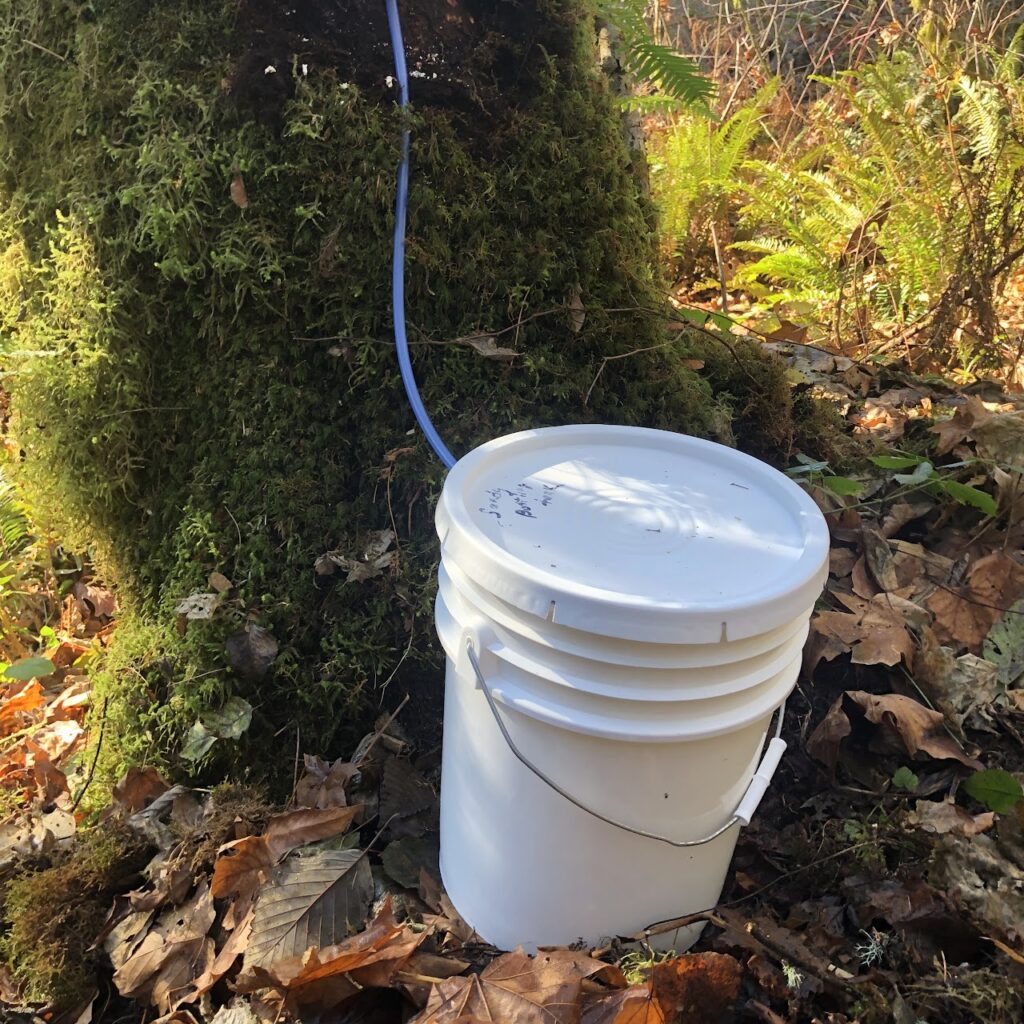
Sap is fluid held inside of trees. It’s mostly water (>98%) but also contains dissolved sugars created by the trees during photosynthesis and a small amount of other organic compounds and minerals (e.g., calcium, potassium, amino acids). During the growing season, sap moves through the tree as bi-product of photosynthesis and transpiration. During the winter, trees are dormant and sap movement is minimal or nonexistent in most trees. Maples, however, are unique in that sap will move in the tree during during dormancy – specifically as a response to swings in temperature from below freezing to above freezing (called a “freeze-thaw cycle”).
The physiological mechanism behind winter sap flow in maple trees is still debated. The leading theory relies on the fact that there is gaseous space inside the wood fiber cells, a trait that is unique to maples (Acer spp.) and also walnut (Juglans spp.) species. When temperatures fall below freezing (32 degrees Fahrenheit), the sap on the outer edge of the gaseous space in these wood fiber cells freezes. As it freezes it draws additional sap from adjacent parts of the tree inward through a process called “cryosuction”. The empty space in the wood fiber cells allow that sap to be drawn in. In other tree species, where these cells are already saturated with liquid, the freezing process would cause that sap to expand and exude outward. As freezing conditions continue, the negative pressure created by sap being contracted into these cells forces the tree to draw water in from its roots into the stem, resulting in a build-up of sap in the tree. Then, when temperatures warm, the sap thaws and the gas in the fiber cells expands, creating pressure that pushes the sap outward. This positive pressure is what causes the sap to be pushed out of a tap hole when we drill into the tree.
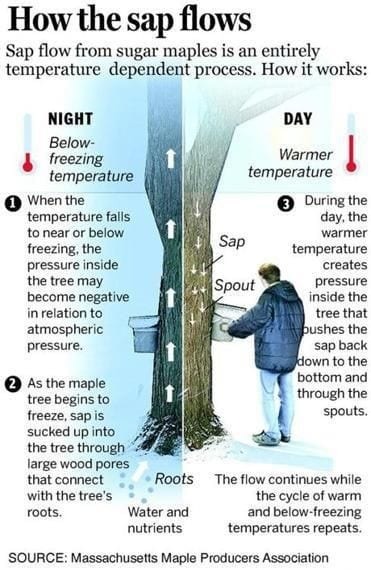
This explanation is still just a theory, and doesn’t fully explain the phenomenon of winter sap flow, but it aligns well with the experience of tree tappers and helps us understand and predict the timing and intensity of periods of sap flow (also called a “sap run”).
As a hobbyist tapper, understanding that freeze-thaw cycles are responsible for sap flow is critical to success. In the Eastern United States where winter conditions are harsher, the sap season occurs over 3-6 weeks in the spring as conditions warm and they get a series of freezing nights and warm days. In Western Washington, we can get freezing conditions throughout the winter, but we almost always have daytime temperatures above freezing. This creates a less predictable, but potentially longer, sap season that generally runs from late November to early March. Hobbyist tappers in our region learn to watch the weather forecast closely during this time.
To learn more about sap flow in bigleaf maple, read the OSU Fact Sheet Ecophysiological Sap Flow Processes of Bigleaf Maple (Acer macrophyllum) (PDF).
Identifying Bigleaf Maple
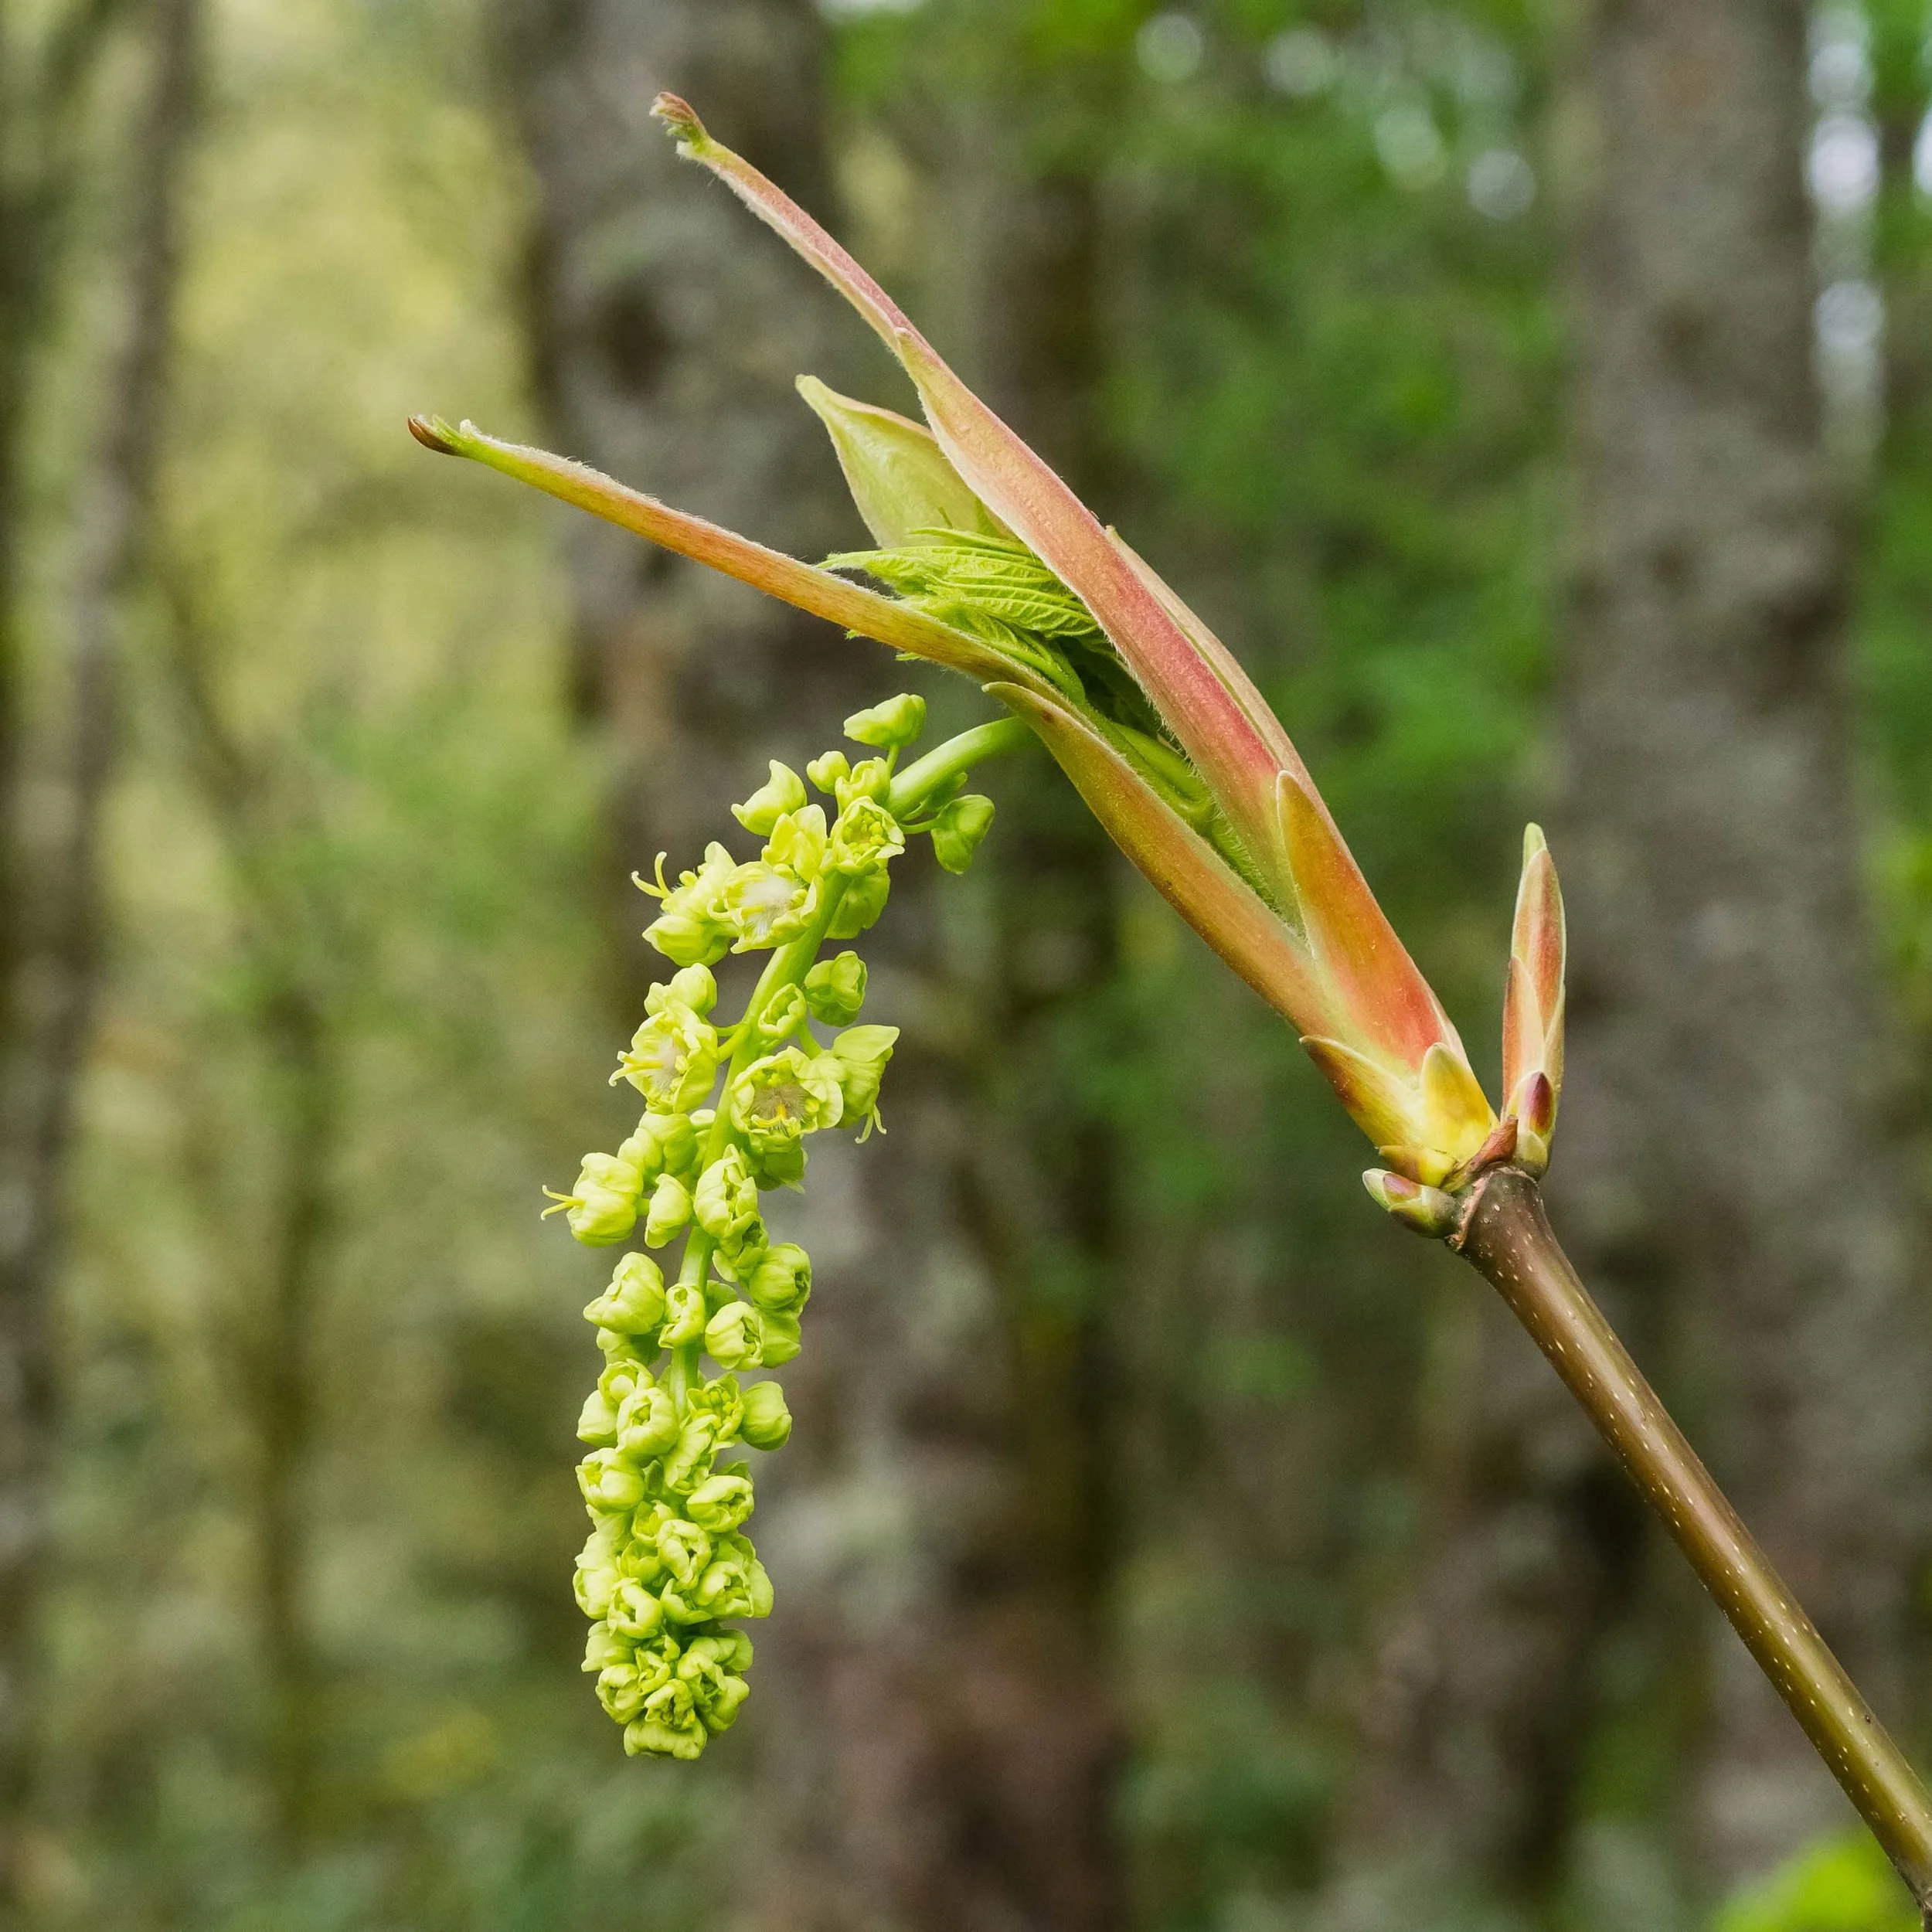
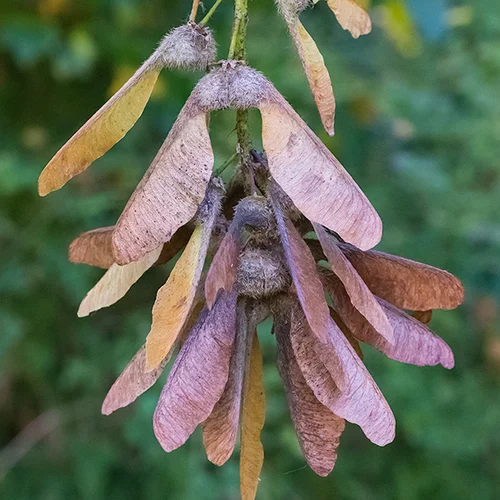
Bigleaf maple (Acer macrophyllum) is very common west of the Cascades in Washington State, but small populations can also be found in parts of Central and Eastern Washington. Identifying a maple tree during the growing season is easy enough. True to it’s name, bigleaf maple has large leaves, often twelve inches across or more, with five lobes in the traditional “maple shape”. However, since sugaring is a winter activity, it’s important to be able to identify a maple tree even after the leaves have dropped. Use the pictures below to train your eye in all seasons.
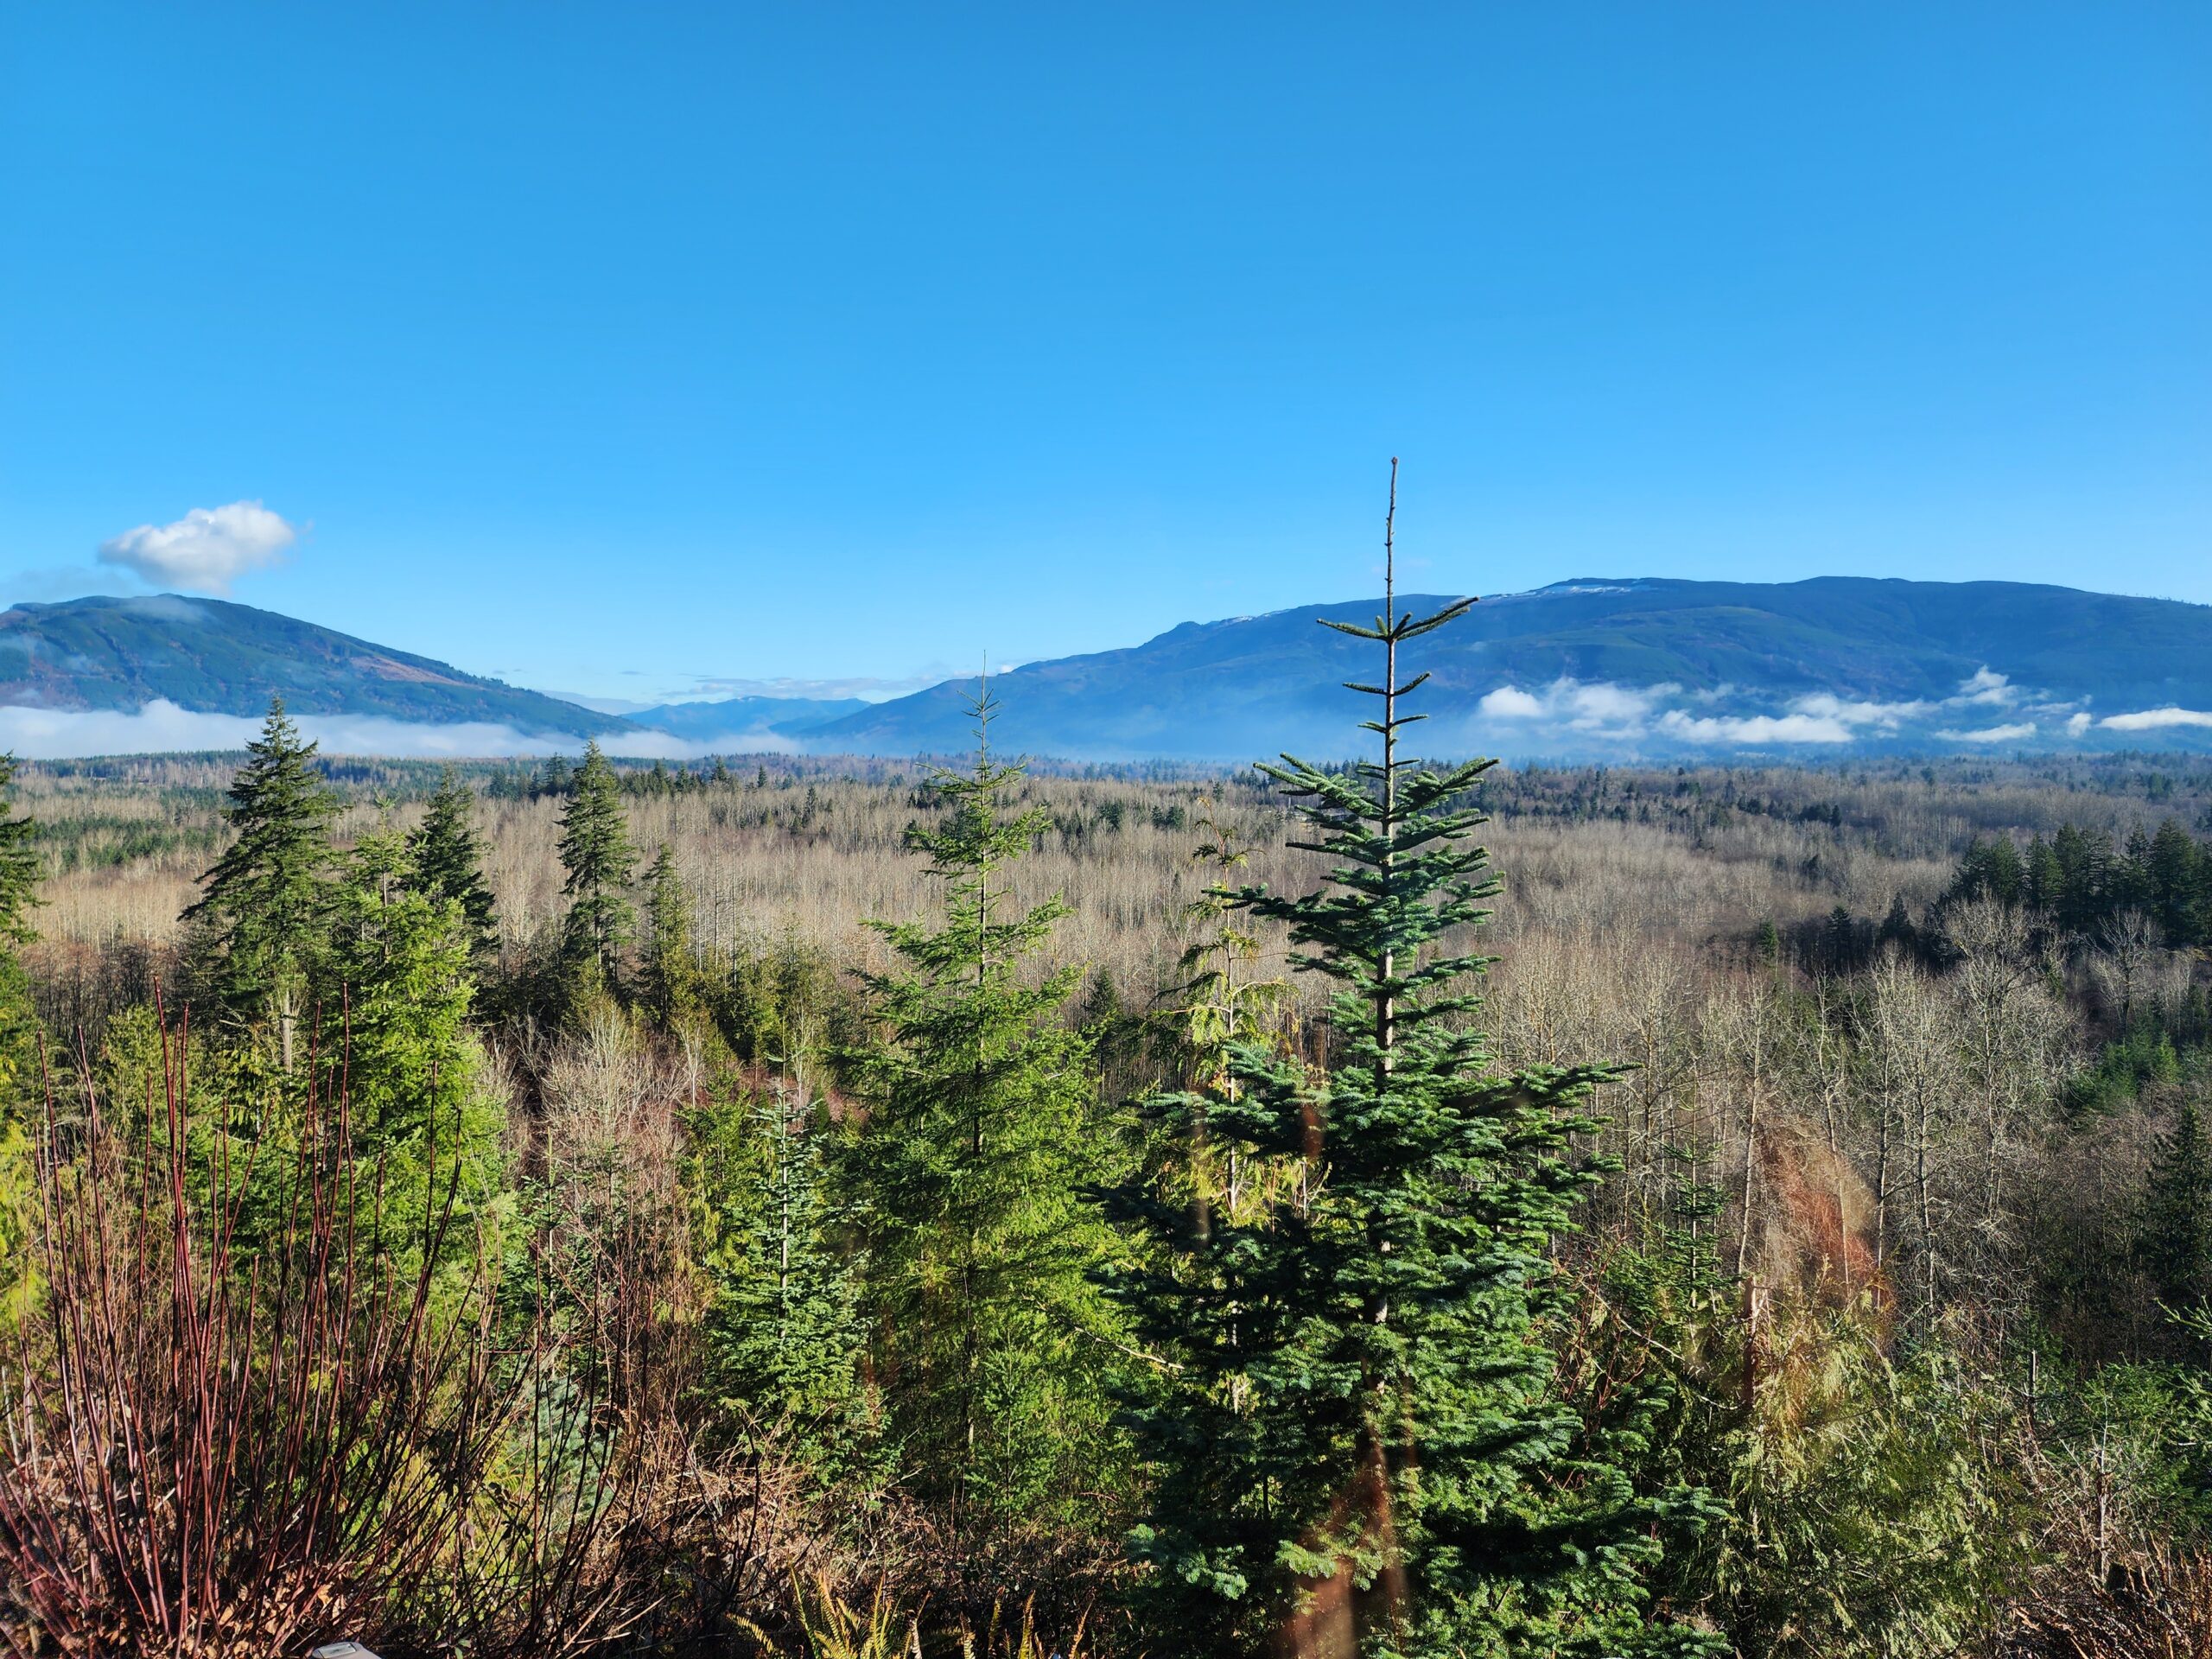
Sites
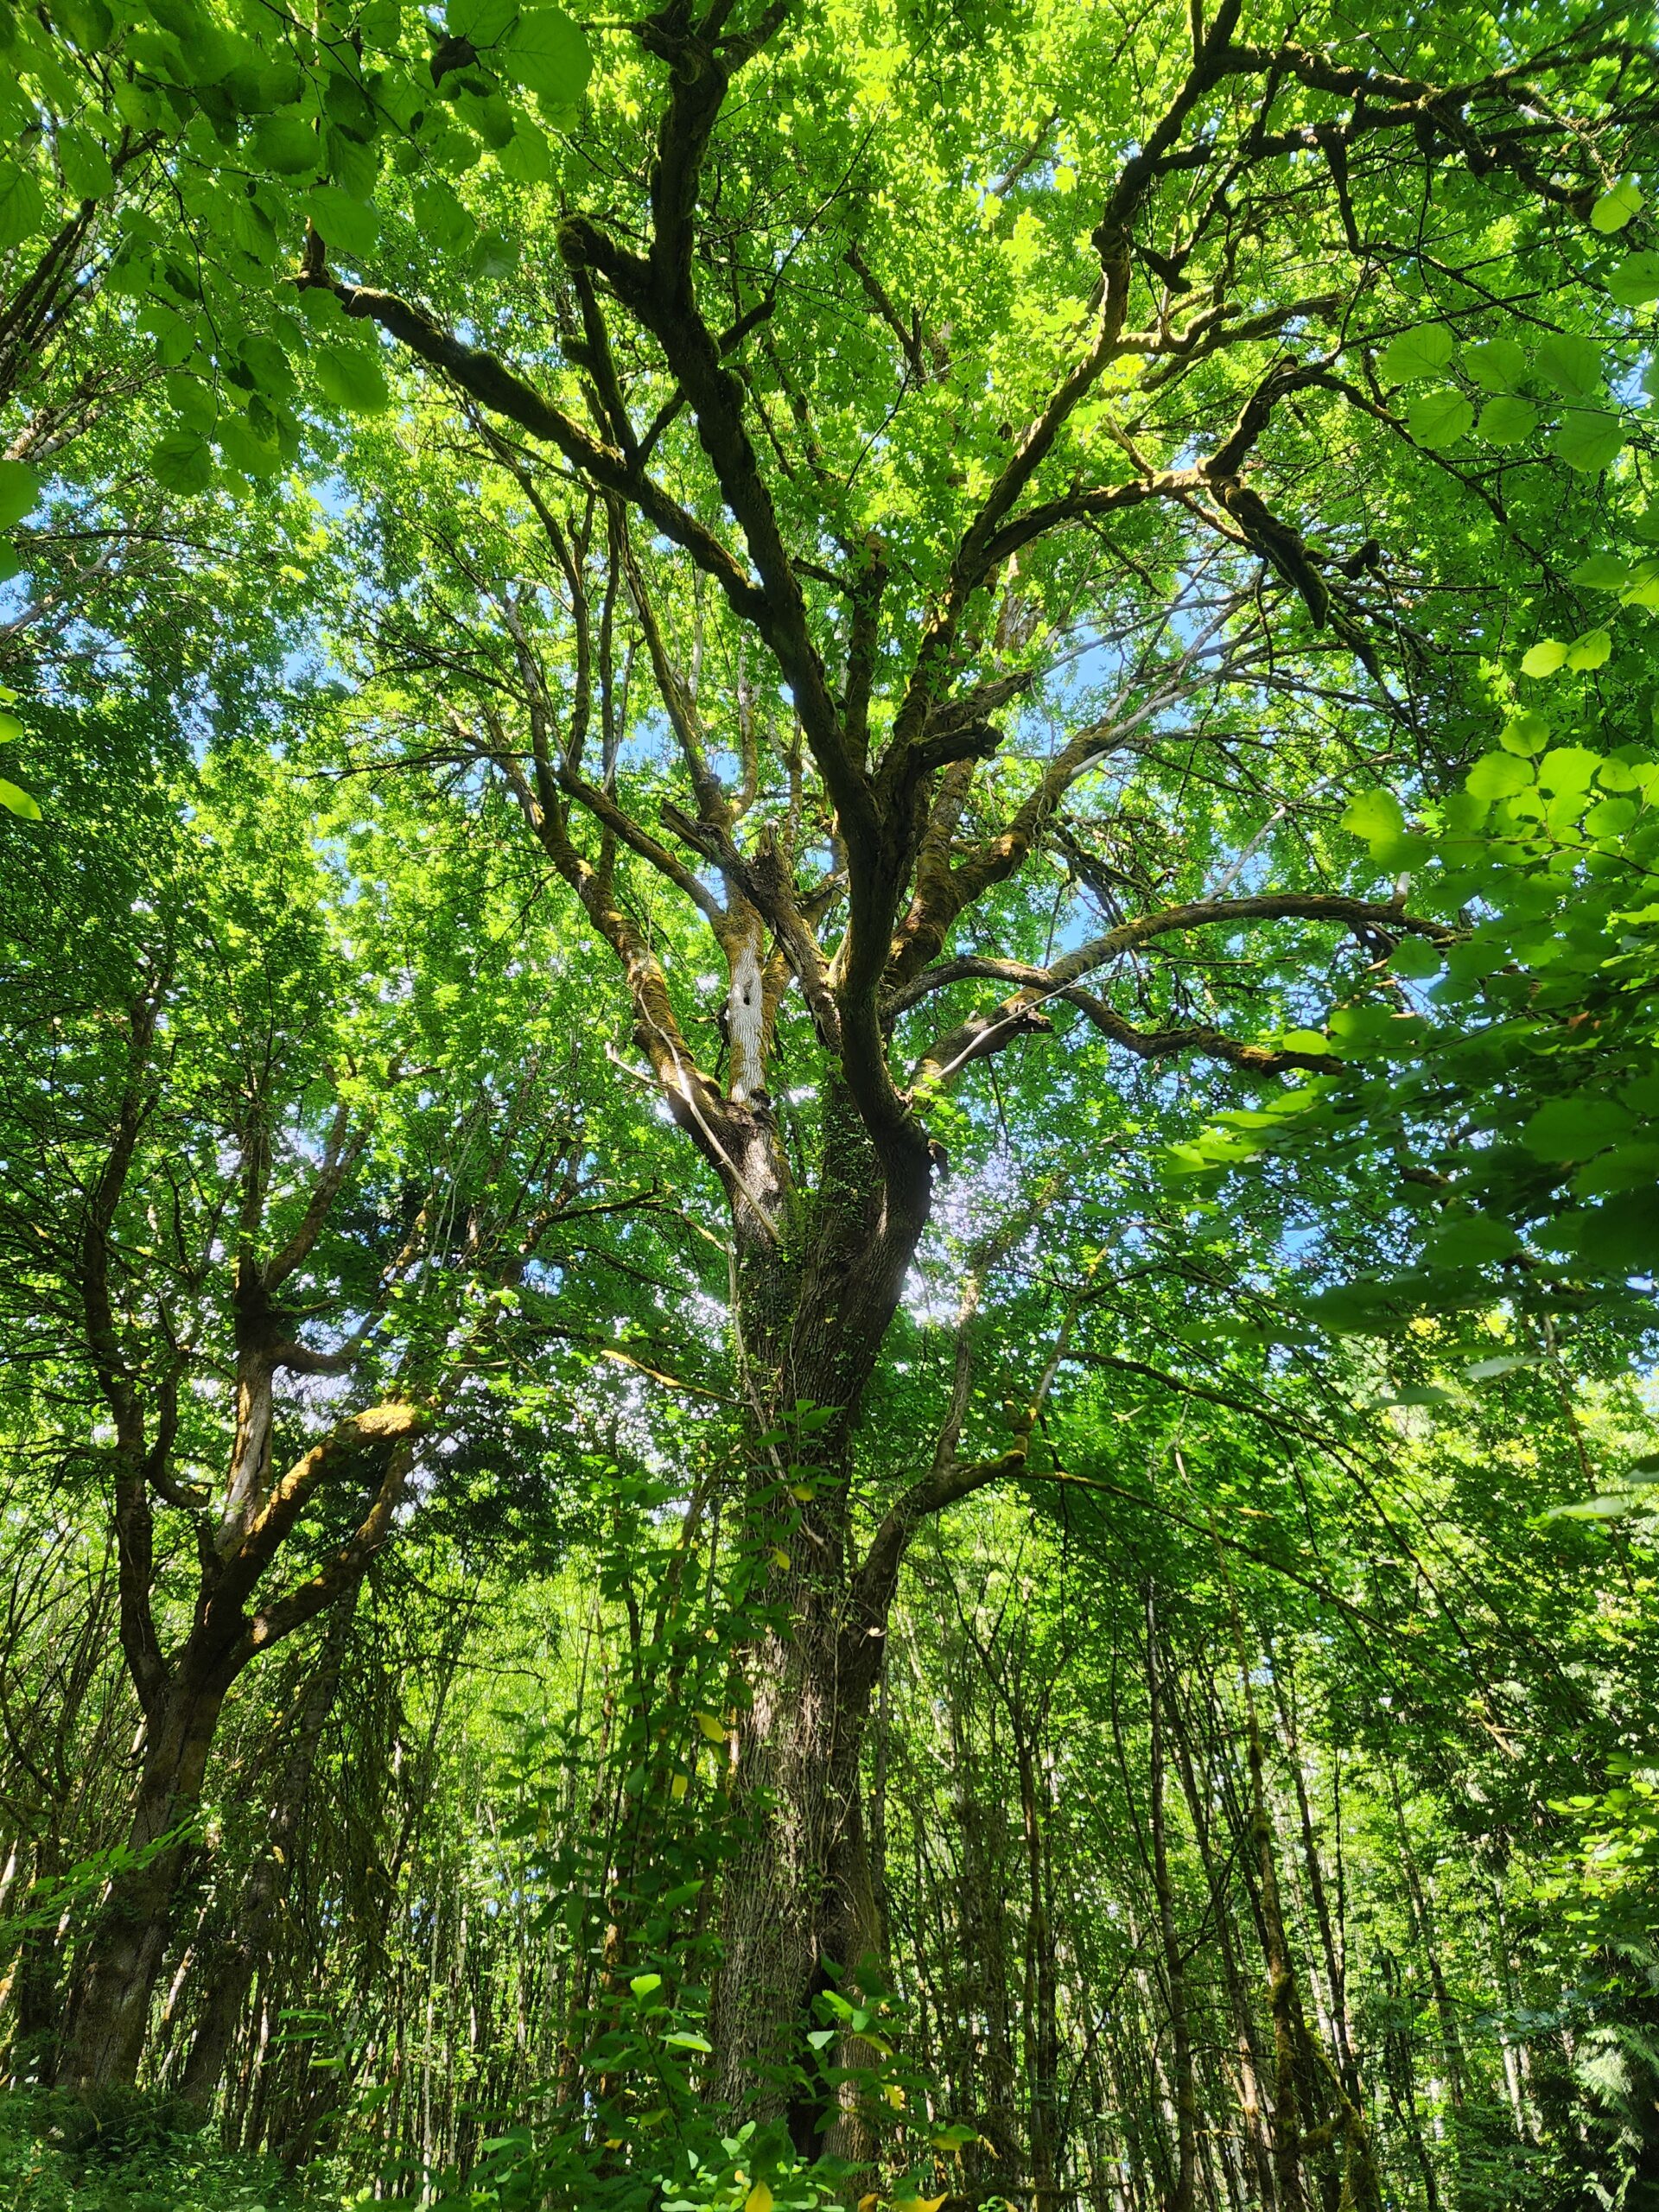
Form
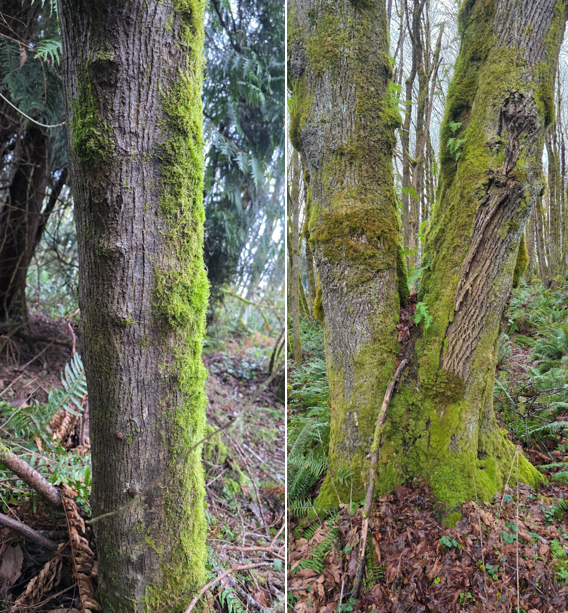
Bark
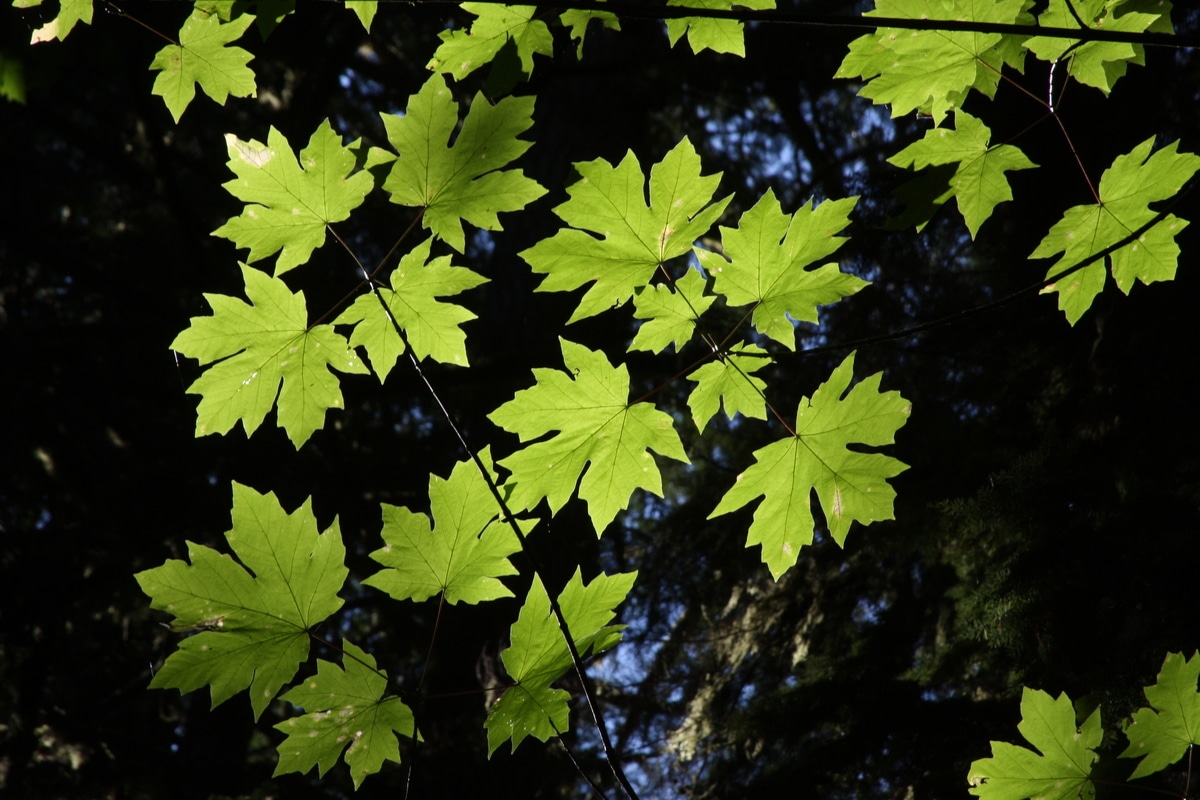
Leaves
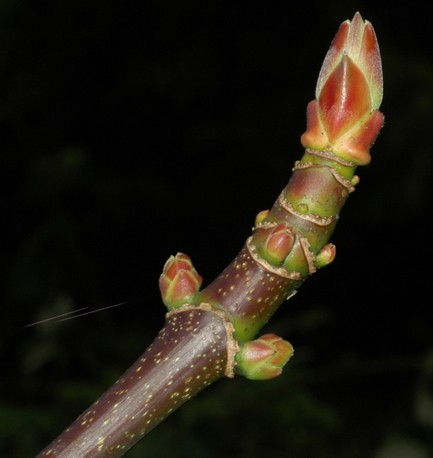
Buds and Branching
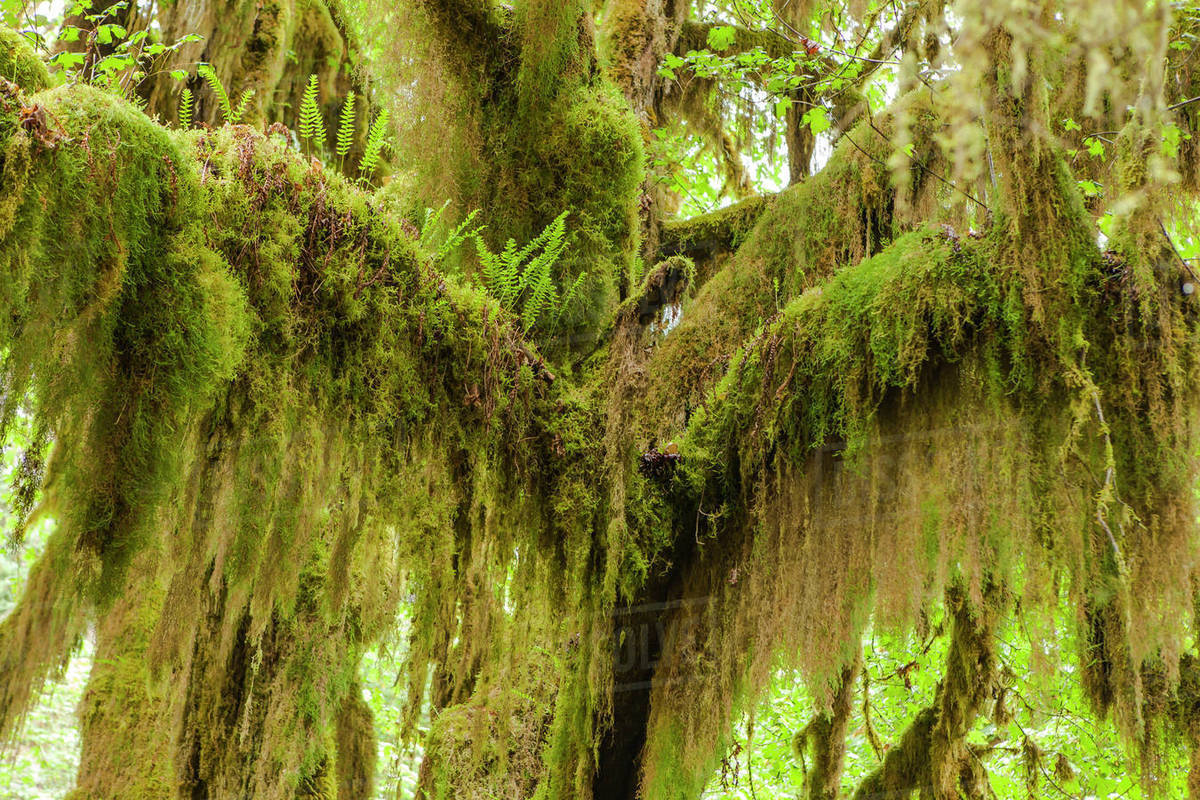
Epiphytes
Flowers
Seeds
Key Characteristics to Look For
- Trees should be 7-8″ or greater in diameter
- Only choose healthy trees with no signs of damage or disease
- Multi-stem trees can have more taps and produce more than single-stem trees
- Larger tree crowns and diameter correlate to better sap yields
- Ideally trees are easily accessible and next to a road or path
- Avoid tapping any trees near old dump sites or on contaminated soils
Other Considerations
When the sap season comes, you’ll find that some trees produce more sap than others, while some trees may not yield anything at all. This can also change from year to year. The conditions or traits that lead to better sap flow in individual trees are not well understood, with the exception that larger trees and trees with multiple stems are known to produce better than small trees and single stem trees (Braun, 2022). Hobbyists that tap over multiple years become very familiar with how their trees produce and often develop theories to predict better sap production based on tree traits and site conditions. Some of the most common theories are listed below, but keep in mind that these are anecdotal and untested.
- Trees growing adjacent to streams or other water sources are thought to produce better due to their roots having access to water even when rainfall has been limited.
- Similarly, trees growing on soils with high water holding capacity, such as clays and loams, are thought to produce better than trees on rocky or sandy soils.
- Trees on a south facing slope receive more sun in the winter, which means they tend to thaw earlier after a freeze. This can lead to earlier and greater sap production compared to north facing slopes where it can take longer to thaw.
- Conversely, north facing slopes stay cooler and may experience more intense freezing, where south facing slopes may not freeze at all or freeze less intensely.
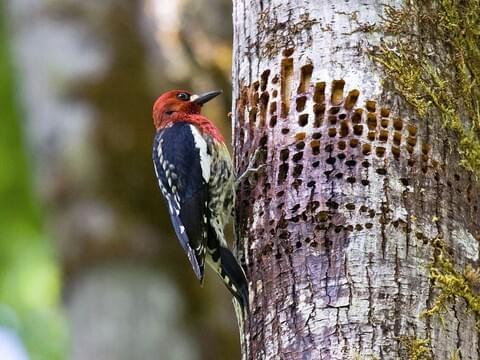
- Some hobbyists remark that trees with sapsucker damage are the better producers. Sapsuckers are a type of woodpecker that feed on sap from trees.
- Some hobbyists report that very large maples (3-4 feet in diameter or more) don’t produce as well. This could be because the bark is thicker and drilling more deeply is necessary to access the sap wood. More intense freezes may also be necessary to promote sap production due to the size of the tree.
Tapping Other Tree Species
Most deciduous trees can be tapped, but not all trees “volunteer” their sap like maples do. Walnut trees respond to freeze-thaw cycles similarly to maple, and birch trees will produce sap as a response to warming soils in the spring, but other deciduous species require specialized vacuum pumps to yield sap. Furthermore, the sugar content of sap from non-maple species is usually much lower, which means you’ll need a lot more of it to make syrup and other products. However, alternative tree syrups offer unique flavor profiles and culinary applications.
Choosing When to Tap
Tapping should be done during or immediately after sufficient freezing temperatures occur. If you feel confident in the weather forecast, it could also be done immediately before, but you risk the weather changing. Tapping frozen trees is best is the best way to ensure you’ll get a sap run, and it also makes for cleaner tap holes. If you’re unsure if you got a sufficient freeze for sap flow, it can be helpful to place a couple of test taps out first to see if you get anything, and then decide whether to tap the rest of your trees based on that.
One of the single biggest mistakes beginning tappers make is to tap too early. It’s a common misconception that, because the sap season starts in late November, the best thing to do is go out and place taps right away and wait for the sap conditions to come. Tap holes begin to heal soon after they’re created. They’re only viable for 4-6 weeks and sap yield will decline over the course of that period as they heal. So, if, for instance, you tap on December 1st but don’t get freezing conditions for several weeks, you may see reduced yields or not get anything at all. Be patient, watch the weather, and wait for the right conditions to tap.
Deciding whether or not to tap can get a little complicated. It’s more than just watching out for a frost. Other factors like precipitation, site conditions, and daytime temperatures can have a significant effect on the length and intensity of a sap run. This is important because you may not find it worth it to tap your trees if you anticipate weak run, especially early in the season. Here are some things to consider when thinking about whether it’s time to tap or not:
- How cold did it get? The length and intensity of freezing conditions is very important. If it only dips below 32 degrees for a few hours you’ll get frost conditions but it’s unlikely to cause much sap flow. Generally, you want 6-8 hours below freezing and ideally getting down into the mid-20’s or lower (the colder, the better!).
- How warm will it get? We nearly always have temperatures above freezing during the day, but a swing from very cold to very warm will cause a better sap flow. Daytime temps in the 40’s and 50’s with lots of sunshine after a freeze create the best yields.
- Are the soils saturated? Precipitation is another important factor. Saturated soils will have more water available for root uptake during freezing nights. Sap runs during dry spells will be less productive than if there was recent rain. This is also why trees near water sources (e.g. creeks, springs) are suspected to yield better.
- What’s your site like? Your site conditions can create microclimates, particularly aspect. For instance, north facing slopes and valleys where cool air collects may freeze more often, but may be slow to thaw.
The longer you do this, the more you’ll become attuned to the conditions that create a great sap run.
“Cold” Tip!
Don’t rely too much on your weather app! That data is based on weather stations that may not be very close to your site and, as discussed, microclimate can have a big effect on sap runs. Buying a cheap temperature logger to track your site’s temperature fluctuations will help you better understand your microclimate and decide when to tap.
Does Tapping Hurt the Tree?
This is by far the most common question people have when they are considering tapping for the first time. The answer is no, provided you’re following guidelines the for sustainable tapping described in this section. Trees are incredibly resilient to damage and bigleaf maple is particularly vigorous. Tap holes begin the process of healing shortly after they are created and are often completely healed over by the next year. Furthermore, the sap collected from trees is only a small amount of the total sap in the tree. So, provided we wait until trees are a sufficient size and don’t place too many taps at a time, trees can be tapped throughout the course of their lifetime without significantly impacting their health.
How to Tap a Tree
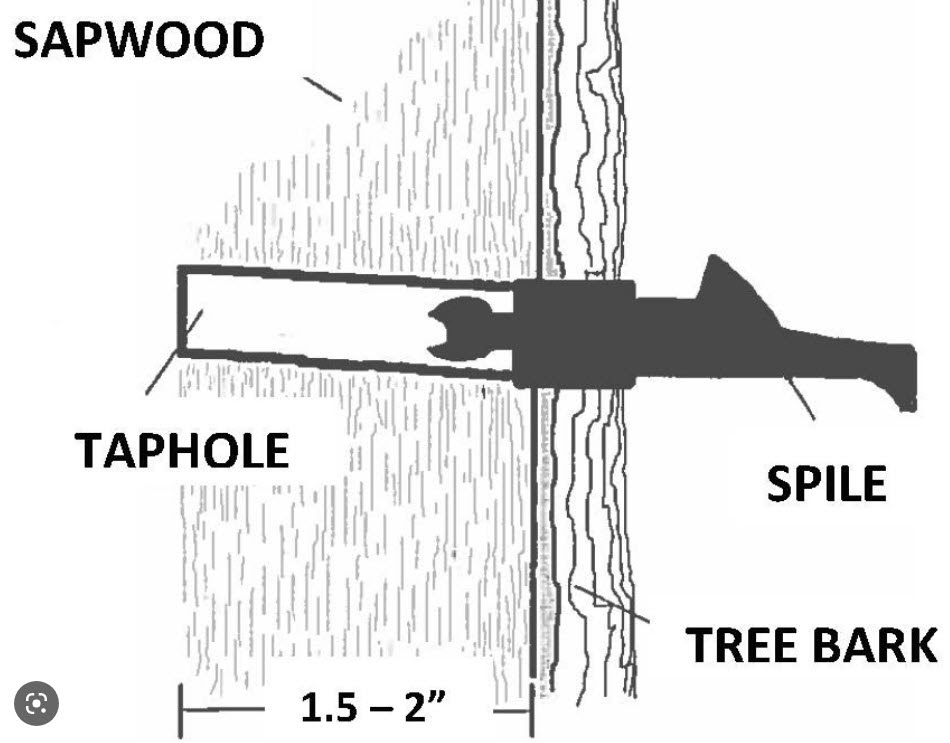
Tapping a tree requires drilling a hole through the bark and into the sapwood of the tree. This creates a chamber where the sap can exude from wood fiber cells, pool, and drain out of the tree. Actually tapping a tree can feel intimidating, but it’s really as simple as drilling a hole, inserting a tap (or “spile”), and gently tapping it in with a hammer. Still, there are some specifics that trip people up. Here a few pointers:
- Location – Where on the tree should you tap? There aren’t a lot of wrong answers, especially for hobby-scale production. Most people prefer to tap around chest height. It’s also important to avoid stem crotches, knots, boles, and other features on the tree that might create tension wood. In short, tap where it’s easily accessible and on a clean face of the tree.
- Depth and Size – The standard depth is about two inches. You can buy a specialized tapping drill bit that is designed to only drill that far, or use one you have and create an artificial “stopper” with a piece of tape or cork. The drill bit size should match the taps you are using but 5/16-inch is the most common.
- Angle – The standard practice is to drill as straight into the tree as possible. However, some hobbyists say that tapping at a slight upwards angle into the tree so that the tap hole slopes downward will help drain the sap.
- Tap Hole Sanitation – Trees respond to external contaminants by healing faster. Therefore, keeping your tap hole clean can help keep it viable for longer. Use a clean drill bit and avoid blowing into the tap hole with your mouth to clear shavings. You can use a clean piece of wire to clear shavings out of the tap hole or you can filter them out of the sap later by running it through a strainer.
- Placing the Tap – Insert the spile into the freshly drilled hole and gently tap it with a hammer or rubber mallet. Don’t overdo it, tap it just enough so that the spile is firmly secured in the wood (hint: you shouldn’t be able to easily pull it out by hand).
- How Many Taps – Trees less than 18 inches in diameter can sustain one tap at a time, trees 18-25 inches can sustain two taps, and above 25 inches can sustain three taps.
Types of Taps
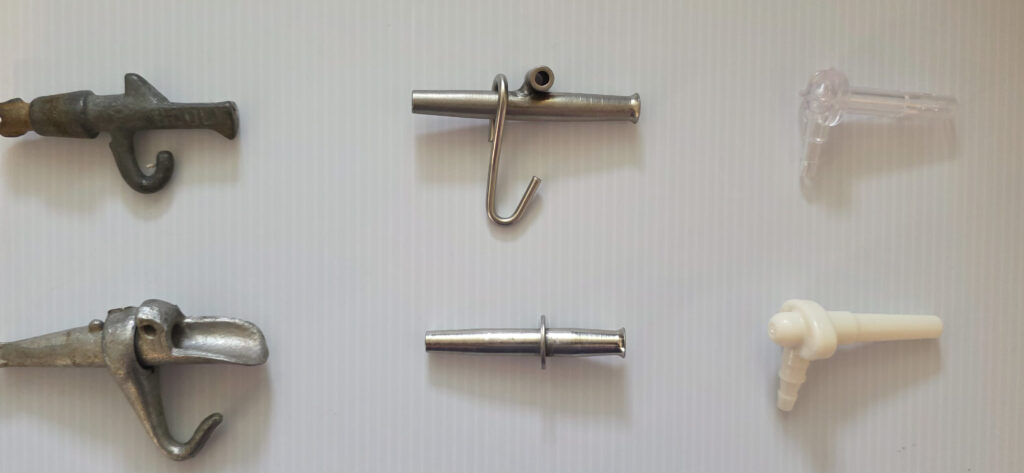
For centuries, Indigenous communities made their taps (also called “spiles”) out of wood or other plant materials. This is still an option, but maple sugaring equipment suppliers offer many different cheap options for taps, as well as tapping kits, for hobbyists. Plastic spiles are cheapest but stainless steel taps are easier to clean (and thus reuse). How you’re collecting your sap (buckets, bags, tubing) will also influence the type of tap you need. If you’re using tubing, you’ll need a tap with a barbed fitting on the end to connect securely, and the barb size must match the diameter of your tubing. You can also hang buckets and bags directly off the tree, but this requires specialized spiles to support them. The different methods for collecting sap is discussed in the next section, so be sure to read that before you purchase your spiles!
Re-Tapping a Tree
As discussed, the tap holes you create by drilling into the tree will begin to heal quickly, even though the tree is dormant. As they heal, there ability to yield sap will diminish. A tap hole is typically only viable for 4-6 weeks. If there is a lot of warm, sunny weather, that window can be even shorter. Since we have a relatively long sap season (12-14 weeks), it’s very common for people to retap a tree within a season by creating a fresh tap hole. When doing so, it’s important to remember all the points described above about identifying the right time to tap. With re-tapping, there is the added complexity of determining when to give up on your prior tap. For instance, if your taps are only a few weeks old but you have the conditions for a really great sap run, you might consider retapping to get a fresh tap and take advantage of the weather. Conversely, if it’s just a minor freeze, it may not be worth it. Regardless, it’s best to avoid retapping a tree more than twice in a year.
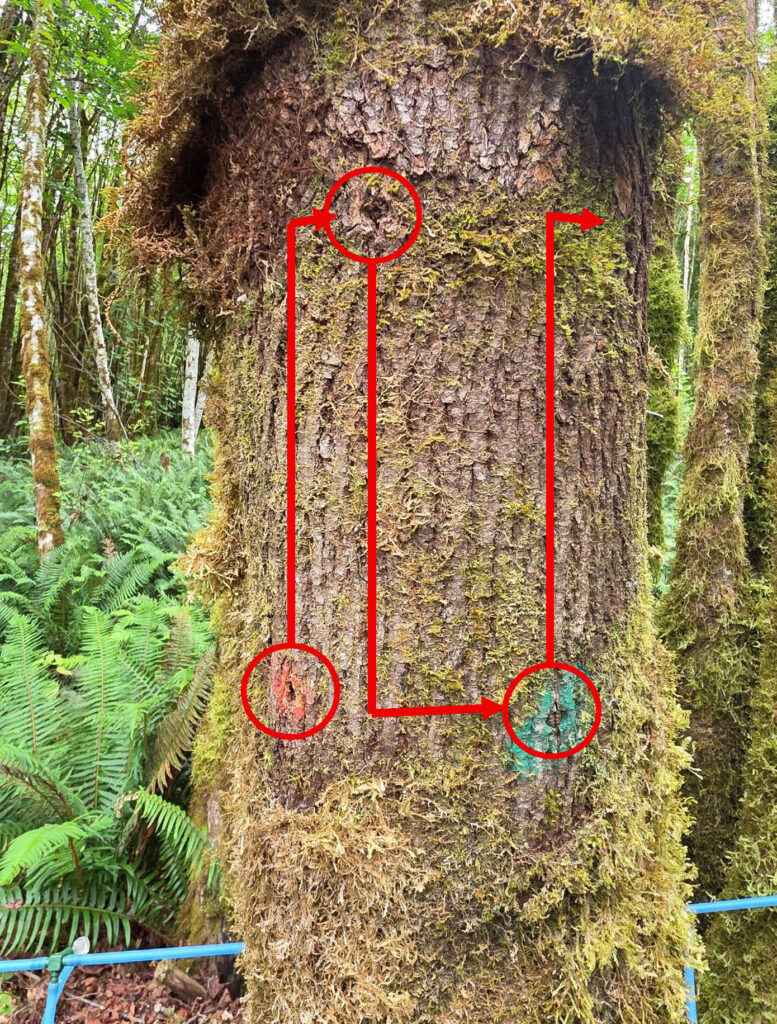
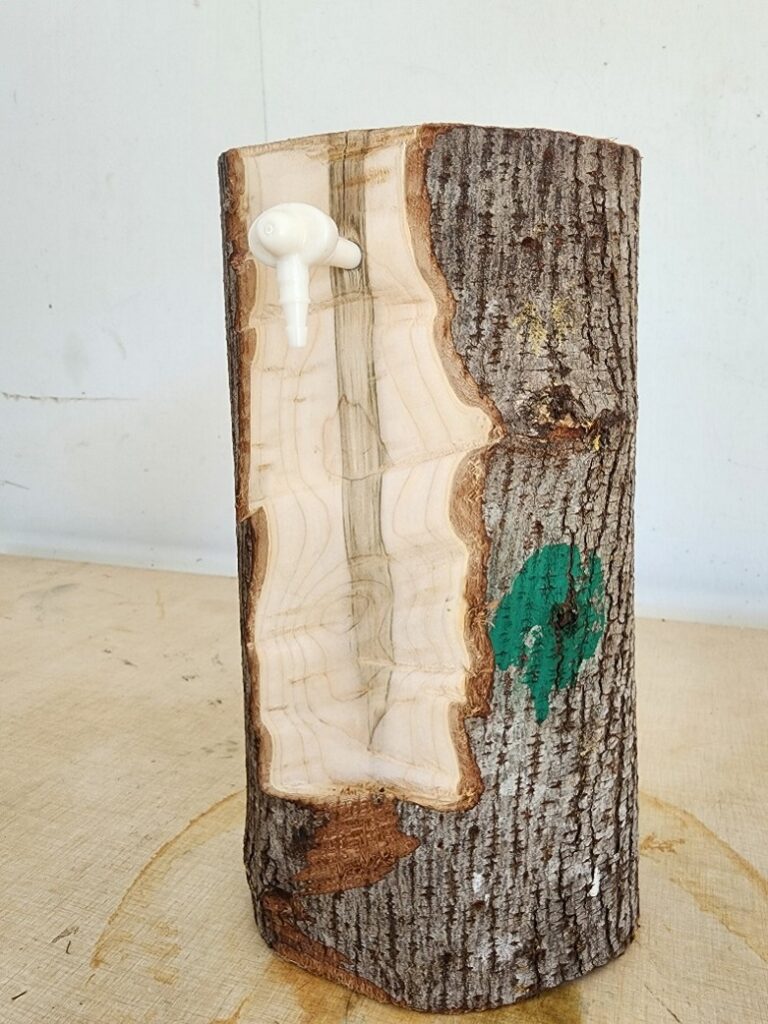
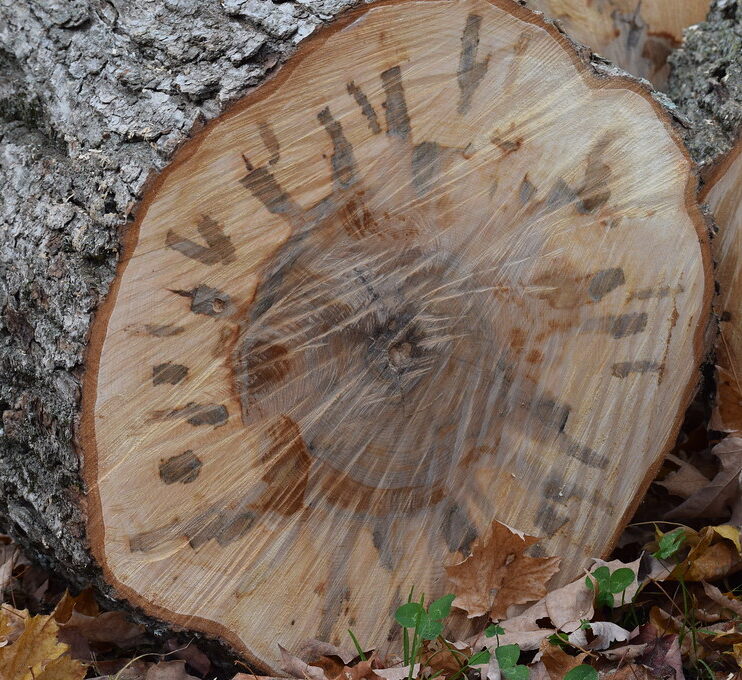
Whether you are retapping a tree within the same sap season or coming back to it for your second season. It’s critical to follow a tapping pattern to protect the tree and ensure you will get sap. Unlike humans, when trees heal from a wound, they don’t recover that tissue. Instead, they seal off that wound and grow new tissue over it. So, as maples heal from tap wounds, they create type of scar tissue called non-conductive wood (NCW). This wood will no longer conduct sap, either during the growing season or during winter freeze-thaw cycles. When retapping a tree, it’s important to know where previous taps were so that we can avoid drilling into NCW. This keeps the wound sealed off and ensures that we’re accessing fresh sapwood that can actually yield sap.
The NCW of a tap scar extends about 12 inches up and down from the tap hole and is 1-2 inches wide. The tapping pattern to avoid these scars is simple. From your last tap, move down or up 10-12 inches, then over 1-2 inches. That is the location of your next tap. The tap after that will then be 10-12 inches vertically (alternating up and down) and 1-2″ in the same direction (see figure). This allows you to move around the circumference of the tree over the course of multiple seasons and, by the time you reach the same face of the tree, it will have grown enough new sapwood to sustain a new tap (see figure).

Ways to Collect Sap
Collecting sap in hobby-scale operations will depend on site conditions, number of taps, and the amount of money you’re willing to spend on specialized equipment versus getting creative. Here are a few common ways that hobbyists collect sap.
Buckets or Bags on the Tree
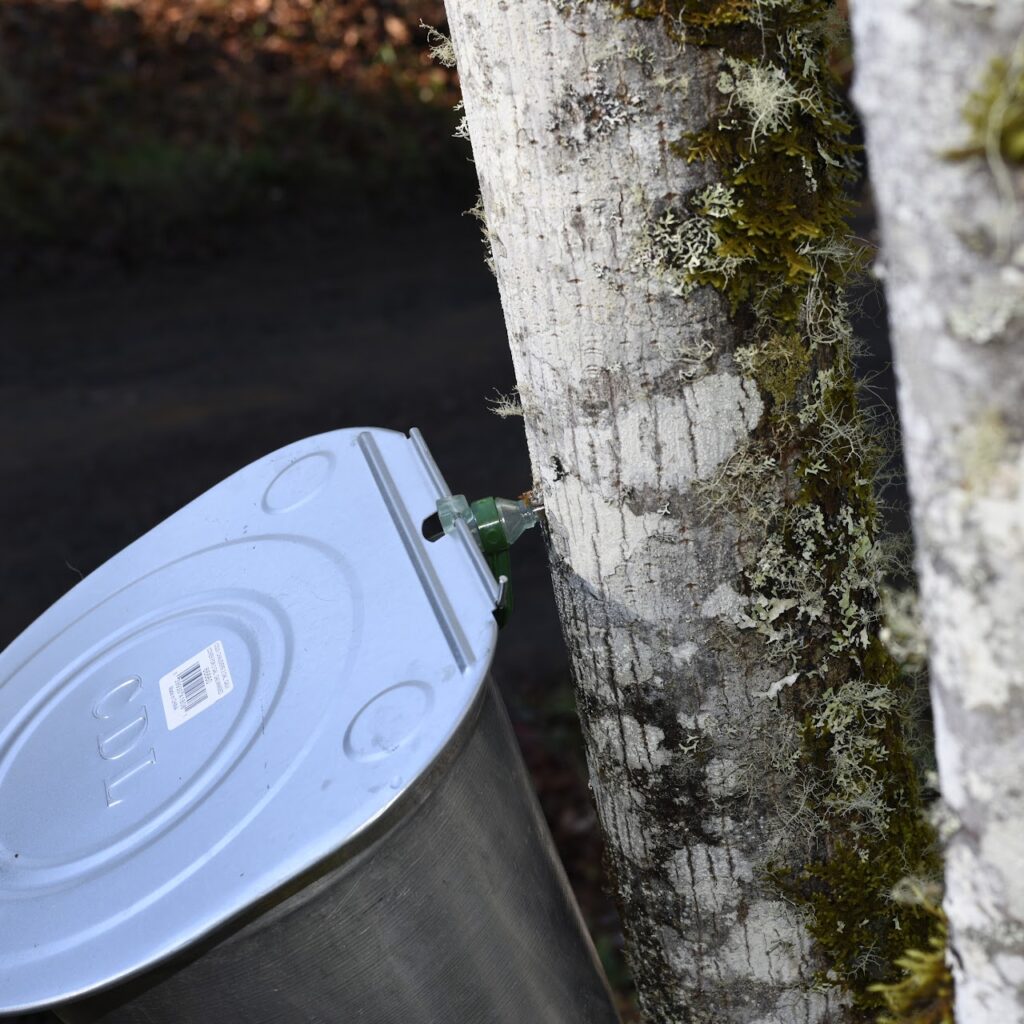
A bucket hanging off a tree is the classic image of maple sugaring, and is still a viable way to collect sap. In fact, even some small-scale commercial operations still use this method. It requires specialized spiles that include hooks or other designs to be able to hang a bucket on it. Most people that use this method also buy specialized buckets that are designed to fit those spiles, although some people will use food-grade containers found around the house and retrofit them (e.g. juice bottle, water jug). More recently, maple suppliers have designed sap bags. These require a special spile and sap bag holder, but the bags are much cheaper than buckets and can be purchased in bulk. However, they are difficult to clean and reuse.
Buckets (+ Tubing) on the Ground
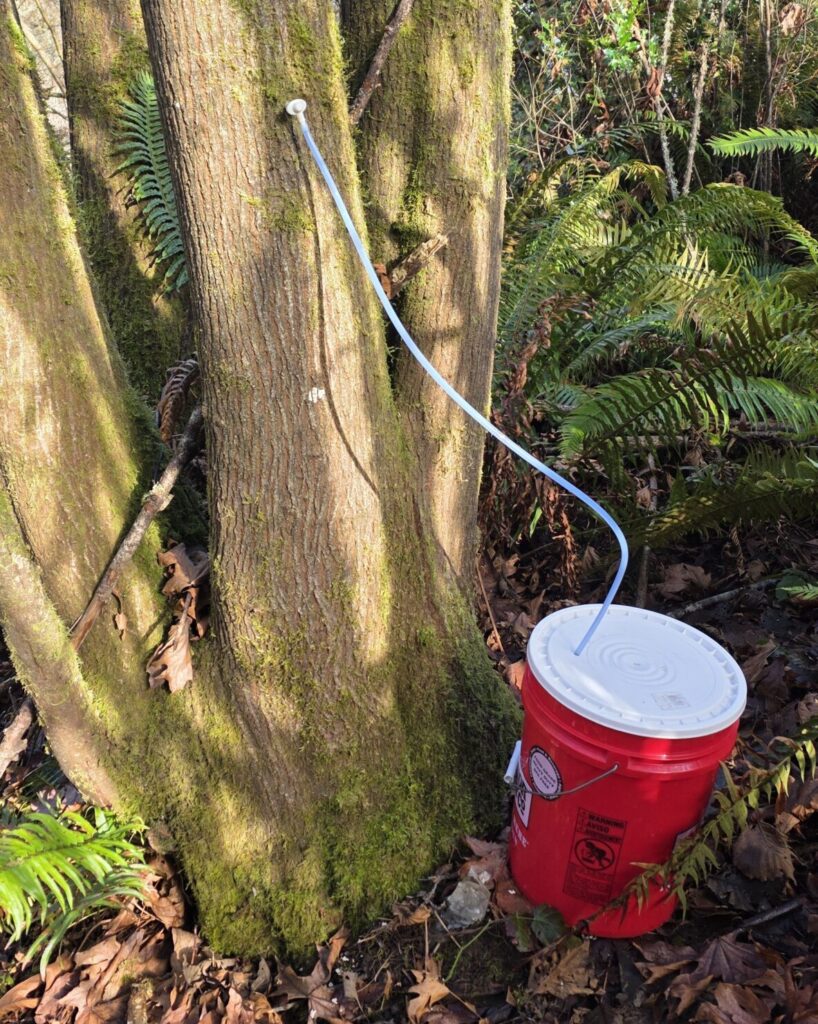
This method involves attaching a small bit of 5/16-inch maple-grade tubing to the spile and leading it to a food-grade bucket or other container that sits on the forest floor. This allows hobbyists to use cheap, plastic spiles designed for commercial tubing-based operations. The tubing is a food-grade plastic and is typically bought in bulk (usually a roll of a few hundred feet), but it is still very cheap, can be reused with proper cleaning, and lasts indefinitely unused. So, one roll may be enough to sustain a decade or more of tapping. Many hobbyists like this method because it allows them to connect multiple trees and drain sap into one container, reducing the amount of emptying and cleaning required. Since it doesn’t require specialized containers and the spiles are cheap, it’s typically the option with the lowest long-term cost.
Tubing System
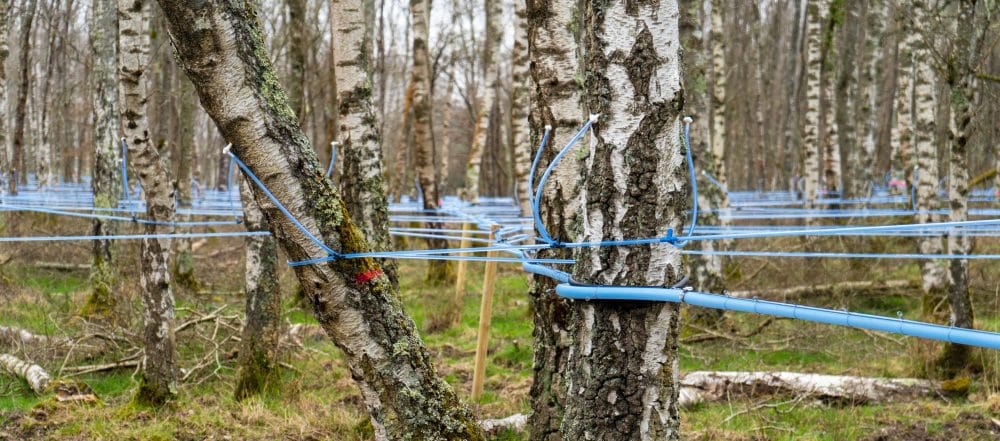
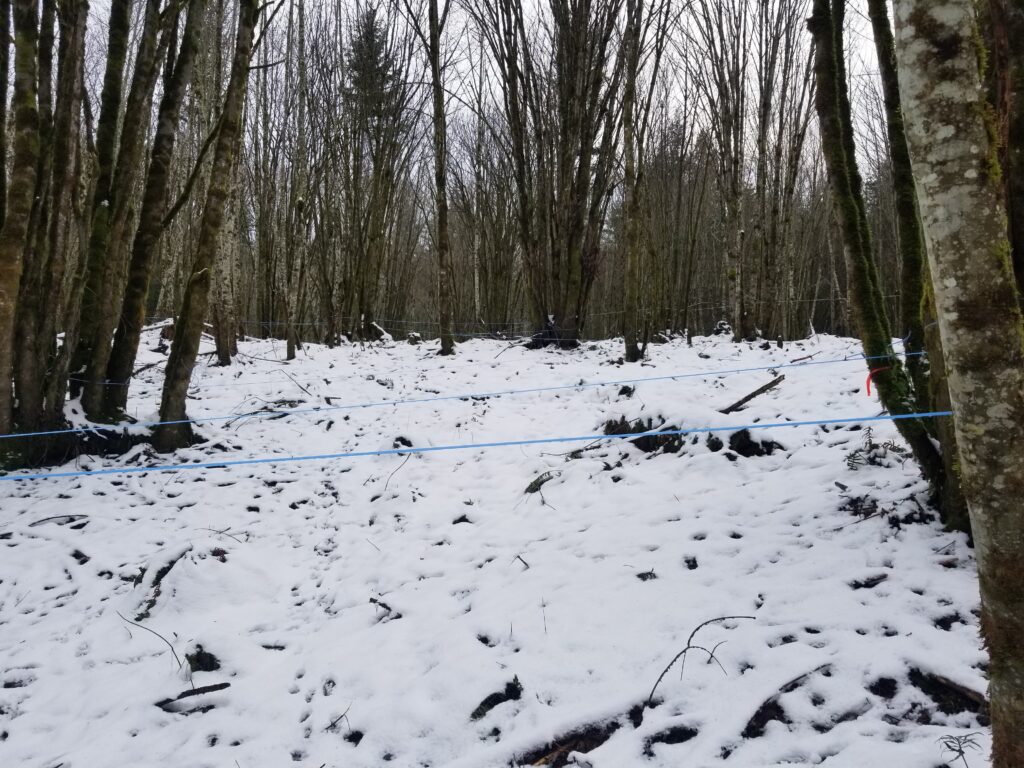
A tubing system refers to a type of sap collection where plastic tubing is weaved through trees connecting dozens of taps and draining them all back to a central location via gravity. These are typically reserved for commercial operations, where syrup producers will have hundreds or thousands of taps connected in a type of forest plumbing system, all draining back to a “sugar shack” where the sap is processed. However, a small-scale version of this could be feasible and preferrable for hobbyists, especially those that are more advanced and have several dozen (or more) taps. This set up is particularly useful in sloped areas where routinely emptying containers connected to individual trees would be difficult and tubing allows everything to drain to a container at the bottom. Note that some slope, about 3-5%, is necessary to sufficiently drain sap in tubing systems.
Tubing comes in two sizes: 5/16-inch and 3/16-inch and spiles are designed to match. Systems that use the narrower, 3/16-inch tubing and can benefit from natural vacuum that is created as the sap drains down a slope and pulls additional sap out of the tree, leading to better yields. However, it is more difficult to clean, so some prefer to use the standard 5/16-inch.
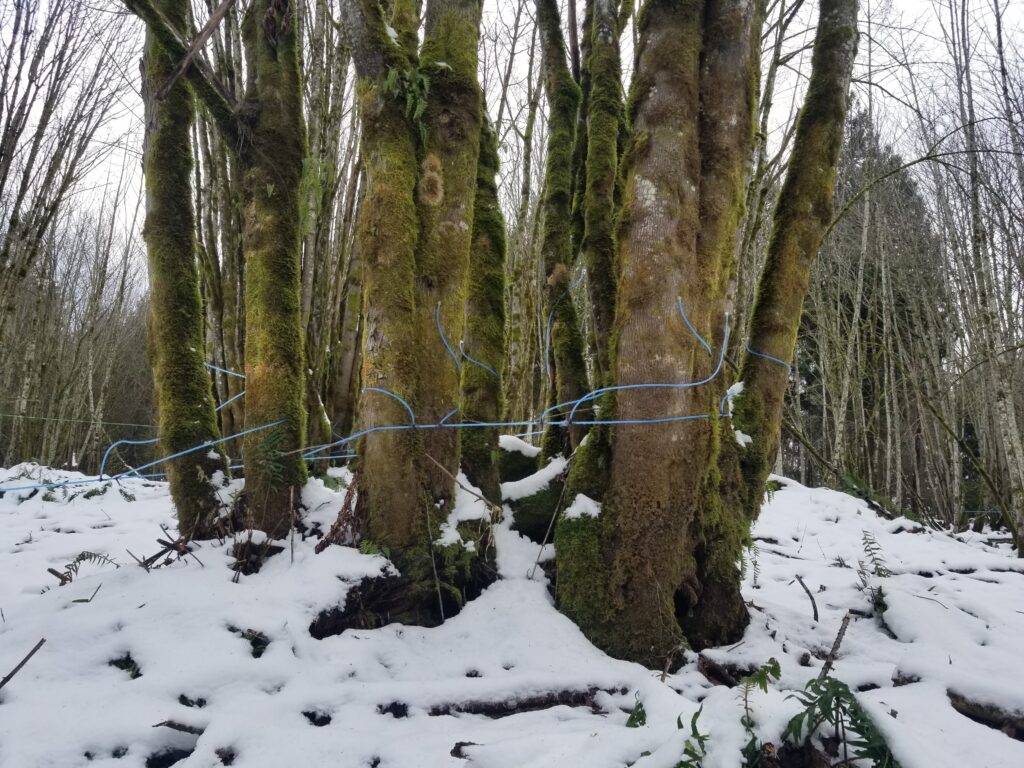
For more information on tubing systems, visit the Tapping at Scale Page of the Commercial Producers Section.
Note: If you’re reusing containers from around the house, be sure that they are food-grade and clean, and avoid using anything that contained dairy products (e.g. a milk jug).
Sap Runs
The length and intensity of a sap run will vary significantly based on the combination of site, tree, and weather characteristics discussed previously, and whether those conditions continue for more than one day. For instance, a good overnight freeze might cause 2-3 days of sap flow on its own. A string of nights like this will keep that flow going, provided it gets warm enough during the day. It’s also not uncommon for Western Washington to experience a “cold snap” where it spends several days below freezing. When that system passes tappers may see 3-6 days of sap production without any additional freezes. The amount of sap you get from one tap in a day will also vary but, generally, a tap will produce anywhere from 0.5-2 gallons in a day, with more sap being produced at the start of a run and tapering off over time.
As you might guess, the dependence on specific weather conditions leads to “good seasons”, “bad seasons”, and everything in between. While this can certainly lead to disappointment in some years, other years often make up for it. This is part of the fun of tapping!
Sap Sugar Content
The sugar content of sap (also called “Brix”) is a very important factor in maple sugaring. Sugar content is measured as the percent of sugar by volume and for bigleaf maple typically ranges between 0.7-1.5% (Braun, 2022). Syrup is made by boiling off excess water to raise that percentage to around 67%. Higher Brix means there is less boiling required, which saves time and energy, and can also affect syrup flavor.
The sugar content of sap can be tested with a refractometer or hydrometer. These tools are also used in beekeeping and brewing. A field refractometer is an cheap and easy tool to carry with you while emptying sap containers and will allow you to keep track of changes in brix between trees and over the course of the season. Note: It’s important to calibrate refractometers regularly using distilled water that is the same temperature as the sap.
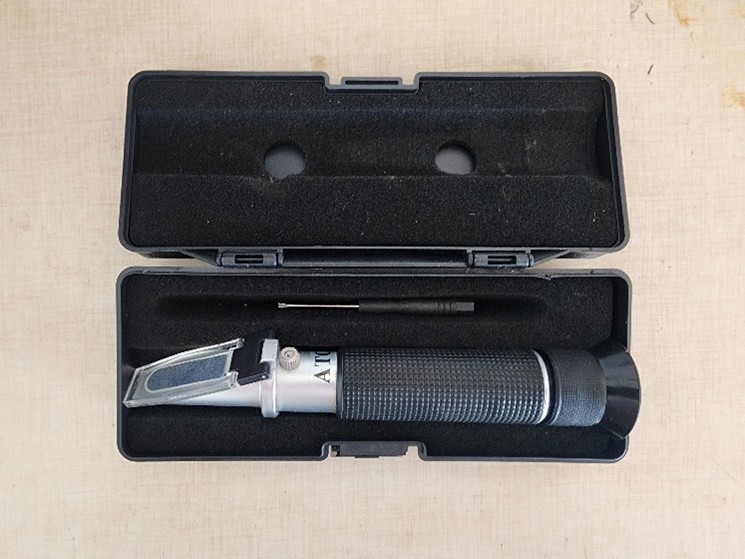
Sap to Syrup Ratio
The equation below is used to help tappers determine how many gallons of sap are needed to make one gallon of syrup.
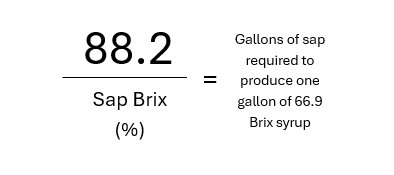
Subtle changes in sugar content can have big impacts on the sap to syrup ratio. For example, a small increase to from 1% to 1.2% sugar means 15 less gallons of sap are required to produce a gallon.
Many tappers don’t bother testing the sugar content of sap, but it can be useful to know what to expect during the boiling process.
Collection and Sanitation
When the sap is flowing, emptying your containers and processing sap quickly leads to better quality syrup. If you let the sap sit too long in the containers, natural yeasts and bacteria will grow and change the sugar composition. Minimizing this will improve the flavor of the syrup you create. If you let it sit too long, the sap may become thick and ropy, making it unusable. Sap containers should be emptied at least once a day, or twice if possible. The warmer the daytime temperatures, the more important it is that the containers be emptied frequently and the sap be processed quickly (more on this in the next section).
Sanitation can also help improve syrup quality. Rinsing the containers with hot water after emptying can help cut down bacterial loads but can be cumbersome. Most hobbyists opt to simply empty buckets while a run is active and then give them a good cleaning after and immediately before the next sap run. When cleaning, use unscented sanitizers like bleach or hydrogen peroxide to avoid off flavors in your syrup and give the containers a good rinse afterwards.
Although there are many other sugar products that can be made with sap, including sugar itself, this section will describe how to process sap into syrup. The basic steps include pre-processing, hard boiling, finishing, filtering, and packing (or storing).
Moving Quickly
Regardless of whether you opt into any of the pre-processing steps or go straight to boiling, it’s important to minimize the amount of time between the sap leaving the tree and receiving some kind of processing or kill-step to mitigate growth of bacteria and yeast. With syrup, we are not concerned about the food safety risks associated with this growth, but it can have big impacts on the flavor. Sooner is always better, but fresh sap would ideally be frozen or boiled within 24-72 hours if unrefrigerated (depending on outdoor temperatures), or it can last 4-7 days in the fridge. Avoiding direct sunlight exposure and good sanitation will help buy you time as well.
Pre-Processing
In most cases it is fine to simply take sap from your containers and begin boiling it. However, some situations may call for optional pre-processing steps:
- Pre-filtering – Using a mesh screen can help you filter out any bugs, leaves, wood shavings, or other unwanted detritus that may have gotten into your containers during the collection process. This is especially important if you don’t have lids on your sap containers or don’t intend to filter the syrup after it is finished (discussed later).
- Freezing – Freezing sap can be an effective way of halting yeast and bacterial growth if you are not prepared to immediately start boiling. Some tappers will collect and freeze all of their sap over the course of a run, or even over the course of a season, and boil it at the end.
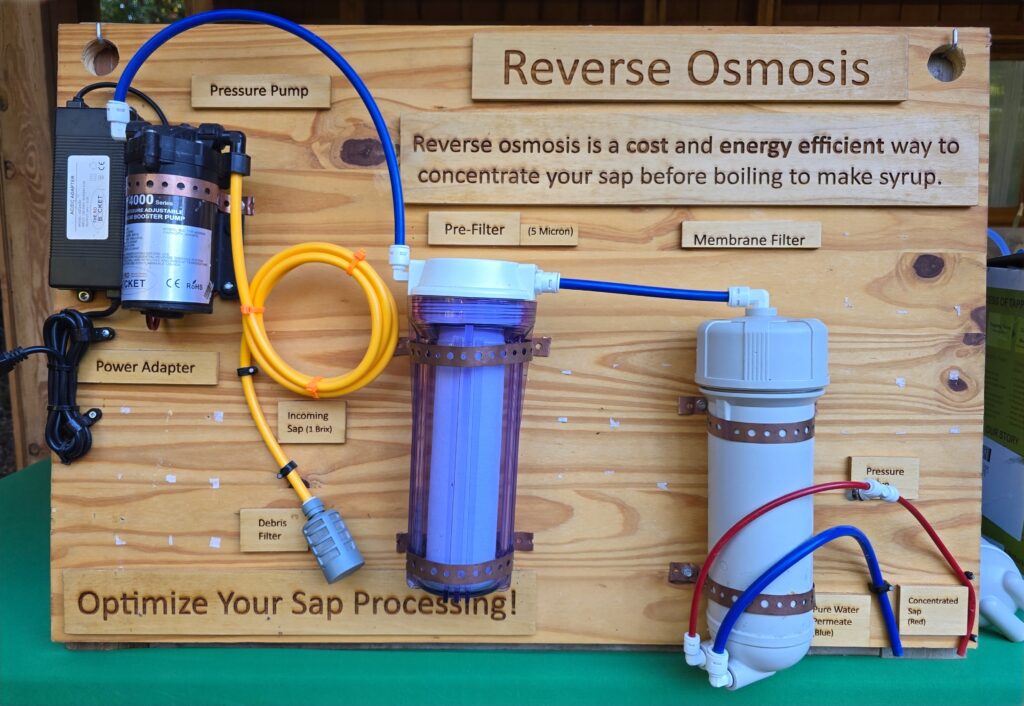
- Reverse osmosis – Reverse osmosis (RO) is a modern filtering technology that allows us to filter pure water out of sap and concentrate the sugar content without boiling. Commercial scale production of maple sap relies on RO to make up for the fact that more sap is required to make syrup with bigleaf maple. Commercial grade RO machines can remove 90% of the water or more without boiling. However, less expensive options are available to hobbyists that can remove around 50-70% of water. Some tappers use RO to reduce the amount of freezer space required to freeze all of their sap and process at the end of the year.
- Flash boil – Quickly boiling the sap to kill bacteria and yeast can help tappers buy more time while they collect enough sap to process an entire run all at once. Flash boiled sap can give you a few more days in the fridge or 24-36 more hours unrefrigerated.
Reverse Osmosis
Reverse osmosis machines have made commercial scale sugaring possible using bigleaf maple sap. An RO is comprised of electric pumps and canisters containing permeable membranes. As sap is pumped at high pressures through the membranes, pure water is filtered out and the remaining solution is concentrated sap. Every time sap is passed through the system, about half of the water is removed.
So, say that you have 50 gallons of sap at 1% sugar. On the first pass through the RO, you will get 25 gallons of water and 25 gallons of sap at 2% sugar. Passing through again will result in 12.5 gallons of sap at 4% sugar. This would save you from having to boil off 38 gallons of water!
Most reverse osmosis units are built for larger operations, but some hobby-scale options are listed on the FAQ and Additional Resources Page. Some hobbyists build RO units themselves and have instructions available online.
Testing Brix at Higher Concentrations
The goal of processing is to bring the sugar content up from 1-2% to 67-68% sugar by removing excess water. It is helpful to be able to know where you are at in this process by testing the brix at every stage. Testing the brix at higher sugar concentrations will typically require a different tool than what you used to test raw sap. The exception being a digital refractometer, which can test brix from sap to syrup. Otherwise, a high-sugar hydrometer is typically necessary.
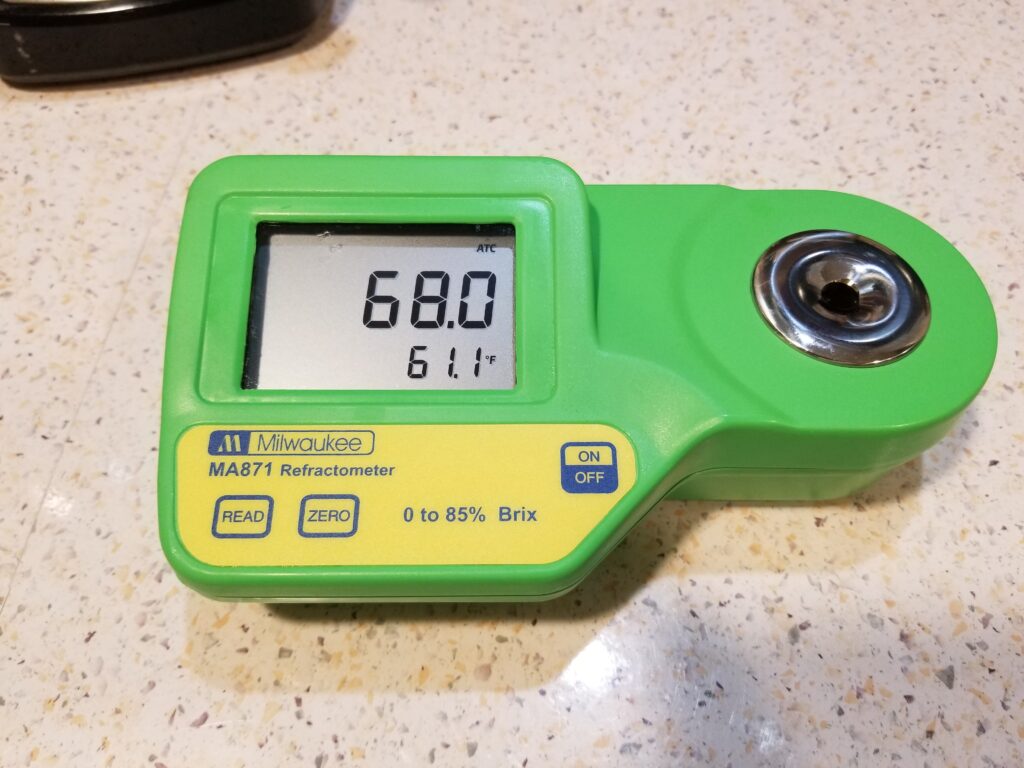
Another solution is to use a candy thermometer. Syrup boils at 219-220 degrees Fahrenheit (7-degrees above the boiling temperature of water). Although its not as accurate as a refractometer or hydrometer, taking frequent thermometer readings to see how you are progressing towards that temperature can be an effective and cheap alternative.
Note: Hotter liquids are less dense, which can lead to underestimations of brix by hydrometers and refractometers. Allowing the samples to cool before testing will give you a more accurate reading. Smoky Lake Maple offers a “Murphy Cup” that compensates for the impact of temperature on brix testing.
Hard Boil
The goal of the hard boil stage is to efficiently boil off the majority of excess water from the sap. This should be done using food grade pans that can handle high heat exposure, ideally stainless steel. It’s strongly recommended to do this outside. The process generates a lot of steam that can lead to moisture build-up and mold indoors. This stage is typically completed using firewood as fuel, as using propane or other fuels is too costly. One exception to this would be if you are using reverse osmosis to remove most of the water prior to boiling, which can make using gas or electric heat a more feasible option.
Like sap collection, there a many ways to approach boiling at the hobby scale. The approach that is right for you will depend on how much sap you intend to collect, how much you’re willing to spend on supplies and equipment, and the resources available to you.
Evaporating setups consist of a heat source (e.g., wood, gas) and an arch that holds an evaporating pan and channels the heat towards it. In practice, this can be as simple as boiling sap in an old stock pot over a campfire. However, this lacks a good arch to contain heat and will result in longer boil and more fuel use. A simple cinderblock arch designed to hold stainless steel restaurant pans will result in much greater efficiency and can be built for less than $100. At higher price points, you can purchase a specially designed evaporation unit from a maple syrup supplier. These come in many different forms, and are typically rated on how many gallons of water they can boil off in an hour. Many of these have features that dramatically increase efficiency, such as divided pans, preheating pans, and drop flues.
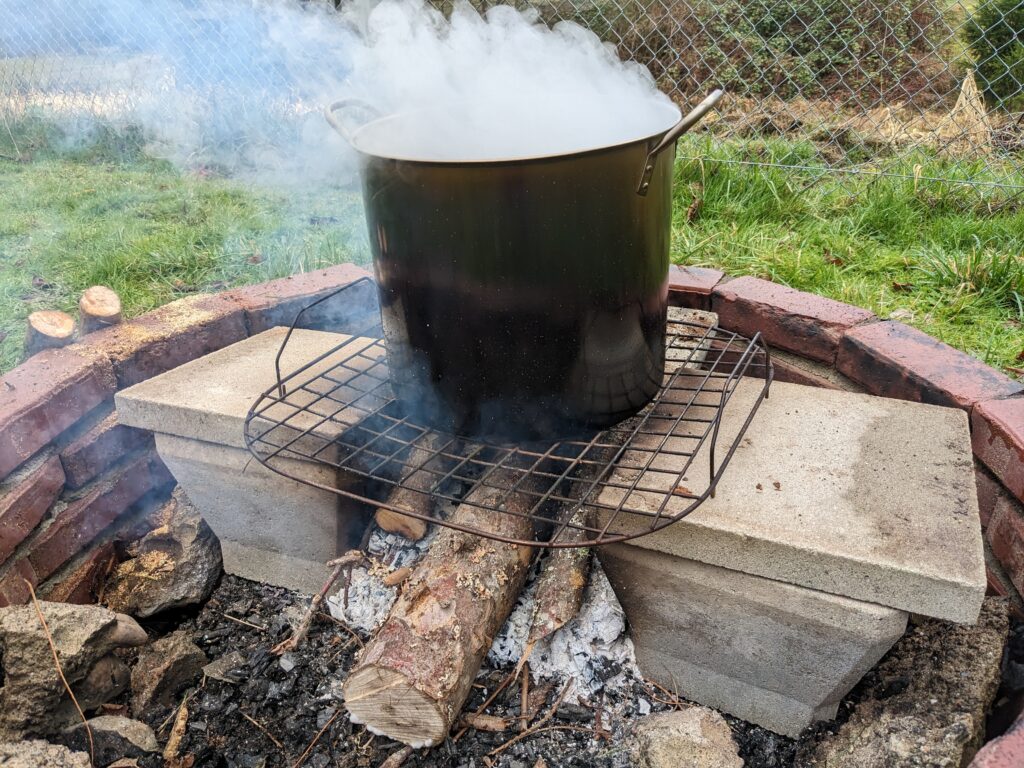
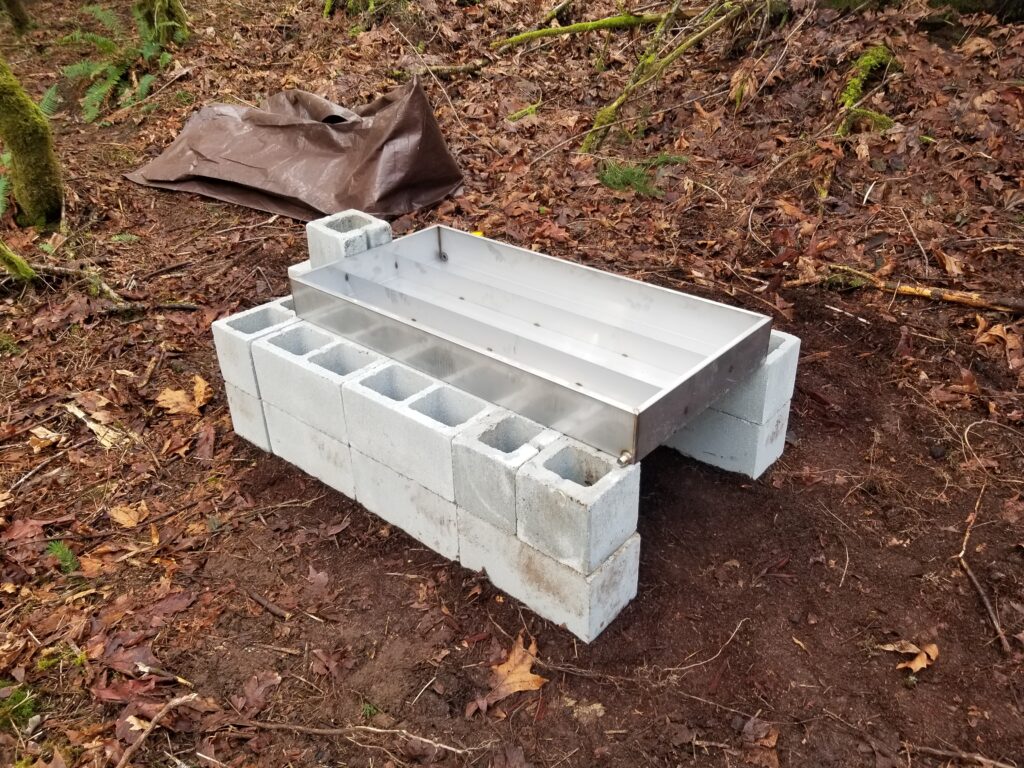
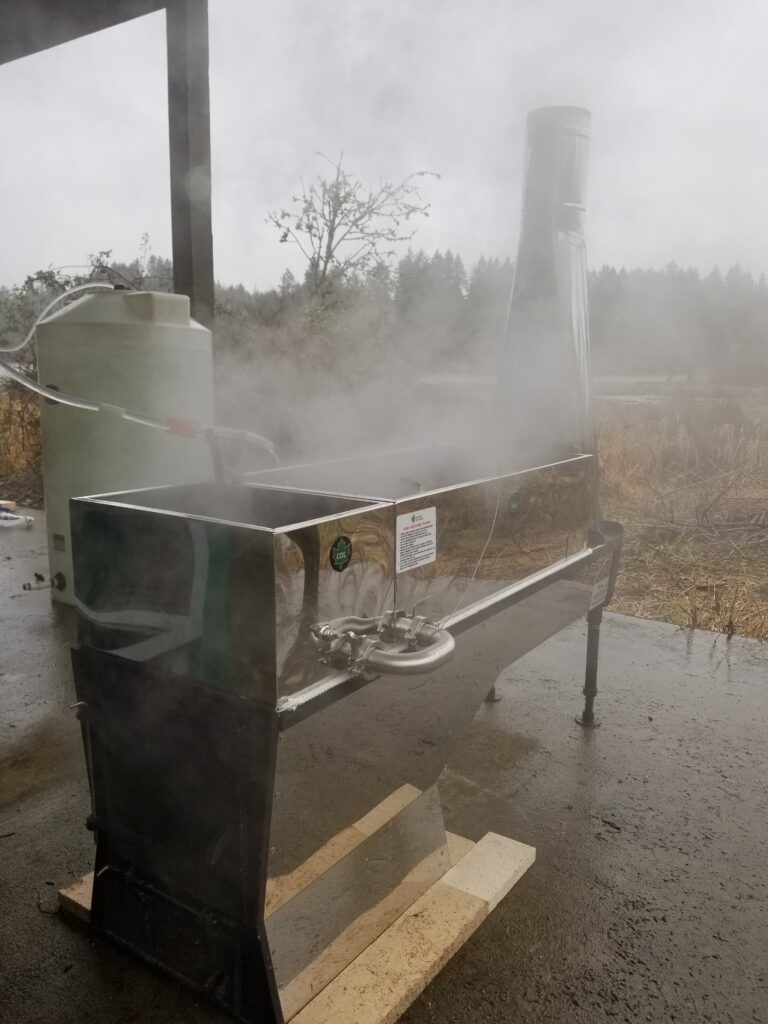
Note: It’s common for foam to build up during the boiling process. This can be minimized by adding a few drops of vegetable oil to the sap. Alternatively, you can sift off the foam with a slotted spoon.
The hard boil stage should continue until most of the water has gone and the sap becomes “pre-syrup”, at about 40-50% sugar. By this time the sap will have thickened a little, taken on a golden or brown color, and will be very fragrant.
The process to get to this stage takes time. Most hobby-scale evaporating units boil off between 1-7 gallons of sap per hour, which means making a couple quarts of syrup could take a full day of boiling or more. But this process doesn’t need to be boring! Make the most of it by engaging friends, family, and neighbors, and use the opportunity to build a sugaring community.
Finishing Boil
A finishing boil refers to the process of further reducing pre-syrup (40-50% brix) to syrup (67-68% brix). Since there is very little water in the pre-syrup at this point, it’s best to do this using a more controlled heat source like propane or an electric stove, to slowly boil off the remaining water. This stage can also be completed indoors, although a stove fan or other method of venting steam is still recommended. Some may elect to finish their syrup using wood heat and the same equipment as the hard boil. In this case, it’s important to at least reduce the heat by maintaining a bed of embers. Finishing over a roaring flame will run the risk of overconcentrating, leading to caramelization and burning.
It’s important to consistently test sugar content at this stage. Although it may seem to be concentrating slowly at first, the pre-syrup will rapidly approach 67-68% sugar as the remaining water is boiled off. As mentioned in the “Testing Brix at Higher Concentrations” section, this can be done using an electric refractometer, a hydrometer, or a candy thermometer (remembering that syrup boils at 219-220 degrees Fahrenheit). Note that the syrup will continue to boil for a brief period after removing it from your heat source, so you may compensate for that by pulling it off a little early.
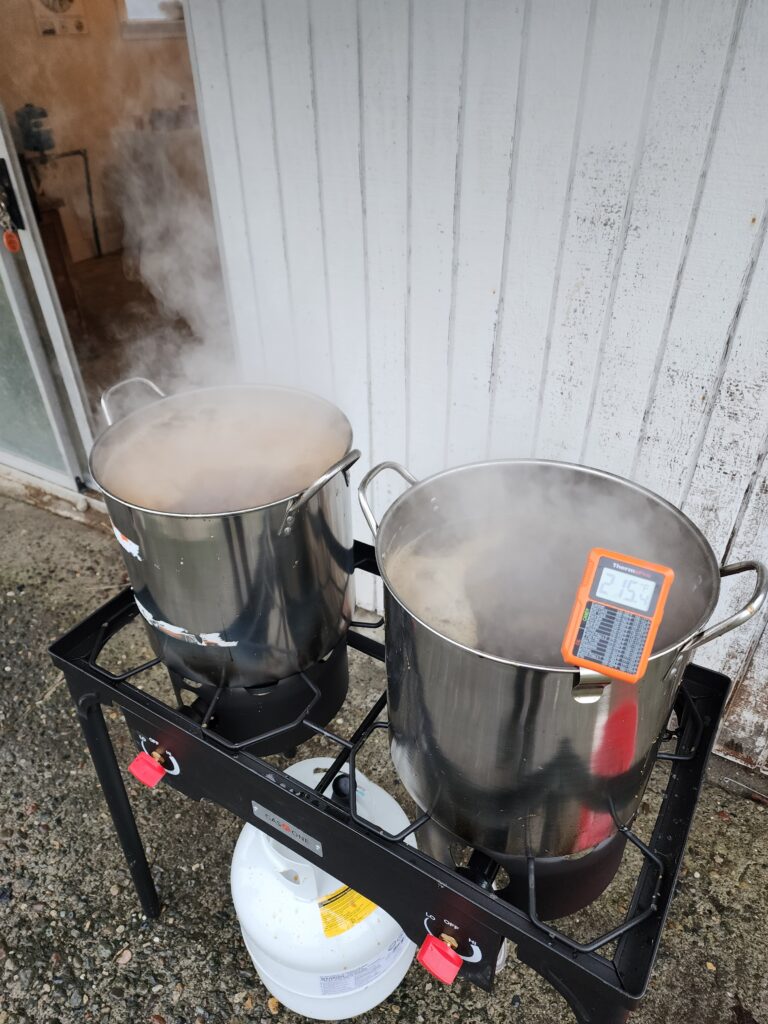
It’s common for hobbyists to overshoot or undershoot the brix of their syrup, especially on the first few tries, but don’t worry about this too much. The reason we shoot for 67-68% sugar content is that it is a “sweet spot” (pun intended) for preserving syrup. Below this mark, there is enough active water content remaining in the syrup to facilitate mold growth, and above it you run the risk of the syrup crystalizing into sugar on the shelf or in the fridge. If you over concentrated the syrup, you can always add a little water back in and, if you later realize you under concentrated it, you can throw it back on the stove. As a hobbyist, this syrup is for your own consumption and you only answer to yourself and whomever you choose to share it with.
Filtering
As you’re finishing your syrup, you’ll likely see that it is still very dark and even “muddy” in appearance. Bigleaf maple syrup is generally darker than the sugar maple syrup you see in the grocery story, so producing a light amber color is not always possible, but you can still achieve a translucent appearance by filtering out the “sugar sands”. Sugar sands (or “nitre”) are a mineral build up caused by sugars bonding to minerals in the sap under high heat in the boiling process. It’s perfectly normal to have sugar sands. They are safe to eat, so filtering is an optional step. However, they do have a slightly bitter taste and filtering them out will remove the muddy appearance, so most hobbyists elect to do it.
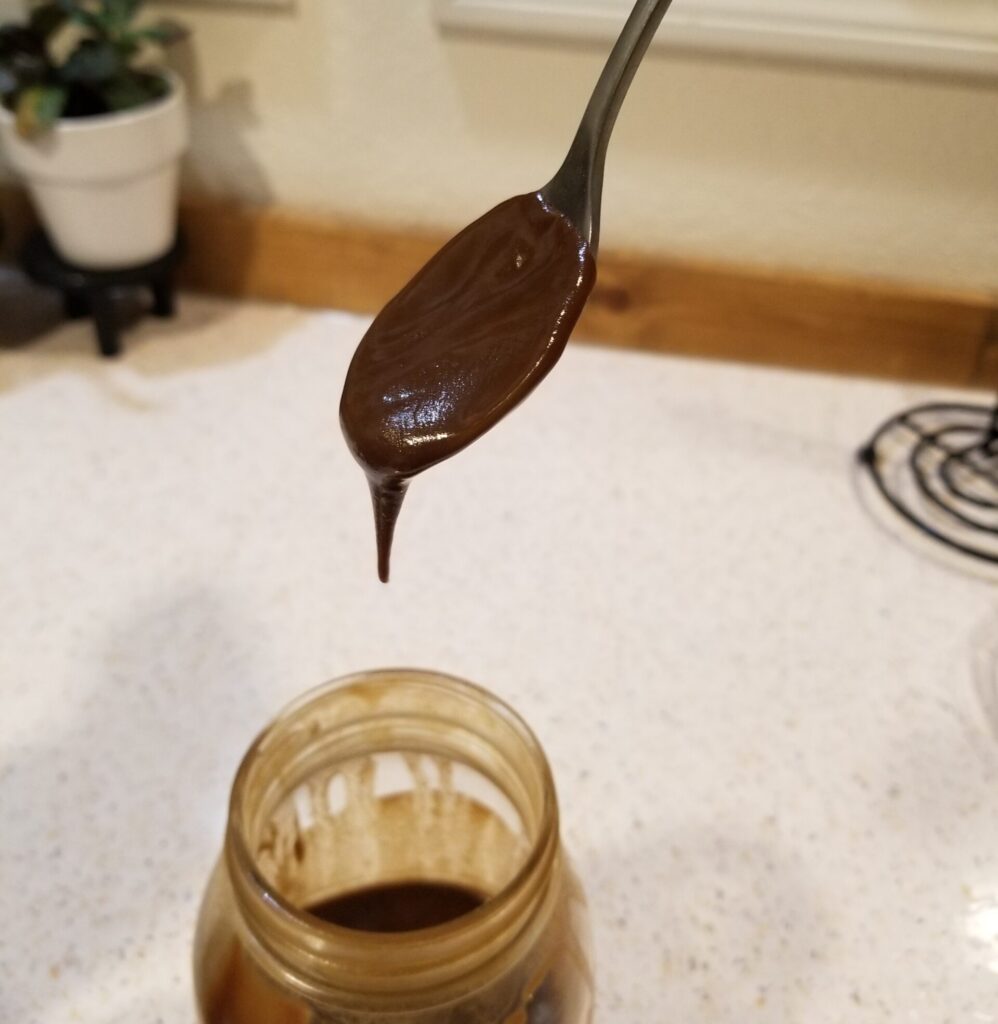
Filtering can be done a number of different ways. The simplest method is to allow the sands to settle while the syrup is in a jar or other container and then pour off the syrup. This is the cheapest and least labor intensive method, but often results in quite a bit of syrup being lost in the bottom where it cannot be poured off. Another cheap method is to pour syrup through coffee filters. This is inexpensive but can take a long time and requires changing out the filters regularly as they get clogged up. It’s best to do this while the syrup is hot so that it is less viscous and passed through the filters more easily. Maple suppliers offer relatively cheap solutions as well, such as cone filters. These use gravity and pressure from the cone shape to force syrup through a series of wool and polyester filters. These are best for larger amounts of syrup (e.g. several quarts, at least) as some of the syrup does get “locked” in the wool.
If you choose to filter out the sands, don’t throw them out! If there’s still syrup in them, they can make a good addition to baking recipes, granola, or animal treats. At the very least, they are a good, nutrient-dense addition to a compost pile or garden soil.
Storing
Storing syrup is very easy, especially compared to other food preserves (jams, jellies, etc.). For shelf storage, the most common method is “hot packing”. It’s important to use sterilized food safe containers, ideally glass but plastic is also acceptable. Sterilize the containers by boiling them in water for 10 minutes prior to filling them. To hot pack, the syrup must be poured into the containers at 185-190 degrees Fahrenheit. This will require putting your syrup back on the stove since it will have cooled during the filtering process. Reheat it slowly to avoid bringing back up to a full boil. Pour the hot syrup to the neck of the container, then place a clean cap on it and invert the container so it sits upside down. Allow it to sit like this for 5-10 minutes to sterilize the lid. When you’re done, you have a shelf-stable bottle of syrup! It’s recommended to eat syrup within 2-3 years of hot packing for the best quality in glass containers, or a year in plastic containers.
You can also store syrup in the freezer, which may be the best option for those with freezer space. The syrup will last indefinitely and freezing won’t affect the flavor or texture. In either case, once the syrup is opened or removed from the freezer, it should be kept in a refrigerator.
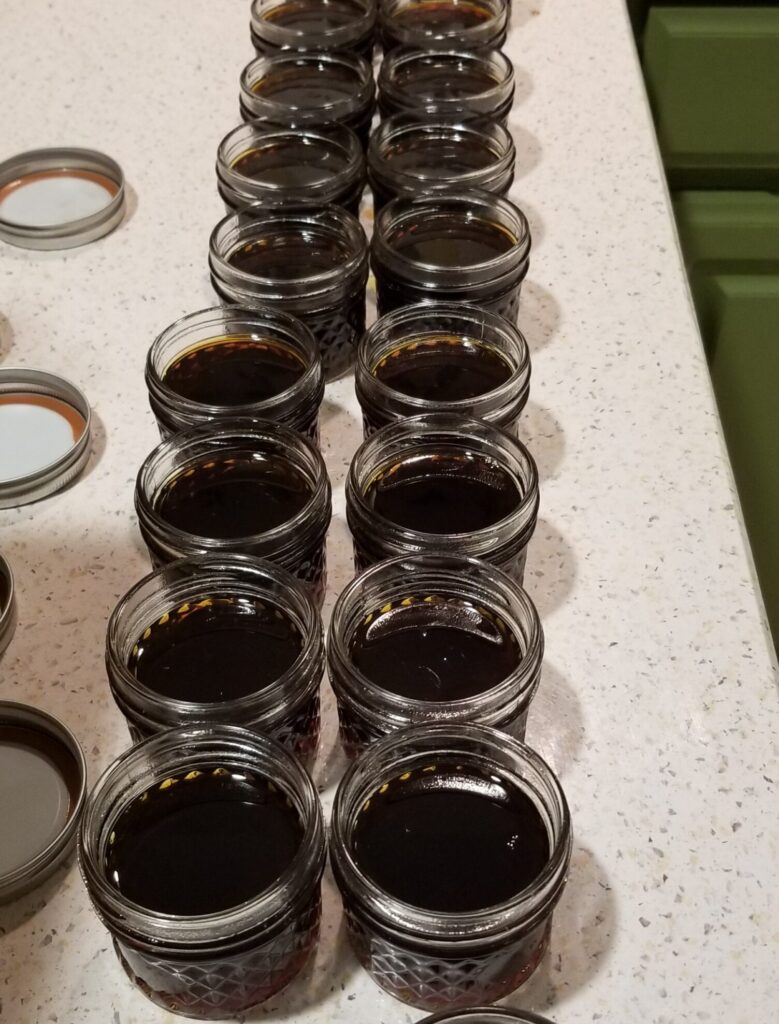
Because of syrup’s high sugar concentration and low water content, it rarely goes “bad”, but if you under concentrated the syrup (i.e. it is below 67% sugar), you run the risk of mold growth on the shelf or in the fridge. However, if you notice mold growing, you don’t necessarily need to toss it out. Instead, you can scoop off the mold and then put the remaining syrup back on the stove and bring it back to a boil to concentrate it a bit more and kill any mold spores. You can then hot pack it again, freeze it, or put it in the fridge. Freezing syrup will prevent mold from growing, even if under concentrated.
Enjoy your syrup! Visit the FAQ and Additional Resources Page for more resources and links to maple equipment suppliers.