The Master Gardener Plant & Insect Clinic diagnosis team publishes articles in the Master Gardener’s internal publication Sage Advice. Another team of Master Gardeners write the weekly In the Garden column in the Wenatchee World newspaper. Some of theses articles are general interest, some are nitty gritty science, and some address specific plant care.
With North Central Washington gardeners in mind, we gathered select columns from both teams on a variety of topics.
Click on the black triangle next to the topic and the text drops down. Click again to close it.
Bugs, Insects and Spiders
Honeybees aren’t the only bees in the garden – 11/04/2024
There are three main ways to be a bee. Honeybees live social lives and share the work of raising young and gathering food to sustain their colonies. Queens lay eggs and workers divide all the labor. Even in winter, their hives remain busy, crowded places, literally buzzing with the activity of thousands of workers.
Bumble bees also live in colonies, but unlike honeybees, their social life comes to an end at the onset of winter. All bumble bees in a colony die in fall except the mated females. These future queens dig shallow burrows and spend the winter underground in a dormant state. In the spring, each new queen, or “foundress,” will establish her own nest, lay eggs, and nurture the first generation of daughters that will help her with foraging and caring for subsequent broods.
Fewer than one out of 10 bees are social. The other 90% are solitary bees, and as their name implies, they spend their entire lives on their own. They serve no queen and do all their work alone.
Males typically don’t live long after mating, but female solitary bees have an extensive to-do list. In the spring, they choose nesting sites, construct nurseries, gather nesting materials, lay eggs, and provision egg chambers with pollen. The one thing they don’t have to do is take care of their babies. Once their eggs are safely tucked in, the females’ work is done.
Solitary bees don’t make honey or combs of wax, but they are incredibly creative when it comes to building nests. Remarkably, over two-thirds of solitary bees nest underground. Mining bees and digger bees are good examples. These small insects that we typically see in flowers also dig burrows that can range from a few inches to several feet deep.
The rest of the solitary bees are cavity-nesters. They build their nests in hollow plant stems and holes they find in dead wood. Starting at the back of the hole, they add pollen and an egg, then seal them up together, repeating this process until the hole is filled. If you could open it up, the completed nest of a cavity-nesting bee would look like a colorful pollen parfait.
Cavity-nesting bees are particular about the materials they use to seal each brood chamber. Mason bees use mud, and resin bees use sap. Leafcutter bees are the best interior decorators; they line and seal their nests with a quilt of carefully cut pieces of green leaves or colorful flower petals.
Tips To Help Native Bees In Your Yard
Whether they are social, annually social or solitary, all bees pollinate flowers as they forage for food. Unfortunately, not all bees get the credit they deserve for the vital role they play in plant reproduction. Honeybees may be the most iconic pollinators but are actually not native and have spread across North America like dandelions. Despite threats from pesticides, diseases and parasites, thanks to their importance to the crops we depend on for food, there are more honeybees in the world today than at any time in history. To put it simply, honeybees are hogging the resources. It is the native bees that need our help.
The best way to help native bees is to provide them with places to live as well as food to eat. When flowers have faded, there are still things you can do to make your yard “bee-friendly”:
Leave the leaves that fall in flower beds to provide shelter and habitat for ground dwellers.
– Leave rodent holes, too. Bumblebees love to build nests in holes that come pre-lined with fur.
– Add logs, rock piles, and sandy areas to your garden to create nesting sites that will be ready for bees when they emerge in the spring.
– Allow some dawn-facing, bare patches of soil to remain undisturbed and uncovered. Tilling and covering the ground with landscape fabric or thick layers of mulch prevent ground-nesting bees from emerging.
– Save the stems on perennials that die back in the winter. Let flowers go to seed for birds and other insects, then old stems will be ready for cavity-nesters to move in when they emerge in spring. Vegetation will grow up and hide the dry stems, and a new generation of bees will emerge to pollinate its flowers.
Keep your yard chemical-free so bees have healthy nesting places to raise their young. Many herbicides and systemic insecticides can persist in soil or vegetation for months or even longer.
By Julie Banken
Rethinking earwigs in your garden – 7/15/2024
When I taught zoology to kids, we had one fundamental rule in our classroom: you can’t say “gross.” Instead, we had to use the word “fascinating” to describe something with a high yuck factor. For many, finding an earwig in fresh lettuce leaves provides an opportunity to put this into practice. The more you learn about earwigs, however, the less offensive they become.
Earwigs belong to the insect order Dermaptera. The naturalized European earwigs found in our area are reddish brown and tan and grow to a size of about half-an-inch long. Although they do have a pair of hind wings under their stubby forewings, earwigs rarely fly; instead, they spend their time walking on the ground or in tree canopies at night. During the daytime, they rest under leaves, in bark crevices and among damp debris.
Unfortunate misconceptions give earwigs a bad reputation. They must live with the label “pincher bugs,” thanks to the long forceps-like pincers called cerci at the ends of their abdomens. Cerci help earwigs catch prey and defend themselves, but they aren’t used to intentionally pinch people.
Earwigs also don’t crawl into your ears while you sleep. They are much more likely to be found in ears of corn. While it seems plausible that they could accidentally enter your ear if you spent the night on the ground in a damp orchard, earwigs are not dangerous to people at all. They don’t bite or sting, and they have no venom.
Finally, it is definitely a myth that earwigs will lay eggs in your brain. In actuality, they lay their eggs in small burrows a few inches below the surface of the ground. Clutches can have from 30 to 60 tiny white eggs. Most insects lay their eggs and move on, but earwigs do something amazing. Like a bird, a mother earwig will stay to watch over her brood, diligently cleaning them and even moving them to safer spots if necessary.
Female earwigs continue to nurture their offspring for several weeks after they hatch. Nymphs will venture out on their own to forage for food at night, but earwig mothers work to provide them with extra food and protect them from predators. When they have molted twice, juvenile earwigs move out and become independent.
Earwigs are not picky eaters. They are omnivores and will eat just about anything, which can work both for and against the home gardener. They thrive in dark and moist places where they scavenge for decaying organic matter, but they will also feed on live plants. Ragged holes in foliage give them away; they also chew on flower buds and fruit. They can eat their way into strawberries, cabbage heads and tree-ripe peaches. Damage can be noticeable when their populations are high.
As with any garden pest, it’s important to know your enemy. While earwigs do cause unwelcome damage by eating plants, they have an important redeeming quality: paradoxically, they also eat other garden pests. Earwigs will consume soft-bodied arthropods such as aphids, whiteflies, mites and caterpillars. They will also eat insect eggs and even the occasional snail, slug and worm.
In studies at the WSU Tree Fruit Research Station in Wenatchee, researchers discovered that earwigs suppressed populations of aphids, codling moths and scale insects in apple orchards, proving that earwigs should be considered valuable orchard allies. Last year, WSU even gave away thousands of earwigs to apple and pear growers so they could release them into their trees.
Earwigs deserve a better reputation. They are caring parents and underappreciated beneficial insects that play a helpful role in pest control. Where they are doing damage to garden plants, decrease their population by collecting them under damp corrugated cardboard placed on the ground during the night. If they are doing more harm than good in stone fruit trees, prevent them from moving through the canopy by attaching sticky bands to the trees’ trunks and branches.
By Julie Banken
Understanding the impact of bug zappers – 6/17/2024
There is probably no sound more unwelcome in summertime than the high-pitched whine of a mosquito. This is especially true when there is work to be done in the garden.
In the quest for a mosquito-free yard, it is tempting to turn to UV light traps, or “bug zappers,” for a solution. Unfortunately, research has overwhelmingly shown that while extremely good at killing insects, bug zappers are useless at controlling mosquitoes.
Bug zappers use UV light to indiscriminately attract insects to charged metal grids, where they are electrocuted with a zap. In one study conducted in the 1990s, six typical residential bug zappers were set up and monitored during a 10-week period.
Entomologists collected, counted and identified the dead insects and found dramatic results: of 13,789 insects killed, only 31 of them were mosquitoes or close relatives. Surprisingly, in spite of these findings, bug zappers are still around, and so are mosquitoes.
As many campers can verify, mosquitoes are quite happy in the dark and are indifferent to artificial lights, ultraviolet or otherwise. Instead, they are lured by the smell of sweat and the carbon dioxide exhaled by their hosts. Check your porch light on a warm night for proof. Many insects will be gathered there, but mosquitoes will only show up when you do.
Although mosquitoes are not attracted to a bug zapper’s light, other insects seem inexplicably drawn to it. Bug zappers take advantage of this. Most nocturnal and crepuscular insects naturally orient themselves so that the dim light of the night sky stays at their backs as they fly through the dark. In the presence of artificial light, they reflexively turn to keep their dorsal side towards the source as they try to figure out which way is up.
Technically, it is not quite right to say that light attracts insects. It is more accurate to say they are confused and ultimately trapped by it.
It’s worth asking why bug zappers are still in use if they don’t kill mosquitoes. This review from a satisfied customer may offer some insight: “I love this light. It kills tons of every kind of bug!” This sentiment undoubtedly resonates; to many, the popping sound of insects getting zapped at night is the satisfying sound of revenge. Thanks to the reputation mosquitoes give insects in general, it is easy to understand why many people feel the only good bug is a dead one.
While it may be hard to accept when a mosquito is buzzing near your ear, fewer than 2% of all insects are pests to people. It is not hyperbole to say that the rest are essential to life on Earth. Insects (including mosquitoes) are bird food, fish food, frog food, reptile food and mammal food, not to mention food for their fellow arthropods. They are decomposers, important predators and pollinators, and without them, the ecosystem would come undone.
Bug zappers are exacting a serious toll on the insect populations that sustain us. According to one estimate, 2 million are sold each year. The number of insects inadvertently lost to UV light traps tallies in the billions. Give insects a safe haven by having a bug zapper-free yard.
It’s important to note that artificial light of any kind disrupts the normal behavior of night-flying insects, hindering their ability to forage for food, mate and reproduce. Consider limiting outdoor lighting around your garden in the summertime, or switch over to lights that are motion-activated and will only be on when you need them. Even closing curtains can help give nocturnal insects a chance to navigate by starlight once more.
How To Prevent Mosquitoes- Mosquitoes need standing water to breed, and even tiny pools can sustain them. It is much easier to prevent their larvae from hatching than to get rid of them once the adults have emerged.
Even before you see mosquitoes in springtime, regularly empty any containers where water can collect, such as bird baths, dog dishes, flowerpots and empty buckets. Also, clear gutters so they drain and keep water from standing too long on top of pool covers.
By Julie Banken
Beneficial insect larvae provide natural pest control – 3/20/2024
Insects are the silent champions of the ecosystem. They pollinate flowering plants, decompose organic matter and sustain countless animals above them in the food chain. To label only a lucky few of them “beneficial” does the rest of them a disservice, but in the gardening world, “beneficial insects” are those that feed on garden pests.
Beneficial insects will soon be hard at work in gardens and yards, and it’s important to be able to recognize them. With insects, this gets a little complicated, as often when they are still larvae in their immature stages, they look nothing like the adults they will become.
Syrphid fly larvae, for example, don’t look remotely related to their parents. When they hatch out of their eggs, they are legless and blind. They can be green, gray or yellow in color, and they are voracious feeders. Just one of these small maggots can suck hundreds of aphids dry with its piercing mouthparts.
Adult syrphid flies, meanwhile, are easily mistaken for wasps or bees. They have yellow and black stripes on their abdomens and spend their time foraging for food around flowers. With a pair of gyroscope-like halteres instead of a second pair of wings, they are weirdly able to hover in one place. Syrphid adults don’t eat aphids at all, but feed on pollen, nectar and aphid honeydew with their sponge-like mouths.
Ladybugs, or lady beetles, are another beneficial insect well known to gardeners. When they are adults, these small beetles are easily recognized by their round shape and shiny, red elytra with black spots. As larvae, they are often overlooked.
Lady beetle larvae resemble a cross between a caterpillar and an alligator. Fresh out of their bright, orange eggs they look like tiny black commas on a page, but by the time they pupate they are usually about a half-inch in length. They are gray and black with orange and white markings; they hold their front legs in an aggressive stance, ready to pounce on and devour any prey they encounter.
Even if you don’t recognize the larvae of beneficial insects, it’s important to appreciate their valuable contributions to pest control. In general, predatory larvae are better at suppressing pest populations than adults for two reasons: first, their main job in life is to eat, and second, until they are adults, they don’t have wings. Without wings, they only travel as far as they can walk, crawl, or hop, so they generally stay in one place, feeding on pests until they pupate.
Unfortunately, because they eat so much and can’t fly, beneficial insects still in their larval stage are hit hard when chemicals are used to control insect pests. Even if they are not treated with a pesticide directly, they can still suffer its harmful effects, as they have no choice but to ingest contaminated prey. In addition, because they can’t fly, beneficial insect larvae are unable to escape to find food that won’t make them sick.
Larvae of all types can become collateral damage even when “selective” chemicals are applied to kill pests. For example, insect growth regulators are a type of insecticide that targets the hormones of developing insects. These chemicals are considered selective because they act on arthropods and not other animals. Not only do they keep adult insects from reproducing, growth regulators stop insect eggs from hatching and prevent juveniles from molting. Insect growth regulators act on all insects, whether they are pests or not.
Insecticidal soaps are another type of chemical often recommended for use in the garden. Labels on these insecticides proclaim they are effective at killing soft-bodied arthropods. Many garden pests — such as aphids, thrips, mealybugs and mites — are soft bodied, but the larvae of all other insects are soft-bodied, too. Soap dissolves the protective cuticle on their soft exoskeletons, and they die by drying out.
Adult insects lay eggs in places where they know their offspring will have enough food. That means attracting beneficial species to your garden requires allowing pest insects to live there, too. The best way to attract beneficial insects is to keep your yard free of chemicals. Let beneficial insects do the work for you and naturally keep prey populations low.
Foregoing chemical treatment and tolerating the presence of pest insects ultimately creates a healthy home for all the beneficial insects out there, not just the garden predators. If you find beneficial larvae in your garden, be sure to celebrate. These young insects are a sure sign of a healthy garden ecosystem.
By Julie Banken
Timing is everything when controlling invasive paper wasps – 4/23/2024
Timing is everything when controlling invasive paper wasps –
Vespid wasps don’t often make it onto anyone’s list of favorite insects. Like fighter jets on a mission, they fly with purpose, and their bold aposematic colors warn that getting too close could result in a painful sting. Although they provide helpful pollination and pest-control services, they are intimidating, even to this Master Gardener.
I considered my own prejudice while I watched a large yellow and black wasp land on the doorframe of our greenhouse. With long legs dangling in flight, a narrow waist and orange-tipped antennae, it wasn’t hard to identify it as a European paper wasp.
European paper wasps look a lot like their aggressive cousins, the yellowjackets. Yellowjackets are the wasps that will ride a ham sandwich into your mouth or fly into an open can of pop just before you take a drink. Normally they feed on insects and flower nectar, but when supplies run low, they scavenge for protein and sugar wherever they can find it. Because they tend to build their nests underground, they seem to appear from out of nowhere at a picnic. Their demand for food becomes acute in the fall, when colonies can number several thousand individuals.
Like an evil twin, yellowjackets cause a lot of grief and frustration, leaving paper wasps to take the blame. European paper wasps need protein and sugar, too, but they are not scavengers and are not interested in people food. They prey on a variety of soft-bodied insects, and gather sugar from flower nectar, pollinating as they go. Colonies usually have fewer than 100 individuals at season’s end, and as long as you don’t disturb their nests, they won’t bother people.
It would be easy to co-exist with European paper wasps if they didn’t build their papery, umbrella-shaped nests in very inconvenient places. Look for them on swing sets, fences, chicken coops, RVs and boats, inside birdhouses, under the barbecue lid and in shrubs that need trimming, such as arborvitae. They also like greenhouses. Last summer, there were so many in my yard that it was difficult to avoid disturbing them.
European paper wasps are a mixed blessing. Even though they pollinate flowers and provide gardeners with natural pest control, these invasive newcomers are so successful that they are outcompeting native species. It makes sense to discourage them from building nests, especially around the home.
When it comes to reducing insect populations, timing is everything. Remove wasp nests early when they are small and have only one queen to protect them. In the spring, queens work alone and must leave their nests to gather food and nest-making material. In another month when the first generation of workers matures, nests will not be left undefended. Colonies will grow quickly and removing them will be more difficult.
To remove paper wasp nests, spray them with a jet of water from a safe distance. Alternatively, wait until the queen is out foraging, then quickly slide nests into a plastic container that can be covered with a lid. Queens will start rebuilding, but if you continue to disrupt them, eventually they will give up and go elsewhere.
Yellowjacket traps will do nothing to deter European paper wasps. While treating their nests with powerful insecticides might be tempting, doing so can invite more problems. Chemicals may kill adults but not affect developing pupae, making them ultimately ineffective. They also will contaminate the area with long-lasting toxins. To top it off, birds and insects that prey on treated larvae or pupae will inadvertently be exposed. Better is to remove wasp nests to slow their reproduction, then let their predators go to work.
By Julie Banken
Bumble bees spend most of their lives underground – 11/20/2023
Last month, when my son and I were harvesting our potato crop, we were surprised to dig up a bright yellow bumble bee.
Bumble bees are known as creatures of the air, not animals that live in the soil next to earthworms. However, these native bees actually spend more time under the ground than above it. These “humble bees,” as they were once known, deserve recognition for the indispensable role they play in the garden ecosystem.
Bumble bee queens like the one in our potato bed spend the winter months hibernating alone in shallow burrows in the soil. After emerging in the spring, they establish their nests in empty cavities in the ground. Rodent burrows, rock piles, and vacant space at the bases of bunch grasses and sedges are their favorite spots.
Once a nest site is chosen, the queen gets busy. She flies from flower to flower for food, traveling up to a mile away from her home base, pollinating a wide variety of plants as she goes. She carries pollen and nectar back to her nest in the ground where she deposits it into tiny wax chambers appropriately called honey pots. The queen lays an egg on top of the food bundle in each honey pot, and, like a bird, will protect her eggs and even keep them warm until they mature into full-grown adults.
It takes about a month for the queen’s offspring to develop into working females. Once her daughters are able, they take over the tasks of the growing colony, allowing the queen to remain in the nest to lay eggs. The daughters care for the queen, build more honey pots, forage for food, store up provisions, and help care for the young. The more pollen and nectar they gather, the more daughters the queen can produce. By the end of the season, colonies have on average 50 to a few hundred bumble bees living and working in their underground home.
In the fall, male bees emerge along with new queens. The social life in the colony comes to an end as winter approaches. Every bee in the colony dies, in fact, except the young, newly mated queens. They dig new burrows in the soil and remain underground until spring, when the cycle starts all over again.
Honey bees get all the glory, but wild bees like the bumble bees are actually more efficient pollinators. They can fly in temperatures as low as 45 degrees Fahrenheit, so they are able to pollinate the first flowers that bloom in the spring and the last flowers that bloom in the fall. They are also able to do something honey bees can’t do: they vibrate their wings until a flower gives up its pollen in what’s called “buzz pollination.” Tomato, potato, and blueberry plants require buzz pollination to create their fruit.
Bumble bees are not the only bee species to live underground. There are over 400 native ground nesting bees in Washington alone, including alkali bees, sweat bees, digger bees, mining bees and plasterer bees. Unfortunately, many of them are threatened or at risk of extinction due to habitat loss and exposure to toxic chemicals in the environment.
Home gardeners can play an important role in protecting our native bees by providing them an inviting place to live and work.
Here are a few ways to make your landscape bee-friendly:
Avoid tilling the soil in the fall. Harvest your potatoes early!
Incorporate a wide assortment of flowering plants into your landscape so the bees will have food throughout the spring, summer and autumn. When deciding what plants to add to your yard, remember that native bees like native plants best. Visit the Pollinator Garden at the Leavenworth Fish Hatchery in person or online for ideas.
Leave the leaves that fall in your garden and flower beds to provide cover for the insects living below.
Create nesting habitat for ground nesting bees by not using plastic or fabric weed barriers. Instead, apply layers of organic mulch to keep weeds at bay.
Above all, keep your yard free of toxic chemicals found in herbicides and pesticides. If the label says “systemic,” then the poison intended for pest insects will end up inside of plants’ pollen and nectar, and ultimately will be ingested by pollinators and fed to their young. Avoid the risk of inadvertently introducing harmful chemicals into your yard by purchasing plants from nurseries that do not use systemic pesticides.
By Julie Banken
Give a gift to your local pollinators this year – 12/18/2023
How do you decide which plants are best suited for your landscape? Wandering through the rows in a nursery in spring can enchant a gardener into choosing a plant for its beauty. Familiarity and price are also hard influences to ignore.
Adding a perennial to your yard is a commitment, however, so do some thorough vetting first.
There are many resources to help you narrow down the choices in a plant nursery. One of the most recognized is the “Sunset Plant Collection.” Sunset’s website divides the Western United States into comprehensive climate zones, taking into account temperature, wind, humidity, length of the growing season, and the amount and timing of precipitation. Their online map makes it easy to browse through a tailored selection of plants that are recommended for the climate where you live.
There is more to choosing a plant than knowing its climate zone, though. Even if it grows well where you live, it might not be a good idea to add it to your yard. The butterfly bush from the genus Buddleja offers a good example. Sunset describes the butterfly bush as a heat-loving, long-blooming shrub that needs minimal care and provides food for pollinator species from spring until the fall. According to their climate guide, the butterfly bush will grow well in Zones 2-24, or just about anywhere outside of the mountains.
Although native to central China, the butterfly bush unfortunately grows so well in other parts of the world that it is now on Washington state’s Noxious Weed List. Each flower cluster makes 40,000 seeds which disperse by both wind and water. Luckily, cold winters keep its seeds from germinating, but in areas where winters are mild, the butterfly bush is considered invasive and will crowd out native vegetation.
The Washington State Noxious Weed Control Board publication “Garden Wise” recommends gardeners in our state choose non-invasive alternatives. Some varieties of butterfly bush have been bred to be sterile or have very low fertility to prevent weediness. These include ‘Asian Moon,’ ‘Miss Molly,’ ‘Miss Ruby,’ and varieties from the Flutterby series and the Lo and Behold series.
Note that just because a plant is for sale in a nursery, it is not automatically a good idea to bring it home. Whether it is bred to be sterile or not, the butterfly bush is an ecological dead end. Their showy flowers hog the attention of pollinators, leaving native plants unfertilized. Crucially, butterfly bushes do not support the complete life cycle of their namesake; no native caterpillar species feeds on their leaves. To plant a butterfly bush in your yard has been described as inviting the parents over for a feast while starving their children.
The very best plant for its place is the one that Mother Nature herself already selected. Unlike exotic plants, native species have evolved to thrive in the climate where they live, so they are less susceptible to environmental stressors. This makes them more resilient and therefore less work.
More importantly, native plants not only belong in the local ecosystem, they
enhance it. They provide essential habitat and food for native pollinator species. These organisms often depend solely upon their relationships with native plants for their survival and reproduction. Without native plants, native pollinators will disappear.
Add a native plant to your landscape and you will be giving a gift to the pollinators in your yard. By turning to nature for gardening advice, you will support and protect the diversity of life that is necessary for a healthy ecosystem.
By Julie Banken
Don’t fret those creepy companions in your garden – 7/28/2022
While we may be used to thinking of snakes and spiders as scary, creepy crawlers, many of them live year-round in our gardens as beneficial helpers. The more we understand the roles these creatures play in the success of our gardens, the less we fear them.
Most snakes in our area are garter snakes. They are non-poisonous, rather shy and usually avoid humans. Garter snakes eat many garden pests including slugs, squash bugs and cucumber beetles. Larger garter snakes will eat small rodents, which can also be garden pests and disease vectors around the home.
Although garter snakes are harmless to humans, they are easily scared and may bite or smear foul-smelling secretions on your hand if picked up, so it is always best to leave them be and let them quietly do their work. It can be a fun activity to identify snakes seen in the garden by their markings; you may find you have several different types of garter snakes.
Learning to tell the difference between them and the poisonous Western rattlesnake is also a good idea, as the Western rattlesnake is native to Washington state, and is common east of the cascades. For more information on living with wildlife, check the Washington Department of Fish and Wildlife website, wdfw.gov.
Probably the creepiest of creepy crawlers are spiders, which are underappreciated by many of us. Spiders play an important role in the ecosystem of our gardens. There are generally three types of spiders in the garden, when categorized by their hunting behavior:
1. Web-building spiders (orb weavers, funnel weavers and sheetweb spiders) wait inside their webs for prey to get stuck in the sticky filaments;
2. fast and active wolf spiders and lynx spiders scurry around hunting for prey;
3. and wandering spiders (cobweb spiders, jumping spiders and crab spiders) ambush their prey by waiting, then pouncing on their dinner.
A garden in our area could have as many as 25 different species of spiders living among the plants, each specializing in hunting particular types of insects. Spiders eat many pests in the garden, including aphids, wasps, beetles, mosquitoes and flies.
Spiders are relentless hunters, crucial to a healthy garden. Keeping soil covered with mulch or grass clippings creates pleasing habitats for ground spiders; avoid frequent tilling of the soil to maintain their happy hunting grounds. Adopt a casual, less tidy approach in the garden by leaving spiders in their webs on the corner of the garden shed, or other areas where you don’t need to clear them away.
You can choose to maintain good spider habitat by leaving plant stalks and other plant debris up in winter, waiting until spring to clear them away. Avoiding pesticides in the garden is always helpful to maintain healthy populations of pest hunters including spiders; this is generally desirable when growing for the dinner table as well. For more information, download the free WSU publication Common Spiders of Washington at wwrld.us/3ortZTl.
While many gardeners think about beneficial insects such as pollinators when planning and tending the garden, the benefits of less appealing creatures that help in the garden — by keeping the “bad bugs” under control — are often overlooked.
Instead of relegating our love of creepy crawlers to plastic Halloween décor, we can try to remember the beneficial work these busy creatures do in our gardens every day and night of the year, and maybe these crawlers won’t be so creepy to us anymore.
By Viva Mertlich
An aphid’s enemy can be your gardening best friend – 6/24/2020
As spring wraps up and we move into the long gardening days of summer, many of the insects that view our gardens as wondrous buffets are making their appearance. Fortunately, so are insects who view them as sumptuous meals. This article will look at a common garden insect pest — aphids — and two beneficial insects that help keep them under control, lady beetles and syrphid flies.
Aphids feed on many types of plants, from ornamental plants and vegetables to bulbs and trees. These small (1/16’ to 1/8”) soft-bodied insects damage plants either by sucking nutrients and moisture from them or secreting a toxin that causes deformation.
Aphids can be green, yellow, rose-colored, black or look powdery or woolly. They are usually found feeding on the tips of new shoots and the underside of leaves, stems and branches.
Wilting and yellowing of the leaves, as well as deformed and stunted new growth, are signs that your plant is infested with aphids. You may also see their “honeydew,” a sticky substance that ants love to harvest and that is food for black sooty mold fungi that, although not lethal, is unattractive.
Enter the heroes of this story: lady beetles (commonly known as ladybugs) and syrphid flies and their larvae.
Most of us easily recognize lady beetles with their classic round bodies and reddish-orange hard wing coverings with black spots. But few of us are aware of their larvae.
Lady beetles lay their spindle-shaped yellowish eggs in clusters on or near infested plants, usually on the back side of leaves, on bark, or in plant litter. One female can lay up to 500 eggs that hatch in a week into alligator-shaped dark gray larvae with orange markings. Because hundreds of lady beetles can reproduce rapidly and one larva can eat hundreds of aphids as it develops, they are capable of controlling aphid infestations.
Less familiar are the syrphid or hover flies. Because they hover around flowers and have black and yellow abdominal bands, they are often misidentified as honeybees or wasps.
Syrphid flies are an aphid’s worst nightmare as they target aphids, laying their white-gray eggs in and around aphid colonies.
Resembling caterpillars in shape, they have a tapered legless opaque body and come in a number of colors and patterns, with most sporting a longitudinal yellow stripe on their backs.
Syrphid flies have three larval stages before metamorphosizing into pupa and finally, an adult.
One adult female can lay as many as 100 eggs during its lifetime. Syrphid fly larvae are efficient aphid predators, each one capable of consuming hundreds of aphids in a month. A sizeable population of syrphid flies in a garden can effectively control 70% to 100% of an aphid infestation.
When choosing plants for your garden, consider adding some that attract lady beetles and syrphid flies. Examples of flowers that attract ladybugs are a variety of herbs, marigolds, alyssum and yarrow. For syrphid flies, plant flowers such as alyssum, aster, daisies, herbs, marigolds, sunflowers and zinnias.
So, the next time you are working in or wandering through your garden, keep your eyes out for your insect friends — the lady beetle and syrphid fly and their larvae.
By Casey Leigh
Prevention is the Best Solution for Gnat Management – 7/14/2021
Have you ever noticed tiny gnats flying around your house plants and running around on the soil in your pots, looking a bit like mosquitoes but never buzzing or biting? You probably are looking at fungus gnats.
Fungus gnats are flies that eat fungi, dead organic matter and plant roots. They are common in outdoor soil, where they play a beneficial role in decomposing dead plant material. They rarely damage outdoor plants, since natural predators and seasonal changes keep their numbers fairly low. But fungus gnats in homes or greenhouses can develop large populations, causing root damage and spreading disease.
Fungus gnats develop in four stages: eggs, larvae, pupae and adults. Adult flies are short-lived and feed very little; their job is to reproduce. After mating, each female will lay 100 to 150 eggs on top of the soil, usually near a plant stem. Maggot-like larvae hatch from the eggs in about four days and begin to eat. They generally prefer fungi and dead organic matter, but they will also eat roots and tender stems. Severe indoor fungus gnat infestations can stunt plant growth, kill small seedlings and may transmit fungal diseases like Verticillium wilt.
Larvae feed for about two weeks, then form pupae near the soil surface. Adults emerge from the pupae in three to seven days. Warm weather speeds up development, and they can have multiple generations in a year. While development stops outdoors in winter weather, fungus gnats indoors can reproduce continuously.
To prevent fungus gnat infestation, use sterile potting medium for growing plants indoors. Avoid using garden soil or unsterilized compost. Bringing outdoor plants indoors for the winter can introduce fungus gnats, so put outdoor plants in isolation for a week or two before placing them near any house plants. Fungus gnats thrive in moist soil, so decrease the survival of eggs and larvae by allowing the top inch or two of growing medium to dry between waterings. Clean up damaged leaves or other plant parts and don’t allow them to decay on the soil surface.
If you think you have a fungus gnat infestation, there are a few tools to help with detection. Adults are attracted to yellow sticky traps. Place a few near your plants and watch for fungus gnats or other insects trapped on the sticky surface. You can trap larvae by taking advantage of their attraction to the cut sides of raw potato chunks. If you place a few chunks cut side down on the surface of your potting soil, larvae will show up in a few days. This technique not only detects an infestation but also can help draw larvae away from plant roots. Remove and dispose of any infested chunks, and replace them with new ones.
Sometimes a light infestation can be controlled using only sticky traps and potato chunks, but heavier infestations may require other measures. Predatory nematodes are an effective biological control for home use. They must be mail-ordered, since they are shipped alive. They can be stored for two to five months depending on conditions, but they don’t have an actual dormant stage and should be used as soon as possible. Another biological control is the bacterium Bti (Bacillus thuringiensis israelensis), which kills certain species of flies, including mosquitoes and fungus gnats. Nematodes and Bti are both applied as soil drenches to kill fungus gnat larvae.
The best solution is always prevention. Good indoor sanitation and water management are the most important tools for avoiding problems with fungus gnats.
By Connie Mehmel
The enemy of my garden enemy -3/12/2019
There are many species of insects, and they all play a role in nature. We, as humanity, tend to put them in groups in relation to what they do to, or for, us.
Most of us encounter them as bothersome pests, invading our space as we try to carry on our lives, insect free. There are relatively few human pests or dangerous insects around us here in North Central Washington most of the year, most of which try to feed on you and your sandwich while you are picnicking in the forest.
Most insects are just trying to get along during their short lives, usually serving some useful purpose, such as pollination of flowering plants, decomposition of dead things (plant and animal) or at least serving as food for other animals or plants.
There are a very few of these insects that eat or parasitize plant pest insects that attack our food, forage or ornamentals. Since they help us by eating or otherwise killing insects that are living their lives counter to our own interests, we call them “beneficial insects.”
I have three rules that you may follow to help you to encourage the beneficial insect population in the region around your home:
Rule 1: Your friendly insects need something to eat. First come the pest insects, aphids on your Birch tree, for example. The aphids feed on the leaves and excrete “honeydew” all over your vintage Nash Rambler station wagon. A bother, for sure.
Rule 2: Beneficial insects develop more slowly than pests. First comes the food source, aphids again in this example. Then come the good guys. A few of the important members of this group of aphid predators include lacewings, ladybird beetles, several true bugs and several tiny wasps. Some of these good guys start off by eating the aphids, a sugary snack, but soon commence laying eggs in large numbers. These eggs hatch into larvae, many of which are like tiny alligators, which munch on aphids like there is no tomorrow. If they survive (and there is some fierce competition), they pupate, emerge as adults in a few days, then continue to feast on the aphids if any remain. There are also tiny parasitic wasps that lay their eggs inside of the aphids, leaving only a dried empty aphid when its larva is finished. The true bugs pierce the aphids and suck their innards out like a kid slurping a milkshake. When the aphids are all gone, these good guys leave their current home by the tens of thousands to search for new neighborhood aphid populations.
Rule 3: These predators and parasites can’t do any of this if you kill them. Trees are usually too tall to spray, but years ago, we found one way to treat tall trees by placing a systemic insecticide in the soil around the tree. The tree picks up the systemic insecticide and transports it to the entire tree. This is very effective way to kill many sucking insects, and usually kicks in as the good guys are building up, killing almost the entire pest and beneficial population in a few days. If the tree flowers soon after treatment, bees and other pollinators may also be affected by collecting contaminated nectar.
Be patient, the trees in the forest rely on the natural enemies of aphids for control, and it works for them.
By Tim Smith
Good bug, bad bug – 3/29/2019
One of my favorite garden insect books is “Good Bug, Bad Bug.” Chock full of helpful information, the book reminds me that the adage, “the only good bug is a dead bug”, isn’t true.
Only 10 percent of all insect species cause problems in our gardens. And even they have a positive role in the environment as pollinators, food for birds and other wildlife, and soil decomposers. The rest either help us keep our gardens beautiful and healthy or are benign, creating no problems for us.
Learning the beneficial species and how to attract them, as well as the destructive ones and how to control them, takes some time and experience, but is doable for the home gardener.
One way to narrow down what insect is causing damage is to learn a bit about insect biology. The insect’s mouthpart determines how adults feed. If the leaves of your plant look like something has been feeding on them, your insect has jaws made for chewing. Some examples of chewing insects that are nuisances in home gardens are grasshoppers, some beetles and earwigs. A second type of insect has an elongated mouthpart that sucks liquid out of the leaf. Common sucking insect pests are aphids, mealy bugs, mites, whiteflies and stinkbugs.
Most insects go through metamorphosis, starting from eggs and developing through one to three stages before becoming adults.
Most of us are familiar with the metamorphosis from caterpillar to butterfly. The larval (caterpillar) stage does the most damage. Examples of larvae that cause problems in our gardens are cutworms, leafrollers, sod webworm and wireworms. Cutworms, the larva of a number of moth species, overwinter in the soil and woodpiles, causing most of their damage in the early spring. They feed primarily at night, emerging around dusk. As their name implies, they feed mostly at the base of young plants, effectively “cutting” off the stems. Leafrollers, another moth larva, are primarily tree fruit pests that earned their name from their way of rolling leaves together to live and feed from. Eggs are laid on branches or twigs, hatching in the spring, when they feed for 4-6 weeks.
The sod webworm is the larva of lawn moths. Feeding at night, they chew off the grass blades at the base. You can find them in the thatch layer, so keeping your lawn thatched reduces your chances of having a sod webworm problem. Evidence of their presence are irregular brown patches in your lawn. Wireworms, the larvae of click beetles, attack root crops such as potatoes and dahlias. Living in the soil, they feed on seeds, underground stems and small roots. Unlike many other larvae, wireworms can take years to reach their adult stage. Crop rotation is an effective means of limiting wireworm damage.
Now let’s meet some of the insects we want to live in our gardens. Predatory beetles and true bugs, lacewings, predatory flies, parasitic wasps and parasitic flies eat many of our most common garden enemies, such as mites, aphids, leafhoppers, scale, whiteflies and mealybugs, among others. These insect friends can be helpful in both their larval and adult stages.
The best way to attract beneficial insects is including a diversity of local native plants in and around your garden and implementing integrated pest management practices that lower the use of synthetic pesticides.
One of your tasks as a home gardener, then, is to be a detective, looking for signs of which insects are out and about. Once you know that, you can make a plan to reduce the population of “bad bugs” and encourage the presence of “good bugs.”
By Casey Leigh
Where do our garden insects go in winter? – 11/19/2020
Do you ever wonder where all the insects that inhabit our gardens from the spring through the fall go once winter arrives? Insects have developed a number of overwintering strategies. Some fly south to warmer climes. Others have found ways to hibernate, while others go underground. Some lay eggs that will hatch once spring temperatures warm.
Knowing where and in what stage in their life cycle insects spend the winter is not only interesting, but also helpful for managing both beneficial and harmful types in your garden.
Like many humans, some species of butterflies, moths, dragonflies, beetles, grasshoppers and true bugs migrate to escape the winter cold. A Texas entomologist, Mike Quinn, estimates that at least 71 species of insects migrate. The most well-known migrating insect is the Monarch butterfly.
Not all butterflies and moths are migratory, however. Some survive the winter “hibernating.” The pupae of most butterflies (chrysalises) or moths (cocoons) can be found attached to an above-ground object, such as a branch. Know which of these pollinators you want to inhabit your garden and learn what their pupae look like and where their pupae might be spending the winter so that you don’t accidentally destroy them.
Not all butterflies and moths are beneficial in our gardens and orchards. One example is the codling moth. After eating the core and seeds of the apple, larvae form silken cocoons under loose bark, in soil, or in debris around the base of a tree, where they stay until they emerge in spring. To reduce their population, find a picture of these cocoons and check for them, destroying any you find.
Bee species have developed differing hibernating strategies for surviving winter. With bumblebees, most of the colony dies before winter, leaving the queen to hibernate on her own in soil banks such as abandoned rodent holes. Honey bee workers and their queen hibernate in their hives or nests clustered tightly together for warmth. Adult solitary bees, such as mason and carpenter bees, have short lifespans so it is their eggs and larvae that overwinter. The female lays her eggs in a nest and then seals it with pollen and nectar for when the eggs hatch. Leave these nests alone if you see them and you will be rewarded with them pollinating your plants during the growing seasons.
In plant diagnosis clinic, we get calls from people who are unhappy with insects that have chosen their houses to hibernate. Box elder bugs, seed bugs, elm leaf beetles, the non-native invasive Asian lady beetle and one of our newer pests, the brown marmorated stink bug, are examples. You can vacuum them up when you find them.
Some insects overwinter in the soil underground, either as adults, larvae or eggs. Root weevil larvae overwinter in soil around roots, emerging as adults in the spring. Cultivating the soil in April or May before planting can eliminate overwintering larvae. Although not an insect, slugs are pests in our gardens. Adults and the eggs spend the winter in the topsoil or under garden debris, mulch, or boards on the ground. Controlling slugs is one reason that it’s important to remove dead plants in your garden.
As I have learned, insect winter survival strategies are diverse and knowing their habits helps me to better manage them in my garden.
By Casey Leigh
Good Bugs – 6/1/2016
Gardeners who bring bug problems to the clinic usually have only one question: How do I get rid of this pest? For many, all bugs are “bad”. While most are aware that ladybugs are good to have around, they don’t know of the many other beneficial insects that visit their gardens nor that 90% of insects are benign. Last month we reviewed six bugs that create problems for gardeners. This month we’ll look at how to encourage six species that are beneficial for our plants: damsel bug, ground beetle, lacewing, ladybug, praying mantis, and tachinid fly.
The damsel bugs are natural enemies of aphids and small caterpillars such as cutworms and tobacco budworms. They are light brown or tan, narrow-bodied insects with long legs and bulging eyes. They use their long snout to kill and eat their prey. They overwinter in leaf litter and grasses. To encourage their presence in your garden, plant low growing perennials and ground covers.
Beetles are some of my favorite insects. Ground beetles will devour, among other things, caterpillars, Colorado potato beetles, corn ear worms, cutworms, and slugs. They have a hard dark-colored shell and can grow up to 1 ½” long. They use their large mandibles to capture their prey. This mandible often worries gardeners who fear being pinched by them, but don’t let it stop you from encouraging their presence in your garden. Ground beetles feed at night, living under rocks, logs, and leaf litter during the day.
Lacewings are many peoples’ favorite insect for their delicate beauty: light green colored body, transparent wings, and golden eyes. Though only a ½ inch long, the larvae can eat up to 100 aphids per day! They also consume mealy bugs, spider mites, scale, and whiteflies, among other pests. The adults don’t feed on insects, but rather are pollen and nectar feeders. So to attract lacewings, grow plants such as coreopsis, cosmos, goldenrod, Queen Anne’s lace, and yarrow.
Most children can identify ladybugs, also known as ladybirds or lady beetles. They are amazing insects. Over 450 species are found in North America. Like lacewings, their larvae are voracious feeders, with the ability to consume 40 aphids per hour! Ladybugs at all stages of its life cycle can be seen on the same plant harvesting aphids. Adult ladybugs are pollen and nectar feeders as well as insectivores, so grow plants such as cilantro, coreopsis, dandelion, dill, fennel, and yarrow to attract them to your garden.
I remember being fascinated by praying mantids when I was a child. What I didn’t know then is that they can turn their heads 180 degrees, using their large eyes to find their prey. Sneaky insects, they lay in wait for their meals of aphids, caterpillars, Colorado potato beetles, squash bugs and others to come to them. One disadvantage is they eat other beneficial insects in addition to the pests you want gone. They lay their eggs on plants stems and branches, so grow sturdy-stemmed plants in your garden.
Although most of us find flies to be pests, the tachinid fly is our garden’s friend. They can be confused with small houseflies, but rather than hanging about on your screen and in your kitchen, you will find them pollinating flowers and settled on leaves. As parasitic insects, adults lay their eggs or live larvae on other insect hosts such as Colorado potato beetles, cutworms, earwigs, and squash bugs. The larvae feed on the host insects. Tachinid flies particularly like herbs, adding to the value of your culinary herb garden!
For more detailed information on these and other beneficials, Good Bug, Bad Bug: Who’s Who, What They Do, and How to Manage Them Organically by Jessica Walliser is a good resource and the one I used to write this article.
By Casey Leigh
Hobo or House Spider? -10/1/2017
Of all the “bugs” brought into clinic, the ones that cause the most consternation are spiders. Although most of the insects we see can be hazardous to plants, they rarely bite humans or even work their way inside houses. Spiders’ reputations for causing painful bites, however, precede them. In reality, spiders as a whole are so beneficial that WSU extension does not recommend using pesticides on them.
One of the spiders found in our region that has been known to bite humans is the hobo spider, Tegenaria agrestis. Although studies have not demonstrated that hobo venom causes necrotic skin lesions, hobo spiders still create fear in peoples’ minds. Because hobo spiders look similar to harmless house spiders, they are often confused with the house spider. Although you can’t positively identify a hobo spider without a microscope, with practice you can learn to identify house spiders that are NOT hobos.
First, hobo spiders are outdoor spiders and are unable to live inside permanently. So the odds are slim that the “look alike” house spider is a hobo. The time you are most likely to encounter a hobo spider in the home is in August and September when the males are wandering in search of females. Hobo spiders make funnel webs, but that is not diagnostic as many other species also make funnel webs. Both house and hobo spiders are brown, so color alone also won’t help. While most hobo spiders have a chevron pattern on the abdomen, it is the most common markings on non-hobo spiders.
Now, disable that spider you are concerned about and get out your hand lens. Look at the sternum, the area sur-rounded by the legs on the spider’s underside. If you see 3 or 4 pairs of light spots on the sides of the sternum, your spider is not a hobo. Remember the saying: “If you see spots, then a hobo it’s not.” Next, look whether your spider has two dark longitudinal stripes on the main part of its body, the cephalothorax. If it does, you don’t have a hobo. Now look at the legs. Are there dark rings around them? Are they shiny, without fine hairs? If so, it’s not a hobo as they have fine-haired, uniformly colored, non-shiny legs. On to the reproductive organs. The male’s reproductive structure is called a palp, which is a swelled area on the end of the front feelers. If the palp is long and pointy, it is not a hobo.
To delve more into reproductive differences that will allow you to positively identify a hobo, you need a micro-scope and more detailed knowledge of arachnid anatomy. But for most of the spiders you will find in your house, the above techniques should eliminate the hobo from contention. If you are in doubt and your spider is still alive, capture it and move it outside. No more problem!
*Information for this article came from “Myths about “Dangerous” Spiders, www. burkemuseum.org/spidermyth; “How to Identify (and misidentify) the hobo spider”, PLS 116, pep.wsu.edu; and “Hobo Spider”, Pest Note Publication 7488, University of California Agriculture and Natural Resources (May 2006, rev.), extension.wsu.edu.
By Casey Leigh.
Design
Make plans this winter to create a lush landscape with less water – 12/18/ 2024
September 2024 temperatures ranked as the warmest on record in Wenatchee, with average temps 5.5 degrees higher than normal. Precipitation was 13% of normal. The U.S. Drought Monitor map shows Chelan County in a severe drought.
Climate prediction models expect this pattern of hotter, drier weather to continue. My response to our changing climate is to spend the winter planning to replace most of my lawn next spring.
There are ways to create a lush, beautiful landscape while conserving water, a finite resource. Xeriscaping is a style of landscaping that does just that – it reduces the need for irrigation. Now is a great time to consider what changes you can make in your landscape to conserve water. Keep in mind plant selection, design aspects, soil management and smart irrigation when practicing water-wise gardening.
Water-wise gardening depends on incorporating native and drought-tolerant plants adapted to our local environment. Native plants also don’t need a lot of soil amendments to be happy. Have a stroll through the Xeric Garden along the Riverfront Park section of the Apple Capital Loop Trail for some good ideas for plant selection.
When designing your landscape, consider grouping plants according to their water needs (hydrozoning). Another design consideration is using shade to decrease water needs. Create shade by using shade cloth or placing taller plants to shade smaller ones. Put your heat-loving, most drought-tolerant plants in the hottest areas of your landscape. Look at how natives exist in the wild for ideas on how to plant them in your landscape.
Improving your soil with organic material is a smart water-wise move. Adding 3-4 inches of compost and 2-3 inches of mulch will improve water infiltration of sandy or clay soil. Other amendments include aged manure or coconut coir (a sustainable alternative to peat moss). Is there soil compaction from new construction or high activity? Repair this to avoid water runoff.
Review your irrigation methods. While automatic irrigation systems make our lives easier, they are not set-it-and-forget-it. Are poorly placed sprinkler heads watering sidewalks or other hardscape features? Use drip irrigation for planting beds to direct water exactly where needed. Water deeply and as infrequently as your plants will tolerate. Water between midnight and 6 a.m. to avoid evaporation. Consider installing a “smart” irrigation controller that adjusts watering based on rainfall, soil moisture evaporation and plant needs. Prevent runoff by using a “cycle and soak” method. For example, run your irrigation system for three 5-minute intervals at one time, allowing the water time to soak into the soil.
Break up great expanses of lawn with planting beds. Use turf only for functional spaces rather than the main feature of your landscape. Allow the grass to grow a little higher during the summer months to decrease water evaporation. Consider turf alternatives – clover, creeping thyme, native seed mixes.
Becoming water-wise in our changing climate doesn’t mean you need to tackle a complete landscape overhaul. Start with one planting bed, or one corner, front or back yard. Or start with incorporating smart irrigation. Even if you have irrigation rights rather than city water, consider becoming more water-wise.
By Dana Cook
A Japanese-Style Garden Is A Calming Retreat For Both Young And Old – 1/13/2022
I love the style of a Japanese garden because of the sense of wonder and peacefulness I get from walking through it. Much of our lives are spent in a blur of motion, but a walk through a Japanese garden helps slow down both the body and mind.
Growing up, I was taught that you fill your landscape with lots of color and variety; open soil was a place that other plants should go. I never really thought about the landscape as a way to relax, but more of a source of tasks and jobs that needed to be completed.
My wife and I bought our first house and I decided I wanted something more than just a yard full of pretty flowers. A timely visit to the Washington State Bicentennial Pacific Bonsai Museum garden in Federal Way while on an FFA judging trip provided the desire to try something different.
One of the most difficult things when I designed my first Japanese garden was to limit my use of “positive space” which is filled with plants, and to incorporate “negative space” or areas without plants or features. This allows you to better frame a plant or feature for a better display.
A well-designed garden changes seasonally as things go in and out of bloom, as well as the changing seasons. A Japanese garden design is like a journey where you make discoveries as you go through it. The views are like windows that frame a space using screening plants and twists in the path that allow you to find subtle changes and features, and provide surprises and a sense of wonder.
The use of a more subdued color palette places more emphasis on varying shades of color and texture that are best appreciated by a slow stroll through the garden. Traditional plants include Japanese maples, grasses, pines, flowering cherry or plum and azaleas, but can often incorporate many of your existing established plants. The plant palette you select needs to work for your growing area and should reflect the environmental factors present and still fit the style you are trying for.
A Japanese garden design can transform narrow spaces into intimate gardens for viewing not only from the garden but the house as well. This is a great way to practice designing your first Japanese garden; it requires less time and uses less material while you get the textures and colors just right. I also like the feel and look of incorporating views from windows in the house into my design. It allows me to glance out a window and feel the tranquility of the garden without even having to actually be in the garden.
The Zen sand garden is one design style that I really enjoy. It is simple in nature but challenging to get right. It contains rock, sand, gravel and perhaps a small tree in its simplest form, and a border of stone or tile. The gravel represents water, and the rocks represent the connection between earth, such as a mountain or islands, and are used in odd numbers of three or five rocks. It can be designed to fit into the space you have to work with and it’s entire design is created to be meditative and calming. The lack of plants helps cut back on some of the maintenance, but it still requires attention to keep clean and orderly. The raking pattern in the gravel should enhance the sense of water and create a feeling of flow around the rocks or islands. Use materials that are local and available to create your oasis of calm.
Remember, in a good design, sometimes simpler is better and less is more. There are lots of resources on the internet to help you with your garden design journey. A trip to an existing Japanese Garden is always a great spot to gather inspiration for starting your own.
By Lloyd Thompson
Think Vertical in Your Garden Plan – 2/8/2022
Gardening and plant space can be difficult to find in an apartment, condominium or townhouse. The choice of what type of plants to grow and where to grow them becomes a bigger issue than in the typical suburban yard.
As I see more and more apartments in Wenatchee, I am amazed at the number of decks and terraces that have flowers or tomato plants growing on them.
With some creativity and imagination, there can be a lot of growing space available on a small patio or terrace. I have always grown potted flowers and plants, but after looking through Pinterest and a few searches on the internet, I’m pretty excited about trying some new things out this spring. One such idea is a vertical garden.
Heat and water are my two biggest concerns to address with a vertical garden. There’s no denying that a west-facing deck, patio or terrace can get pretty hot, so plant selection is a big decision; how to keep it watered is another major concern.
My wife and I recently started growing screening plants in large pots, with our most successful being sweet potato vines. They help us add a vertical screen to our patio that not only adds some seasonal shade but also additional privacy from the neighbors. Our vines climb a trellis that we set next to our large patio pots and we direct some of the vines to grow up rather than over the pot brim like before.
The options for vertical gardening have exploded the past few years as more types of soil bag and vertical pot arrangements have come onto the market.
Using soilless potting mixes that can hold more water for longer periods of time, and weigh less than mineral soils, help with those choices. Repurposed racks and frames can provide the support for hanging the soil bags for colorful displays. The use of drip irrigation emitters and tubing can provide the means to keep your designs moist enough.
One challenge for us has been containing extra water that flows through the pots and containers so it doesn’t make a mess. I recently bought a rubber winter boot tray — it has been quite handy this snowy winter — and plan on using it to help with catching dripping pots during the spring and summer months.
I searched for vertical gardens on Pinterest and found some great ideas we want to try out. There are a lot of ideas on growing herbs that take less space and are easier to manage and can even be moved indoors during the winter months to continue growing under an LED light source.
I also loved the ideas I found on repurposing old dressers and picture frames into vertical growing areas. I have used clay pots and steel rebar to make a stacked planter that looks like the pots are tipping over into the pot below it.
Right now, I am planning out a hanging design by using an old picture frame, some hardware cloth, moss, and using sedums and other succulents that will take the heat to make summer wall art for our deck.
After spending the last few weeks surrounded by mountains of snow, the thought of planting and nurturing a vertical garden is just the thing to help bust out of the winter doldrums!
By Lloyd Thompson
Designing a sensory garden is very much worth the effort – 9/18/23
Five senses … we all have them to varying degrees and use them every day without even thinking about it. After researching the elements of a sensory garden, however, I think I need to step up my landscaping game a bit.
A sensory garden is designed to stimulate and enhance the five senses as it is viewed and explored. I’ve spent years working on the visual appeal of my yard and garden but have only lightly touched on some of the other senses of taste, sound, smell and touch.
I love walking along a gravel garden path and smelling the fragrant scent of lilac or lavender while hearing the soft crunch from my steps on the gravel and the trickle of water from a nearby fountain.
The textures of the plants and hardscapes also add to the tapestry of a sensory garden, even if you don’t touch the plants. A fresh strawberry or blackberry as you walk through the garden tastes even better than one out of the refrigerator. Softly swaying grasses or moving water can also provide soft sounds to enjoy as well.
We spend so much time dealing with the visual side of landscaping that we miss the opportunity to enhance the garden’s other sensory displays.
Each garden can embrace the experience of the other senses with a bit of planning and thought. The five senses include sight, smell, sound, taste and touch. Think about ways they can be incorporated into your landscape and how they can enrich the experience for visitors.
Most of the time, I think of designs from the perspective of young children and try to include adventures that will appeal to them. One year, I found some glow-in-the-dark pebbles that I spread out on a pebble walkway. It provided a scavenger hunt for our grandchildren to search for as the evening grew darker and many excited reports of how many they had found. I’ve done the same thing with marbles and even had small baskets for collecting their marble loot.
Taste is another winner in the garden as people find a strawberry, blackberry or raspberry to munch while wandering a garden path.
Smell in our garden is an evolving process as we go from fragrant mock orange to lavender and honeysuckle as the season progresses. We are always looking to fill empty niches in the bloom sequence with a new fragrance. Growing a variety of herbs along a retaining wall fills the air with the subtle smell of rosemary, basil, and mint.
Sound is important and can include the songs of birds you attract to your landscape through food, water from water features, and the gentle sound of wind chimes. I like a mix of wind chimes that include metal, bamboo and glass designs. A bamboo deer clacker is great because it creates a distinct random sound that allows you to close your eyes and focus on the gentle sounds of your garden.
Touch includes not only the plants but also the hardscapes in a landscape. Who hasn’t run their fingers over a smooth rock or rough bark while exploring a garden?
Choosing the right plants with a variety of leaf textures is important. Just watch out for any prickly plants, such as Oregon Grape, which our grandchildren have found out is best to avoid touching.
There are so many things you can include in a sensory-designed garden to enhance the experience: a gazing ball, a green-bean tepee, or a vine-covered tunnel, as well as sequenced pollinator blooms to attract butterflies and bird feeders and bird baths for more wildlife opportunities.
I try to watch what catches a young child’s attention as they go through the garden and enhance the areas and things that catch their interest. If you can pry a young mind away from their electronic device and enjoy their adventure in nature, I think you have a winner.
By Lloyd Thompson
The right plant for the right place – 5/20/2024
My dad asked me for ground cover advice for a corner of his partial sunny, soggy clay Alabama yard. Knowing that it is tolerant of less-than-ideal soil conditions, I suggested periwinkle (Vinca minor). But first, I advised, we need to check if this trailing evergreen is suitable in Alabama. Consulting the local extension office, we learned that a similar plant, Vinca major, is invasive in this area. So, we looked at other options.
If gardening had one instructive motto, it would be “Right Plant, Right Place.” This simple saying sums up the art and science of gardening.
The fundamental concept of putting the right plant in the right place means choosing a plant that will thrive in its new home. You, as the property owner, get to choose the tenants that live in your green space.
New gardeners often make the mistake of choosing plants based solely on the aesthetics … “Oh! Look at this pretty, small mint plant,” newbies say. (Experienced gardeners are chuckling.)
On the list of factors to consider when choosing plants, aesthetics is not even in the Top 3. Sun, soil and space are the first considerations in deciding what plants to add to your new garden.
For example, understanding that your garden space allows for plants that need partial shade, well-draining soil and minimal watering will guide your plant choices. I say this because when you walk into that garden center or nursery, all the plant colors and textures will entice you to do things like plop a dogwood tree in your south-facing, full-sun, bone-dry yard. Don’t do it.
Of course, you can force plants to survive in less-than-ideal conditions by providing extra water, fertilizer or other labor-intensive tasks. But in the end, your plant will not be happy and frankly neither will you when instead of enjoying the bliss of your garden, you become a working slave to just to keep the darn thing alive.
A step-by-step approach to plant choice looks like this:
– Know the water availability for the garden space. You’ll enjoy lugging heavy watering cans for only so long.
– Know the soil type — sandy, clay, loam.
– Know the hours of sun/shade.
– Know the space you have available. Is it better suited for one big plant or a menagerie of small ones?
With that set of plant-selection guidelines, you can now go to plant nirvana and look at plants that will thrive in the conditions you have. Like puppies, baby plants are irresistible. But will you love it when it grows up? And will your adult plant still love its space when other plant neighbors have moved in?
And finally, consider the environmental impact of your plant choices. Native plants that do not require lots of water or fertilizer and play a role in the life cycle of our local insect friends are the best environmental choices. Like my dad and I did for his Alabama yard, check to ensure the plant is not invasive in our location.
Choosing plants is the most fun part of gardening. But do so with a methodical approach. If you are lucky enough to have a larger garden space, consider adding a few plants each year to allow the first ones to settle into their new home.
By Dana Cook
Questions to consider when deciding what to plant – 2/27/2024
“Well, it looked like a good place to put that plant …” When plants fail to thrive, some gardeners claim they must have a “brown thumb.” But that is not necessarily true.
Deciding what to plant and where to plant it in your yard needs a true understanding of your landscape and the characteristics of the plant you have selected.
Some questions to answer and some rules of thumb to consider:
What are the water requirements of the plant and how will they be delivered? Standing by the hose-end dooms the plant to failure because you do not have a means of knowing how much water you are applying. Too much water can be as deadly as too little water.
What are the light requirements for the plant? Full sun means 6-8 hours of direct sun on a place on the ground; it does not mean that it is daylight.
What are the full-grown dimensions of the plant? Do you know how wide and how tall the plant will be? You need to determine if you have enough square feet allotted to the mature plant. Constantly pruning a plant back is tiresome to you and adversely affects its health.
What is the plant’s cold zone designation? USDA has reconfigured the plant hardiness, the cold zones, in the U.S. Our area hovers in the 6-7 zone. The cold can be very slightly adjusted depending on the slope of your yard and the effective use of mulch to protect the plant’s root system. Even if it freezes to the ground, many plants with protected roots will re-sprout. Wishing you could still grow the plants you loved to grow on the West side of the Cascades is merely a fantasy.
Heat tolerance is more difficult to adjust since the plant’s physical makeup determines how much water it can deliver to leaves. Adding more water to the soil can lead to root rot. In addition, soil organisms are affected by heat. The American Horticultural Society has created zones based on the number of days over 86 degrees. Many plant labels now contain heat zone information. In North Central Washington, we range between zone 6 and zone 7. Zone 7 means 61-90 days over 86 degrees. NCW had 198 frost-free days last year, the highest number ever recorded locally.
What are the seasonable impacts of the plant. If it is deciduous, are the leaves going to fall on your deck or in your rock garden? What about the tree’s flowers, seeds or needles? Not something to look forward to, usually. If the plant is supposed to screen a view, what happens when the branches are all bare?
How does it rank for fire-wise safety. The placement in the yard needs to be considered if it is a plant likely to burn fast and hot. Those plants need to be at least 30 feet from the house.
How will the mature plant affect your view or your neighbor’s view?
How invasive is the plant? Is it going to reseed readily or spread by underground stems into areas where it has not been intended?
How will the plant thrive in the lawn? Usually, large shrubs and trees do not thrive when planted in the lawn because the lawn and the ornamental plant have different irrigation requirements. On the other hand, planting lawn under trees is not usually successful because the tree’s surface roots will claim the moisture.
Happy plant selection. Plan a fabulous garden this year.
By Bonnie Orr
Plan your home and landscape to save energy – 7/18/2023
What if I told you that you could save 25% on heating and cooling your house while doing nothing to, or in, the house? This isn’t anything new, requires no gadgets and can improve the curb appeal of your house while you save that 25%.
A well-designed energy saving landscape not only can add beauty to your home but also can reduce your heating and cooling costs. A well-placed tree, shrub, or vine can deliver effective shade, act as a windbreak, and reduce your energy bills. Carefully positioned trees can save up to 25% of the energy a typical household uses. While it works with older homes, it may be even better on new construction that incorporates the house’s design features to work with the landscaping.
In most of the United States, we have both a winter and summer season. The sun’s position changes with the seasons, and that change increases as you go north. The farther north you are, the lower the sun rises in the winter months.
For me, this means the sun’s rays strike the south side of our house longer in the winter than in the summer when it rises higher and is blocked by the eaves on our house. It can get warm enough on a sunny day to be too warm to sit in front of our glass slider, even when the temperature outside is near freezing. We have noticed this the most during January and early February, but by March the sun is rising higher and the sun strikes the windows for a shorter period each day.
Landscaping with deciduous trees and shrubs on southern exposures can make use of this by allowing the sunlight to reach the house by dropping their leaves in the fall. Evergreen trees would block the winter sun and you miss out on the extra heat and light reaching your house during the winter.
This thermal benefit can even be enhanced on new construction by careful planning and design. Wider eaves can shelter a home from hot summer sun while allowing it to reach the home during the winter because of the lower sun angle. Heat will “sink” into areas of your home, such as masonry walls, which allows the sun to warm up the thermal mass during the day and will continue to release the heat after the sun goes down.
The other side to this is that cold, winter winds are often from the northeast. While we are protected by the surrounding mountains from the worst of the winds, it can still be a substantial loss of heat from homes. This is where thoughtful use of evergreens can help break up the wind pattern and reduce the loss of heat by slowing the wind speed as it strikes the house.
Windbreaks are often designed with several rows of plants to maximize the efficiency at reducing the wind speed. Be careful while planning so you don’t plant flammable plants too close to the house. Washington Firewise USA practices to prevent wildfires can help to determine distances and what plants to use.
This is often reversed during the warmer months, when winds are from a more southwesterly direction. Hot, dry winds can cause a substantial loss of soil moisture and drying out of plants. Once-soft green leaves can become crunchy as the drying winds pull the plants’ moisture away. This is worse in some plants than others; some are better adapted to our area and have a leaf surface designed to withstand the loss of moisture. These plants are often ones selected for xeriscaping as a result.
Using these deciduous plants on the southern and westerly exposures will help ease the winds and can protect your plants from drying out. If properly designed and spaced, you can substantially reduce the cost of cooling your house by keeping hot winds and direct sun away. The evaporation of plant moisture and the reduced direct sunlight striking the house can reduce cooling costs 25% or more.
There’s not enough room to talk about everything that will help in planning a home and landscape to save energy. Many ideas were developed long ago and forgotten over time. Houses built prior to the use of widespread air conditioning incorporated covered porches and windows that drew cooler air in at night. The plants and trees were selected and planted for more than just the esthetics they brought to a design. Closing blinds or curtains during hot days or cold nights can make a big difference.
Careful, well thought-out homes and landscapes can make a substantial difference in the cost of heating and cooling, not to mention the enjoyment of a well-designed landscape. For detailed more information, check out the energy efficient landscaping at energy.gov/energysaver.
By Lloyd Thompson
Water magic in a garden – 6/20/2023
Water is an essential element when considering landscaping. However, I think it should also be considered an essential design element. The sound and visual dimension of water can be very powerful; it allows the designer to easily bring the focus to the desired aspects of the landscape.
The use of water can be as simple as a recirculating fountain or as complex as a pond with a waterfall. The limitations usually tend to be either space or cost. The variety and availability of pumps are greater and more affordable than ever before. You can find a colorful bowl or pot and use a small pump to quickly create a water feature anywhere, including for a deck or patio.
I’m writing this while listening to our water feature. We created it by turning a long, narrow flower bed located between a west-facing concrete wall and patio into a shallow reflection-type pond, with a basalt vessel type sink to allow the water to fill and overflow into the reflection pond. We dug it down about 20 inches, lined it with pond liner and then filled it with about 10 inches of pea gravel and then used a few inches of colorful “rainbow rock” from Montana for better visual appeal.
The reason we used nearly a foot of gravel was to provide a deeper water reservoir while not having to worry about the grandkids’ safety around a deeper pond. It also provides a natural way to filter the water using the extra surface provided by the rock for beneficial bacteria to live.
We were able to turn a difficult-to-grow area (due to heat and watering) into a safe, eye-and-ear appealing design feature. It has also become a favorite cooling off spot for the dogs and kids to play in on a hot summer day. My granddaughters and I also look for interesting rocks while on hikes or at the beach, which we then run through a rock tumbler. The ones that don’t make the grade for special use as gifts or collections get added to the pond and add memories as we point them out and retell the stories of where and when we found the rocks at family gatherings.
Dry stream beds are a great way of breaking the landscape up and it provides a sense of flow in the landscape.
Fountains can be anything from ornate to rustic; the options can fit any style and provide that soothing sound of flowing water. Wildlife can also make good use of the fountains for bathing and drinking, while adding another attraction.
Ponds can be more natural or more structured to fit a house or landscape style — the choice is yours.
Waterfalls are amazing, and while the idea of building a waterfall can be intimidating, it’s an easy way to incorporate the existing slope into an eye-catching design. The use of pond-liner material, gravel and stone requires careful planning but can result in an amazing space that is as soothing to the ears as it is to the eyes.
Combinations of any of these makes each design unique and special. I like the use of a dry stream bed while using a recirculating waterfall to create the visual appeal while negating many of the more problematic issues of building a wet stream bed, such as leaking or needing time-consuming cleaning.
I’m pretty sure that the sound of running water lowers a person’s blood pressure while elevating a sense of peacefulness. This is especially true if you add submersible lights to create a gentle uplight and an outdoor speaker with your favorite music for those warm summer evenings on the patio. This allows you to not only extend the evening, but it is also a great incentive to enjoy our great outdoors. You may not want to come inside until fall!
By Lloyd Thompson
Square foot gardening may be the right fit for your lifestyle – 5/24/2023
The first time I heard the term square foot gardening (SFG) was around the late 1980s. I was teaching horticulture for the first time, and a book I had purchased described something called SFG.
It was a different method than anything I had ever used in regard to gardening, employing small squares and grids rather than long rows. The idea included giving less open space for weeds to grow since plants filled the entire area. This also increased productivity since there was so little space not planted.
Having grown up helping with gardens watered by ditches and the space between the small ditches called rills, this was a totally different way of doing things.
The basic idea is to create raised beds about 3 or 4 feet wide and use grids to lay out the planting area in 1-foot squares. I have seen grids that use string, PVC pipe and wood strips. While many websites say a bed 6 inches deep is sufficient, I’d build or buy boxes that are 10 to 12 inches to allow enough soil for deeper-rooted plants. The location should be mostly in full sun.
There are various planting plans that offer a wide variety of choices on what to plant and how many plants for each grid. For newer gardeners, there are some advantages for the SFG system, since the beds are smaller and easier to maintain than a larger garden and are very productive for their size.
Like all raised beds, square foot gardens tend to dry out faster, so water can be an issue. And, the higher cost, like any raised bed, can be a factor. Weeding, while less intense and time consuming, needs to be done weekly and requires hand weeding rather than using a hoe.
The raised beds are available premade or you can do it yourself; material choices include wood, concrete stack block and vinyl. I would avoid using treated lumber for vegetables because of the chemicals used in the treatment process.
If you are just starting out, try just one small bed and experiment with vegetables and the time required. Another alternative is to use large pots to garden rather than a raised bed, which allows apartment dwellers a way to garden. Pots with vegetables also can be incorporated into landscapes to allow a harvest among the flowers and other plants.
If you are interested in learning more about square foot gardening, there are a lot of resources available on the internet that include planting plans. As with most things web-related, rely on well-known and trusted sources for the best information.
Square foot gardening is a good way for someone who is new to gardening to get some experience and enjoy success at growing their own vegetables. It isn’t a perfect system by any means, but its variability and small size makes it more manageable than more traditional gardens with long rows and space between each row.
It’s time to plan your easy-care landscape – 3/22/2023
We’ve had our fill of the cold and aren’t we all hankering for spring? It’s time to seriously plan landscapes with colorful, easy-care flowers, whether annuals or perennials.
It’s too early for planting some hot weather plants, but certainly not too early to be researching and planning your low maintenance flowers.
Climate change is a factor to consider. It’s important to identify plants that can take our warmer summers in stride.
Luckily, we have tough plants that are both hardy and heat resistant. Many have the bonus of being less thirsty, although most will bloom more profusely with regular watering.
A popular name for gloriosa daisies are black-eyed Susans, although their Latin name is Rudbeckia hirta. Their big, yellow/orange blooms are about 3 to 4 inches across, centered by impressive dark seed heads held high above those radiating petals. This short-lived perennial multiplies easily, so just dig out the older plants every few years and keep the newer, surrounding ones. There are very attractive reddish ones such as “Cherry Brandy,” “Cherokee Sunset” and “Cappuccino.” Shorter ones include 9- to 10-inch-high “Goldilocks” and “Toto.”
Related charmers include R. Ratibida (Mexican Hat) and Echinacea (coneflower) and our ever-popular annual sunflowers. My favorite sunflowers range from 4 to 6 feet high, and I save mature seeds the goldfinches can’t reach for next season’s crop.
Penstemons are another low-water but short-lived perennial. Native to our mountainous regions, their cup-shaped flowers are perfect for attracting hummingbirds and bees. Bloom colors include red, pink, white and purple.
A couple of years ago, I wrote about the glories of sedums; they are low maintenance, heat tolerant, and come in a multitude of interesting colors and shapes.
Once established, their thick, succulent leaves hold water so they can thrive on less irrigation. Low sedums are popular in the front of the flower bed or as ground covers. Varieties offer a range of leaf color and pattern that is amazing, from silvery purples to spring greens to golden yellows. Bloom colors include yellow, pink, white, orange and red.
The old standby sedum “Autumn Joy” sports pink flower clusters in summer that attract butterflies, and in fall slowly turns golden brown. Cut off those old flowerheads and stalks to enjoy new, green growth.
Sprinkle around some fine alyssum annual seeds that grow quickly to fill in and mix nicely in front of a perennial border of taller plants.
Annuals worth checking out in addition to sunflowers include marigolds and zinnias. These two popular annuals come in just about any height and color you can imagine -except blue.
These annuals need warm soil and heat, so hold off planting for a month or so.
Perennials listed above are more comfortable in spring temperatures.
Plenty of appealing, low maintenance flowers are a welcome addition to your upcoming landscape this year, and now that we’re just barely into spring, it’s time to get in gear.
By Mary Fran McClure
Now is a good time for revisualizing your landscape – 12/28/2022
As we wind down the year and prefer the warmth of indoors, this is a good time to contemplate garden projects that make life easier and improve the landscape.
A good start is evaluating plants that have outgrown their spaces or just don’t satisfy. Another consideration is what to do with those plants that have proven to be thugs. Eliminating some lawn is yet another possibility. Perhaps you’re ready to take on a larger project, such as redesigning your backyard, as Lloyd Thompson’s Nov. 16 garden column outlined.
I’ll share some landscape changes we have made that may provide ideas for spiffing up your own landscape.
A few years ago, deer were decimating the arborvitae bordering our long driveway. Our neighbor was about to pull them out as they are on his property. We appreciated the border and came up with a plan to set up a temporary winter electric fence. I wrote about our project in my November 2020 column. It has worked successfully, and we’re all happy with the results (except for the deer!).
Another example of thinking outside the box is making a slate path from our front porch around the corner to our garage. It is much handier than having to walk out to the driveway and around the yard to connect the front door and the garage. Credit my daughter with suggesting we remove the end porch railing, pour a concrete step and then construct a curving pathway connecting the two entrances. With surplus slate from another project, we utilized those supplies. From landscape design, we know curving a path invites the viewer to follow what the eye can’t see, yet another bonus of the design.
In our backyard, a low concrete block wall enclosing two sides of our landscape provides height and interest, certainly more interesting than a plain level yard. The downside was having to leap up the 3-foot wall or walking along it from a lower end, since we can attest that age lessens agility. We designed a plan to add built-in steps at the curve that connects the two sides. My husband Pat and friend Brad Timboe removed the blocks in that area, dug back into the ground and concreted in new steps that match the wall. In addition to the benefit of handy steps for getting to the higher level, aesthetically it enhances the look of the landscape.
Smaller projects can make a visual difference, such as digging up a clump of interesting bunny tails perennial grass (Lagurus ovatus). It isn’t that the grass is a problem—just planted in the wrong place and it grows too tall, blocking the view of birds visiting the low basalt bird bath in our backyard. Bunny tails is an appropriate name for a fun and interesting plant with personality and texture. It’s a keeper and just needs a better location. Some divisions of the plant will be available in our late April plant sale. This spring we’ll plant a smaller penstemon near the bird bath.
So many plants -whether trees, shrubs or perennials -are planted too close or too near buildings. They look fine early on, but then start causing problems. A solution is to plant those so-called permanent plants according to their needed mature space, then interplant annuals or short-term perennials that can be removed as the others gradually fill in.
Some thoughts and plans made this winter can be accomplished in our better weather of 2023, providing satisfying benefits for both your family and your landscape. Here’s to a happy and healthy New Year.
Mary Fran McClure
Flowers
Overlooked hellebore will brighten your – 3/22/2017
Flowers this spring will be doubly appreciated after this long, cold winter; even the often overlooked hellebores. They’re sort of the odd-balls of late winter into spring — in quiet colors of soft green, white or purple — opposite the flashy oranges, reds and yellows of daffodils, tulips and more familiar signs announcing spring.
Their five petals (actually sepals) are saucer- or bell-shaped, usually nodding or drooping rather than facing upright. Most species grow 1- to 3-feet tall with dark green leaves. They’re long-lived and undemanding as long as they’re shaded.
The growth pattern of hellebores extends from fall through late spring and then go into dormancy, although they’re later in our climate than when grown west of the Cascades. Grow them where they can be seen during late winter/early spring’s bare landscape, then are hidden by summer-blooming plants later on.
Plant in a shady spot in well-drained, organic-rich soil. Hellebores do well beneath the shaded skirts of tall shrubs or tree canopies or by a north-facing wall. Doing best left undisturbed, leave them be unless you need to divide or transplant them.
Rhizomes of this clump-forming plant are best divided in early fall, as plants are emerging from dormancy. Take pruners, shovel or handsaw in hand to divide the woody base. Following transplanting, anticipate a couple of years before you see blooms. Be patient. A dose of light fertilizer once or twice a year encourages growth.
Hellebores may self sow. Young plants may or may not be similar to the parent plant, and will take a couple of years before you see blooms.
Beware that all parts of the plant are poisonous, although that’s a plus because deer and rodents won’t bother them.
Corsican hellebore (helleborus argutifolius) takes more sun and has green or whitish-green flowers. Christmas rose (H. niger) reaches only about a foot tall and has white flowers turning pinkish with age. It is the best for colder zones. Lenten rose (H. orientalis) blooms later and is easier to transplant. Bear’s foot hellebore (H. foetidus) sports purplish-red markings on leafstalks, stems and on edges of its green petals.
All are interesting and a bit unusual.
By Mary Fran McClure
Easy-going alliums are an easy choice – 10/29/2018
While you’re out planting daffodils and tulips this time of year, why not add some alliums? They’re easy care and attract bees, butterflies and other pollinators while discouraging deer, rodents and rabbits. Alliums are welcome bloomers after daffodils and tulips wind up their flamboyant spring presentations.
Alliums are also good as cut flowers or dried. They have a lot going for them. All they ask for is a sunny spot with good drainage.
Some 700 species offer a wide range of flowers, from 4- to 6-foot tall stalks topped with huge globe-shaped spheres of awe-inspiring flowers down to petite, more subtle ones less than a foot tall. Alliums have many umbels springing outward from the center like stars, while some are drooping.
Yes, these are flowering onions, a relative of our edible chives, garlic and onions. They can have a bit of oniony fragrance when leaves are crushed. These bulbous perennials have grassy, tubular leaves, sometimes hollow, and some strappy. Most are native to Europe, northern Asia and a few native to Washington state. Blooms range in color from white to yellow, pink, violet, red, blue and purple — something for everyone.
I grow two species in our landscape, one large and one small. A. christophii (Star of Persia) produces huge starry, metallic rose-lilac florets atop bare stalks some 2-feet high late spring. It’s an old species, dating back to the 1880s, and looks best when skirted with lower perennials covering its long stems, such as baby’s breath or hardy geraniums. There are many similar large globe-shaped alliums with white, blue, purple or reddish coloring. These dry beautifully and some like to spray dried heads with gold or silver for dramatic indoor decorations.
At the short end of the allium spectrum is A. moly ‘Jeannine’, a dainty nearly foot-high plant producing cheerful little yellow umbels late May into June. These smaller ones are nice in containers, window boxes and entry plantings. Plant several together for an effective grouping.
Nothing wrong with planting chives (A. schoenoprasum) or Oriental garlic (A. tuberosum) along a pathway, especially handy just outside the kitchen door. Their lush green clumps are attractive, as well as handy for culinary additions.
Alliums can multiply by reseeding, although I find them not a nuisance; just deadhead them before seeds mature or dig clumps and divide in late summer.
Alliums need good drainage, sunshine and can take low watering once they’re growing well in late spring. They’re an easy-going plant that can be pretty much neglected, that is until you see their showy late spring performance.
By Mary Fran McClure
Tips for dividing perennial plants this month – 8/1/2018
As the days shorten, plant growth slows toward dormancy; this is the time to divide perennial flowers.
Before you grab the spading fork, consider why you are digging into the root mass of a plant:
♦ You have friends who have been coveting the plant, and you are willing to share.
♦ You want to create more plants to fill in a portion of your landscape.
♦ The plant will bloom more profusely if it is not as crowded.
♦ The plant has become a thug and out-grown the space allotted for it.
♦ It is the wrong plant in the wrong place.
Dig the plants in the early morning or early evening after you have thoroughly wetted the soil the plant is growing in, and the soil in the spot to which you are moving some of the divisions. Dig close to the parent plant so you know that the roots you are lifting are from the plant you want to divide. Often the plant you want to divide, such as a daylily, has multiple crowns, which can be teased apart.
I like to use a spading fork to lift parts of the root and then use an old bread knife or a pruner to cut out the parts I want to sever. Cutting with blunt force from a shovel can damage both the parent plant and the divisions you are creating. Some plants such as Astilbe may have such a large root mass that an old saw is the best tool for creating root divisions.
Throw out any diseased parts. And if root weevils have been noshing on the leaves of a particular plant, wash all the soil from the roots of the plant before moving it to the new locations to prevent moving the insect pest to a new area of your landscape.
So, your friends want some plants. Give them a heads-up so they can prepare the site in their yard — otherwise many shared plants languish in a half-filled pot of soil or in a plastic bag, and that is not a happy way to start life as a transplanted flower.
Be sure your transplanted divisions that will fill-in your landscape actually have sufficient light and water to thrive. Most perennials require full sun. Assessing the environment will prevent you wasting your time moving plants to areas where they will not grow happily — instead, you could be spending your time reading a novel and drinking lemonade to create a special, successful scenario for yourself.
Many plants need to be thinned in order to bloom consistently. The classic is iris that need to be spaced so that each rhizome is exposed to a few hours of direct sunlight each day. Another classic perennial is strawberry; the “mother” plant grows vigorously for only two or three years, and then must be removed to make room for the divisions it has created in the space around it.
If the plant has become a thug and grown more vigorously than you imagined it would, do you really want to transplant divisions into other portions of your landscape?
If you can’t convince unsuspecting friends to take the divisions, be tough and throw the divisions in the green can. Put them in the compost after allowing them to dry thoroughly so they cannot sprout and overtake your compost pile. People have the hardest time throwing away plants even though they are not sentient beings! I am always suspicious when people offer extra plants because I fear an extra exuberant is lurking in that pile of offered offshoots.
The same considerations should be applied to the wrong plant in the wrong place. Do you actually have space for the plant to grow properly when you move the divisions? If so, move the divisions, grit your teeth, and pull out the entire parent plant. The wrong plant in the wrong place — be it the wrong size, texture, color or growth habit — will torment you for another season if you do not deal with it this August.
Some plants such as peonies will not take lightly to having the roots disturbed. Don’t be disappointed if the plant takes a year off to re-establish its roots before it blooms.
Have a wonderful time beginning your fall gardening season.
By Bonnie Orr
Encourage your perennial flowers to re-bloom – 6/19/2018
Looking around my yard, it is hard to believe that we are still in the month of June. It seems that nearly all of my plants are ahead of schedule. Many things that don’t typically bloom until much later in the summer are already showing their colors in full force.
This is the typical result of a warmer-than-expected spring with plenty of regular moisture. It has me wondering what my yard will look like in August. Will there be anything left to flower?
For this reason, I have been putting some time into thinking over the best way to encourage re-blooming. Will it be possible to get some of my perennials to bloom again? And what do I need to do to keep my annuals happy? Here are a few tips to keep the color in your garden coming all season long.
Blooming takes a lot of energy. What this means is that you will want to be sure that your flowering plants are well fed. This starts before the plants are even in the ground. It can be especially necessary in older garden plots or deck planters where the soil has been used over and over again. Eventually a majority of the easily accessible nutrients will have been used up, leaving very little behind for your most recent plantings.
Be sure to properly amend your garden beds and planters before adding this season’s plants. Consider adding a layer of compost to increase organic matter and water retention within your soil. Mix in a good, slow-release granular fertilizer. A variety of formulations are available at most garden supply stores.
If you are looking to increase performance in already established perennial beds, compost can be top-dressed to a depth of around 1 inch per year. Gently scratch the compost and granular fertilizer into the soil’s surface. Avoid deep-digging actions that would damage root systems. It is also important to keep flowering plants well-watered. Water-stressed plants stop flowering.
For most plants, regular pinching back and removal of the spent blooms will encourage re-blooming. By pinching plants back early, you encourage branching, which in turn encourages a higher number of blooms per plant. Pinching should be done using a pruner if stems are becoming tough and fibrous. This will eliminate any accidental ripping or pulling on the plant which can cause root damage. If plant stem growth is still tender, pinching can be done by hand without use of a tool.
Be sure to make your pinch just above one of the whorls of leaves that surround the plant’s stem. This whorl is where the plant will send up additional shoots. Most recommendations are to remove only the top 2 inches of a plant during pinching. However, some plants do best by encouraging pinching much closer to the base. Knowing where to pinch a plant to increase flowering is a trial-and-error learning experience. When in doubt, do a little research specific to the species you grow.
Harvest your flowers! You grow them to enjoy them, so cut them. Harvesting flowers to make bouquets by following the pinching rules listed above is one of the most fun ways to encourage re-blooming.
Allowing flowers to go to seed on the plant will encourage re-seeding (if that is your goal) but will discourage additional blooming. A plant is looking for the most efficient way to produce seed. Cutting flowers before they have made seed is frustrating to the plant and will force the plant to try again. Conveniently for you, this means you will have more flowers to cut later.
Have fun with your flowers, and happy gardening!
Beautiful, but hanging flower baskets require some work – 5/29/2018
You know it is officially summer when Leavenworth comes alive with its hanging flower baskets. People travel from far in wide to take in the scene — planters on every street post full of picture-perfect geraniums, sweet potato vines and lobelia trailing their gracious flowers in long tendrils that sway in the gentle mountain breezes.
The hanging baskets always look fresh and lovely and to the passing visitor seem as though they must be very easy to care for.
What the typical tourist doesn’t see are the city grounds crews making their way around town in the wee hours of the morning with their truck full of fertilizer and water.
They don’t notice the well-hidden drip emitters attached to every basket.
They aren’t aware of the employee who has to pluck the dead blooms and replace the baskets that aren’t doing well.
It’s a well-choreographed illusion of effortless beauty.
In reality, keeping planters alive and beautiful in our climate can be a bit of a challenge for the average homeowner.
People frequently ask me if there are any magic tips to keeping planters looking great. What I usually say is this: You need to want them to live. This is true for just about any plant but is especially pertinent for planters.
Potted plants are similar to having a pet. You need to keep an eye on them constantly. They depend on you for water, food and sometimes shelter. They don’t just ‘take care of themselves’. At least, this is the case for the traditional baskets that contain highly colorful water-thirsty annuals.
Although I do keep a copper boiler full of pansies and violas on my porch, I also keep numerous pots full of succulents and hardy perennials. Since I lead a very busy life and am gone from home a lot, I need to be sure that my planters really can ‘mostly’ take care of themselves.
Here are few things to consider that will help you find the best container plants to suit your lifestyle:
If this sounds like too much work, then forgo the annuals and invest in some hardy perennials and succulents. Succulents and most flowering natives or hardy perennials will do fine in large pots (3 gallons or more). They will still require water at least once a week but do not have the same fertilizer and deadheading requirements as annuals and look equally attractive on your patio or doorstep.
Have fun experimenting, and happy gardening!
By Eron Drew
Plant bulbs now for spring beauty – 10/14/2020
Ah, to dream of spring and its wondrous display of blooming bulbs. Dainty purple crocuses sporting bright yellow centers, an impressive blanket of yellow daffodils or gloriously elegant tulips in numerous colors — they are all a proud announcement of spring.
We deserve some spring cheerfulness after this year of challenges; nothing can provide more color come spring than planting a few handfuls of bulbs this month. Leaf through any bulb catalog and you’ll be enchanted — and hooked!
It’s a wonder how that smooth little nodule you hold in your hand can transform into such beauty in a few short winter months. Time to plant them now. Tulips, daffodils and many hardy bulbs thrive in our climate.
If you later come across forgotten and somewhat shriveled ones tucked away, go ahead and plant them. Although they will have less vigor, for them, it’s better late than never.
Most bulbs need a sunny site and good drainage. They will provide their best performance with these amenities and a balanced fertilizer. Pass on adding bone meal, as additional phosphorus isn’t needed here. Read the label to determine how deep to plant, although a general guideline is about two times the bulb height. Feed with a high-nitrogen fertilizer at blooming time. After bloom, remove flower heads but not leaves, as they are needed for replenishing bulbs for next year’s repeat performance.
A grouping of one variety and color makes the most splash visually. Petite bloomers may be visually lost unless clustered together and located for close-up attention. Rock gardens are usually constructed with smaller plants in mind, so crocus and diminutive narcissus (daffodils) are ideal.
The true harbingers of spring are ground-hugging snow crocus. Suddenly their bright little blossoms appear, a couple of weeks ahead of the slightly larger Dutch hybrid crocus group.
Next come the early daffodils. Dainty ones like February Gold and Jetfire are perfect miniatures of the classic big guys. They’ll be followed by the larger trumpet ones, such as Orange Sunset and white Mt. Hood. The last daffodils to bloom are the fragrant and multi-stemmed Jonquils, such as canary-yellow Baby Moon and apricot-yellow Kedron.
Keep in mind daffodils point their heads toward the sun, so consider your viewing site and plant them north of that area. One clear advantage of daffodils is deer and gophers don’t eat them, while tulips are happy fodder for these pests.
Classic and stately tulips are a spring ritual, with their amazing colors. Earliest include the Kaufmannianas, which are small, low-growing gems, and the Emperors — Red Emperor is an heirloom iconic of spring. Then come species tulips and the giant Darwins. So many colors — a challenge to choose!
We haven’t even touched on the multitude of lesser known bulbs, such as dainty snowflakes (Leucojums) with their perfect, bell-shaped nodding flowers tipped with green dots, enticing trout lilies (Erthronium) native to our Northwest or Alliums, an easy-to-grow relative in the onion family that includes a huge range of clustered flowers, both large and small.
Just dreaming of all these beauties next spring makes these darker days exciting!
By Mary Fran McClure
Sedums For Low Maintenance, Color and Heat Tolerance – 7/21/2021
While not the divas of the landscape, sedums are the non-demanding, low maintenance workhorses we all appreciate — I’d say especially as we wilt under record-breaking heat. This succulent perennial takes on these hardships, as long as it has good drainage and doesn’t get overwatered. A bit of shade in our area is nice, but they’re definitely not for the shady garden.
Most but not all sedums are hardy in our region.
Sedums have water-retaining, thick, fleshy leaves, allowing them to thrive on infrequent watering and hot weather. Also know as stonecrop, the more ground-hugging ones are popular in rock gardens as they happily snuggle up to rocks and fill in those spaces by creeping, crawling and spreading out. Don’t overlook them as low edging plants in the front of flower beds.
For patios and balconies, they’re ideal because they don’t wilt if you forget to water them one day, as many of us have experienced with other, less-tough plants. Sedums look good in pots, dish gardens and interesting containers, often drooping over container edges.
An added plus is their wide range of color, both in their starry-looking blossoms and especially those fleshy leaves. Sedum leaf colors are of particular interest, as they provide color and shapes that are distinctive throughout the gardening season.
Favorite colors of mine include leaves of deep maroon, lime that’s nearly yellow, gray and various greens. Their blossoms are a bonus and can be yellow, pink, white, orange and red.
So it’s worth looking at various sedums that appeal to you and select plants that provide the colors and character that blend with your landscape.
They are easy to divide — just separate a rooted clump and replant each division.
Taller ones such as Sedum ‘Autumn Joy’ are nice in a mixed border. Reaching nearly 2 feet high and wide, these hybrids are hardy and easy-care. ‘Autumn Joy’ offers pink flower clusters in summer that slowly changes to a rusty coloring in fall, making a nice contrast with blue and purple asters. They remain interesting through many months. Cut them back before new growth starts in early spring. Check out similar sedums sporting white edged leaves and various heights. S. ‘Vera Jameson’ is another popular somewhat tall one, with purplish leaves and rose-pink flowers.
Pollinators are attracted to the flattened flower clusters, especially on the taller sedums. I’ve photographed groups of bees busily working on a single flower cluster of my ‘Autumn Joy’. Butterflies like those easy landing pads also. And a bonus — they’re deer resistant!
Sedums are especially appreciated during the dog days of summer for their display of color, easy care and casual appearance.
By Mary Fran McClure
Tips for successfully growing annuals in containers – 4/26/2024
Gardening magazines are filled with pictures of lush containers lining a walkway or along the sides of a deck. Containers are lovely and a great gardening option for people who do not have gardening space or who have limited mobility.
In North Central Washington, containers are a great way to grow annuals. If you have storage space in a garage or in a heated shed and lots of muscle power, containers filled with perennials can persist for many years. Selecting lighter-weight containers will allow you to re-arrange pots more easily. Ceramic-coated clay containers are heavy and prone to frost break if left uncovered outside. Selecting containers with wheels will allow you to appropriately site containers.
Our region’s weather creates challenges for plants grown in containers. The wind can break stems. We have wind about every five days pretty much for the entire growing season. Gardening magazines often feature standard roses in containers. These are roses grown as miniature trees. They are not an option for NCW because of the wind. In addition, the pot must be moved to a warm spot for the winter to prevent the roots from freezing.
More serious is the heat. Have you put your hand on the side of the large container when the sun has been shining on it for several hours? Pots get hot and the heat stresses the roots. It is difficult to find the happy-medium for watering the plants: too much water rots the roots; too little water causes the plants to wilt.
Many people who grow tomatoes in containers grow tomatoes that suffer from blossom-end rot — that yucky-looking black bottom. Cherry tomatoes do not suffer as much, but standard tomato plants cannot get enough water from the roots. When you clean out the container at the end of the season, aren’t you amazed at the huge root mass the tomato plant grew?
Light is another limiting factor to container gardening. Plants that require full sun need at least six hours of direct sunlight on the container — not just light, but full sun — otherwise these plants will grow wimpy and straggling and be more likely to attract insect pests. On the other hand, there are many shade-loving plants to fill containers.
Daily observation of containers plants will allow the gardener to deal with insect pests such as aphids or petunia bud worms or scale before the entire plant has been weakened by the pests. It is easy to rub away those first few insects.
Do you have to refill your container each season with new soilless potting mix? Absolutely not. It is too much work! During the previous growing season, the potting mix could have lost some of its nutrients, but if you are fertilizing the annuals biweekly, there are plenty of nutrients remaining in the soil. Sometimes the soil gets compacted from the weight of the water falling on the surface of the soil. If so, just stir it around and fluff it up and plant for the new season.
Enjoy the beautiful flower garden created by the annuals growing in containers.
By Bonnie Orr
Fair warning about beautiful wisteria – 3/26/2020
Wisteria is one of those love/hate plants. An arbor graced with a blanket of lavender blooms viewed from below is a sight to behold in spring. But later it becomes not so much fun as suckers spring up, rampantly growing somewhat reminiscent of a jack-in-the beanstalk attitude.
Beware of this lovely vine, as it can eventually overwhelm its supports with crushing strength, mangling wood.
I know of an elegant, two-story country home more than 100 years old that had a fantastic display every spring of lavender wisteria hanging off the eaves of a wraparound porch. I also know those vines nearly tore away the porch posts as the wisteria climbed upward. The owners had to replace the entire porch, providing stronger supports for those hefty vines beyond the porch.
My own experience with this legume was in a lattice-topped courtyard that was gorgeous while the wisteria was blooming, but those enthusiastic vines destroyed the lattice.
Slow to grow until it becomes established, wisteria then takes off. It favors a full or mostly sunny area and doesn’t require a lot of water once established.
Cut wisteria in winter and again right after spring blooming to encourage flower production. Remove suckers and trim back long streamers to keep wisteria directed where you want it. After a dramatic flower show in spring, trim back the vine and it’ll put on another show in late summer, although not as dramatic. Pruning encourages new growth and flowering.
Give wisteria plenty of space because it will demand it, whether you plan for it or not. It’s not a vine easily contained. In fact, it can wedge itself between crevices, shingles — wherever a bit of crawling space is available. In addition to vining up an arbor, it can be trained as a multi-stemmed shrub or somewhat tree-like when limited to just one leader.
Wisteria needs early support, but then can become self-supporting as it grows. It also can be planted to sprawl down a bank as a ground cover, although blooms won’t be as evident and showy.
We see more Chinese (Wisteria sinensis) and Japanese (W. floribunda) than the eastern native (W. frutescens). The Oriental ones are fragrant and bloom before leaves appear in spring. The American natives produce leaves followed by blossoms without fragrance. The latter are less aggressive than the Oriental ones and probably not as available in nurseries.
A beautiful, awe-inspiring vine while in bloom, wisteria is an enthusiastic one that calls for maintenance and good judgment. Keep this in mind as you select that cute little vine that appears so innocent in the nursery.
By Mary Fran McClure
Beginner’s Guide to Gardening – 3/12/2024
Do visions of salad greens dance in your head? Do you dream of the buzz and flutter of a pollinator garden? Does your fantasy garden have you seated on a white iron bench reading a favorite book surrounded by the lovelies of your cut flower garden?
Gardens come in all styles, shapes, and themes — balcony gardens, container gardens, raised beds and Japanese gardens. There are as many types as there are ideas!
The first step in creating any garden is assessing your space. The magic of gardening is that with a bit of ingenuity and creativity, you can garden anywhere. It truly is a work-with-what-you-have activity. And what you have determines what you can grow.
Sun and Shade
Begin your garden space assessment by determining how sunlight and shadow play around your property. Set an hourly timer from dawn until dusk to walk around your space. Take note of when the sunlight falls on an area and when the area is shaded. Take time-stamped photos or videos. For tech-savvy green thumbs, there are phone apps you can download that display the arc of sunlight and shadows for each season.
The sun’s arc changes with the seasons, so an area that may be shady now might have much more sun in summer. A sunny area may be full shade once a nearby tree sprouts leaves.
Pay specific attention to the cool morning sunlight versus the scorching afternoon sun. Where is the shady north? The south tends to be Sahara HOT. East has the lovely cool morning sun, and the west will catch hot afternoon sun.
Does your space have dry, full sun? Wet, full sun? Moist partial shade? Dry shade? Moist shade? Morning sun, afternoon shade? Morning shade, afternoon sun? Dappled shade? Full shade?
If your dream garden has sunflowers and tomatoes, look southeast of your space. For fresh herbs and greens, consider spaces with a bit more shade. Most veggies demand full sun, about eight hours per day.
Water, Water … Nowhere?
Wenatchee’s average rainfall of 9 inches per year will do little to sustain new plantings or even most mature plants. While sprinkling your green darlings with a watering may seem a delightful vision, about the third haul of a heavy pitcher in our July sun will have you pouring the water over your head.
Water accessibility may be the most critical factor in determining the success of your garden. Can you connect a hose to a water source? Will you need an irrigation system, or will you be able to water by hand? Can you collect rainwater? Embrace water conservation as a guiding principle in all your gardening decisions.
Also, consider water runoff on your property. Are there areas that are a soggy bog in the spring?
Protection from the Elements
Wind is a significant stressor on plants. Do you have areas of wind tunnels between buildings? Wind blowing against a solid wall or fence can create turbulence that will annoy your tender blooms. Containers can be particularly vulnerable to a drying wind. leaves. Not only do deciduous trees lose their leaves but so do conifers. Conifers shed the needles at the back of the branches nearest the trunk.
Let’s hope for lots of deciduous leaves this autumn. We missed the leaf drop last year because the weather was so warm until November. This caused the tree to hold on to its leaves.
Usually, a tree cuts off the water to the leaves, and the chlorophyll dies. This is why leaves ‘turn color.’ An abscission layer of cells cuts off the water and causes the leaf to eventually fall from the tree. Often the leaf drop is accelerated by wind or heavy rain or even snow.
A large maple tree can grow up to 300,000 leaves. What to do with the leaves? Most people sweep the leaves from the turf because heavy layers of wet leaves can smoother the grass crowns and kill them.
Leaves are not just a nuisance but also an asset in the garden.
Now, what to do with a million leaves.
If possible, grind up the larger leaves with the lawn mower or the chipper. They will break down more quickly and be less likely to be blown around by the wind.
Piling them up on the veggie garden about 8 inches deep will keep down spring weeds, feed the worms all winter and enrich the garden’s soil. You will be amazed at how few of the leaves are left when you go to plant your veggie garden.
Cover the ground-up leaves with a tarp to keep them dry so you have the brown material you need to mix with green material for next year’s compost pile.
Pile the leaves 8-10 inches deep to deliberately smother the turf to prepare to create a new flowerbed.
Use them as mulch in your existing flowerbeds to protect perennials’ crowns, enrich the soil and deter weeds. I am amazed how rich my sandy soil has become as a result of using leaf mulch each fall. The worms take the leaves down into the soil to provide water-hold capacity, and their castings or droppings provide nutrients for the roots of the plants.
Place leaves in large plastic bags — not to throw them in the trash, but to use as insulation for your compost pile. Placing the bags around the pile or compost bin will keep the pile from freezing, and it will continue to work, albeit slower, all winter long.
Make a big pile and have a treasure hunt or a children’s wonderful play day with cider and cookies.
These weeds established a foothold two summers ago when we had a week of intense heat that damaged the turf. The dead places in the lawn provided light to the dormant weed seeds.
In the succeeding two summers, these weeds have been having a field day and have overtaken many lawns. Correct timing for pre-emergent herbicides will help curb some of the weeds but be aware that there is a seed bank of thousands of seeds waiting for another opportunity to germinate.
It even might be time to reassess the amount of land you devote to turf. It is much easier to control weeds around shrubs and perennials when mulch is correctly applied. So, why not convert some of the lawn into new flowerbeds or areas of xeric shrubs? This is the time of year to undertake garden conversions.
The first step is to plan the perimeter by marking it off with a line of spray paint, so you create the area you have in mind. Take advantage of the cool weather because the lawn has essentially quit growing for the season, and the soil is dryer.
The easiest way to convert lawn to beds is to smother the turf plants. There are several easy ways to do this after you have determined the areas you want to change. These include:
After the final mowing, consider piling all the leaves and the grass clippings on the designated spot to the depth of 6 inches to 8 inches. If you mix the leaves and the grass clippings together, there is less likelihood the leaves will blow away. The advantage of using this system is that the worms and microorganisms will utilize the organic material over the winter and enrich the soil.
After mowing the lawn, lay down multiple layers of newspapers topped with a final layer of cardboard to secure the newspaper in place. Again, these organic layers will be broken down by the soil citizens.
Purchase wood chips and pile them at least 6 inches deep. Do not leave any open spaces between the chips where light can reach the grass plants. Remove the chips in the spring. Do not dig them into the soil.
The next methods are more labor intensive and do not enrich the soil. They merely kill the turf plants.
Cover the turf with smothering materials such as composite roofing to totally cover the spot.
Cover the turf with heavy gauge black plastic and pin it down with stakes. Do not use landscape fabric, which is permeable.
The disadvantage to the final two methods is that they can damage existing tree or shrub roots because they cut off the source of oxygen and moisture to those roots.
If you have made the commitment to have less turf, skimming up the lawn with a cutting tool such as a large flat-bladed spade or renting a mechanized sod-cutter will get rid of the plants. The bare soil should be covered with a mulch of chopped leaves to prevent weed seeds from germinating in the early spring.
Tilling up the turf could leave many grass roots to regrow, as well as the seeds from the nuisance weeds.
season.
In the spring, the new bed needs to be spaded up because most turf areas are fairly compacted. Organic materials can be incorporated when spading the bed.
By Bonnie Orr
Rudbeckia to cheer to your garden – 4/13/2016
Who can’t resist a cheerful, easy-care daisy that blooms summer into fall, with the added incentives of drought tolerance, disease and deer resistance?
Gloriosa daisies are just plain glorious. Actually, I should say rudbeckias are glorious, but that sentence isn’t as much fun. Gloriosas are part of the genus rudbeckia. This column highlights rudbeckias, easily recognized as part of the sunflower family and named after Swedish 17th-century botanist Olaf Rudbeck.
Predominant types have yellow or orange petals with distinctive, dark raised centers. Many new varieties have amazing shades of red, mahogany and multi-colors.
Most are native to various regions in the United States. They attract butterflies while in bloom and then dried seed heads are popular with seed-eating birds come fall. Some are short-lived perennials or biennials, and multiply easily while not being invasive.
Popular garden ones have been developed to extend bloom time and offer fantastic colors. Rudbeckia hirta ‘Black-eyed Susan’ (also called gloriosa daisy), sports big blooms about three inches across on stalks one to three feet high. This fast grower is a short-lived perennial, but blooms the first year from seed started early spring, so could easily be treated as an annual.
A couple of attractive reddish types are R. hirta ‘Cherry Brandy’ displaying mahogany red petals with a black center and R. hirta ‘Cappuccino’, a beauty with maroon petals tipped with a dash of orange.
Lower-growing R. hirtas include 10-inch-high ‘Goldilocks’ and ‘Toto’, or take a look at those about 2-feet high, such as ‘Sonora’, ‘Cherokee Sunset’ and ‘Marmalade’.
When I lived in Centralia, a mass of perennial R. fulgida ‘Goldstrum’ made a huge display of color that dominated my perennial border over several months every year. These big yellow daisies with dark centers grew about 2-feet high, needing very little care.
There are new varieties of ‘Goldstrum’ that are shorter and ideal for front-of-the-border planting.
Although drought tolerant, they’ll perform best with regular irrigation. Rudbeckias are an excellent plant to brighten the landscape border. Divide longer-lived perennials every few years if they become crowded, to encourage more blooms.
Rudbeckias are related to echinacea (coneflowers), helianthus (sunflowers) and ratibida (Mexican hat) — all tough, low maintenance ornamentals with daisy-like flowers.
By Mary Fran McClure
Practical tips for growing lavender – 7/29/2015
Lavender is a popular plant in this region because it is not very thirsty.
Many types of lavender are not winter hardy for North Central Washington; they are truly Mediterranean and will not tolerate temperatures in the low teens nor will they suffer the high summer temperatures. Types such as “Spanish” should be grown as annuals. The tried-and-true lavenders for this area are Lavandula agustifolia’s dozen named varieties, such as “Hidcote” and “Munstead.”
Lavender is a pretty carefree plant. When the plants are mulched with pea gravel, they self-seed new plants. I like lavender because it buzzes with bumblebees and butterflies. I do not cut off the fall blooms so they will produce seed to feed the birds during the winter. The seeds fall, and the ground-feeders, such as towhees, juncos and finches, scratch up the seed.
Lavender’s roots rot when they get too wet — especially when they are planted as a border for a flowerbed next to a lawn. If your plant has not persisted more than a couple of years, excess water could be the cause of its death.
Generally, Lavender grows between 2.5-feet and 3-feet tall and equally as wide, which is why so many people like to create topiaried balls with the plant.
This type of pruning is fine in a formal garden, but in a xericscape landscape, a looser pruning might look more natural.
Poor pruning that has resulted in an unsightly plant is a main disappointment. If the plant is not pruned at all, it will grow 3 feet tall with all the growth at the top, few blooms and lots of shaggy, wood stems. When the plants have gone rogue and become woody, you have two choices:1) Pull out the plant and start a new one with a good intention to care for it more consistently. 2) If you belong to the “Lazarus” school of gardening, as I do, and know you can resurrect any plant, then you have taken on a three-year project.
Here’s how you resurrect a plant that has gotten leggy and woody: Cut one third of the woody stem about 6 inches from the ground in May. New growth may start on the woody stem. If it does not do so by June, kiss the plant goodbye. If you get new growth, it means the plant is going to fill in with new growth.
The second spring, you cut another woody one third, and the third spring, you cut out the final old wood. If you cut out more than one third of the woody plant at a time, the roots will not have enough leaves to create new growth and will collapse. Then you will have a woody, ugly, dead plant that will have to be pulled out anyway!
Cut the blossoms and dry them for use in your closets and to perfume any room.
There are dozens of craft projects to make with lavender, and lavender blossoms are added to baked goods, as well as savory and sweet seasonings.
Take care of your plants and enjoy the fruits of your labor.
By Bonnie Orr
Fruit
Raspberry Pruning – 2/2026
For me there’s nothing better than grazing on raspberries fresh off the vine, or more accurately, fresh off the cane. How to prune and manage them, however, has been a bit of a mystery to me. After doing some research, I’ve learned that it really depends on what type of raspberry you have.
There are two main types of raspberries: summer bearing and fall bearing. Knowing the type you have is key to determining when and how to prune them. Consistent pruning each year will keep the plants from becoming a tangled mass and will produce better fruits. Pruning and thinning improves air circulation and allows more sunlight to reach new, emerging canes.
Summer-bearing red and yellow raspberries produce fruit in the early summer on two-year old canes, called floricanes. This type of raspberry should be pruned twice a year, once after fruiting and again in the spring (late March or early April). Canes that have fruited become dry and brown and will not produce again; soon after harvest, you’ll want to cut these down to the ground. New canes, called primocanes, will grow from the roots and will bear next year’s fruit. In the late winter or early spring before growth starts, remove any thin, weak, dead or diseased canes to the ground and cut back any tall canes to about five feet.Fall-bearing red and yellow raspberries (also called everbearing) can bear fruit twice. The heaviest fruiting will be in the top third of first-year primocanes. After harvesting, cut off the fruit-bearing part of each cane. These canes will produce some fruit in the lower portion of the cane the following summer. Once you’ve harvested those older, second-year canes, they should be cut off at the base. In the meanwhile, the roots will have produced new primocanes, which will fruit at the top of the cane in the fall. For simplicity, some gardeners prefer to cut all canes to the ground in the winter and treat the plant as a single crop fall producer.
The previous paragraphs cover the more commonly sold raspberry varieties. My garden includes another variety of raspberry — the black raspberry, which has a different growth pattern and requires pruning three times a year: spring, summer and after fruiting.
Similar to summer-bearing red raspberries, black raspberry canes that have fruited should be cut out soon after harvest. Black raspberries can grow very long primocanes in the summer, and they should be tipped
(removing the top 2 or 3 inches) when they reach 24 to 30 inches high to encourage lateral branches that will bear next year’s fruit. In the spring before growth begins, prune back the lateral branches to about 8 or 10 inches.
Once you’ve finished pruning your raspberries in the spring before growth begins, give them a boost with a balanced fertilizer (labeled 10-10-10) to encourage strong growth. Some gardeners choose to fertilize again after harvesting to stimulate new cane growth. Stop fertilizing by summer; late-season growth will be too tender to survive the winter.
All types of raspberries will benefit from a support system using posts and wires to keep them upright in windy conditions. In addition, many types of raspberries produce “suckers” that can pop up outside the desired growing area. Either remove them or transplant them back into the row when they appear to keep your berry patch more manageable.
By Ann Briggs
How to Grow Strawberries – 5/1/2014
Strawberries bear best on 2 year old plants. With yearly division and replanting, your strawberry beds will remain highly productive. This type of planting requires some forethought and planning. Ideally, you have made space for one mature bed of strawberry plants (2 year old bed) and a second bed prepped out for spring transplanting of last year’s runners from the strawberries in your mature bed. The runners from last year can be clipped and separated from their parents and planted into this empty, spring bed. When creating a new strawberry bed, several factors are necessary for the success of the planting. The most important prep work is the thorough weeding and de-grassing of any new area that is being planted to berries. Strawberries are relatively resilient plants and can handle a minor amount of abuse and neglect but the one thing they cannot tolerate is competition with grass. Please take the time to remove all grass roots before planting your bed; you will be thankful for your attention to detail later on. If you are starting new beds and are removing sections of lawn to do so, the best approach is to dig out the section of lawn for planting a year in advance. The optimal time of year for killing grass is mid-summer. Step one is shutting off any irrigation to the site to be de-grassed. Once the irrigation has been turned off, the grass can be cut into strips and flipped over to bake in the sun using a flat bladed shovel. After several weeks, the grass should be brown and dry and the soil can be shook loose. The grass clods can then be moved to your yard waste bin. Weeding of this new bed should be done again in the spring before planting to remove any grass roots you may have missed the previous summer.
Since strawberries are heavy feeders, your bed should be properly fertilized before planting. In addition, fruit set cannot occur without regular and consistent irrigation. Simple irrigation can be created using ½ inch or 34 inch poly tubing with a dripper placed at each strawberry crown. Make it easy on yourself and hook the irrigation system up to a timer so that watering is predictable and regular. Happy Gardening!
By Eron Drew
Tips on Growing Blueberries – 5/1/2018
The plant clinic’s first berry questions of the season have been about blueberries– e.g., when to plant, whether to fertilize, types that grow well here, and light requirements. All are good questions, for which we had answers, plus a little extra advice!
Now is the time to set out the blueberries you bought at this year’s MG plant sale or acquired elsewhere. They do best planted in well-drained, porous, acidic soil in a sunny location, but will still produce berries if in partial shade. Blueberries should not be fertilized their first year. After that, fertilize once in the spring with a fertilizer designed for acid-loving plants. Add 4” of mulch around the plants (but not touching them) to protect the plants from our summer heat. The following advice is often the hardest to follow: Don’t let your plants set fruit for the first year so they can put their energy into healthy root development. To do this, pick the flowers when they appear. Failure to heed this advice will result in berries of lower quality and lesser quantity.
Many types of blueberries thrive in our area, e.g. ‘Berkeley’, ‘Blue crop’, ‘BlueRay’, ‘Elliot’, and ‘Jersey’. Select varieties that produce fruit early, mid-season and late season for treats all summer long. Be sure the plants fit into your landscape. Fortunately, blueberries come in many sizes: short, mid-sized, and tall.
Mature plants should be pruned in early spring to remove broken stems and to keep the plant’s structure open. As shallow-rooted plants, blueberries need the soil to be uniformly moist around the base. During our hot, dry summer months, they could need as much as 1-2” of water each week.
If taken care of, your blueberries will provide you a bounty of delicious fruit throughout the season and be-yond if you freeze them. If you feel the urge, bake some blueberry scones, or perhaps a pie, and drop them off at the plant clinic. I guarantee they won’t go to waste!
By Casey Leigh.
Budding Your Fruit Trees For Variety – 58/2/2017
Master Gardeners get many questions about backyard fruit trees. It turns out that many people don’t have room for the number of fruit trees they would like to grow. There’s a solution to this backyard fruit production problem. It is called budding, which is a type of grafting.
Fruit trees are beginning to go dormant in August. It may not seem evident from their green, lush growth, but their bark has begun doing what is called “slipping.” This highly resembles crepey skin on your arms if you are over 60.
This loose bark is easy to cut and slip in a wedge of wood to create a new variety on a branch. Here’s a step-by-step description of how it’s done:
1. Find a branch about as thick as your thumb. Cut off a leaf bud with the leaf attached. Make the cut a canoe shape.
2. Carefully cut off the leaf, making sure not to tear the bud. Keep it moist.
3. Select a lateral branch that you want to have a different variety growing on (recipient branch). Cut a 2-inch slash about 12 inches to 18 inches from the main stem or trunk. Cut so it barely penetrates the bark and the cambium layer is not cut.
4. At the top and bottom of the 2-inch slash, make perpendicular cuts so the bark easily peels back and doesn’t tear.
5. Slip your canoe-shaped bud into the slit of the recipient branch. Next, wrap the slit securely to cover all open bark. Be sure to leave the bud uncovered.
6. To create an airproof closure, seal the branch with grafting wax, paraffin or clear packing tape or wrap it with rubber grafting strips.
7. Tie a brightly colored ribbon at the terminal end of the recipient branch. This is essential so that in the spring an enthusiastic burst of pruning won’t result in cutting the darn thing off.
It is astounding how fabulously fast the new variety will create a new branch!
Tim Smith, our emeritus teacher and extension expert, has created pear trees, apple trees, Asian pears with up to six different varieties on each. This method is also effective for trees which need pollinizers. Rather than having two almond trees, I budded two branches of a pollinator donor on my almond tree.
By Bonnie Orr
Maximize your strawberry-growing efforts – 5/24/2017
Nearly everyone loves to eat a good strawberry. When strawberries are in season, there is almost nothing as satisfying as walking out into the garden and harvesting a colander full of these sweet, fragrant and beautiful fruits. Most of the time, the berries don’t even make it back to the house before we have devoured them all.
Strawberries are fairly low maintenance after they have become established but they do need a little love now and again to really reach their true potential. If you are thinking of putting in a patch, here’s a little advice on how to do it well.
First, there are a number of varieties to choose from when installing a strawberry bed. My all-time favorite are the Shuksans.
Shuksan strawberries only fruit one time compared to some of the other “ever-bearing” varieties. However, they have a relatively long harvest window lasting approximately three weeks. Over the course of that time period, the first berries to ripen will be the largest of the bunch. Then, the berries tend to decrease in size but increase in flavor.
If you decide to grow Shuksan strawberries, do not neglect to pick the final set of micro-sized fruit since they have the most flavor of all. It’s like eating a strawberry Jelly-Belly jellybean … only much, much better. I have eaten these berries for years and am still amazed that the flavor can really be so intense. Truly, these are not your run-of-the-mill California-grown mega berries.
My second favorite strawberry to grow are the very petite alpine strawberries native to this region. Their flavor is equally amazing, although production is low compared to commercial cultivars. The alpine strawberries are fun to grow because they can tolerate a variety of soils and climates and don’t seem to mind a little abuse now and again. This is not the variety to grow if you intend to make a lot of jam, but it is certainly a fun addition as a ground cover within your landscape.
If well cared for, both of these varieties have a tendency to send out a lot of runners. As the caretaker of your garden, it is your job to keep them where you want them. The nice part about this job is that there are always plants to give away to friends and neighbors. Once a year (or at least every two years), it is a good idea to thin out the bed. The center of the strawberry plant tends to get woody as it gets older and production starts to decrease. Peak production for a strawberry plant is in its second year of growth. By about the third season, it is a good idea to remove all of the older, woody plants and replace them with the fresh new runners. Just snip off the runner from the mother plant, remove the mother and put the new runner in its place.
Strawberries can be heavy feeders. They like to be fertilized once a year. If you have access to a good-quality manure when setting up your bed, this is probably the best fertilizer you can give them. Otherwise, top dressing with a good-quality slow-release organic granular fertilizer right away in the spring is also a good choice.
To make sure the fruits stay clean, make sure to lay down a layer of quality alfalfa hay or straw around the plants in the early part of the spring after you have thinned out beds. This will act like a blanket and will keep the fruit off the ground. The hay will also break down and help amend the bed.
Have fun and happy gardening!
By Eron Drew
Thoughts On Growing A Fig Tree – 12/22/2021
“ … Now, bring us some figgy pudding, and bring it out here!
Good tidings we bring to you and your kin.
We wish you a Merry Christmas and a Happy New Year.”
I was thinking of figgy pudding … until I found out it is not made of figs.
Figgy pudding is a cake that is either baked or steamed. It is actually a form of a plum pudding, neither of which has figs nor plums but is primarily made from raisins. So much for vaulted tradition.
But, let’s talk about those figs.
Figs grow on a huge, spreading, shrubby trees that produce hundreds of pounds of fruit twice a year, if you live on the other side of the Cascade Mountains or in warmer areas of the world — or if you are the fig diva, which I am.
1n 2013, a longtime friend of mine gave me a houseplant fig tree that someone had unloaded on her. The plant had outgrown her “houseplant” status, and I just moved it outside to my garden with a spade and a prayer.
Late fall, I took pity and put mulch on its roots. I had done some reading, and found out that figs survive as far north as Ohio (We are north of that), and that one of the ways to ensure survival is a procedure called “careening.”
Careening is the same process Capt. Cook used in 1770 to tip his wooden ships over in dry dock to scrape off the barnacles. Essentially, you dig up half the roots, tip the tree over to the ground, cover the tree trunk and the exposed roots with soil, mulch well, pray for snow and hope for the best.
OMG. That is too much work for a woman who will not grow dahlias because I refuse to tie them up and de-bud them.
That first winter, the lowest temperature in my yard was 10 degrees. The plant froze to the ground, re-sprouted in the spring, and, low and behold, I harvested a handful of Kadota figs in early fall.
Vastly encouraged, the next winter, I wrapped the tree in Christmas lights and encircled it with landscape fabric. Does this sound easier than careening the tree? Anyway, about half of the stems survived the winter, and I harvested a few figs in July.
There are two fig crops each year when the tree is thriving. The breba crop grows on old wood and ripens by early summer; the fall crop grows on new wood and ripens in October. In 2014, we had a killing frost at the beginning of October so none of the fall crop ripened.
Now, here is the truth: No matter what you do, Mother Nature trumps all. If it is a cold winter, all the wood dies down and this plant is essentially a large shrub; you have no spring crop since the fruit is produced on new wood. If it gets too cool, too soon in the fall, the fall crop will not ripen. The fruit must ripen on the tree.
I was not to be deterred and each year have protected the tree with either lights or mulch. And the tree has thrived —although only the breba or the fall crop has ripened. Many years, more than half of the old wood has frozen.
With the mild winter and warm summer in 2021, for the first time I harvested vast numbers of both breba and fall figs, more than 300 for each crop. With the mild autumn, I harvested until the second week of November.
I have made jam, compotes, pickles, pies, gave away baskets of the fruit. Luckily, the robins and starlings discovered the fruit and snacked away the summer months.
My plant is 10-feet tall. I no longer give it winter protection because I don’t want one zillion figs.
Give it a go. It is a lovely plant with huge leaves. We all may be now feasting on “figgy pudding.”
By Bonnie Orr
Should You Plant Backyard Fruit Trees in Wenatchee – 4/22/2021
First, let me say as a gardener, there is a certain joy of growing and harvesting any crop from your garden, whether it’s that perfect tomato, cucumber, melon or a juicy apple.
Most of the things we grow require some planning, time and resources, be it seed, fertilizer or the perfect plant.
Some crops, however, require a much greater level of commitment in order to be grown successfully and responsibly. I love looking at the catalogs that show a fruit tree with buds that will eventually grow three or four different varieties of apples on the same tree. How cool is that?
As exciting as that seems, a backyard fruit tree is where the responsibility part comes into play. Apple and other tree fruits require a lot more time and effort than most crops. They take years of training, pruning, and a pretty big space in your garden before you get that first crop.
Since we are in a commercial fruit-growing area that depends on selling fruit on a worldwide market, homegrown fruit is required by Chapter 15.08 RCW and Chapter 15.09 RCW to be pest free. The state laws basically say “each owner of land containing any plant or plants shall perform, or cause to be performed, such acts as may be necessary to control and to prevent the spread of horticultural pests and diseases.”
Codling moth and cherry fruit flies are just a few of the pests from backyard trees that cause major problems for our local growers. Commercial growers can report unsprayed trees to local pesticide boards, who will follow up with inspections and possible fines.You don’t want to be the person who fails to maintain their fruit trees properly, potentially causing a commercial grower to spray more often (at their own expense) in order to make up for your negligence in maintaining your trees.
While the prospect of growing your own fruit is tempting and potentially rewarding, there are things to consider before you buy that apple, cherry or pear tree. I would suggest a little research into what it requires before you decide to plant that new tree. Requirements, besides making sure that tree is pest free, include training the tree to grow in a manageable and productive form that allows you to spray and harvest the fruit.
Organic backyard trees are certainly possible, but require an investment in both time and money to be successful. The pests are there by opportunity and favorable growing environments, and really don’t adhere to vacation schedules in regards to their control. The control methods will still require multiple sprays of approved organic sprays during the season and often labor-intensive alternatives, such as bagging the individual apples to keep away pests. The bags are put on a few weeks after bloom until a few weeks before harvest when they are removed so the fruit will color properly.
Non-organic backyard trees may be a little less labor intensive but will still require either hiring a commercial applicator to spray them or the investment of equipment and time for the homeowner to apply the required six or more applications to control the pests.
As a retired agriculture teacher who helped run the former Eastmont FFA orchard, I know the effort required to spray, prune and care for fruit trees and dealing with other peoples unsprayed backyard tree pests. I personally think I will visit a local fruit stand, farmers market or visit a grower who sells directly to the public. This still allows me to enjoy those wonderful fresh apples, cherries and other fruit at a much lower cost than trying to grow them on my own.
If you decide to grow your own fruit trees, remember to do so responsibly. The WSU Tree Fruit Research Center website has some great guides to help with a successful tree fruit experience. The link for growing backyard fruit is treefruit.wsu.edu/backyard-fruit-trees/.
By Lloyd Thompson
The Attractive Rhubarb Plant Serves Double Duty in The Garden – 3/03/2021
Rhubarb is sort of an oddball many of us enjoy its edible stalks as a tart fruit, especially when combined with strawberries (as in a delicious pie!). Botanically it’s a vegetable even though eaten as a fruit. Sort of the reverse of tomatoes fruits that we eat as vegetables.
Beyond that, a big rhubarb plant provides an impressive landscape show with its large, crinkly triangular leaves but be aware, those leaves are poisonous.
Time to plant this herbaceous perennial, or if you already have one or more in your landscape, time to fertilize this vigorous plant. Use a high nitrogen fertilizer, such as 16-8-8. Fertilize three times a year; now, when growth starts and again after harvest.
A single plant can easily spread four feet or more, so allow ample space for its beautiful leaves. Best planted in well-drained, fertile soil with plenty of added organic matter, it thrives in sun or light shade and regular watering.
Whether red stalks or green, (depending on variety) they both taste the same.
Wait a year before taking a small harvest of stalks from a young plant. Stalks are generally harvested about from May into July; never remove all the stalks.
It’s best to harvest by gripping a stalk down near the base and twisting to one side, so it snaps off at the base. If you must cut, do it right down at the base of the plant to avoid rot.
Cut the leaves off your bundle of stalks and they may be stored in a refrigerator up to a couple of weeks. We cut them, cook, add sugar and freeze in handy containers.
As stems become thinner and shorter in late summer, stop harvesting and allow the plant to rejuvenate and store energy for the coming year.
Rhubarb can be very productive for perhaps eight years, then it’s time to divide the plant. Just slice down through the rhizomes and replant a healthy segment.
In fall, remove stalks and debris as they die down. Then cover with a light mulch as they get their needed winter chill.
Rhubarb serves double duty attractive landscape plant as well as producing delicious fruit, providing you enjoy its tangy flavor.
By Mary Fran McClure
Home-grown strawberries are a delicious, rewarding treat – 3/17/2022
I’m pretty sure that homegrown strawberries are at the top of many people’s list of favorite berries. They are an easy-to-grow perennial, so they don’t have to be planted every year, and can produce up to a quart of berries per plant. Raising your own homegrown berries allows you to choose if and what pesticides to use.
Your first decision in raising strawberries is deciding what type or types of strawberries to grow. There are three different types: June bearing, everbearing and day neutral. Each has some advantages and disadvantages.
June bearing strawberries are probably the most common, and tend to be the largest type of strawberry. This variety only produces one crop over a week or two in June. This allows enough berries at one time to be used for jam, frozen berries and lots of eating. Everbearing strawberries produce a larger earlier crop in June and a smaller later crop, with some berries in between the two crops. This variety tends to be smaller than the June bearing varieties. Day-neutral strawberries produce somewhat smaller berries throughout the season and are now starting to be grown by commercial growers in Washington and Oregon.
After you decide on what type or types of strawberries you want to grow, there is still the decision of what variety to plant. While strawberries aren’t difficult to grow, they can be a bit “persnickety” on what they like; as a result, lots of regional varieties have been developed over time that will perform better in certain areas.
Washington State University Extension recommends the following varieties for Eastern Washington:
– June bearing: Hood, Benton, Rainier and Shuksan
– Everbearing: Quinault, Ogallala and Fort Laramie
– Day neutral: Tristan, Albion, Seascape, Rainier and Selva
Make sure to select certified virus-free plants for a better yield, and resist the urge to get plant starts from family or friends, as they can be infected. You can purchase dormant, bare root stock and plant in late March to April, or use container grown plants, which can be planted in May. Strawberries can produce for four or five years with proper care. You can plant strawberries in a variety of ways, including containers. I like growing mine in a raised bed for better drainage, not to mention the fact that a raised bed gives me a place to sit while I pick them.
A loamy sandy soil with good organic matter works the best, but any well-drained soil will do. Mulching with 2 to 3 inches of straw can help with weeds, and a heavier winter mulch can protect the strawberry plant crown during the winter. Just remember to remove the winter mulch as soon as it starts to warm up in the spring and before the plants start to grow. Strawberries need careful watering before and during harvest, as well as in August when new buds are formed. Make sure they don’t get waterlogged. Drip irrigation works better than overhead watering which may lead to fruit rot.
Here’s a good source for more strawberry-growing information: https://extension.oregonstate.edu/catalog/pub/ec-1307-growing-strawberries-your-home-garden.
Now that the snow has mostly receded, time to start thinking about a wonderful summer garden bounty, which hopefully will include lots of fresh, delicious strawberries!
By Lloyd Thompson
Tips For Pruning Your Backyard Fruit Trees – 2/10/2025
One of the great advantages of becoming a WSU Master Gardener is access to a wealth of knowledge and experience. For this week’s topic on pruning backyard fruit trees, I sought the advice of Anita Poortinga, a veteran Master Gardener and certified arborist.
As Anita explained, “fruit tree pruning is done mainly for fruit production rather than for beauty, as you would for an ornamental tree. However, done correctly, fruit tree pruning can achieve both.”
Pruning is done to direct growth, maintain tree health and manage fruit-bearing potential. According to Anita, a common mistake made by home gardeners is not pruning at all.
“When you don’t prune your fruit trees, the interior becomes crowded and there is no air flow. That can lead to smaller fruit and lower production,” she said. “Trees can also become too large for their space, with fruit only growing in the upper branches.”
For example, if left unchecked, a peach tree can grow to 25 feet, making fruit hard to access. Commercial growers keep their trees between 7 to 10 feet tall.
Generally, the best time to prune is while trees are dormant, from late winter to early spring (January to March), before the new growth starts. Avoid pruning when temperatures drop to near zero to reduce the risk of tissue damage. Plants become brittle in extreme cold and branches may snap or split unintentionally. If you wait too long and pruning is done after growth has started, it may decrease fruit production.
How much you prune depends on the type and age of the tree, but you should never remove more than one-third of the tree’s mass. Become familiar with where the fruit attaches on your variety of tree so you don’t unintentionally prune away your future fruit.
For peaches and nectarines, flower buds are produced at each node (the point on the shoot where the leaf is attached) on one-year old wood. The terminal bud (at the end of the shoot) is always vegetative.
In apples, cherries, apricots and plums, the flower buds are produced laterally and terminally on one-year-old shoots. On older wood (at least two years old), fruit is produced on long-lived spurs, which are short, compact shoots.
Here are some basic rules of pruning to keep in mind.
– Start by removing any dead, damaged or diseased wood. Remove suckers and water sprouts. Remove crossing branches and inward- or downward-growing shoots.<br>
– Remove low branches. Any branch within about 4 feet of the ground will probably be too shaded to produce fruit and will just invite deer and other animals to come nibble.<br>
– Keep pruners sharp and clean. Sharp pruners will result in cleaner cuts that heal more easily. By disinfecting your pruners, you’ll reduce the risk of spreading disease from one plant to another.<br>
– When cutting a branch back to the main trunk, be sure to leave the branch collar (the raised tissue at the base of a branch where it attaches to the trunk). It has specialized cells that seal the pruning wound.
More detailed information about pruning various types of fruit trees is available online for free. “Training and Pruning Your Home Orchard” can be downloaded from the WSU Extension website: bit.ly/wsupubfruitpruning.
By Ann Briggs
Peaches and nectarines are good backyard tree choices – 10/22/2018
In a recent column, I went on a rant about apricots. I braced myself for a public outcry, led by the Apricot Protection League, but, not a peep came my way. This has encouraged me to move forward into my new topic – tree fruit you won’t regret growing: peaches and nectarines.
Few gardening experiences can match the pleasure of the taste sensation of that first summertime bite into a tree-ripened nectarine. The peachy, sweet-tart flavor comes with juice that forces you to bend forward to avoid making a mess of yourself. This all comes with peaches being the easiest tree to grow, with a short wait until first fruit. It’s typically a three-, four-year wait at the most.
The trees are more compact than other fruit trees. Usually, you can keep them about 12-feet tall and 16-feet across at maturity. Many people take advantage of this low-maintenance crop by sticking a peach tree in their backyard. Then they move, leaving the tree for you to use. We get a lot of peach problems brought into the master gardener clinics, so what follows are a few basic tips about their management.
First, they are short lived trees. Fifteen or 20 years is old for a peach. Replant when most of the green growth is out on the end of old, corky wood.
They need a higher level of mineral nutrition than other fruit trees. Too little, and they don’t produce the new wood that produces next year’s flowers and fruit; too much, and your fruit will be lower quality.
They need to be pruned severely every winter, or else. The fruit is produced on the shoots that grew the prior summer, so leave too much wood on the tree and you will get too much fruit set. This will cost you a lot of time thinning little green fruit. Thinning fruit early, starting at bloom time, is very necessary. Too much fruit on the tree will reduce the growth and cost you crop quality. Thin fruit to about 5-6 inches apart; they will be much better if not crowded on the bearing wood.
There are fewer pest problems with peaches than most fruit trees, and most can be controlled with organically acceptable sprays. Two fungus diseases and two insects are key pests we see most in Master Gardener clinics. The two fungus diseases – peach leaf curl and Coryneum twig blight (shot hole) – require control treatments in the fall.
I won’t tell you what to spray to control these because I’m not allowed to do that in this sort of column, but I will tell you the timing, which is now!
Peach leaf curl has become much more common in the past few years. Our dry climate prevents infection most years, but untimely rain on March 13 and 22, triggered it in 2018. This timing was critical because the leaf curl spores that live on the tree surface were washed by the rain into the opening buds on the peaches. Without the rain, no infection. Once the spores are washed into the buds, they infect the new, developing leaves. This infection turns into the thick, twisted, discolored leaves you see after bloom.
If you spray in the fall, you can greatly reduce this disease. Or, you can also spray in early to mid-March, but most people are not thinking about spraying then. The same sprays will help control the Coryneum twig blight. Come into the office at 400 Washington St. in Wenatchee to pick up a spray guide to learn what you need to spray and when you need to spray it.
By Tim Smith
You best think twice before planting that apricot tree – 8/28/2018
The first house my family purchased had a mature apricot tree growing in the backyard. It was loaded with fruit, and harvest was terrific.
The fruit was an old, heritage variety, both delicious and aromatic. We ate them fresh for a week or two and canned numerous quarts for later. (Helpful home canning hint: mushy canned apricots did not go well for our family.) It was six years later that we used our last quart of canned ‘cots. I know they can be dried, as they do in Turkey along miles of paved roads.
We have since moved from that first home to the Wenatchee area, but I did not plant an apricot in my present backyard … for a reason. We found that you just can’t give them away.
Sure, you can ask, and people will be enthusiastic, but what they want is a dozen or maybe a small boxful. They don’t want as much as you need to give away. I finally resorted to leaving full boxes on a porch, ringing the doorbell and running away.
Who needs all those apricots ready all at once? What sounded like a good idea in March when you purchased that fruit tree may not be practical in August. You like apricots, but do you like more than 300 pounds of them? That’s what a mature backyard tree will produce each year.
In order to grow fruit in the back yard, you need to love the process, not just the produce. The harvest is the end of a yearlong effort, and it’s a lot of work. Everything needs to be done on time, every time, or you risk serious tree damage and poor fruit quality.
What a good grower will do: Let’s start with winter, when each tree needs thoughtful pruning and training. Figure on about two hours of effort plus $35 in equipment cost.
Then come the spring sprays – very important. Including the time you take finding out what to spray and when to spray it, and the cost of the sprayer and spray material, it adds up to five hours and another $50 in expense. Then there’s about three hours of work to thin the flower and small, green fruit.
Depending on the type of fruit, there are at least two and as many as four summer pest-control applications. Let’s be optimistic and say six total hours and $20 for sprays. Then comes harvest and the orchard ladder you need to make picking safer, plus the picking bucket. Those add up to two hours of harvesting plus $150 for the ladder and picking bag purchases. Then, finally, there’s a fall spray required on most stone fruit, which takes about two hours and $20 in spray material cost.
If you spread the value of the ladder, pruning, picking and sprayer equipment over 10 years, and pay yourself $15 per hour for your hard work, that totals 20 hours labor or $300, and $24 per year for equipment plus $90 in spray materials, organic or conventional. This totals about $414 per year to produce your apricots, or roughly $1.38/pound for your “free” fruit.
Now, wouldn’t you rather loaf out at the lake or hike in the woods than produce fruit? Most people would. The commercial growers keep the roadside stands and farmers markets full all summer and fall, and you can pick up the seasonal fruit on the way home from your summer fun.
On the other hand, maybe you are a person who enjoys taking on a challenge. If you have personal reasons for producing your own fruit, go for it. We have information at the Chelan/Douglas County Master Gardeners that can help you with that problem.
By Tim Smith
Why blossom time for our tree fruit is probably the best anywhere in the world – – 5/23/2018
There are few places on earth that have a desert climate with scant summer precipitation, but also have a large river running smack through the middle. The Nile River and Egypt come to mind.
This geographical rarity is even less common if you are looking for areas that have moderate summer temperatures and real winters. So, Egypt is out.
Only tiny specks of the earth’s total surface, including central Washington, meet these special conditions. Those temperate desert-with-river areas also include parts of southern Chile and some regions in north central Turkey that look very similar to central Washington. These rare regions are special for many reasons, including that they are an easy climate to live in, but also that they are exceptional areas to grow temperate-climate tree fruits.
To be near perfect, these fruit production areas must have moderately cold winters.
Cold weather is necessary because it triggers dormancy in fruit trees, but severely low temperatures can kill a fruit tree or damage the flower buds before they open. The Christmas/New Year season of 1968-69 set the record for low temperatures in Washington (/25F in Wenatchee, and a reported -40 to -50F in other areas of eastern Washington.) This almost killed the tree fruit industry in some areas of the state, such as the Winthrop region, because few fruit trees can tolerate -40F. Fruit flower buds were not killed directly by these low temperatures, but many fruit tree trunks died. Growers saved many by “arch grafting” live tree branches over the damaged parts of trunks, and a few of these repaired trees remain alive to this day.
Winter must be cold enough to send a clear signal to the tree that it remain dormant, at rest. Full dormancy and their deepest degree of cold tolerance is usually acquired by Christmas, and warmer temperatures any time after that will accumulate and signal the tree that is should slowly break dormancy, becoming less hardy as the warm days add up.
Some other tree fruit production areas with warmer winters have trouble getting their fruit trees fully dormant. This leads to scattered blossoms opening for two or three weeks, instead of the optimum few days. This drawn-out bloom period leads to uneven fruit maturity. Also, without proper winter chilling, different varieties of the same tree fruit may bloom weeks apart in the spring, complicating pollination and fruit set. Areas that have this issue include tree fruit production areas of north central Mexico, Chile, California and South Africa.
All of this leads to advantages for central Washington, with a tree fruit blossom time that is probably the best anywhere in the world. The first to bloom are apricots, with showy mid-pink flower color. A few days later, the plums produce a blizzard of small white flowers. Then the pink peach and wildly pink nectarines come out, followed by the fluffy pink-white cherries and the light greenish-white pears, and finally, the apple blossoms that put on a show with pink highlights on white.
Timing for all this display occurs late March to mid-May, depending upon the warmth of the year’s spring weather and the orchard’s elevation. The date of apple full bloom in Wenatchee has varied wildly (April 9 to May 16) over the 86 years of monitoring at the WSU Tree Fruit Research Center in Wenatchee.
Unfortunately, the Wenatchee Apple Blossom Festival timing rarely lines up well with the April 27 long-term average full bloom date in Wenatchee. However, it was a close match this year. It was nice to have apple blossoms around for this year’s festival. The “little green fruit” festival just wouldn’t sound right.
By Tim Smith
Neglected Fruit Trees Are Everybody’s Problem – 11/15/2017
Enjoying a couple of fruit trees in your backyard seems sensible – just walk out and pick your own fresh fruit. In addition to watering, thinning branches and picking, many folks don’t realize it’s a big responsibility to keep pests from invading your tree fruit.
Results of neglecting that part: pick an apple and you find apple maggots (larvae of a fruit fly) have invaded your fruit well ahead of you. With cherries, the main culprit is cherry fruit fly.
These pests aren’t just repulsive as you take a bite, they’re a menace to orchards and residents nearby.
Whom do you call if this describes you or a neighbor? The answer is the Chelan-Douglas Horticultural Pest and Disease Board, providing you live in either of these counties. The board’s phone number is 667-6827 and its office is at 412 Washington St., Wenatchee.
Will Carpenter, director of the board says, “I definitely recommend calling us any time you know of a problem. Don’t wait until next spring to report it.”
Another alternative is to email him at will.carpenter@co.chelan.wa.us.
The board’s busiest time is spring for cherries and late spring-early summer for apples. Pears have thicker skins so are less of a problem but still can harbor pests.
The longer neglected trees are left untended, the more pests are multiplying and invading neighbors’ trees as well as nearby orchards.
“One apple tree can produce a ridiculous amount of codling moths. I have seen seven worms (codling moth larvae) in just a single apple,” the Carpenter says.
He describes an East Wenatchee orchard infestation and said it was obvious the direction of invasion. Going house to house within a half mile of that area, they discovered seven residences with pest problem trees. He explains an infestation in an orchard points exactly in what direction the pests are coming from, although prevailing winds can also bring in pests.
Allowing pests to invade our area means crippling our agriculture industry and local economy. Overseas buyers simply won’t buy such fruit.
When a report is called in, Carpenter or his assistant Jim Walters goes out and inspects the site to determine if pests are on the property. One or two seasonal employees are hired during their busiest time.
“Everyone has their own issues, and we talk with them and try to solve the problem in a way that works for everyone,” explains Carpenter.
They offer WSU Extension spray schedules for those who choose to keep and manage their trees to prevent pests.
Another option is allowing the board to cut down the tree and apply an herbicide to the stump so it doesn’t resprout, all free of charge. They can’t afford to do this for a number of trees on one property though.
Sometimes in an old orchard, the owner limits sprays to save money or just isn’t paying attention as pests become a problem.
They are following 270 cases right now, and most take a year of monitoring, but two years is not unusual. The board has the authority to prosecute those who refuse to work out a solution to their pest problem. Reporting an irresponsible neighbor can be made anonymously.
“Pests and diseases are not just limited to edible fruit varieties of trees, but include a lot of ornamental trees and shrubs as well,” says Carpenter. “Vegetation ranging from crab apples, ornamental apples/cherries/pears, to even some smaller shrubs make it into our case list frequently. I have personally documented codling moth eating through several pea-sized fruit on an ornamental apple tree. They will burrow in one side and out the other side of the fruit, then on to the next piece in the small cluster.”
Carpenter has an associate of technical science degree in natural resources from Wenatchee Valley College and was hired in 2013. He grew up in Wenatchee and Okanogan. His grandparents owned an orchard in the Okanogan area, so he’s in tune with our large fruit industry and how important it is to our economy.
Mary Fran McClure
Fire Blight is an ongoing threat to apple, pear trees – 7/7/2018
We probably shouldn’t complain about central Washington’s weather, because it tends to be better than many places. In fact, the local weather makes it possible to grow almost any deciduous tree fruit without many disease problems common in other tree fruit production areas. The low occurrence of rain especially helps us avoid tree fruit disease problems that thrive in wet climates.
Unfortunately, that is less true these past few years. You may have read in articles in The Wenatchee World about something called “Fire Blight” that Wenatchee Valley pear growers are burning much later into the growing season than usual.
What is “Fire Blight,” and why are those growers burning it?
Fire Blight is a disease caused by a specific bacteria attacking an apple or pear tree through its flowers. It is native to North America, causing a minor disease of Hawthorn trees. It found the apples and pears planted by the European settlers to be quite susceptible.
The Fire Blight bacteria moved across the USA to the Pacific Northwest in 1948, where it settled in, mostly in pears. What kept the disease under control for years was the weather, and that Red Delicious is quite resistant to the disease. This gave Wenatchee-area growers an advantage over eastern growers due to the cool, dry conditions, especially while apples and pears are blooming.
In order for this disease to do its job, the bacteria must be transported from last year’s infected wood to open flowers by insects. Daily temperatures must be abnormally warm for a few days. By then, the colony of bacteria may have developed to a number numerous enough to infect the flower if the flower is wetted by rain or dew. This must occur in order – bacteria on flower first, proper abnormally warm temperatures, then wetting.
Once the bacteria gain entrance to the flower, they move into the wood and kill a portion of the younger wood and leaves, leaving them brown and appearing burned, hence the name.
This exact infection process is not very common in central Washington, but it has been for the past three years, and the disease is causing grave damage in many pear and apple orchards.
It rained on April 28 this year, when apples and pears were blooming across central Washington. There was a plentiful population of the blight bacteria carried over from last year, and temperatures had been abnormally warm, mid- 80s for the past three days – near perfect conditions for the bacterial development.
Then rain occurred across the entire state, washing the bacteria into the flowers, causing infections that started appearing about two weeks later. Most growers recognized the extreme infection weather conditions, but some were not able to treat their entire orchard in time to prevent infection. Some growers were able to apply controls in a timely manner, and report good results.
The orchard owners are burning the blight cuttings because the only treatment for infected trees entails cutting the infected part off the tree and removing the cutting out of the orchard. Part of the sanitation process includes the burning of the bacteria-infested wood, to reduce the number of bacteria in the orchard environment.
Further new infections are possible this year through “rat-tail blossoms” and wounds on the tree caused by hail or high winds with rain. Sanitation efforts will continue until next spring.
Ornamental flowering pears, crab apples, and shrubs such as Pyracantha and Cotoneaster are also susceptible. Numerous fire blight samples have been brought in the Master Gardener plant clinic for identification this year.
By Tim Smith
Fun Things to Try
Drying flowers -6/29/2020
The height of summer is near, and it is the time to think about fall and winter decorations from the garden. Take a walk around your garden to determine what flowers you would like to enjoy all year around.
Gather flowers on a dry day or after the irrigation water has evaporated so that the interior of the flower is not wet and subject to mold. Select plants with compact, small flowers. Large flowers don’t dry attractively because they flop. White flowers fade to cream; pink flowers deepen to magenta. Yellow and blue flowers tend to hold their hues.
Most flowers are cut with long stems and hung upside down. Have you wondered why they hang upside down? It is so the flower head does not flop before it is totally dry. False Goat’s Beard (Astilbe sp.) is an example of a flower that needs to dry upside down. A winter bouquet’s colors remain more vibrant if the flowers are dried in a darkened area and if they are displayed out of direct sunlight.
Some flowers have soft stems, and those flowers dry more effectively if a thin piece of wire is pushed up the freshly cut stem. In this way, the flower stem is sturdy enough to be added to a bouquet of dried flowers. The wire can also be used to extend short stems.
Drying flowers in vases of water helps to preserve the colors of yellow yarrow (Achillea millefolium) and Mophead or Lacecap Hydrangea (Hydrangea sp.). Cut the flowers with long stems, remove the leaves and put them in a vase filled with 4 inches of water. The flowers will dry gradually as they absorb the water. Another technique, especially good with leaf sprays such as vine maple in the fall, is to add glycerin to the water. The glycerin keeps the leaves supple and attached to the stem.
Don’t forget to harvest seed pods to add to an arrangement. Nigella (Nigella damascene) is particularly wonderful as is Baby’s Breath (Gypsophila paniculata), which is ready to pick right now. Bee Balm (Monarda didyma) seed pods retain their ”minty” fragrance. The amaranths such as Love-Lies-Bleeding make dramatic accents in dried arrangements.
Really fine additions to a winter display are leaves. Leaves, especially large ones such as peony, dry best by being flattened or pressed between layers of newspaper with a weight placed on top. Leaves are easier to arrange if a thin wire has been inserted into the stems. Consider Lamb’s Ears (Stachys byzantine) or Lady’s Mantle (Alchemilla vulgaris). Grasses with seed head that do not shatter, such as Great Quaking Grass (Briza maxima), grow graceful seed heads that turn bronze in the fall. Bunny Tails (Lagurus ovatus) create compact fluffy seed heads.
Some flowers dry naturally on the plant. Now is time to harvest lavender while it is still in bloom because the bracts are uniformly purple. When you deadhead the perennials, think about the form and color of the dead flower stem. Many flowers such as Yarrow complement an arrangement.
There are a number of more complicated means of drying flowers. On YouTube you can find instructions for drying individual flowers in the microwave. Follow the directions carefully to avoid fires. Silica gel is a desiccant used to dry individual flowers as well. The flowers must be free of moisture and take up to a month to dry.
Probably the easiest way to have preserved flowers for the winter is to grow “straw” flowers, that is, flowers that have large, colorful bracts. Some examples that thrive in this area are Globe Amaranth (Gomphrena sp.) and Everlasting (Xeranthemum sp. or Acroclinium sp.).
Bonnie Orr
Plant Names Tell a Backstory – 1/22/2021
How did plants get their names? What does the botanical, the scientific name, mean?
The story that first caught my fancy is the naming of one of my favorite plants, the fragrant Sweet William, Dianthus barbatus.
In 1066, William the Conqueror took the throne in England. He was from Holland and brought over his entire extended family and best friends to whom he gave vast tracts of land. The problem was that the stone in the south of England was pale yellow, and the familiar Dutch stone was gray. So these new lords wanted to build their castles in a familiar color. They floated over the English Channel hundreds and hundreds of shiploads of gray stone as building material. Lo and behold, the stones had soil on them—and the soil contained various plant seeds. In that way the Dianthus was introduced to England and named for the new king, William.
As an aside, the second part of the name, barbatus, makes sure that you will not be purchasing any of another 20 types of Dianthus. Barbatus means beard, and the petals of the Sweet William are shredded on the edges, resembling a beard.
The pilgrims set sail from their homes in Holland where they had taken refuge after being exiled from England. They packed the Mayflower with what they thought they needed, including medicinal plants; that’s how Taraxacum officinale, Dandelion, was brought to America. The species name, officinale, indicates that it was a medicinal plant. And indeed it was. It was one of the first green plants to grow in the spring, and the settlers were desperate for the vitamins in green plants to restore their health after a winter of existing on dried meat and root vegetables.
Plants are often named after people who first described them or collected them in a new territory. David Douglas, 1799-1834, was a British plant collector. The common name for Pseudotsuga menziesii is Douglas fir, a common tree in our area. Douglas actually came through our region on his plant collecting. He collected the seeds of the Black Hawthone, Crataegus douglasii, hence the species name of this plant. The Douglas fir’s species name honors another British naturalists, Archibald Menzies, who first collected the fir’s seeds.
Lewis and Clark, the early explorers of the West, collected more than 260 plants new to science on their journey at the turn of the 19th century. They pressed the plants, collected seed when possible, and managed to get most of the plants back with them. They lost many other plants when canoes overturned and soaked beyond salvage other dried plants. That must have been a heartbreak.
A number of plants have genus or species names of Lewisia or Clarkia. The state flowers of Montana and Idaho are Lewisia rediviva, Bitterroot and Philadelphus Lewsii, Mock Orange, named for Meriwether Lewis. William Clark is remembered with the lovely spring flower Farewell-to-spring, Clarkia amoena and the really charming Ragged Robin, Clarkia pulchella.
Plants are named for places, Festuca idahoensis; colors, Ribes sanguineum, Sambucus nigra; leaf shape, Artemisia tridentate. The plant’s growth habit is also described. Our favorite plant to hate, puncture vine is called Tribulus terrestris because it hugs the earth.
Learning how plants are named is a fascinating hobby. It might be something new for you to do during these quiet days of little activity.
By Bonnie Orr
Dehydrate to Preserve Fruits and Veggies – 8/30/2017
Thanks, Summertime; I am so glad you could come and visit once again. Because of you and your partner, sunshine, there is an abundance of all things good and growing. I know that I personally have an ever-increasing stockpile of produce that needs to get dealt with NOW.
Of course, some items are best used fresh from the garden. Zucchini is a prime example. I know there are people out there who take the time and effort to preserve this garden super star. For me, I prefer to enjoy it while it is in season and forgo any preservation techniques. It just isn’t the same eating a pickled, frozen or dried zucchini.
And since the alternatives to fresh aren’t nearly as good as the original, I let this one go on my long list of items to preserve. However, there are a lot of fruits, veggies and even flowers that are well worth the effort of saving. And for this reason, it’s a good idea to start working through the list so that winter is that much more flavorful.
At the moment I am focusing on things that fit easily into my dehydrator. Since I don’t have much time for canning at the moment, the dehydrator has been working non-stop. It takes up very little space and because it has a programmable timer, I can fill it to the brim and then walk away for the day knowing that when I return, everything will be ready to be packed into clean jars.
If you lead a busy life, dehydrating is definitely one preservation technique that will fit in with your schedule. Here’s a short list of some of my favorite items to dry:
Fruit: After traveling a bit this summer, I am reminded how lucky we are to live in a valley filled to the brim with fruit. If you want to experience the best stone fruit on the planet, there’s no better place to be. Since grocery store fruit can be downright depressing in the winter, I like to put aside as much as I can when the season is at its peak. Nectarines are one of my all-time favorites for preserving. I don’t bother with the hot water bath but head straight for my dehydrator. A dehydrated nectarine is one of the most satisfying snacks ever. They are great for school lunches and backpacking trips into the mountains. Other fruit that dries well are apples, pears and thinly sliced strawberries and melons. Avoid excessively over-ripe fruit since it can become a sticky, sloppy mess requiring a lot of scrubbing and soaking of your dehydrator trays later on.
Herbs and Flowers: I am about to start harvesting my medicinal flowers and herbs for the season. Some great ones to dry include calendula, elderberry, parsley, tarragon, dill, mint, thyme, sage and rosemary. Chamomile and Celeriac greens also do well in the dehydrator.
Vegetables: At this very moment my dehydrator is overflowing with peppers. We like to grow a variety called Jimmy Nardello, which is an Italian roasting pepper. It has relatively thin skin, making it a good choice for dehydrating and later crushing into flakes. The flavor is sweet and spicy. Kale is another great choice for the dehydrator. Crumbled, it makes a great topping for soups and baked potatoes.
Wherever your culinary creativity takes you, enjoy the journey. Eat well and happy gardening.
By Eron Drew
Use Prunings to Make Bentwood Plant Supports – 2/7/2018
While you’re bundled up and outdoors pruning those dormant shrubs and trees, consider recycling some of those whips and branches, transforming them into plant supports and decorative additions to your landscape.
A friend makes interesting plant supports — even a covered bench from castoff wood. Lewis County Master Gardener Sharon Tipping says, “I like making limb structures because they are from my own material (cheap), and they fit in with our more casual landscape.”
She and husband Jack live near Onalaska and teach log cabin building, hands-on classes that brings folks from all over. Obviously, they built their own home as well as several outbuildings.
As for her smaller bentwood projects, she explains, “They are good as a temporary, moveable plant support. I make fence sections that I can move around where needed.”
If something gets floppy, Tipping just supports it with a fence section, which can be tied to rebar or stakes in the ground.
She recommends saving two types of wood; larger branches for the main structure and bendable ones for curves and such.
Think of all those prunings cut from apples, pears and cherries. Water sprouts or long whips are very bendable, as are smaller cedar branches. For the structural part, fruitwood, vine maple, filbert, redwood and ash are best. Willow, poplar and alder don’t last as long.
“Willow is on the ‘poor keeper’ list because it rots soon when in the weather, but that’s our Western Washington weather, not yours,” she says. “It bends nicely and makes beautiful things, so I wouldn’t discourage anyone from using it in your area.”
Keeping wood off the ground, using bricks or rebar posts will lessen rotting.
Attach your completed panel to rebar or hefty stakes in the ground with tie wire or use lag screws for wood.
Deck screws work best for attaching the structural pieces (they have coarse threads and a weather-resistant, non-staining coating). Common nails pull out, although are OK for small bentwood structures. Except for delicate bentwood structures, pre-drill holes to prevent splitting, she advises. Tie all intersections of the panel with tie wire to strengthen it.
Her construction sequence includes: 1) gather limbs; 2) make a design, taking into account your chosen wood’s character; 3) build the outer frame, making sure it’s squared 90 degrees as best you can. Try larger, then smaller branches, experimenting as you go; 4) screw down branches to the main frame more than 1 inch in diameter and wire together all intersections; 5) lastly, mount on a support structure, whether rebar or wood.
If you’re serious about such projects, Tipping recommends the book “Making Bentwood Trellises, Arbors, Gates and Fences,” by Jim Long. You just might have fun doing your bit recycling some of those branches, as well as adding interest to your landscape.
By Mary Fran McClure
Gardening Practices
Garden Soil Testing: An Important First Step – 4/1/2015
Soil tests offer up some valuable information that often explains patterns you may already be seeing within your garden. Have you ever planted beets in one location and watched them flourish and then planted them in a new location where they languish and refuse to size up? Beets are very sensitive to soil chemistry. Often a small Boron deficiency can be the difference between a successful crop and a near failure. Although through observation you can pose plausible guesses as to the problem (after reading a myriad of articles on the subject,) it is much wiser to throw down a little bit of money and have a professional soil analysis done. This is especially true if you intend to garden in the same place for an extended period of time.
Several forms of soil tests are available. Some are more intensive and offer up a broader zone of information on trace mineral content including Boron, Zinc and Arsenic. Some are more specific to the most common deficiencies such as Nitrogen, Phosphorus, Potassium, Percentage Organic Matter and Soluble Salt content. The soil test will tell you the amounts (often in parts per million) present in your garden soil. It will also clearly lay out if more of a specific nutrient should be added for optimal plant growth and will give a recommendation on how much remediation is needed to reach optimization. The broader of the tests is more expensive, but should be done at least once to understand the basic soil chemistry of your gardening soil.
Contact the WSU Chelan/Douglas Master Gardener Diagnosis Clinic for recommendations on where to have your soil test performed. There are several options. By Eron Drew.
Put the fun back into your garden – 5/3/2017
No matter how beautiful your garden is, there seems to be one eye-snagging location that isn’t up to snuff. It could be the perpetually dry section of the lawn or the place where the petunias collapse in a coating of aphids or where the weeds overwhelm the cosmos without giving them a fighting chance.
We all have garden areas that challenge us. It can be hard to keep in mind that gardening is a relaxing, fun hobby that gives us pleasure when we fuss about the imperfections. You know the adage, “Doing the same thing over and over and expecting different results is the definition of insanity.” So rather than struggling, try something dramatically different.
Growing lawn grass under trees sometimes works when the grass is a fine fescue that tolerates shade, but it goes dormant in mid-summer during the heat. If you continue to overwater it, you have a good chance of killing your tree. Besides, the surface roots of any tree will outcompete lawn.
Substitute this frustration with flowers. Purchase large bags of potting soil. Cut three lashes in the bottom of the bag. Place the bag under the tree and cut as many X’s as you need to plant shading loving flowers such as impatiens or hostas. Water the potting soil well. Then place the selected plants in the X’s. Disguise the bag with mulch and enjoy a colorful display under the tree all summer long.
It is not effective to use herbicides on annual weeds. The time to use herbicides is as a pre-emergent early in the spring.
Since that time has already passed, the best way to deal with annual weeds, most of which have shallow roots, is to scrape them off rather than digging them out. Apply three to four inches of mulch to prevent additional weed seeds from growing; most weed seeds need light to promote germination. Weeds get out of control because the first dozen interlopers were allowed to flourish. Eliminating huge swaths becomes a gardening frustration.
And speaking of weeds, be sure to cut or pull all the listed noxious weeds that have shown up on the edges of your property or under the mail box or by the driveway. Get them out before they bloom and produce thousands of seeds.
Sometimes the most difficult part of your garden is landscape you inherited when you bought your property. At new homesites, landscapers overplant trees and shrubs so the garden looks “full.” Often these plants continue to grow cheek on jowl, becoming less attractive and less healthy.
Cutting out two overgrown plants in a cluster of three will create a happier garden space and will eliminate the worry of caring for plants that are beginning to fail. If there are shrubs that you think are ugly or a tree in such a wrong place that you are constantly whacking away at it, you have permission to ease your sorrows by eliminating the plant. Take it out.
Plants are not sentient beings, and there are no prohibitions against plant killing. If a foundation planting of an arborvitae is your difficult plant because it is a fire hazard, needs persistent pruning, smells terrible, is messy and is just plain ugly, take it out. Stir up the soil and plant some tall annual flowers such as zinnias or marigolds or sunflowers and apply mulch until you have seen just the right perennial you want to place in that spot.
The other difficult landscaping problem is perennial flowers that have turned into thugs or shrubs that have run amuck.
Many people plant fast-growing perennials such as Vinca minor or Michaelmas daisy because they spread fast and cover bare grown effectively without much effort. When you have reached the point of wanting to use that piece of sunny land for a specimen plant or to grow blueberries, dig out the thugs.
To reclaim this misused land, you must be diligent all summer and pull out any new sprouts or shoots. Herbicide is not an immediate answer to fight many landscape thugs. Pulling sprouts a few minutes after work once a week will do the job and preserve the area for your newly planted, personally-selected flowers or fruit.
See, you can return the “fun” to gardening!
By Bonnie Orr
Are you Firewise? – 5/17/2017
We live in a wildland-fire-prone area, there’s no doubting that. I’ve only been around the valley for a little more than four years, and witnessed some devastating wildfires.
Wildland fires can start by any ignition source, and typically come without warning. We invest a lot of time and money into our houses, and being “Firewise” will help keep you and your home safe. There are some simple, easy ways to keep your home protected from a wildland fire.
Being “Firewise” does not mean your home is fireproof, but it reduces the risk of loss from a wildland fire.
All vegetation is potential fuel for a fire. All plants will burn if the conditions are right. There are, however, plants that are FIREPRONE and those that are FIRE-RESISTANT.
A well-designed landscape around a home is a key step in reducing the risk of loss from a wildland fire. Maintaining that landscape is an essential step to providing defensible space for your home and firefighters when a wildland fire occurs.
The Home Ignition Zone begins with at least 30 feet of defensible space immediately around the home and extends out as far as 100 feet to 200 feet depending on the characteristics of the adjacent land. An easy way to manage the Home Ignition Zone is to break it into three separate landscaping areas. Let’s call these Landscape Zones.
Landscape Zone 1 is closest to your home. The area is 10 feet out from your home (5 feet if constructed with one-hour flame resistant siding). Nothing flammable should be planted or placed in this zone. Within this zone, low-flammable plants can be planted if they are maintained properly. That would include ground covers, vines, sod grasses, bulbs, annuals and perennial herbaceous plants.
Use only inorganic mulch in this area. Do not use organic mulches in this area. Red cinder rock is a mulch to consider in this area. Sometimes known as “lava rock,” it is a porous igneous rock that is flame resistant. Clean up any dead materials or vegetation from your deck, patio, and around your house. Keep firewood and propane out of this zone. Water regularly or consider a xeric landscape if you have limited water available or want to use less water.
Landscape Zone 2 is the area 10 feet to 30 feet from your home. Maintain a well-kept lawn or other suitable landscape in this area and avoid evergreens that can ignite easily and burn quickly. Use raised beds, rock gardens, stone walkways and patios to create visual interest while providing fuel breaks. In this zone, use ground covers, vines, sod grasses, bulbs, annual and perennial herbaceous plants, broadleaf evergreen and deciduous shrubs, and small and medium deciduous trees. Trees planted here should have a clearance from the house of at least 30 feet at the tree’s mature size.
Landscape Zone 3 is the outer zone, 30 feet to 100 feet from your home. In this area, the idea is to reduce the amount of fuels. If this area ignites, you want it to be a low-intensity burn and to reduce the likelihood of sparks and other materials being able to travel closer to your home. To manage this area, thin out vegetation, prune trees 6 feet to 10 feet high from the ground, and rake up any dead materials such as leaves or pine needles. Trees should have a minimum of 10 feet to 15 feet of space between tree crowns to prevent the spread of fire. Desired plants in this area are ground covers, vines, sod grasses, annual and perennial herbaceous plants, broadleaf evergreen and deciduous shrubs, conifers, and deciduous trees and grasses. Arborvitae, a popular perimeter privacy conifer, is a member of the juniper family and consists of 80 percent to 90 percent dead material behind its green facade. It is highly flammable and is not recommended.
Maintenance is essential to maintain a Firewise landscape. Plants listed as fire resistant but allowed to grow unchecked and poorly maintained can become a fire hazard. Proper maintenance of landscaping is crucial and cannot be ignored.
As for your home, consider using fire-resistant materials. Roofing materials come with a fire-resistant rating. Composition shingles and metal, clay and cement tiles provide the best fire protection. For exterior walls, consider using cement, plaster, stucco or masonry as fire-resistant materials. Although vinyl can be difficult to ignite, it can easily melt or fall away during a fire. Utilize double pane or tempered glass for windows, doors and even skylights. As for eaves, fascias, soffits and vents, enclose or cover them with at least 1/8-inch metal screen. Research shows that 1/8 inch is small enough to block embers and sparks so it does not ignite your attic space.
Anything attached to your home is considered part of your house. Fences can be separated from the house with a masonry or metal gate, and constructed out of noncombustible or flame-resistant materials.
Hopefully our wildfire season will not be as bad as the past couple of years, but becoming Firewise will provide a level of comfort just in case a fire races towards your home. There are some great videos and information at firewise.org to help you become Firewise and I encourage you to go check it out.
By Ken Muir
Solving the Mystery of the Ground Beneath You– 4/7/2017
We are blessed to live in a very geologically diverse area. The Cascade Mountain range provides our valley with unique minerals and soils.
It is important to know what type of soil or even geology you have because it will help dictate what your plants are benefiting from. Also, it is good to know the chemistry of your property’s soil. This will help you apply the right kind and the right amount of fertilizer to help your plants thrive.
The geology in our valley has evolved thanks to multitude of factors. Since the creation of the earth, the tectonics, volcanism and glaciation in our area have given us a pretty unique landscape. The majority of the geology consists of basalt, gneiss and a mixture of mainly igneous and metamorphic rocks with some sedentary rocks as well. This, combined with glacial till and the Missoula floods, helped create the landscape we are working with today.
In the Wenatchee area, the majority is clay, loamy soil mixed in with alluvium and cobbles from the Missoula floods. In East Wenatchee, the majority is opposite. It mainly consists of sandy soils.
There are variations throughout the valley and it is dependent on the geology and historical changes that scoured the landscape. While this might not be the exact characteristics of your backyard, it is good to know what your soil is characterized as.
Soil testing is highly recommended if you haven’t done so already. The more you know about what your soil is consisted of, the better you can understand how your plants are doing. However, it can be a little overwhelming because there are a variety of things you can test for.
The simplest and easiest method is to grab a soil test kit from your local gardening store. They are fairly cheap and usually come in a variety. They all should test for pH (acidity), nitrogen (N), phosphorous (P) and potassium (K). There are labs that you can send your soil samples into and they can provide more detailed analysis of your soil, but it does come at a larger expense.
The proper way to test your soil is to gather more than one soil sample or do more than one soil test. Doing only one test will only give you the results from that specific location, so if you wanted to get a comprehensive test of your whole garden, take random and scattered samples from all over.
It is not enough to just test your soil but you also need to understand the results. pH is how acidic or alkaline your soil is from a scale of 0 to 14. The higher the number, the more alkaline; the lower the number means it is acidic. A pH of 7 is neutral.
Plants have evolved to adapt and prefer certain types of soil pH. The best example is hydrangeas. The color of their flowers can easily indicate the acidity of your soil. The more alkaline the soil causes the flowers to turn pink; blue flowers means the soil is more acidic. This is why some people are disappointed when they purchased a specific blue-flowered hydrangea and it produces a white or pinkish flower.
There are soil acidifiers to increase the soil acidity and products like garden lime to reduce the acidity to achieve a healthy soil pH. If your pH goes too high or too low, then it can be detrimental to your plant and kill it. Nitrogen, phosphorous and potassium are all key to plant growth, but at just the right amount.
Each compound is responsible for different aspects. Nitrogen is commonly found in the atmosphere, but in order for plants to uptake it, nitrogen has to come in the form of either ammonium (NH4+-N) or nitrate (NO3-N). Organically, you can find these sources of nitrogen from manure and other organic wastes. It can also be found in some legume varieties that produce rhizobia, which are nitrogen-fixing nodules found on peas and soybeans roots.
Phosphorous is also naturally found from animal manure and in the soil. However, high amounts can leach into the groundwater or can runoff into nearby streams and lakes. There are also restrictions on phosphorus fertilizers for lawns due to phosphorous going into fresh waters and contributing to algal blooms and other issues. The amount of phosphate the soil is able to absorb and retain is also dependent on the pH of the soil.
Potassium (K) has a key role in the plant’s photosynthesis. It helps regulate how the plant breathes as well as how it creates proteins and starches. Potassium deficiencies can lead to stunted growth and yellowing of leaves (but yellowing of leaves could fit a multitude of symptoms).
Nitrogen, phosphorous and potassium are all found in variety of potency in fertilizers. After your soil test, make sure to treat with the correct amount.
Didn’t think your soil was that important? Well, think again!
Before you start digging and planting, think twice about what you are about to put your plant in, so you can have some insurance on a healthy and long-living plant. WSU Chelan/Douglas County Master Gardeners can help answer your soil composition questions.
By Ken Muir
Winterizing garden tools and equipment – 11/25/2024
While raking those last leaves for composting, many gardeners are hankering for other adventures such as skiing or enjoying pursuits in the warmth of indoors. Before moving on, take time to winterize gardening items and you’ll be ahead of the curve next year.
Not my favorite activity, but this one is too important to overlook. Next year will be less frustrating if we tackle these winterizing jobs now.
First in line is cleaning and sharpening tools. Tops on my list are pruners and loppers; they’re used often and get gummed up and dull quickly. A clean cutting blade is a pleasure. There are sharpening kits available, some more complicated and exacting, and one very simple one. The latter is just a small tool with a sharpening stone at one end. The trick is keeping the angle constant as you sharpen. Clean the blade first, then be sure to use a drop or two of oil as you sharpen.
Save yourself some frustration by cleaning and painting the wood handles of your hori hori knife, weeders and other tools. I use a sample can of bright orange paint, so the tools are easily spotted while working in the yard. Otherwise, those dull wood colors of well-used tools are easily camouflaged beneath leafy undergrowth.
Shovels should also be cleaned; if they have slightly rough wooden handles, lightly sand and then rub with boiled linseed oil.
Gas should be emptied from lawn mowers and other gas equipment, either by running them until they stop or pouring out the remaining and disposing of it properly.
Not exactly tools, but irrigation filters need attention also. The frustrating job of cleaning those little micro-sprinkler filters has suddenly become a snap. I found that by using my late husband’s dental pic, it takes no time to clean those little filters. It’s much better than going to the extent (and expense) of buying new ones every time they need cleaning or using a brush for a time-consuming cleaning.
On the subject of irrigation, I’ll share a quick fix on marking the direction of micro-sprinklers, although winter isn’t the right time to do this. Keep this in mind for next year as you get ready to restart your irrigation system. Using a Q-tip, take that handy little can of orange paint and walk around to each sprinkler that has a directional aim; dab a bit of paint on top of the sprinkler head centering the direction of watering. It’s greatly satisfying being able to avoid having to turn on sprinklers to see if they’re pointed in the correct direction and then getting wet while correcting them.
As for potted plants and containers, they’re vulnerable in freezing weather. I move my pottery containers into the garage; some still contain tropical plants such as canna rhizomes and mirabellas. In my Oct. 31 column, I shared how I save these plants year after year.
My antique wooden gypsy cart gets moved into storage and out of the elements. Several years ago, I replaced its decaying wooden base, added a good drainage hole, then painted fiberglass on the entire inner shell to protect that old brittle wood. With soil and plants added, no fiberglass shows.
Accomplish these projects and come indoors to enjoy a warm beverage and perhaps thumb through garden catalogs as you dream of a new and productive 2025 gardening year.
By Mary Fran McClure
Beginner Gardener: Basic garden care tips that make a difference – 7/1/2024
Gardening is one big science project. Your hypothesis is your garden plan — you envision a thriving plot of green lushness. You’ve prepped your soil and added your plants or seeds. You try to control the variables of sun, water and nutrients. Then, monitor and modify based on your results at least every two weeks. Monitor and modify, rinse and repeat.
Your plant babies will continue to need tender, loving care as they mature into functioning adults. They need the proper amount of water, nutrition, and protection from schoolyard bullies. Let’s look at the basics of garden care activities.
Water: Almost anything we plant in our garden needs supplemental water. Know what your plants need. Some do not like wet feet; others need constant moisture. Keep your soil moist but not waterlogged. Water in the morning to minimize rot and evaporation. Newly planted botanical beauties will need more water. As they get established, they generally require less.
The weather influences how much water your plants will need. They’ll need more in hot, dry and windy (sound familiar?) conditions. Water where the roots are. Rather than following a strict schedule, let the soil and weather dictate how much water is needed. Use a moisture gauge to determine the moisture near the roots of your plants.
Nutrition: Of the 17 essential nutrients, plants get three — oxygen, carbon and hydrogen — from air and water. The remaining 14 nutrients they get from the soil need to be supplemented by commercial fertilizer, compost or organic material. The primary nutrients a plant needs are nitrogen, phosphorous and potassium. In the garden world, we describe these as “N-P-K.” These initials are used on commercial fertilizers to describe the percent of each nutrient by weight.
Of the primary nutrients, nitrogen is the most deficient in our soils and the most important nutrient for plant growth. Use the results of a soil test to guide your fertilization efforts. Overapplication of fertilizer leads to it polluting our rivers and lakes. It is also detrimental to our plants. To learn more about fertilizers, download and read WSU’s “A Home Gardener’s Guide to Soils and Fertilizers (Home Garden Series)” found at bit.ly/wsusoilsfert.
Protection: While Mother Nature is a doting mom, sometimes she needs a little help protecting her flora from overzealous fauna. She takes care of the occasional solo bug thug. When a gang of bullies (infestation) arrives, She may need a helping hand.
Every bug plays a role in a balanced ecosystem. Beneficial bugs are required to pollinate our flowers and veggies and keep the bullies in check. When the gang of bully bugs appears, you might be tempted to grab a bottle of widespread murder agent with a name ending in “-cide.” Sadly, this practice often wipes out the beneficials with the bullies, leaving your garden hopelessly bugless.
Learn the difference between bullies and beneficials. Embrace the occasional bully. Welcome a chomped leaf or bud, knowing that your plant is playing a vital role in the natural order of things. If a gang of bullies appears, look for alternatives to widespread bug genocide. Besides chemicals, there are other methods of bully management. A stream of water can send aphids soaring off your plants. Incorporate plants that attract the beneficials that munch on the bullies. Don’t buy ladybugs to control aphids. The “ladies” will fly away when they awake from hibernation, just as they are genetically programmed to do!
If you must apply a pesticide, choose the most environmentally friendly option that will be safe for bees. Follow the package instructions carefully. Pesticide use can lead to pest resurgence. This happens when the beneficials who once lunched on the bullies have decided to dine elsewhere because there are too few bullies left for a feast. However, there may be just enough bullies left to begat more bullies. And infestation begins anew.
Another problem with broad-spectrum insecticides is secondary pest explosions. What happens here is that the murder agent kills off the primary bullies and the beneficials. And then an opportunistic new gang of bullies from another part of town moves in.
By Dana Cook
Beginner Gardener: Tools that you will put to good use – 6/12/2024
Like many new hobbies, gardening requires a few tools to get started. A trip to the garden center of any big box store can be overwhelming with the bewildering assortment of garden implements. A Google search provides hundreds of options just for weeding — Grampa’s Weeder, CobraHead Weeder. There is even a weeder just for cracks! And what the heck is a Hori Hori?
Before taking out a loan for your new horticultural hobby, know that you only need a few things to start. Cheap tools will not perform well and may require replacing, so don’t skimp on quality tools. Here are the basics:
Gloves: A durable pair of gloves should be your first purchase. While gardening is typically a safe activity, your hands require protection from thorns, blisters, chemicals and infections. Gloves come in a variety of materials. My favorites are those with leather or other durable material on the palm and fingers and breathable material on the back of the hands.
Shovel: Used for moving soil, aerating it and mixing in compost. A good garden shovel should have a strong shaft with a reinforced collar attaching the blade to the handle. Pay attention to how the blade is attached to the handle. This is the point where weak shovels will often break.
Hand Trowel: An indispensable tool for digging small holes for planting. Look for one with a comfortable handle and sturdy blade.
Hand Pruner: Spend your extra money on this tool essential for trimming and shaping plants, harvesting fruits and vegetables and deadheading. Most gardeners will agree that pruners are one of the most important and most used tools. Bypass pruners offer the most flexibility of all the variations.
Watering Can/Water Hose: If you do not have an irrigation system, you must haul water to your cultivated cuties. Consider the size, capacity and spout type when choosing a watering can. Free-flow spouts target individual plants, while a rose (sprinkler-type) spout offers a gentler, rain-shower-like flow. The “rose” can often be removed to create a free-flow spout. If your garden space is within distance of a garden hose, choose one that doesn’t kink and is easy to store.
If you still have some money to spend after getting these basics, here are a few other useful items:
Garden Kneeler or Pad: Your knees will be grateful to have something soft to rest on while you kneel to weed or lovingly tend to your flora.
Gardening Apron or Tool Belt: How often have I left my pruners outside in a garden bed? Mistakenly dumped them into the ‘Green Bin?’ Found them in other mysterious places? I’ve lost count. A gardening apron, tool belt, or even a 5-gallon bucket to keep your tools corralled is priceless, considering how much more efficient you can be with time otherwise spent hunting down your tools.
Wheelbarrow: I can’t set out to do even one garden task without my wheelbarrow – its uses are countless.
Hori Hori knife: Not to leave you hanging, a Hori Hori knife is a favorite among Master Gardeners. Hori is the Japanese word for “to dig.” With its serrated edge, the Hori Hori knife makes a great versatile tool for weeding, cutting through roots and trimming woody stems.
When choosing garden tools, pay attention to how they feel in your hand. Make hand motions that mimic using the tool to get a feel for it. How will it feel after hours of use?
Remember to maintain your tools. Keeping them well-oiled and sharp makes a difference in how they perform and in the health of your plant by making sharp, clean cuts. The Master Gardeners typically offer a tool sharpening service at the beginning and end of the season at our Third Saturday events at the Community Education Garden.
By Dana Cook
Your compost pile doesn’t have to go dormant this winter – 10//2023
Composting is an essential, environmentally important process that all homeowners could practice. It is a means to lessen the need for larger and more costly wastewater treatment plants that process the vast amount of organic material flushed down the garbage disposal.
By composting, we have an opportunity to build richer soil that is easier to work and holds water more effectively. Who wouldn’t want a garden with beautiful, hand-made soil?
Many people who compost during the summer allow their compost piles to go dormant because there is no longer a huge source of green material such as grass clippings and garden debris. The compost pile you started last spring can continue to work beyond summer.
The compost pile becomes dormant because of the lack of water, lack of new material and decrease of temperature. The micro-organisms, invertebrates (bugs and insects) and worms die when they are too cold, too dry and too hungry.
The downside of a dormant compost pile is that you have to start from scratch in the spring to rebuild the populations of beneficial insects and bugs, worms and micro-organisms.
Composting experts at Washington State University recommend that a compost pile be in direct soil contact so the microorganisms and invertebrates can enter the material and convert it to compost.
I have found that if I dig a depression 12-18 inches into the ground on the 3-foot-by-3-foot area the compost pile will sit upon, the compost pile more likely will overwinter. This is because the depression below ground level, with the composting materials stacked above, provides a warm refuge for worms and other actively working organisms. When the weather gets really cold, they will move into this lower, warmer, below-ground level.
I have dug down into this refuge and found big writhing knots of worms and lots of larva and pill bugs in the unfrozen refuge. In addition, different bacteria that thrive in cooler temperatures begin working on the materials.
It is also important to prevent the compost pile from freezing during the winter if you want to continue the composting process. In November, as the air and ground temperatures fall, I surround my compost pile with a barrier of straw bales or large plastic bags filled with leaves. An outer layer of wood chips also can provide insulation. It is amazingly effective.
When it gets really, really cold, and if there is snow, I use the snow from my driveway and heap it on top of the compost pile and all along the sides of it. (You never knew how important compost pile placement was did you?)
The insulation and additional snow protection have prevented my compost pile from freezing. I continue to add new material, mostly kitchen scraps, every day or so. Wood ashes are not a good addition to the compost pile because they clump and lower the pH of the pile. Too much water will drown your “wee beasties” because evaporation has slowed.
During the less friendly winter weather, I gather the kitchen scraps in a 5-gallon bucket in the garage. You need a place that is not too warm so the scraps rot, and not too cold so the material freezes. I add these stored materials to the pile when I have shoveled a path to the compost pile.
With our winters becoming less severe, this might be the season for you to overwinter your compost pile. You can ask a WSU Chelan Douglas Master Gardener for information about establishing an effective compost pile.
By Bonnie Orr
Ditch the tiller to try a different approach to gardening – 5/3/2023
I am going to suggest an alternative to till gardening based on the science of soil. Using a garden tiller may seem like easy work, but in the long run it causes much more work.
The soil is made up of individual particles of sand, clay and silt organized to incorporate air and water. It is not an inert mass, but a substance of living matter. Garden soil contains organic materials — large invertebrates like worms, centipedes, sow bugs, beetles — and thousands of micro-organisms that include mycorrhizal fungi and bacteria.
All these organisms create healthy soil. They break down organic matter so the plant’s roots can absorb the nutrients. The worms create tunnels that guide water below the surface and places for roots to easily move through the soil.
The living matter in the soil works together to make beneficial micro clumps that include pores, or open spaces, between the clumps. Healthy soil is 50% clumps, 25% water and 25% air.
When garden soil is pulverized by a tiller, all the soil structure disappears and there are no more soil clumps, no paths for water, no paths for roots and no place for air exchange, and many of the invertebrates are left dead. Often the soil becomes compacted when it is watered. All the remaining organisms must start rebuilding the soil structure from scratch.
Tilled soil often becomes compacted and hydrophobic, which means the water sits on the surface an inch or so rather than running down into the soil. This, in turn, creates a hard crust on the surface of the soil.
And need I mention that tilling brings weed seeds to the surface so they can germinate?
Along with not tilling, consider another change in the garden regimen: Don’t pull up the plants in the fall when they have been killed by the frost. Instead, cut them to the ground to get rid of any diseased leaves or pests, but leave the roots in the ground to add organic material to the soil and preserve the structure of the soil. Top the garden with a layer of leaf and grass clipping mulch to feed the worms and their friends over the winter. The soil will be ready in the spring for the gardener to open up little holes and place in plant starts or seeds. You can use a broadfork or spading fork to gently loosen the soil and make room for the plants.
If this sounds too great a departure for your gardening practice, go halfway by not tilling the garden paths. This allows some of the healthy soil structure to remain undisturbed.
If you have a vegetable garden that is a half-acre or so, maybe a tiller is appropriate, but for the typical backyard vegetable garden, tilling causes great damage to the soil.
Also, if you are establishing a brand new garden space, tilling is a great way to get the garden established and to incorporate organic material into the soil.
By Bonnie Orr
Coconut fiber is a renewable alternative to peat moss – 12/14/2022
I have used peat moss as my primary go-to potting soil base in most soil mixes for years, as well as a major soil amendment for improving the mineral soil matter in landscapes. It works amazingly well because it is lightweight, holds soil moisture extremely well and is readily available.
As climate change discussions “heated up” (no pun intended), I started thinking more about things I need to address. Peat moss is a specific type of peat, formed in areas with a high concentration of sphagnum moss. Peat moss is peat, but not all peat is peat moss.
One issue is that while peat moss is a naturally occurring product, it’s not sustainable to use at the current rate of consumption. It takes up to 1,000 years for peat moss bogs to form and mature and we are using it at a much faster rate than what it can be produced.
The other issue is once it’s harvested and used, it begins to release the carbon that was locked up in the cold, wet bogs as it breaks down over time. We are also changing a sensitive environment by removing the peat moss and its water-holding capacity from its natural ecosystem.
I must admit, the first time I saw coconut coir I was pretty sure it was a ridiculous idea. Why would I use it instead of sticking with peat moss? Coconut coir is a fiber that forms the husk around the inside portion of a coconut. With a pH around 6 it works well for most plants.
I am by nature usually open to change, and after using some coconut coir fiber-lined hanging baskets I started to appreciate how well plants did in them. The liners held lots of water, helping the soil temperature stay cooler. Of course, I was still using a peat moss-based soilless mix in the liners, so I had a ways to go before I got out of the peat moss habit.
The nice thing is coconut fiber can be ground similar to peat moss, chipped for use as a mulch or as a long fiber for basket liners. It holds moisture well and is more green-friendly since it’s a secondary food byproduct, and it lasts longer before breaking down than peat moss.
Coconut fiber can hold moisture, improve soil structure, help with aeration and drainage, and has become readily available in many garden centers. It was actually used extensively in the 19th century before peat moss was first widely used.
There are other alternatives to peat moss, such as compost, manure, wood chips, sawdust, leaf mold, pine needles and bark mulch. Most have a narrower band of use than coconut fiber and peat moss due to some restraints related to pH, fertilizer and moisture. That leaves coconut coir fiber a greener choice and a better alternative to using peat moss.
By Lloyd Thompson
Ideas for putting fallen leaves to good use – 10/23/2023
The autumn days are noticeably cooler and have fewer hours of light. These are the signals to trees to prepare for dormancy, so they get ready to shed their leaves. Not only do deciduous trees lose their leaves but so do conifers. Conifers shed the needles at the back of the branches nearest the trunk.
Let’s hope for lots of deciduous leaves this autumn. We missed the leaf drop last year because the weather was so warm until November. This caused the tree to hold on to its leaves.
Usually, a tree cuts off the water to the leaves, and the chlorophyll dies. This is why leaves ‘turn color.’ An abscission layer of cells cuts off the water and causes the leaf to eventually fall from the tree. Often the leaf drop is accelerated by wind or heavy rain or even snow.
A large maple tree can grow up to 300,000 leaves. What to do with the leaves? Most people sweep the leaves from the turf because heavy layers of wet leaves can smoother the grass crowns and kill them.
Leaves are not just a nuisance but also an asset in the garden.
Now, what to do with a million leaves
If possible, grind up the larger leaves with the lawn mower or the chipper. They will break down more quickly and be less likely to be blown around by the wind.
Piling them up on the veggie garden about 8 inches deep will keep down spring weeds, feed the worms all winter and enrich the garden’s soil. You will be amazed at how few of the leaves are left when you go to plant your veggie garden.
Cover the ground-up leaves with a tarp to keep them dry so you have the brown material you need to mix with green material for next year’s compost pile.
Pile the leaves 8-10 inches deep to deliberately smother the turf to prepare to create a new flowerbed.
Use them as mulch in your existing flowerbeds to protect perennials’ crowns, enrich the soil and deter weeds. I am amazed how rich my sandy soil has become as a result of using leaf mulch each fall. The worms take the leaves down into the soil to provide water-hold capacity, and their castings or droppings provide nutrients for the roots of the plants.
Place leaves in large plastic bags — not to throw them in the trash, but to use as insulation for your compost pile. Placing the bags around the pile or compost bin will keep the pile from freezing, and it will continue to work, albeit slower, all winter long.
Make a big pile and have a treasure hunt or a children’s wonderful play day with cider and cookies.
Leaves are a gift the tree provides us.
By Bonnie Orr
It’s time to plan next year’s garden – 9/28/2022
Yes, everything is still growing, and the garden is producing bountiful crops. All our work has paid off. But it is not good form to be patting yourself on the back. It is time to assess the landscape. Have you been taking pictures or videos all season to document what is working in the landscape and what may need a bit more attention?
First, consider failing plants. If you have a shrub or plant that is not thriving, the Chelan Douglas Master Gardeners can assist you in determining why. Send close up photos of the entire plant to chelanmastergardeners@gmail.com to help chart your course.
Then assess the wrong plant in the wrong place. My wild tiger lilies have thrived beyond my fondest dreams. They are spectacular, but they are also a menace since the pollen, which is indelible, has ruined many of my clothes when I have walked too close to the blooming plants. So I have been scouting places to replant them far from the walkways.
Some plants take too much time and energy. It is easy to resolve not to plant flowering plants such as Gaillardia, blanket flower, because they have to be deadheaded the entire season to look tidy. I know this is “dahlia country” but when you plant those gnarly tubers you have committed yourself to a regimen that highly resembles taking on a new puppy — and then the tubers have to be stored for winter.
Not all plants earn their keep. I think that an ideal landscape plant has four seasons of interest: blooms, beautiful leaves, radiant fall color and interesting shape, seed pods or bark to glow in winter. Lots of those choice plants are available and might be a replacement for the old workhorse, Burning Bush, Euonymus, that only shines for a few weeks in the fall.
Dry places in the lawn? The first step is to figure out if it is a defect in the spray patterns from the sprinkler. Put out empty tuna cans to measure the distributed water in several places, then adjust the sprinklers. If it is not the irrigation, it is time to check the soil to determine if is compacted so the water does not percolate into the soil. If the soil is too sandy without enough organic material, water passes too rapidly through the soil. If there is more than 1 ½ inches of thatch, the water may not be getting to the grass roots. It is possible to thatch in the fall. If the dry spots are under a tree, abandon the lawn there and this fall plant a ground cover whose roots will not compete with the tree roots. Tree roots will trump grass roots nearly every time.
Finally, consider removing the plants that have outgrown their allotted space and all season long must be whacked back to keep some semblance of order in the garden. This is a consideration in the vegetable garden, as well. I have found that growing melons, cucumbers and gourds on a trellis allows me to curtail their exuberant growth, to trim them back and to check for insect infestations.
Enjoy the fall and anticipate a new growing season.
By Bonnie Orr
Plan For The Worst When Making Garden Plans – 2/13/2018
It’s that time of year when many gardeners start to dream about how they want to tackle some much-anticipated landscaping projects.
Over the next few months, our mild winter will give way to a pleasant spring and (likely) hot summer. And although those displays of lush hostas and heavily blooming begonias look attractive now, it is hard to deny that we simply do not live in a climate that is well-suited to those types of mass border plantings. It can be a hard pill to swallow, especially if you have relocated here from a part of the country that has the moisture to maintain such verdant landscapes.
So what does one do when they are interested in maintaining a full and lush looking landscape in an arid and semi-inhospitable climate?
Certainly one solution is to forgo any sense of reason and water your garden until your water bill reaches the triple-digit mark.
A better solution would be to form a relationship with plants better suited to our climate. Fortunately, there are some great plants in the succulent family that are both attractive and easy to care for. Succulents live in partial to full sun and require good drainage but can thrive in relatively marginal soils. A small amount of water once a week is all these beauties need to survive.
Each year, I have tested out a number of different succulents at my own house. Some have proven hardy and some have not. Some thrive and some merely survive. The ones that thrive continue to look good with very little care.
So how do you know which will be the best for your own home? First, consider realistically the harshness of the climate within your yard. Is the space you intend to plant in full or partial sun? What is the coldest day you have experienced where there is not an insulating blanket of snow on the ground? Is the spot you intend to plant coarse and rocky or is there a skim of top soil? How is the drainage? What about foot traffic? Sit down and answer these questions honestly and your chances of success in planting succulents the first time around will be dramatically increased.
Our yard is considerably colder than most. We live in a constriction within a valley that causes us to receive more snow, wind and cold air drainage than a majority of places within Chelan County. For this reason, when I purchase succulents I look for ones that are hardy to zone 3.
Most years, our yard behaves more like a zone 4 or 5. Therefore, I know that if I select plants that are hardy beyond this threshold that they will be able to take whatever weather comes their way. I also know that when I plant my succulents in planters I will be able to leave them out during the winter months without worrying about mass die-off. Several of my planters have made it through the last three winters successfully without a need to re-plant. Each spring they pop back to life as soon as the sun warms the pots.
Some of my favorite succulents are very easy to come by. Matrona sedum is a tall purple cousin to the traditional ‘Autumn Joy’. These tend to reach 12” inches in height and bloom at the end of summer after most other flowers have come and gone. Lime Zinger stonecrop is another amazingly beautiful variety.
And don’t forget about the furry version of Hens and Chicks. These look great as table-top centerpieces. Have fun designing with sedum and happy gardening.
Eron Drew
Ease Your Body Into The Gardening Season – 2/20/2018
It has been an “open winter” in the Wenatchee Valley. The cherry tree branches are glowing pink, and the willows are bursting out orange. It seems that spring is truly on its way.
Many people are itching to get out to the garden to begin, if not gardening, at least preparations such as clean ups.
This time of year is the chiropractor’s favorite time of year because enthusiastic gardeners muscle into garden tasks on a radiant winter day — and their bodies are not prepared for it.
There are also people who dislike gardening because they seem to hurt themselves in the garden and get laid up for weeks with torn ligaments, sore muscles, tennis elbow, stiff knees. These gardeners have allowed the joy of gardening to be marred by physical discomfort.
Powering through garden chores is pointless. There is no bubble bath or hot tub that can soak this abuse away.
Because gardening is a choice, a hobby and a pleasant pastime, why beat yourself up? Even if you exercise regularly, gardening calls for different muscle use and different movements. You wouldn’t climb off the couch and run to the top of Saddle Rock would you? Neither should you jump off the couch and garden for six hours.
It is fine to do the exercises inside in a gym, but more pleasant, I think, to combine these with other activities, especially out-of-doors. If you can do yoga, that is the most systematic means of stretching your muscles. Stretching is really important for your body’s preparation for gardening.
If you are taking Rover for a stroll, pick up the pace to begin the process of stretching the thigh and calf muscles, which you will use in the garden to tote tools and lift loads.
Find stairs to climb to warm up your knees. Even walking carefully up and down a slope or a sidewalk going up a hill will help you gain strength in your knees. Go dancing and start swimming. Dancers and swimmer’s legs and knees are fit!
So many gardeners hurt their wrists while using their pruners and loppers. Practice grasping exercises such as a squeezing a ball, or knit or peel lots of potatoes. Hands and wrists get tired and achy if they have not been used before entering the garden. Swing a racket or hit a few golf balls to warm up the elbows.
Start with short sessions and listen to your body to be sure not to overdo the preparation exercises. Then, think about your body’s movements when you finally get out into the garden.
Kneel or squat as you weed, and don’t bend; this protects your lower back. Move your body rather than overreaching and pulling muscles in your back. Pull or push wheelbarrows or carts with your strong legs not your back. Using garden carts with a large wheel ratio helps you to maintain a healthy body. If you make many small trips to the compost pile with all your trimmings, you are less likely to hurt yourself because you avoid bending to lift huge piles of debris at the end of the day when your muscles are already beginning to tire.
Remember, there is more to gardening prep than just toning your body. Tune up your tools so they make your work easier rather than harder. Sharpen your tools with a file or a whetstone. Sharpened spades go into the soil much more easily.
Always keep in mind that gardening is not a competitive sport, and your garden does not have to be buffed and prepared for the season during one or even two or three weekends of work. Don’t lose the joy of gardening by gardening mindlessly.
By Bonnie Orr
Now is a good time to test your garden soil – 3/24/2022
As you ready your garden beds for flowers and vegetables, it’s important to know some things about your soil. Soil supports and nourishes your plants, so you want to know if it has the nutrients your plants will need to get off to a good start.
Soil is dynamic. Nutrients are continually added by the weathering of rocks, minerals and organic matter, and the actions of living organisms such as bacteria, fungi and microbes. Nutrients are continually removed by leaching and the action of microbes that convert plant-available nitrate to nitrogen gas. You also remove nutrients by harvesting your vegetables and flowers.
Before you start spring planting, you might want to check your soil fertility with a soil test.
If you have had your garden soil tested in the last three years, you probably don’t need another one. You should seriously consider a soil test if you are establishing a new garden, if you have added amendments and don’t know your current fertility level, if you have noticed a decline in productivity, or if it has been more than three years since your last soil test.
Home soil tests are available for prices between $15 and $30. You can get good results from them if you follow the instructions carefully, though laboratory tests are more accurate. If you are using a lab, contact them ahead of time for any special instructions.
To get a useful soil test, you need to collect soil from the rooting area, about 6 to 8 inches deep. Remove any roots, mulch or debris from the samples. Collect soil from at least five different areas in your garden. One way to do this is to sample in a “W” pattern, with a sample at each point. Put your five samples in a clean container and mix them thoroughly. Be sure each collection point is representative of your garden. If different areas have different textures, colors or fertilization histories, they will need separate tests.
A basic soil test will provide pH and levels of nitrogen, phosphorus and potassium, which are the major plant nutrients. Laboratory tests may also provide levels of secondary nutrients, micronutrients, or other tests upon request. Most laboratories will also include fertilizer recommendations.
For best results, base your fertilization program on a soil test. Fertilize several days before planting, incorporate well, don’t overfertilize, and enjoy your garden!
By Connie Mehmel
Improving Your Soil Can Make A Difference In Your Garden – 1/10/2018
Thriving plants need healthy soil, just as healthy people need a balanced diet. Except for sunshine and oxygen, plants get all their nutrients from the soil.
Soil is living, and if we’re good stewards and understand its needs, we continue to improve it. The first step is to determine your soil type — sandy, clay or a mix of the first two.
Friable soil (crumbly stuff with a mix of sand, clay and organics) provides spaces between particles so that organic matter, water and air are available to plant roots. Too much sand and you find your garden dries out quickly; too much clay and your soil is the last to dry out come spring. The latter contains more nutrients but its heavy density is tough on plants.
In the Wenatchee area, numerous ice age floods 13,000 to 15,000 years ago shaped our region, depositing pockets of sand and gravel in the inner curve of the Columbia River (East Wenatchee), while dropping off a pretty good soil mix on the outer elevated curve on the Wenatchee side. These are generalizations, as floods aren’t discriminating.
Whatever type of soil you’re dealing with can be improved with organic amendments. Healthy soil enables plants to better adapt to drought, mineral deficiencies, diseases and pests. Tiny soil organisms called mycorrhizal fungi are part of this organic good stuff that promotes healthy plants.
Compost is a winner for incorporating organics, although with a few hesitations. Too much use of fertilizers and pesticides can be detrimental to mycorrhizal fungi and other beneficial organisms, whether directly applied to your garden or from compost.
A pet peeve of mine is the rampant use of lawn weed and feed. Most lawns don’t need the herbicide portion, just a little fertilizer. While it doesn’t kill grass, it can remain in grass clippings for a short time—and grass clippings are a valuable ingredient of compost. Some herbicides and pesticides take several months to break down, so compost that is recycled fairly quickly could still contain lingering traces of these chemicals.
We each have our own ideas about using herbicides and pesticides. My take on them is to use them only when needed, not indiscriminately. For lawn weeds, every once in a while I walk around carrying a handy gallon sprayer of 2,4-D weed killer, spot-spraying dandelions and other broad-leafed weeds.
Don’t forget that mulch protects soil. Bark and mulches that decompose add organics as they settle in, improving friability.
As 2018 unfolds, focusing on ways to improve our soil is a long-term, worthwhile goal.
By Mary Fran McClure
Now Is The Perfect Time To Assess Our Stewardship Efforts – 1/24/2018
We live in an amazing community that supports a wide variety of activities, from recreational opportunities to transforming social concerns. We give money to our churches and organizations such as the Community Foundation of North Central Washington that fund projects that we believe in because they enhance our community.
Most people enjoy being stewards of endeavors that make us all healthier and happier.
One means of stewardship is undertaking sustainable garden practices. The protection of our natural resources is vital to us and to future generations. The improvement of air quality, water quality and soil health will sustain our environment.
January is the perfect time to assess our sustainable practices that enhance the environment rather than wearing it down or damaging it in such a way that it cannot be reclaimed or, at best, reclaimed at great cost.
As both a WSU Master Gardener and Master Composter, I am an advocate for practices that improve soil health. Backyard composting creates the materials that restore minerals and trace elements and some nutrients to the soil. Composted materials added to the garden or other places in the yard improve the ecology of the soil; they break up clay soils and add water-holding capacity to sandy soils.
And this is important because healthier soil creates an environment that fosters the growth of important micro-organisms. That, in turn, provides sustenance and homes for many invertebrates that continue to enrich the soil and make a home for healthy roots. Healthy plants are not as susceptible to insect damage, thus healthy plants don’t require the use of pesticides that kill not only a target insect but destroy an entire ecology of beneficial insects, bugs and spiders.
Healthier soil built with sustainable practices means that water conservation is possible all year around. In addition, less fertilizer will be wasted because the lighter applications of product will effectively reach the roots where it is utilized by the plant. This means that excess salts from heavy fertilizer applications and excess watering do not contaminate the groundwater nor affect our streams and rivers and the life that thrives in the water.
Sometimes, all the effects of sustainable gardening are not readily visible. Huge, expensive water treatment plants constantly need to be enlarged because more and more effluent is being washed down our sewers.
One of the effluents that must be processed by the water treatment plants is the organic material flushed down the garbage disposal. This non-sustainable loss of organic materials can be reversed when homeowners compost organic — that is plant — material either in a compost bin or by trenching the material into the garden. Daily, coffee grounds, tea bags, lettuce leaves, water from steaming vegetables is poured down to the sewer rather than being incorporated into the soil.
Considering how to sustain and conserve soil health will allow all of us to be good stewards in our community.
By Bonnie Orr
We Need To Protect Our Natural Surroundings – 2/1/2018
We live in a dynamic and unique ecosystem. Being on the east side of the Cascade Mountains creates a broad spectrum of environments. The geological history of our area— glaciers and the Missoula Floods — have carved the landscape we know today.
A watershed, also known as a drainage basin, is the area of land where all the water from precipitation collects in the same place, such as a river or a lake. The definition of stewardship is to supervise or take care of something. So combining the two terms, we can define a watershed stewardship as persons and actions that protect and improve the quality of a watershed.
The easiest step to being a good watershed steward is removing trash. We’ve all been encouraged to “Leave No Trace” or “Pack it in, pack it out”. This means to stay on the trail, leave it as you found it, take out all trash you brought in or see, and pack out human waste or dig a hole 6 inches to 8 inches deep and 200 feet from any water or campsite.
When we think of watershed stewardship, we immediately think of protecting a river or stream. The “Leave No Trace” concept expands the protection to fragile vegetation and riparian areas. The riparian area is the vegetated area that outlines a stream or lake. Since this area is fairly wet for most of the year, any disturbance can be harmful or even catastrophic to the riverine system.
Another consideration to be good stewards to the river, is to be mindful about any contaminants that can leech into the river. Contaminants have a cumulative effect as the water travels downstream and can easily alter the water chemistry of nearby rivers and lakes. Since we have sensitive and endangered species living in our local watersheds, it’s especially important to keep soaps away from water sources. We should also know of the proper amounts of fertilizer, pesticide/herbicide, oils, even ice/snow melt (liquid or salt) that can be applied. Phosphorous, for example, is commonly found in soaps and fertilizer and can cause large blooms of algae. Some types of algae are toxic to humans.
A watershed stewardship isn’t confined to the river and streams. It also includes caring for the forests, sage brush and all other landscapes. Proper management and understanding the proper ecosystem dynamics of these upland areas will help you become good stewards.
More recently, wildfires has become a hot topic. As a good steward, be mindful of these areas. Depending on the severity of the fires, it can be hard on the watershed to rebound and find equilibrium. It takes time for nature to heal from wildfires, and we can try to expedite this by doing some volunteer plantings of native trees and plants on burned grounds. This is to not only help establish new growth, but also to help stabilize soils made unstable due to the lack of plant roots.
Watershed stewardship is crucial to the vitality of the landscape we live in. We should be true caretakers of the beauty that surrounds us. If we don’t, then future generations cannot cherish what nature has taken centuries to create.
If you need help getting involved, look to your local land trust, conservation district, or environmental non-government organizations (NGOs) to see if there are any opportunities in the near future. Some examples in our region, are Chelan-Douglas Land Trust, Cascadia Conservation District, Washington Native Plant Society, Audubon and Wenatchee River Institute. I challenge everyone to be or become outstanding stewards to our land and to where we live.
By Ken Muir
A Home Gardener’s Introduction To Growing Degree Days – 11/29/2017
Most gardeners have put their gardens to bed, composted the debris and mulched with leaves. And believe it or not, many gardeners are already thinking about next year’s garden, wondering how to improve production, how to deal with insect pests and how to have a more carefree garden experience.
For hundreds of years, gardeners have tried different approaches to increase their yields or develop new plants. Many of their efforts have centered on how to plant for best germination and increased yields, and how to beat insect pests that decimate crops.
Farmers’ Almanacs were popular in the 18th, 19th and 20th centuries because they contained weather predictions and advice on when to plant. These may have been interesting reading in front of the wood stove, but generally as our country was settled from east to west, the gardeners encountered increasingly varied growing conditions that the almanac may or may not have touched on.
In many parts of the country, planting by the phase of the moon was continued into the mid-20th century. Root crops were planted by the dark of the moon and tall, vigorous plants by the light of the moon, etc.
Fortunately for home gardeners and farmers, in 1914 the federal government established the agricultural extension service at state land-grant colleges. Researchers and professors spent their careers figuring out how to grow crops more effectively. The research resulted in better crops, crops designed for particular areas, better land practices, and water and soil conservation.
Research that I have found enticing has been underway for about 30 years. It is called Growing Degree Days. GDD is a method of predicting life cycles of plants and plant pests. Our most familiar example is the prediction of when the apple blossoms will be in full bloom. Based on air temperature the tree’s blossoms develop at faster or slower rates, evolving from tight buds, to looser buds, to opening buds, to a percentage of open flowers and then to a tree filled with full blooming blossoms.
Growing Degree Day information can be applied to most fruit and vegetable crops. This information is valuable to gardeners, farmers and orchardists because it can guide their water, pollinator and pesticide applications.
Even more importantly, GDD information helps to predict when insect pests will hatch, create larvae and begin attacking specific plants. The information can indicate when a second or third generation of the pest will emerge, so effective treatments can be scheduled. The research has shown that root weevils become active at 600 GDDs. This is the pest the home gardener loathes because it causes unsightly crescent-shaped holes in lilac, peony and other leaves.
There is another aspect of Growing Degree Days that monitors soil temperature. Various vegetables and other plants’ seeds germinate when the soil is a particular temperature. The most familiar example for many gardeners in this area is the advice from the WSU Master Gardeners to apply pre-emergent herbicide to control crab grass when the Forsythia is in bloom. The forsythia blooms when the soil temperature is 50 degrees.
WSU’s agricultural weather website is a fascinating site for home gardeners because it provides information about GDDs for dozens of local areas. Anyone can access the site at AgWeatherNet. To view GDD, click on Crop Models in the left-hand column. You must become a registered user by creating a logon user name and password to access the Growing Degree Day models. It is free of charge and encouraged for all user to access data and utilize all the tools available for use within this website.
After exploring the local information, other sites such as the National Plant Network or MyPest Page – IPM Pest and Plant Disease Models and Forecasting can provide more information about cultivating a successful garden.
Bonnie Orr
Choose The Right Kind of De-Icer This Winter – 11/8/2017
I hate to say it, but winter is coming. Or is it already here? Either way, with colder, wet weather, we’re bound to get some slippery icy conditions on our walkways and driveways. And we’re always tempted to find the quickest solution: either shovel off as much as you can or find ways to melt the ice.
I’m guilty of throwing down de-icers and salt during harsh times, but have you considered the consequences from the chemicals? I will break the chemical compositions down so that you can make a right decision when you buy and use de-icer.
The whole idea of de-icing is based on chemistry. If we remember our grade-school chemistry, the addition of salt to water in an ice cube tray disrupts and slows the water molecules from becoming a solid, which in turn lowers the freezing point.
The typical salt we think of is sodium chloride, or table salt. Sodium chloride is readily accessible and the chemical structure allows it to come in different sizes from table salt to rock salt. Sodium chloride, though, is detrimental to plants, and it is marginal in terms of lowering the freezing point of water.
There are other chemical de-icing salts we commonly use for ice that are superior to sodium chloride. There are calcium chloride, magnesium chloride, potassium chloride and calcium magnesium acetate. All are designed to lower the freezing point to zero degrees F or even lower.
The best option for plants and pets is calcium magnesium acetate. It is derived from limestone and acetic acid, which have been proven to be non-corrosive and have little impact to plants. Since it’s a fairly new de-icer, it can be a little expensive but it will save you in plants and repair time in the long run. In all cases, use de-icers sparingly around plants and pets. Too high of concentrations will increase toxicity in the soil.
Plants in the winter are mainly dependent on root growth, so if the soil toxicity is high it will damage and potentially kill the plant. The other way de-icing salts can damage plants is by direct contact with the leaves or needles through the use of liquid de-icers.
For pets, make sure to read the label and see if it’s pet friendly. Some de-icing salts can destroy your furry friend’s paws, so a pet-safe de-icer helps them out during the winter time.
Also, remember to consider run-off areas. Salting uphill or upslope can potentially cause damage as ice melts and drains downhill. Also, excess runoff of any chemicals are capable of harming the groundwater, streams, rivers and lakes where other organisms and creatures live.
So when the weather turns icy this winter, keep in mind what type of salt you put down. It’ll keep your plants and pets happy as well as keep you safe walking around your house.
By Ken Muir
Survival Instincts Are Kicking In For Plants, Trees – 10/25/2017
Dang, the air is getting chilly and I’m not ready. My body is still acclimatized to summer and although I know that I will eventually adjust, at the moment I feel the need to wear lots of layers and sit next to a warm fire.
At our farm, we are in the midst of harvesting fall carrots. Sown in the middle of summer, these carrots are also adjusting to the changing of the seasons. Since they will not be able to make viable seeds this season, the carrots have started to focus their energy on staying alive through the winter so that they can try again when warmer weather and sunshine return. It’s this raw determination to survive that gives fall carrots their distinct and special sweetness.
Physiologically, the carrots’ cells are preparing to overwinter by increasing their sugar content as a form of natural anti-freeze. The carrot knows that survival through a hard, cold winter will not be possible without making this expensive choice. It converts some of its starch stockpiles into sugar. This sugar mixes with the water within the plant’s cells and keeps the cells from freezing and bursting during cold weather. It’s a similar concept to throwing salt onto icy roads to lower the freezing point (the temperature where water turns to ice) or adding anti-freeze to RV lines to keep them from breaking.
Throughout the natural world of the Northern hemisphere, perennials everywhere are adjusting their internal chemistry to prepare for the season of enduring.
When you are a plant, winter is not for thriving but for surviving. Leaves have been changing color for weeks now and are starting to fall to the ground. The process that makes this happen involves the growth of specialized corky cells at the junction of the leaf base and the stem. These cells form an abscission layer which blocks the flow of materials from the roots (such as carbohydrates and minerals) to the leaf.
For deciduous plants, this process is tied to the length of the night rather than the overall temperature. Although temperature affects the vibrancy of the colors we see, it is the number of daylight or nighttime hours that signals leafy plants to begin the process of shutting down for the winter. Leaves will not form again until after the tree has experienced a prolonged period of cold temperatures.
Even if there are relatively brief periods of warming during the winter, the tree will continue to stay dormant until a specific number of cold temperature days have passed. This process is known as vernalization and is the evolutionary adaptation that has allowed deciduous plants to protect themselves from budding out too early and risking the threat of freezing their first tender leaves or missing the window for pollination by flying insects.
As climate changes, plants in specific regions will also need to adapt their strategies of survival. Evolution continues to happen all around us as the plant world adjusts to both warmer and colder than usual temperatures throughout all of the seasons. Land races (plant varieties or species that are endemic to a specific region) will prove valuable to home gardeners and professional farmers alike since they will hold the key to finding new genetic combinations that are well-suited to a variety of temperature and moisture regimes.
As a home gardener, becoming a seed saver and experimental plant breeder will begin to give you insight into just how variable and magnificent plant communities really are. Watch your plants as they adjust to the changing of the seasons and notice if any seem to thrive a little more than others.
Have fun and happy gardening.
By Eron Drew
Changing irrigation practices as the calendar turns – 9/13/2017
Fall is around the corner and it’s time to start thinking about how you are watering your yard and garden. Overwatering your lawn or garden can have negative impacts to your plants, soil and the groundwater below.
This time of year, plants and trees start to transition into dormancy. As nights get cooler and the daylight becomes shorter, the transpiration process starts to change. What do I mean by this? During the summer, plants are utilizing the most water and carbon dioxide through a complex process called photosynthesis that allows plants grow by converting sunlight and carbon dioxide into sugar. Plants and trees use this sugar to grow.
When the temperature cools and daylight shortens, the growth process stalls. This allows the plant to transition into dormancy and the plant will begin to focus more on the roots. In turn, this reduces the amount of water the plant decides to uptake.
To put this in perspective, take a look at the river flows during this time of the year. Whether it’s current or historic flows, you can notice a slight increase in flow even though there hasn’t been any precipitation. This is the natural transition in transpiration, where the groundwater is not being taken up by trees and plants, allowing more water to flow into rivers. There are plenty of other variables that can contribute to river flows, but it is a strange phenomenon when there hasn’t been any direct precipitation.
For your lawn or garden, reducing watering allows plants to transition into dormancy. This is especially true for fruit trees, flowering trees and shrubs, and even grass. It allows the plants to focus on an established root system and prepare for the upcoming winter. If you’re worried about reducing water, just remember that you have cooler temperatures and the fall precipitation to help you out. Changing your water patterns can also ease your plants when your irrigation gets shut off for the season.
We’ll continue with some talks about fall gardening preparations and tips. As always, if you have any questions about diseases or pests, contact our Plant Clinic at 667-6540 and they will be able to help you out.
By Ken Muir
Tips for fall fertilizing your lawn and garden – 9/27/2017
Fall is a season of wrapping up loose ends in the garden. Hopefully you achieved what you wanted from the summer, but if not, there is always next year.
During the next couple of weeks, take the time to inventory your successes and failures. Think about your wish list for next year but also don’t forget to finish out the season strong by taking care of a few last details before the rain starts to fall (and then refuses to stop!). One of the last of the chores you can do for your lawn and garden is to consider a fall fertilization. Since the temperature is cooling down and we are starting to get a bit of moisture again, now is a great time to address this topic.
Here are a few tips on fall fertilization that will help you get next season off to a great start. Keep in mind that timing is everything. This is a task that you want to complete several weeks in advance of freezing temperatures since once the ground is frozen, there is little chance for the fertilizer to become active and available for your plants. Fertilization should also take place after active growth has started to slow. If you are still mowing your lawn regularly, it is too early to fertilize. If fertilizer is applied as plant growth slows it must contain at least 50 percent slow-release nitrogen to prevent it leaching from sandy soils. Find that sweet spot between the end of lawn-mowing season and the beginning of snow and ice season for the highest likelihood of success.
Fertilizer for Lawns: Lawns take a beating in the summertime. Between the hot sun, heavy foot traffic and general lack of a deep penetrating rain, lawns need a little extra time to refresh themselves during these cooler months of the year. In order to help your lawn recover, it can be a good idea to apply a slow-release nitrogen fertilizer in late September/early October. Recommended application is approximately 1 pound per 1,000 square feet. If snow mold is a problem in your lawn, it is recommended to eliminate the addition of potassium from your fall fertilizing. Recent research has linked snow-mold growth with a late-fall application of potassium-rich fertilizers. Although potassium can be beneficial to increasing the cold tolerance of warm season turf grass, ultimately it can lead to greater problems with grass die-off due to snow-mold growth. A soil test should be done to determine what nutrients your soil needs.
Fertilizers for Flowers and Vegetable Gardens: If you are done growing veggies for the summer, one of the best ways to fertilize and retain soil texture is to plant a cold-tolerant cover crop. There are only a few short weeks left for getting a cover crop planted and established. Some of the best mixes for this region include rye grass, vetch, fava, and winter pea mixes. Cover crops can be sown until approximately the second week of October … at the latest. Any later than that and the seed will not have enough time to reach a size large enough to really do much good for the garden. Cover crops can be allowed to overwinter “as is” and are turned under in mid-spring. The above mix of seed is filled with plants that fix nitrogen in addition to adding green matter to the soil. It is, certainly, my favorite method of fertilizing.
If cover cropping isn’t possible, applying a small dose of slow-release granular fertilizer high in nitrogen and low in phosphorus is also recommended for flowers and veggies. Followed up with a good-quality mulch of chopped alfalfa hay (hopefully weed free!) and you have set the foundation for a strong start to next season’s garden.
A note of caution: later-season fertilizing with quick-release nitrogen can stimulate growth that will have no time to harden-off before winter and cause plant damage.
Enjoy the cooler temperatures and, as always, happy gardening!
By Eron Drew
Make October count as a gardening month – 10/4/2017
The light is golden, the evenings are cool, the colors are radiant. It must be autumn, so the garden is winding down.
Yes, it is time to plan for next year’s garden. “Already?” you ask. Absolutely. Fall planning creates enjoyable spring gardening.
Next year’s garden will contain all the features that created joy for you this season. It will not continue to nourish the aggravators, and it will include space for innovation. Sound doable? Indeed, make October count as a gardening month.
Have you taken pictures this season of your garden delights? Those pictures will warm your heart and give you hope in the dark days of late January during the long days and nights filled with inversion-layer gray.
Snapping photos is the first project this October if you have not been keeping a record of your garden.
If you have been keeping a record of your garden, then you can review those pictures to see what needs to be done to make your late April garden more uniformly colorful or decide what to add in late June to fill in the blank spots. And, oh yes, I hope you have recorded those brown or weedy bits of your lawn (although most people photo-shop those out of their memory) that caused you so much grief.
This record of your gardening year will be the basis for the plan you design for October. What can you divide or move to create the contiguous color spots you have in your mind’s eye but have not quite materialized? What can you do about the unresponsive patches of lawn? Perhaps eliminate those trouble spots of grass and replace them with a more compliant ground cover or a flourish of annuals?
So that is working on the good parts of the garden. Now, what about the heartaches? In my gardening experience, there are two types of aggravators: Weeds and over-enthusiastic thugs, which usually include perennial flowers or ornamental grass.
The annual weeds — you already know this deep inside and intended to deal with this early in the summer — need to be eradicated before they go to seed. So that will be a New Year’s resolution in January … again.
For those perennial weeds, such as horsetail or morning glory, an October application of herbicide will help set them back, if it is then followed by an herbicide application in the spring when they first again appear. If you are diligent and apply herbicide to these ravagers in September 2018, you may have succeeded in knocking them back to manageable bits of annoyance rather than major aggravations.
Some perennials are just meant to thrive. But you don’t want them in the garden unless you are trying to populate an acre that would otherwise be filled with Russian thistle or knapweed. In a modest garden, these thugs out-compete their more modest, and often more attractive, companions. I will rue the day when I asked for a particularly colorful Michaelmas daisy, and the generous gardener said, “Don’t bother to thank me for these.” I should have known.
If you have a thug, October is time to grub it out. Take out all of it, even if you think you might like it a little bit. Don’t worry, you will have missed a few pieces that will color you garden next year. Be bold about grubbing out plants that irritate you or that spoil your intend garden plan. Mercy-killing is appropriate for non-sentient beings.
Is this Bonnie Orr’s column? What am I going to stress next? You guessed it, my favorite topic — soil. October is the time to integrate your compost into your flower beds and your veggie garden. Remember only 10 percent by volume. Your garden will thank you.
If you are creating an entirely new bed from sodded grass, be sure to use your compost in this area first. Some people dig out the turf. Others, who want to ride the Apple Capital Recreation Loop Trail, merely spread a 1-inch thick layer of newspaper covered with 4 inches of chopped leaves and grass over the newly intended bed. Then, in the spring, the now-composted grass and leaves are raked off, the paper put into the proper compost pile. Turn the dead turf with its organic material and mix in the new compost, and the new bed is ready to plant at the end of April.
By Bonnie Orr
Water Efficiency Will Pay Off In Those Not-So-Rainy Years – 6/28/2017
I am finding it a little amusing that on the day when I have finally sat down to write about water efficiency, it’s raining.
This spring has been remarkably wet and cool. It’s easy to forget that just a few short years ago, anyone involved in agriculture was wondering if there would be enough water to make it through the summer. During those few seasons, the maple trees near my home were already showing signs of water stress, catastrophic fires were only a few short days away from starting, and the creek in my yard had practically run dry.
This year is shaping up to be much, much different. The creek is flowing at a record pace, the vegetation is so lush I could almost swear I was back in the Midwest, and fire season has yet to really take hold.
So why talk about water efficiency when this summer is obviously shaping up to be a season of abundance rather than one of drought? In all honesty, this is the best time to start thinking ahead toward the future when we will likely experience drought again.
Have you given much thought to how you use water in your yard or landscape? According to a study by the state Department of Health, the short answer to this question is “yes.” Daily water consumption per individual has been dropping. In 2005, water usage per person was recorded at 207 gallons per day. This number was reduced to 131 gallons per day by 2010. Part of this drop in was attributed to efficient use of water in the home landscape.
Certainly, not everyone is taking steps to increase their irrigation efficiency, which means there’s still room for our community to continue to improve.
How a person chooses to water their yard and the type of system that is installed can have a dramatic impact on our overall water footprint as a society. This can be especially important during those lean years when water is in high demand but short supply.
For those of you who have not thought much about how you water your outdoor spaces, here are a few ideas on how you can reduce your personal demand on this precious and often limited resource.
1. Only water when necessary. Watch your plants for signs of water stress and figure out the best watering routine for your landscape. There are many plants that tend to go limp in the afternoon sun. This is OK and doesn’t necessarily mean that these plants require more water. Signs of actual drought-related water stress can include yellowing leaves, crunchy leaf margins and leaf dropping.
2. Water deeply. A deep watering once a week after established is better than a few short waterings every day. Most high water-use lawns require an inch of water a week. By watering deeply, the roots are able to move down into the soil and are better equipped to deal with hot, dry days.
3. Plant the right lawn. Pacific Northwest grass blends are available now that require less water and can summer survive dormancy.
4. Group plants together by their needs. Put all your high water-usage plants in the same bed with their own irrigation system. Plant xeriscape beds in areas that have lean soil and are hard to water.
5. Install a timer on your irrigation system. This will keep you from both overwatering and underwatering.
6. Fix your leaks. Inspect your irrigation system every season for leaks and fix them.
As always, good luck and happy gardening!
By Eron Drew
Mulch Serves Many Purposes During Winter – 11/9/2019
Most readers know that I consider applying mulch one of the most important garden tasks — it protects plants and enriches the soil. One of the aspects that I have not written about is how mulch helps preserve and protect beneficial insects.
All bugs and spiders and various creepy crawlies and wee beasties are going to be referred to in this article as “arthropods.” Arthropod means “jointed segments” which all of our insects, spiders, worms and many of our other soil dwelling organisms have. We know that 95% of arthropods are beneficials that provide support for healthy garden flowers and vegetables. We are probably most familiar with those insects that pollinate plants such as bees, butterflies, moths and even some flies and beetles.
There are also a host of “beneficial” insects that can attack the egg, larval, pupa and adult stages. In the spring and early summer, the “bad bugs” seem to get a head start munching garden plants. The beneficials eventually catch up and start doing their job.
One of the reason for the slow start for beneficials is that our gardening practice destroys the good guys overwintering environments.
When we totally denude the garden of all spent vegetation, exposing only bare ground (sure, it looks nice with the new snow on it), we destroy the protection that the dead leaves and stalks provide. Insects overwinter in the top few inches of the soil, and bare soil freezes more readily. Those brown seed pods, dead flower stalks and rolled up leaves harbor many insect eggs, larva and adult insects. The plant parts lying on the ground are protected from truly hard freezes since the moist soil gives off some residual heat. In addition, the snow covering the plant debris also provides a warmer environment for the insects.
There is a plus side besides just providing insectary sanctuaries. If you wait until spring to remove the garden debris, the work is about two-thirds easier because the leaves and stalks and stems, break down during the winter. So there is less material to compost or add to the green can. Even better, the decaying organic material is incorporated into the soil during late winter.
When the soil temperature reaches 40 degrees, insects begin moving about. Worms work all winter and move closer to the surface when the soil warms. The worms break down the organic material lying on the soil and carry it into the top few inches of the garden.
This year’s colorful leaves have finally fallen. I am always torn about what to do with this treasure. Do I grind them with the lawn mower and store them to use as brown material for the summer’s compost pile, or do I use them as insulating mulch on the flowerbeds and around the veggies in my winter garden. I just don’t have enough leaves!
The flower beds every year get about 8 inches of leaves. In the spring, I can see the places where the worms have incorporated the organic material into the top few inches of the garden bed. This means that the soil will retain water more effectively, and more air can get down to the plants’ roots.
Since our last few winters have been much milder than in the past, I have found that 10 inches of leaf and grass clipping mulch is effective at protecting the roots of tender perennials such as Black and Blue Salvia ( Salvia guaranitica).
I use 10 inches of leaves to mulch the carrots and beets that I harvest all winter. This amount of mulch prevents the soil from freezing and ruining the vegetables. I mark the rows with tall poles and add piles of snow if we get enough. Then those wonderful January evenings, going out into the snow and the garden to harvest frost sweet vegetable. When I dig down through the mulch, the sweet summer soil scent makes me yearn for May.
By Bonnie Orr
February Is a Good Time To Clean Up Your Gardening Act – 2/4/2019
December and January have been warmer than usual winters, and there certainly hasn’t been very much snow. So we are probably itching to get out into the garden and do something.
Generally, late winter is the time to prune many shrubs, trees and brambles. It is only mid-winter. Last Saturday was the Cross Day, the halfway point between the winter solstice and the vernal equinox. Deep cold can occur in February, so plants that have been pruned early may suffer winter kill on the ends of the branches. It is better to wait until the last week of February before yielding the loppers and saws.
So, what can you do now to cure the gardening itch? I find this is a perfect time to clean my pruning tools with soapy water. That is all that is needed to remove most dried sap. Then a thorough drying, and I apply light oil, or silicon to the moving parts so the tool is doing the work and not my arms and shoulders. Oiling wood handles makes them less likely to split into slivers.
Do any of you have hand pruners with dark-colored handles — those are the ones I am always misplacing in the flowerbed. February is when I paint those handles fire-engine red or hazard orange. It makes life so much easier.
As long as I am in a cleaning mood, mid-February is a great time to clean the rest of my hand tools, and clean and sharpen the edges of my shovels and spades.
Now you are itching to be out in the garden, so go out and make a plan.
Making a plan is what prevents us from getting overwhelmed by a gardening task. Do you know anyone who has gone out on an early spring Saturday, worked from dawn to dusk, got everything done and could not walk, bend over or use their elbows for a week after the extreme garden activity? By making a plan, you can divide up all the tasks and spread them out over a number of gardening sessions.
In the late winter and early spring, I like working in the sunshine rather than in the shade, so I prune the raspberries and blackberries in the morning, and when that part of the garden is no longer brightly lit, I clean my tools, put them away for the day and make myself a cup of cocoa. Then a few days later in the afternoon, in the sunshine in another part of my garden, I deadhead the seedpods from the ocean spray and the elderberry shrubs. Life is good in small doses.
When it is time to prune, remember that all of your spring flowering shrubs have already created their bloom buds. The Forsythia, lilac, rhododendron, azalea, Spiraea, quince, mock orange, Viburnum, Hydrangea and other spring shrubs do not get re-shaped or cut back until June when their blooms are finished
One last thought about February tasks: It is the time to apply dormant or delayed dormant sprays on your fruit trees to eliminate insect pests that damage fruit. Call the WSU Master Gardeners at 667-6540 to receive written instructions about what to spray on your trees and when to spray it.
By Bonnie Orr
Some Cautions On The Use Of Composted Manure – 7/7/2020
Compost made with livestock manure is an excellent soil amendment for vegetable gardens. Compost improves soil structure, provides nutrients and helps optimize soil pH. However, gardeners should be aware that cow and horse manure sometimes contains residues that can damage certain plants.
I recently visited the garden of a friend who had noticed discoloration and deformity on tomato and pepper plants after mulching with composted manure she had obtained from a nearby farm. The damage appears to be caused by residual herbicide.
The herbicides of concern are aminopyralid, clopyralid and picloram. These chemicals are used to control broadleaf weeds, including some toxic plants. They are sold under various trade names for use in pastures, commercial turf, residential lawns, grain crops, certain fruits and vegetables, and along roadsides.
Horses and cattle can safely graze treated pastures and feed on treated hay. The chemicals are not digested by the animals, but are excreted in urine and manure. The herbicides eventually break down through exposure to sunlight, soil microbes, heat and moisture, but the timing is variable. Field reports on herbicide breakdown range from 30 days to several years, with the slowest breakdown occurring in piles of manure and compost.
Plants vary in their sensitivity to these herbicides. Lettuce, peas, tomatoes and peppers (among others) are very sensitive, developing cupped leaves, deformed stems, and little or no fruit production. Squashes and mints are more tolerant. Corn, cole crops and tree fruits are not affected.
Before using composted manure, try to find out what herbicides were used on hay or pasture the animals have been grazing. If you are unsure, it’s a good idea to do your own test.
Testing is straightforward. Take several random samples from your compost pile and mix them thoroughly. Prepare three or more small pots with a 1:1 mix of compost and potting soil. Prepare the same number of small pots with just potting soil. Put a separate saucer under each pot, and do not let water flow from one pot to the other. Plant three pea or bean seeds in each pot, water carefully, and let them grow until they have three leaves, about 14 to 21 days.
If they all grow normally, you can probably use your compost with no problem. If the plants in the compost mix are abnormal, you may have a problem with herbicide residue. Washington State University Puyallup has a compost website that gives a complete description of how to do this bioassay at home, and I recommend it as a reference if you want to run a test.
If you think that your manure or compost contains herbicide residue, you can still use it on plants that are not affected. If you have already applied the compost and seen damage to sensitive plants, try tilling the soil and planting a less sensitive crop for a year or two. Then do a pot bioassay before planting any sensitive crop again.
Compost is a valuable soil amendment, but like all other gardening tools it requires your attention.
By Connie Mehmel
Leaves aren’t litter; don’t treat them like trash – 10/21/2024
For years, I dutifully raked the leaves that fell in my yard, and, after stuffing my compost bin with as many as I could, carried the rest up to the road. Until yard debris collection was an option, Waste Management took my leaves by the black plastic bagful and hauled them away to the landfill with the week’s garbage.
Last year, however, this fall ritual got interrupted. Instead of putting them in the green yard waste bin, load by load, I put all my leaves into a wheelbarrow and carted them to an empty corner of my garden so I could deal with them later. The pile grew until I had to push the wheelbarrow up a small mountain of leaves to dump it, and by the end of autumn, the pile stood at least 3 feet high at its peak.
Maybe it was because the leaves fell so late. Instead of chipping away at my leaf pile by filling up the green bins every other week, I left the leaves there. “Leave the leaves” is the new conventional wisdom, and that’s just what I did. When winter came, I forgot all about them.
Mother Nature is the ultimate recycler. No one rakes up the leaves in a forest, yet every year they seem to disappear. That is exactly what happened to my giant leaf pile. By springtime it had predictably deflated, but by the end of the summer, only a few inches of crushed, dry leaves remained. Below that lay dark, crumbly compost and some very happy worms.
I’m not sure how much I would have to pay for this compost at a hardware store, but the lesson I learned was surely more valuable. I knew that leaves would decompose; what I didn’t realize was that they could be broken down into beautiful compost so quickly. With a little irrigation, it took less than a year for that giant pile of leaves to be completely transformed.
A study by Rutgers University showed that leaves contain on average about 1% nitrogen, .4% potassium, .4% phosphorus, and 1.6% calcium, along with a long list of micronutrients, such as iron and boron. While compost in general is not a substitute for fertilizer, it provides many benefits that fertilizer can’t.
Leaf compost is almost 50% carbon, making it an important source of organic matter. Adding organic matter to your soil simultaneously increases drainage and retains moisture, improving its texture. Better yet, as microorganisms and small invertebrates feed on it and break it down, they slowly release the leaves’ nutrients and minerals, making them continuously available to plants.
It’s time to rethink the way we describe leaves in the fall. Calling them “yard waste” sends the wrong message. Leaves are not litter and shouldn’t be treated like trash. They are a natural, renewable, (and free!) resource that shouldn’t go to waste. They are my trees’ way of replenishing the soil they grow in, a last gift before winter.
Rather than sending them away to decompose elsewhere, reuse your leaves at home. If devoting space for one big leaf pile isn’t possible in your yard, spread them directly over garden and flower beds. Keep them moist so they don’t blow away. Not only will a thick layer of leaves return nutrients to your soil next summer, they will also provide winter insulation for your plants’ roots and prevent weeds from growing in the spring.
Unfortunately, lawns don’t do well if they are covered for too long under a thick blanket of wet leaves, so protect turf from getting smothered. To minimize raking, WSU Extension’s Calendar of Garden Tasks recommends running over dry leaves with your lawn mower and leaving the small pieces to break down.
While shredding leaves with a lawn mower will speed the decomposition process, consider the benefits of raking them up and leaving them whole. Many insects and other garden arthropods that may be living among them will appreciate not getting chopped up, and whole leaves will provide them with needed shelter and protection when winter comes.
By Julie Banken
Think Composting Isn’t For You? It’s Time To Re-Think – 5/13/2021
What are you doing with your lawn clippings? Are they going in the Green Can or making a moldering pile? What happens to your leftover vegetable scraps from fixing dinner?
It might be the time to set up a compost pile.
Some basic facts:
1. Compost does not smell bad. When it is working correctly, it smells like a walk in a conifer forest.
2. Compost is not unsightly nor does it need to be hidden away behind a shed.
3. A steaming pile of lawn clippings all slimy and moldy is not compost, nor is a pile of pruning and odds and ends of old sticks.
4. Compost is not an exact science and difficult to do.
5. Compost is not a fertilizer that will make your garden grow faster.
6. Compost takes at least six months to complete the process of breaking down the organic materials.
The most effective compost piles have to be in contact with the soil so the micro-organisms and red wiggler worms can activate the composting process. There is no need to buy worms or starter organisms.
The size of the pile is critical. A cubic yard is about right; 3-feet-by-3-feet-by-3-feet is large enough to create the heat to break down organic materials and small enough that all materials can be incorporated with minimum turning.
In North Central Washington, the compost pile has to be watered during the summer. Its texture should be about as damp as a wrung-out sponge. If it is too wet, you will drown your worms and other beneficial insects. If it is too dry, the microorganisms cannot utilize the organic material.
You do not need a container. Instead, consider these options:
– A pile on the ground works.
– You can build a cement block fence around it to hold it in place. (The micro-organisms will “eat” a wooden fence.)
– Hog wire does not work in NCW because the pile dries out.
– A commercial, black plastic bin is dandy and costs about $100.
– A tumbler is the poorest choice in NCW. The high summer temperatures dry out and “cook” the organisms that create the compost. It is difficult to have enough material at one time to fill the tumbler so it can work effectively.
In the fall, you can save leaves for next year’s compost pile.
This year, purchase straw. This dry material, usually brown, allows air to circulate. Composting is an aerobic process, and that is why air has to be available to all the organisms that are working to break down garden and kitchen waste.
Add no animal waste, no meat scraps, no fats — these materials break down by rotting, which is an anaerobic process, and can also attract vermin to your pile. Don’t add thorny things or weed seeds.
When the compost is black and crumbly and has no smell or bugs and no recognizable plant parts, it is ready to incorporate into the soil. Add no more than 10% by volume of compost to your soil. Compost increases the water-holding capacity of the soil. It also provides “loft” — air spaces for roots to move more easily through the soil. You can overdo a good thing by adding too much compost.
WSU Master Gardeners can give you more information.
By Bonnie Orr
Decrease Water Use In The Landscape, Even On The Hottest Days – 12/15/2021
If you were in Wenatchee this past summer, I am sure you are aware of the double water whammy; it consisted of super hot temperatures and wind, lots of wind.
Many people responded by using more water than they normally would, trying to keep their plants and lawns green. The extra water may not be doing much good, depending on your soil type and watering practices. Sandy soils don’t hold much water and the extra will just flow through the soil profile once it’s saturated. If you have a clay soil, that extra water may not be draining fast enough and can cause other issues to deal with.
There are some things, however, that can help keep your landscape looking good:
– The use of mulch cover helps shade the soil and reduces the drying effect of both sun and wind. It also keeps the soil temperature cooler and can help reduce a plant’s water requirement needs.
– Make sure your irrigation system has a uniform overlap that allows all areas to receive an equal amount of water. More sprinklers can actually save water because it allows a more uniform water application and keeps you from adding extra time to get the “dry spots” (which occurs from having sprinklers spaced too far apart when it’s hot or windy). Make sure sprinklers are watering the intended area without hitting sidewalks or driveways to help save water.
– The type of sprinkler can make a big difference on water usage; sprinklers that cause misting will result in more water evaporation and wind disruption, while drip or lower volume sprinklers will direct the water more toward the plants roots and not up into the air to evaporate.
– New plantings require more water while becoming established. If possible, plant in the fall when plants are less stressed from the summer heat and require less water as roots become established. I “renovate” grass areas by thatching and reseeding in early fall. This also works well for establishing new lawns and allows roots to continue to grow even after it starts to cool down. The big advantage is warmer soil temperatures for seed germination in the fall.
– Keep plants with similar water requirements grouped together. This prevents more water-needy plants from causing the overwatering of more drought-tolerant plants. Visit the Riverfront Xeriscape Garden north of Pybus Public Market along the Apple Capital Recreation Loop Trail to see low-water use plants that work well in our area. You can see plants and their growth habits and you can learn more about them on the Chelan County PUD demonstration garden website. The garden was designed and planted by WSU Chelan-Douglas County Extension Master Gardeners volunteers, who also maintain the area. Chelan County PUD co-sponsors the garden.
– Reducing the amount of lawn can also help save water since it takes lots of water for grass to stay nice and green. Careful selection of grass varieties can also help; some varieties take considerably less water than others. Kentucky bluegrass — a favorite lawn choice for its nice green color and softer feel for bare feet — uses more water. Fescue grasses use less water and can be easier to manage. Most lawn grass seed mixes contain several types of different grass types.
– You can save even more water and convert some of that green lawn to a less water-needy planting. Use natives or other plants that sink deeper roots and use less water to start with or even incorporate a bark or gravel ground cover.
Hopefully, Mother Nature will ease up a bit on the heat domes, atmospheric rivers and other nuisances in the years to come. If that is not the case, you now have several options to keep your lawn and plants looking good during our Wenatchee Valley summers.
By Lloyd Thompson
Beat the weeds by turning some of your lawn into flowerbed – 10123/2023
Many gardeners in North Central Washington have been talking about turf problems and how their lawns are weedier than ever before. The weed culprits seem to be spotted spurge, crab grass, Oxalis and Purslane.
These weeds established a foothold two summers ago when we had a week of intense heat that damaged the turf. The dead places in the lawn provided light to the dormant weed seeds.
In the succeeding two summers, these weeds have been having a field day and have overtaken many lawns. Correct timing for pre-emergent herbicides will help curb some of the weeds but be aware that there is a seed bank of thousands of seeds waiting for another opportunity to germinate.
It even might be time to reassess the amount of land you devote to turf. It is much easier to control weeds around shrubs and perennials when mulch is correctly applied. So, why not convert some of the lawn into new flowerbeds or areas of xeric shrubs? This is the time of year to undertake garden conversions.
The first step is to plan the perimeter by marking it off with a line of spray paint, so you create the area you have in mind. Take advantage of the cool weather because the lawn has essentially quit growing for the season, and the soil is dryer.
The easiest way to convert lawn to beds is to smother the turf plants. There are several easy ways to do this after you have determined the areas you want to change. These include:
After the final mowing, consider piling all the leaves and the grass clippings on the designated spot to the depth of 6 inches to 8 inches. If you mix the leaves and the grass clippings together, there is less likelihood the leaves will blow away. The advantage of using this system is that the worms and microorganisms will utilize the organic material over the winter and enrich the soil.
After mowing the lawn, lay down multiple layers of newspapers topped with a final layer of cardboard to secure the newspaper in place. Again, these organic layers will be broken down by the soil citizens.
Purchase wood chips and pile them at least 6 inches deep. Do not leave any open spaces between the chips where light can reach the grass plants. Remove the chips in the spring. Do not dig them into the soil.
The next methods are more labor intensive and do not enrich the soil. They merely kill the turf plants.
Cover the turf with smothering materials such as composite roofing to totally cover the spot.
Cover the turf with heavy gauge black plastic and pin it down with stakes. Do not use landscape fabric, which is permeable.
The disadvantage to the final two methods is that they can damage existing tree or shrub roots because they cut off the source of oxygen and moisture to those roots.
If you have made the commitment to have less turf, skimming up the lawn with a cutting tool such as a large flat-bladed spade or renting a mechanized sod-cutter will get rid of the plants. The bare soil should be covered with a mulch of chopped leaves to prevent weed seeds from germinating in the early spring.
Tilling up the turf could leave many grass roots to regrow, as well as the seeds from the nuisance weeds.
In the spring, the new bed needs to be spaded up because most turf areas are fairly compacted. Organic materials can be incorporated when spading the bed.
Have fun.
By Bonnie Orr
Questions to consider when deciding what to plant – 2/27/2024
“Well, it looked like a good place to put that plant …” When plants fail to thrive, some gardeners claim they must have a “brown thumb.” But that is not necessarily true.
Deciding what to plant and where to plant it in your yard needs a true understanding of your landscape and the characteristics of the plant you have selected.
Some questions to answer and some rules of thumb to consider:
What are the water requirements of the plant and how will they be delivered? Standing by the hose-end dooms the plant to failure because you do not have a means of knowing how much water you are applying. Too much water can be as deadly as too little water.
What are the light requirements for the plant? Full sun means 6-8 hours of direct sun on a place on the ground; it does not mean that it is daylight.
What are the full-grown dimensions of the plant? Do you know how wide and how tall the plant will be? You need to determine if you have enough square feet allotted to the mature plant. Constantly pruning a plant back is tiresome to you and adversely affects its health.
What is the plant’s cold zone designation? USDA has reconfigured the plant hardiness, the cold zones, in the U.S. Our area hovers in the 6-7 zone. The cold can be very slightly adjusted depending on the slope of your yard and the effective use of mulch to protect the plant’s root system. Even if it freezes to the ground, many plants with protected roots will re-sprout. Wishing you could still grow the plants you loved to grow on the West side of the Cascades is merely a fantasy.
Heat tolerance is more difficult to adjust since the plant’s physical makeup determines how much water it can deliver to leaves. Adding more water to the soil can lead to root rot. In addition, soil organisms are affected by heat. The American Horticultural Society has created zones based on the number of days over 86 degrees. Many plant labels now contain heat zone information. In North Central Washington, we range between zone 6 and zone 7. Zone 7 means 61-90 days over 86 degrees. NCW had 198 frost-free days last year, the highest number ever recorded locally.
What are the seasonable impacts of the plant. If it is deciduous, are the leaves going to fall on your deck or in your rock garden? What about the tree’s flowers, seeds or needles? Not something to look forward to, usually. If the plant is supposed to screen a view, what happens when the branches are all bare?
How does it rank for fire-wise safety. The placement in the yard needs to be considered if it is a plant likely to burn fast and hot. Those plants need to be at least 30 feet from the house.
How will the mature plant affect your view or your neighbor’s view?
How invasive is the plant? Is it going to reseed readily or spread by underground stems into areas where it has not been intended?
How will the plant thrive in the lawn? Usually, large shrubs and trees do not thrive when planted in the lawn because the lawn and the ornamental plant have different irrigation requirements. On the other hand, planting lawn under trees is not usually successful because the tree’s surface roots will claim the moisture.
Happy plant selection. Plan a fabulous garden this year.
By Bonnie Orr
Beginner Gardener: The dirt on soil – 04/15/2024
Renaissance man Leonardo da Vinci (1452-1519) said, “We know more about the movement of celestial bodies than about the soil underfoot.” It took about another 300 years for the study of soil to become a true science.
Today we know that soil is a complex, living, dynamic ecosystem of diversity created from the minerals of weathered rock, decaying remains of once-living things (organic matter), water and air. And it is the single most important factor in determining the success of your gardening efforts.
Not only does soil physically support your plant, but it influences the water and nutrients your plant babies need to thrive.
Soil Science Simplified
Ideal soil composition is 45% mineral, 25% air, 25% water and 5% organic matter. Good garden soil is like dark, soft crumbly cake.
Soil texture: Soil contains a combination of three basic mineral particles. From largest to smallest, these are sand, silt and clay. The combination of these particles determines its texture. Soils in our area range from sandy on the east side of the river to siltier on the west side. However, you may have different variations even within your own yard.
The easiest way to learn your soil’s texture is to grab a handful and roll it into a ball. Does it feel gritty and crumble apart? That is sandy soil. Does it roll-up slippery and sticky, and easily rolls into a sausage shape like Play Dough? Yep, that is clay soil. Does it roll up into a smooth ball, but crumbles when you try to roll into a sausage shape? Goldilocks would find your loamy soil “just right.”
Your soil’s texture determines its ability to hold water and nutrients. Sand does not hold water, quickly washing away nutrients. Clay, or “claggy”as the Brits say, soil can easily become waterlogged but holds nutrients well. Silty soil is the sweet spot of water and nutrient retention but can become dusty and blow away.
Soil Structure: The minerals of soil cluster combine with organic matter to form clumps. The space between these clumps allows water and air to move throughout the soil. Ideal soil structure is sponge-like, allowing water but draining the excess.
Organic Matter: The soil food web is perhaps the most important and easily destroyed component of your soil. A whole community of critters lives within your soil. A billion microorganisms may live in one-quarter teaspoon of topsoil. These are bacteria, fungi, and invertebrates that breakdown decaying plant and animal remains to create organic matter. This organic matter provides the all-you-can-eat buffet to your plants. Without this earthy ensemble, your dynamic ecosystem of life-giving soil is just dead dirt.
Best Soil-Health Practices
1. Get a soil test. A soil test can tell you the composition of your soil, its nutrients and pH.
2. Increase organic matter by adding compost. For more info on composting, check out the WSU Chelan-Douglas Master Gardener website bit.ly/cdmgcomposting.
3. Protect your soil’s structure by avoiding tilling.
4. Add mulch to help keep moisture, add nutrients and suppress weeds.
5. Avoid using any chemical with a name ending in -cide; fungicides, herbicides and pesticides impact your soil’s food web.
By Dana Cook
Thriving through change: Strategies for gardening in a changing climate – 10/21/2024
“Gardening in a Changing Climate” was the theme of this year’s Master Gardener Advanced Education Conference that took place in late September. While the message we often hear about climate change is usually doom and gloom, the speakers at this year’s conference provided a balanced view and some hope for our adapting to these changes.
Our planet has been 2 degrees warmer since 1900, and climate models predict another 2-4 degrees of warming by 2050.
Although July this summer was the hottest month on record, temperature is only part of the story. Changes in water availability will have the most significant impact.
Here in Eastern Washington, experts predict our current climate will intensify with the potential for extreme weather. We’ve already seen evidence of this with record-breaking temps during the heat dome of summer 2021 and the record snow fall in April 2022 that impacted the cherry crop.
The impact of climate change on our garden is a good news-bad news story. Let’s take a closer look at how the predicted hotter, drier summers and warmer, wetter winters may impact our gardening activities and what, if anything, we can do about it.
Warmer winter temps may lead to a longer growing season as the gap widens between our first and last frost dates. According to the nonprofit group Climate Central, our region has seen a 20% increase in the number of days plant growth can happen (known as growing degree days). This may allow us to try new plant varieties, start our gardens earlier and continue to harvest later. That’s assuming our gardens can survive the hotter, drier summers, which can cause leaf wilting, fruit damage and reduced growth.
Warmer days may also increase the rate of plant growth. While this may seem beneficial, quality is sacrificed for quantity when vegetables grow so quickly that they do not have time to accumulate sugars and nutrients.
Many plants, such as lilacs, need a certain number of hours of cool temperatures to trigger flowering, a process known as vernalization. Warmer temps, especially warmer nights, may require a different tactic such as changing planting times or artificial vernalization techniques such as storing bulbs in the fridge.
The most critical climate change factor for North Central Washington gardeners is the potential for decreased snowpack. Winter precipitation is expected to be more rain than snow. Sound familiar? More rain leads to early peak-season water flow and late-season drought.
Weeds are well prepared for climate change as they adapt quickly and can stay dormant in the seed bank, awaiting the ideal environment. We may see new types of weeds in our area. Same with pests and diseases — the type and intensity may change. For instance, we may see an increase in the spread of powdery mildew.
Some strategies to control the impact of some of these changes involve the good practice of the principle of “right plant, right place” and adding at the “right time” to take advantage of when water is most available. Utilize compost, mulching and cover crops to retain soil moisture and improve its quality. Take advantage of native plants and others that may be more drought tolerant.
Despite these changes, much of the natural world will adapt. Some of our traditional gardening advice may change as we see new challenges and opportunities. By planning for and observing the impact of climate change, we can be in a better position to adopt nature’s versatility.
By Dana Cook
Herbs
Bring summer to your dinner table when winter comes – 9/21/2022
Most culinary herbs grow in the heat of summer, or year-round in climates far from North Central Washington. With our long, hot, sunny days in the Wenatchee Valley, you can grow herbs in your garden in summer, but what about winter?
Why not try an indoor herb garden? There are many indoor herb garden kits available to purchase, or you might enjoy making your own.
Popular herbs that can be grown indoors include basil, thyme, oregano, parsley, cilantro and rosemary. Plant them in a commercial potting medium rather than garden soil. Though your soil may produce good results in your garden, it tends to contain weed seeds, insects and pathogens that should not be brought indoors. Most garden soil becomes crusty and does not drain well under indoor conditions.
Place your herbs in a south-facing window that receives at least six hours of sun daily. If you don’t have a sunny window, a fluorescent or LED grow light can do the work of sunshine during our short winter days. For best results, keep plants in a warm place away from drafts.
You need good drainage to keep your potting medium aerated and avoid root rot. A deep tray filled with small rocks under the herb pots allows you to see water draining, while keeping pots and roots, above any standing water.
Drying fresh summer herbs for use in winter months is another way to supply your kitchen. Choose a calm, dry morning to harvest, and pick them just after the dew has dried. You can use a dehydrator, following the instructions on your appliance. For air drying, remove the foliage at the base of each stem and bundle in groups of six to 12 stems with thin rubber bands. Rubber bands contract and hold as the plant material dries and shrinks. Hang in a cool place, away from sun and wind.
If you want to freeze herbs, make sure to freeze each cutting separately on waxed paper trays before bundling together for storage. A useful publication on growing and preserving herbs can be found on line at the Purdue University Cooperative Extension website, extension.purdue.edu.
Herbs are a wonderful way to make your dishes more interesting and they are a healthy addition to your diet. Although fresh vs. dried herbs change flavor and intensity, both are a welcome addition to any dinner table. They are full of nutrients, antioxidants and scrumptious flavor that can help limit the need for salt. They are simple to grow at home with little space, and also simple to preserve after summer days are past.
By Viva Mertlich
Dried herbs, spices within easy reach – 1/4/2017
Now that we are snuggled up and warm inside our winter cocoon, our kitchen has become a hive of creativity. Long nights mean more time for cooking and gathering together around the evening meal.
We have a drawer in our kitchen devoted to nothing except spices and herbs. It is probably the most important drawer in our whole house. Each jar holds a unique flavor and aroma — the secret to keeping dinner interesting.
As winter wears on, I watch our little stash of dried herbs slowly diminish until nothing remains except the thin film of powder along the bottom of the jar and the hint of a scent that reminds you of the former inhabitant. As the containers begin to empty, I start to make a mental list of the herbs I want to grow once springtime arrives again.
The key to drying herbs successfully is to own a nice dehydrator. Certainly, it is possible to dry herbs without a dehydrator but the process tends to take longer and the results are less consistent. A good dehydrator comes with a programmable thermostat and a timer with an automatic shut-off feature.
For most herbs, 11 hours at 95 F is adequate for proper drying as long as the trays are not overloaded, allowing for good air movement. After drying, herbs can be stored in glass jars until ready for use. I like to keep mine in our cool back pantry, out of direct sunlight. If cared for properly, the flavor is preserved and remains pungent.
One of the most versatile of the herbs that can be grown and dried is basil. If you like to cook, it is worth your time to begin experimenting with growing different varieties other than the standard Genovese basil. One of my favorites to dry is Thai basil. The color is a little darker, the leaves are more petite and the flavor is more pungent than its Italian cousin. Alternatively, lemon basil makes a great accompaniment to fish dishes and sauces.
Leaves should be stripped from the stems before drying. This will save space in your dehydrator. It is also much easier to strip green leaves off of basil stems than dried leaves later on.
Oregano is another standard herb that can be grown in our region and is suitable for drying. Without dried oregano, pizza sauce just tastes a little flat. In winter, it is an excellent herb for creating delicious Italian soups. Oregano is easy to grow in our climate and can spread rapidly if left unchecked. It can make a nice ground cover and offers up a profusion of flowers that act as a nectar source for beneficial insects. For drying purposes, the leaves should be harvested before flowering occurs since this is when essential oils are at their peak.
Rosemary is a necessary herb if you like to make focaccia bread. Several varieties do well outside in zone 6 climates and higher. We are right on the cusp of this range in our region. For those of us who live in the Upper Valley, Rosemary can be grown in pots and brought indoors during the winter. Rosemary is susceptible to root rot in wet soils, similar to lavender. It should not be overwatered and should be allowed to dry down from time to time. When grown indoors, it can be susceptible to whitefly. If whitefly becomes a problem, the plant should be disposed of or it can be treated using strips of Encarsia Formosa, a beneficial insect.
Some other favorites for drying include celeriac leaves (celery flavor), thyme, mint and stinging nettle.
By saving up the flavors of summer, winter cooking can turn from dull into the extraordinary. Happy gardening!
By Eron Drew
Growing cilantro in Eastern Washington – 8/12/2024
Gardeners are inherently patient people, but it’s easy to run out of patience with cilantro. Every spring, I optimistically plant cilantro seeds, imagining the salsa I will make in the heat of the summer. It is now August; the tomatoes are red, and the jalapeños are ripe, but my leafy green cilantro flowered and went to seed a long time ago.
It’s time to stop blaming myself for another failed cilantro crop. It turns out that while tomatoes and cilantro go together beautifully in a salsa, nature didn’t intend for them to be harvested at the same time, at least not in Eastern Washington.
There are significant differences between these two plants.
Tomatoes like it warm. They are happiest when their roots are at least 65 degrees F. Below that temperature, root development is slow and plants have a hard time taking up nutrients. In optimal conditions, tomatoes start producing fruit two to three months after planting, and will continue to bear throughout the season until they are killed by the first frost.
Cilantro, in contrast, is a cool-weather plant. It grows quickly, and its first leaves can be ready to harvest after just three to four weeks. Seedlings are surprisingly hardy and can survive temperatures that drop below freezing, but cilantro seeds won’t even germinate when the soil is too warm. Cilantro thrives in cool temperatures and shuts down in heat.
Unfortunately, this means that cilantro is not the kind of plant that you can sow in the spring and enjoy for the rest of the season. Unlike tomatoes, cilantro does not last through the summer. Long days and temperatures consistently above 70 degrees signal to hormones that time is up. At the hint of summer, they stop focusing on growing stems and leaves and shift operations to reproduction.
When cilantro forms a tough center stalk with fern-like leaves, it is about to make flowers that will ultimately develop into seeds. This process is aptly called “bolting,” as it happens very quickly, and often when you aren’t ready. Like a horse out of a gate, it is impossible to stop cilantro from bolting once it starts.
As the plant channels nutrients out of its leaves and into its growing flowers, cilantro leaves begin to fade and change color. They also change flavor. When cilantro starts to bolt, bitter aldehydes begin to build up, probably as means of protection from herbivores. Leaves that once tasted citrusy and bright (at least to most) will take on the flavor of soap.
By the time you notice the thickened flower stem in a bolting cilantro plant, leaves will have already changed their taste. Cutting the center stalk will slow the seed-making process, but cannot prevent it. Left unchecked, lush cilantro plants will become tall and wispy, and will be sparsely covered with thin, lacy leaves and umbels of tiny white flowers.
The good thing is that even if it no longer tastes good in salsa, cilantro still has a role to play in the garden. Its flowers provide food for pollinators, and look beautiful, too, as they fill in the negative space between other plants. Ultimately cilantro has a second life. Its flowers develop into small round seeds that, when they are dry, are better known as the flavorful and versatile spice called coriander.
Helpful tips for growing cilantro
While not as easy as raising tomatoes, growing cilantro throughout the summer is not impossible. Stay patient, and extend your harvest by trying these strategies:
– Choose slow-bolting seed varieties such as Calypso.
– Plant seeds directly into the garden, since transplanting plants with tap roots can cause stress that may trigger bolting.
– Sow a few seeds every week instead of planting all your seeds at once.
– Plant cilantro in the coolest part of your garden and where it will grow in the shade of bigger plants.
– Keep plants moist; to a plant, dry roots imply hot weather is coming.
– Plan ahead to “over-summer” cilantro by raising it in pots that can be moved indoors out of the heat.
– Start a fall crop outside in mid to late August when temperatures begin to cool and days shorten. Cilantro planted in late summer can still make it into a salsa with the last of the season’s tomatoes and jalapeños.
By Julie Banken
Helpful tips for planting a summer herb garden – 4/25/2023
There is almost nothing as wonderful as the aroma and flavor of fresh herbs on your plate. It is easy to start and grow a summer herb garden, and it is one of the most rewarding edible gardens you can grow.
Herbs do well in containers or in the ground, but they all need lots of sunlight to thrive. Just like a vegetable garden, you should plan for your herb garden to get a minimum of six hours of direct sun per day, and make sure you have healthy soil with good drainage. There are some herbs, such as cilantro, parsley and mint, that will tolerate or be more successful in part shade.
As a rule of thumb, herbs should be planted after the last frost in spring. Although some herbs — rosemary, parsley, sage, cilantro and mint — are hardier and can be planted earlier, most new plants will get off to a better start if planted when conditions are mild and conducive to growth.
Cilantro is a short-lived plant and can do well when planted earlier in spring, or even later in fall, if there is enough time before freezing weather to get a crop. Once cilantro bolts — sends out flowers and goes to seed — the leaves turn bitter, and a new crop begins; the dried seeds are called coriander. Cilantro bolts after eight to 10 weeks in the garden and when the roots of the plant get above 75 degrees. Salsa lovers may want to plan several staggered plantings of cilantro during summer.
Basil, like cilantro, is a leafy herb often used in copious quantities, such as for making fresh Italian pesto. Successive plantings for several weeks can give you a long and delicious season of this herb as well. Basil needs full sun to thrive.
Rosemary or mint may grow quite large and last well into early winter, when all the other fresh herbs are long gone from your yard. Be careful planting any type of mint; it is a very invasive plant and can be difficult to contain or eradicate. Many gardeners choose to grow mint in containers for that reason.
Most herbs are minimal maintenance in the garden and require low water, once established. When planning garden placement, do not forget that afternoon shade for your cilantro, parsley and mint will keep the plants from overheating and drying out during the sweltering summer months. Herbs can be sown early indoors from seed (follow directions on seed packets) in a south-facing window or with grow lights, or easily purchased in spring as small plants from garden centers around the valley. Be sure to check out the annual Master Gardener plant sale at Pybus Public Market on April 29.
Due to the relative ease of growing them, satisfyingly rapid growth of most herbs, and the flavor and healthy qualities they can add to your culinary delights, it may be worth growing an herb garden this summer.
Herbs are beautiful plants that can also add interest to your garden, and many are disliked by deer and friendly to pollinators (if you forget about them and allow them to flower). Feel free to mix your herbs into other areas of your garden or grow them in their own dedicated area; just make sure to be especially safe and thoughtful about any chemical treatments in or near an edible garden. Follow label directions for any chemicals used in your landscape.
More detailed information on many favorite herbs, and ideal growing conditions of each can be found on the WSU Extension King County Master Gardener website, bit.ly/tipsheet8.
By Viva Mertlich
Tarragon is an elegant garden herb – 3/29/2023
If you haven’t yet discovered tarragon, a gastronomic adventure awaits you. Its aromatic leaves have a pungent licorice or anise flavor that is a complement to fish, meat, vegetables or salads. It is often used in sauces and vinegars.
If you want to introduce this herb to your garden, be aware that three different plants bear the common name of “tarragon.” These are French tarragon (Artemisia dracunculus var. sativa), Russian tarragon (Artemisia dracunculus dracunculoides) and Mexican tarragon (Tagetes lucida). Before you plant, you should learn the differences.
French tarragon is native to temperate zones in Europe and Asia. It was cultivated in English gardens as early as the 16th century, and was brought to America by British colonists. It is a hardy, perennial shrub that is spread by rhizomes. It rarely flowers and any flowers produced are usually sterile, so French tarragon is almost always propagated from cuttings or root division.
If your neighbor has an established French tarragon plant with good culinary qualities, maybe you can get permission to take a few 6-inch tips in late spring or early summer when the plant is actively growing. Strip the leaves from the lower part of each cutting, set them in a seed-starting medium and keep them well watered until they have rooted. It’s a good idea to transfer them to pots with growing medium until the roots are well developed. Then you can plant them out in the garden.
Russian tarragon (sometimes called wild tarragon) is the same species as French tarragon, but a different variety. The leaves may or may not possess the licorice aroma and flavor of the French variety. Russian tarragon has a history of use as a medicinal herb, but is considered vastly inferior as a spice. Unlike French tarragon, it does produce flowers and seeds, so if you see tarragon seeds for sale in a catalog, they are almost certainly Russian tarragon.
Mexican tarragon is in the genus Tagetes, or marigolds. It has many names, including Mexican mint, Mexican marigold and pericón. It is native to Mexico and Central America, where it is a perennial herb valued for its aromatic leaves, which are used in the same way as French tarragon. The plant also has lovely little yellow flowers that attract bees and other pollinators. Grown as an annual in our climate, it thrives in full sun and is drought tolerant once established. I discovered this charming herb last year, and it has become one of my favorites.
By Connie Mehmel
Houseplants
Best Bets for Houseplants – 12/1/2016
– Bonnie Orr has compiled a list of houseplants in various categories that can help us make the best choices for our homes. Let’s start with flowering plants: Hoya, Lipstick, Christmas/Easter cactus, Peace lily, Begonia, Gardenia, Cyclamen, Hibiscus, African Violet, Citrus species, and Jasmine.
Next are the two lists I need most. First, easy plants: Sansevieria, Spider plant, Palm, Devil Ivy, Philodendron, Christmas/Easter cactus, Dieffenbachia, Shamrock, Wandering Jew, Peace lily, Aluminum Plant, Asparagus Fern, Grape Ivy, Swedish Ivy , Sedums, Cast Iron Plant, Begonia, Aralia, Prayer plant, Rubber tree, Velvet plant, Croton, Ti plant, Piggyback plant, Peperomia, Snakeskin, and Chinese evergreen. Note that some of these easy plants are also in the flowering plant list! Second, difficult plants: Ferns, Polka Dot , Fig, Norfolk Island Pine, Gardenia, Cyclamen, Hibiscus, Bougainvillea, Kalanchoe, African Violet, Mandevilla, Coleus, Caladium, and Copper Leaf. I like this category – messy plants: Ferns, Lipstick plant, Begonia, African Violet, Rosary Vine and Mother of Thousands. Fortunately this is a short list!
Finally, we have low-light plants: Chinese Evergreen, Aspidistra, Baby tears, Dracaena, Elephant ears, Iron Cross Begonia, Ivy, Maidenhair fern, Palms, Peace lily, Peperomia, Philodendron, Polka Dot plants, Devil’s Ivy, Rabbit-foot Fern, Sansevieria, and Ti plant. Enjoy your indoor plants!
By Casey Leigh
How to Care for Your Christmas Cactus – 12/1/2015
Although not as common, questions about houseplants are brought to the Diagnosis Clinic. For this month’s article, we decided to give information about a houseplant that often appears in stores in the late fall: the Christmas cactus, a popular houseplant brought from Rio de Janeiro in 1840. Dozens of species exist, and they bloom at different times. A short description of the plant will help a home gardener grow this plant successfully. In Brazil, the cactus grows as an epiphyte—that is, it grows on the branches of trees solely for physical support, taking its nutritional needs from the air and rain. The plant produces profuse elaborate blooms based on the change in the number of hours of light. Because we are at the 47th parallel, we have a dramatic change in the number of hours of daylight. This makes for perfect timing for this plant to bloom for Thanksgiving or Christmas.
Christmas cactus suffers when the temperature is less than 55 degrees. In late May, I take this potted houseplant outside to a place with bright, indirect light on the northeast side of my house. Remember, this plant’s ancestors lived on the shady branches of trees in Brazil. Water and feed it regularly with a low nitrogen fertilizer. In September I bring it back into the house. If you purchase one from a store at this time of year, be sure to have the clerk wrap it securely in several plastic bags and hurry home with it. Or, propagate it yourself, as it is easy to do so. If you see a plant you like, ask your friend for two or three joints of the petiole. Let it dry for a day or so, then place it in seed starting planting soil. Water the soil well. Cover the pot with plastic wrap and place the pot in bright indirect light. Do not water it again until the plant shows signs of new growth. NOTE: You have made a commitment. The plants can grow for generations. I know people who have inherited them.
The traditional Thanksgiving cactus has little horns on the petiole (leaf). The Christmas cactus has smaller petioles that are smooth and rounded. The plant has been hybridized to produce huge, complex flowers. The color spectrum ranges from pale orange to vibrant pink to shocking red.
• How to get the plant to bloom. Stop watering the plant in September. As the light lessens, the plant will put out flower buds. Watch for them carefully; water the plant well when they first appear.
• Then water once a month. If you water too frequently, the flowers and the buds will fall off (Does this sound familiar?) It does not need very much water. Over watering is the main cause of this plant’s death.
• A 65-70 degree room is best for the plant.
• When the plant’s flowers have faded, water and fertilize lightly. Then continue to water once a month until it is time to take it outside again.
During these short days, the cheery blooms of these cacti are a welcome color. Enjoy yours as much as I enjoy mine.
By Bonnie Orr
Low-light Houseplant Care – 12/1/2017
We have entered our low-light phase of the year—that means lots more time to curl up in front of the fire to read a good book. We will enjoy that—but our houseplants will not be as contented.
This week my portable houseplants returned from summer camp. Well not really, they just spent the summer in the fresh air on the north side of my house. They grew in natural light, and their leaves were regularly washed with the sprinkler. The venerable houseplants—mostly over 30 years old—are too big to move outside, but I moved them to a brighter window for the summer.
All the houseplants were fertilized once a month. The best time to fertilize is when they are growing rapidly in great conditions. The plants can utilize the fertilizer, and there is not accumulation of excess salts. More importantly, when the plant is growing in good conditions, the plant’s growth is vigorous and healthy. In low light conditions, growth forced by fertilizer is usually wimpy and succulent—just what the sucking insects ordered!
If your plants did not summer outside, a sane fertilizing schedule follows the seasons. For the spring equinox, provide fertilizer at ¼ strength (the water will barely be blue). For the summer solstice, fertilize at ½ strength, and for the autumnal equinox, fertilize at ¼ strength. Do not fertilize at the winter solstice since the inside light is barely strong enough to support plant growth. Of course, if you use grow light, you can fertilize at ½ strength for all the seasons.
This is the time of year to prune back unruly houseplants to get them ready to be admired by holiday guests. Get rid of dead leaves or long stringy growth. Then give you plants a shower—either in the bathroom or by placing plastic on the floor and gently squirting the tips of the leaves of large plants. We live in a windy, and often smoky, area, and you will be surprised how much dust is washed off the leaves of the plants. The plants need clean leaves for two rea-sons. First, light is essential for photosynthesis. A dirty surface reduces the amount of light that reaches the leaves. More importantly, dust is a hiding place for insects, especially red spider mites that love hiding the in the dust that provides anchors for their minute webs.
This is also the season for tough love. If one of your plants has been languishing for several seasons and has never regained its vigor, toss the plant out. I know this is hard. Twenty years ago I planted a coffee bean and have been nourishing my coffee tree, but it has become a magnet for scale insects which can rapidly infect every nearby plant. So I kissed it goodbye at the compost bin. It was difficult, but if I can do it, you can do it. One of my Christmas cactus has been limping along for the past year. The compost worms are enjoying that plant as well.
If you bathe your houseplants, fertilize moderately and eliminate the weakened plants that will become susceptible to insect infestations. Now you should have more time to sit back and read!
By Bonnie Orr
Show your indoor plants some love this winter – 12/21/2016
Just when you thought you were done with gardening, there are those precious indoor plants that need your attention.
Indoor plants give a nice characteristic and ambience from their greenery. They also provide healthier air by filtering the air in your home.
There are a variety of indoor plants and their maintenance can vary, but for the most part I’m going to try to cover anything from your Christmas tree to a cactus.
As a rule of thumb for any plants, they all need water, light, nutrients and the right climate to survive. Those rules still apply with indoor plants.
The appropriate amount of water needed is based on the plant type. As with any potted plant, the proper amount of water and consistency is key for longevity. You do not want to stress the plant with periods of flooding and drought. The easiest way to test this is by placing a finger in the pot and seeing how moist the pot is. Also make sure the water you pour is room temperature and your plant is in a well-draining pot.
Water alone isn’t enough. Make sure to give your plant some fertilizer throughout the year.
Light and climate are also important. Plants need sunlight to induce photosynthesis, which is a process to create food for plants. Ideally, place your indoor plant in a location where it can reach sunlight. If sunlight isn’t an option, there are a variety of alternative lamps that provide equivalent sunlight for plants to go through photosynthesis.
Provide at least six hours to eight hours of indirect sunlight for your plant, and a few more hours for flowering plants. As for climate, keep plants at room temperature (65 F to 75 F). Most indoor plants are acclimated to the warm temperature so it’s key to have it in that temperature range.
Pests and disease can occur indoors. Monitor your plants and check for any changes in growth, diseases or infestations. Remove any foliage and dust from plant. Dead foliage can attribute to disease and attract unwanted pests. Dust can prohibit sunlight and the ability to breathe. To clean your plant, wipe them off with a moist, soft cloth and use an insecticidal soap. This will help prevent any transfer of eggs or tiny insects.
There are plenty of benefits from indoor plants. Just keep these few things in mind and you can have a thriving plant throughout the year, even if you don’t have a green thumb. I hope everyone stays warm.
Happy holidays and see you in the new year!
By Ken Muir
Overwintering tropical plants is economical and rewarding – 10/30/2024
Salvaging expensive plants always gets my vote. Many tropical plants can be saved year-to-year by overwintering in an enclosed garage or area that doesn’t freeze.
Yes, those lovely tropical mandevillas and cannas you see lining garden store shelves during spring and summer can be saved. An added plus is how much larger these plants will develop with year-to-year growth rather than starting from scratch every year.
On the other hand, I don’t try to save my sweet potato vines because buying little starts next spring is economical, and they grow quickly.
These steps are how I save my mandevilla vine and cannas.
Popular mandevillas sold locally generally have either red or white trumpet-shaped flowers. They bloom all summer and well into fall, definitely making them an attractive vining plant that deserves attention. Native to Central and South America, this woody-stemmed climber does well on a pergola or trellis to show off its blooming profusion all summer and into fall.
It prefers warm temperatures but not hot; it’s best located with morning sun and afternoon shade. My vine faces east with at least six hours of morning sun and then afternoon protection next to the garage. This also provides some wind protection.
Plant in quality, well-drained potting mix for long-term care. Use a large container but one that can be moved. I have left my healthy mandevilla in the same mix and it seems happy with doses of light fertilizer during the growing season. Water whenever the soil begins to feel somewhat dry.
I’ve saved my three- or four-year-old mandevilla by simply moving it into the garage for overwintering in late October, before heavy frosts.
The other tropical plants I overwinter are cannas that I grow in large pottery containers. After a light frost, I move them, pot and all, directly into the garage. I cut off foliage and allow the rhizomes to just hunker down for the winter. A light watering not more than once a month seems to keep them healthy. Less water is better than too much, which can cause mold and decay. Too much water and too frequently is the most likely culprit for damaging the rhizomes.
The real trick in overwintering these tropical plants is not overwatering while they’re essentially in a state of no growth.
You can either dig and divide rhizomes when you’re moving them into storage or wait until early spring when a few new sprouts begin appearing. I carefully separate those rhizomes, saving the new healthy ones and repotting them in containers. They prefer warm soil, so if planting outside, put them in a protected, sunny location and wait until the soil warms. Cannas like conditions similar to tomatoes; they’re laggards when put out in cool weather and need warm temperatures to thrive.
Once we have warm weather, cannas provide interesting leaf patterns as well as spikes of colorful blossoms all summer.
Is this the year for you to try overwintering your tropical beauties?
By Mary Fran McClure
Tips for growing the orchid houseplant – 11/9/2016
Some people are simply gifted when it comes to the care of indoor plants. I am not one of these people.
To compensate, I like to blame my lack of skill with houseplants on my house versus my shortcomings as a gardener. I speculate on what might be happening in my home environment that leads to the inevitable demise of nearly every indoor plant I have ever grown. Maybe there isn’t enough light. Maybe there’s too much light. Maybe there is a draft. Maybe there isn’t enough air movement. Maybe it’s too dusty. Maybe … maybe … maybe.
And because I seem to have a black thumb when it comes to house plants, I have always avoided things that seem finicky and/or expensive, like orchids. Over the years, I have heard horror stories about how hard orchids can be to care for and so they ended up inevitably at the bottom of my list of plants that should be put under my personal supervision … as much as I really, really wanted one!
Well, over the last couple of years, I have received a number of very stunning orchids as gifts. And a crazy thing has happened … I haven’t killed them! In fact, recently one of my oldest orchids re/bloomed for the first time ever. With the appearance of the first new buds I suddenly became filled with a growing sense of hope. Perhaps orchids are really the type of houseplant I should have been caring for all along!
So here’s a little information on caring for orchids that maybe you will find useful especially if you share the same talent I have for killing indoor plants.
♦ First off, orchids like bright indirect light. Turns out that the windows at the front of my house receive direct morning light that eases into indirect bright light as the day progresses. This seems to be the optimal growing conditions for my little green friends. My front windows face almost due east; direct light into my house only lasts about an hour before the movement of the sun and the bottom of the roof block the most intense rays.
♦ Secondly, I fairly regularly forget to water my orchids for up to two weeks at a time. It seems that orchids don’t really mind being forgotten about and prefer to be watered about once or twice in a two week period. They detest standing water since they behave more like an air plant and they prefer to have dry feet but high humidity.
♦ Orchids like air circulation. My orchids are all directly inside my front door. The air movement from the door opening and shutting is a good thing in this situation. Orchids like the draft.
♦ Orchids like a little humidity. Since every couple of weeks I give them a gentle bath with a shower head to wash the dust off their leaves, this helps to keep the humidity high around the plants in between their regular watering.
♦ Finally, orchids love temperatures between 65 and 75 degrees Fahrenheit. Our house has its thermostat set to 68 degrees, which is the most comfortable setting for our family. That falls right in the heart of an orchid’s preferred growing range as well.
So, basically all of the characteristics about my house that make it hard to grow other indoor plants are really the optimal conditions for one of my very favorite flowers. Accidents can turn into the best surprises. Hopefully you will find your perfect indoor plant companion too! Happy gardening!
By Eron Drew
Think indoors for tropical fruit – 12/7/2016
I am definitely in a tropical mood lately. Short, gray days make a person crave warm trade winds and sunny skies.
And although our climate here in Washington does not lend itself to growing exotic fruits like rombutans or starfruit (someday, when I become a billionaire, I am building a house-sized greenhouse!), it is possible to force a few other equatorial treasures to grow indoors, with a little assistance.
Probably the most common and easy to grow tropical fruits are the miniature versions of lemons and limes. Both the Meyer lemon and Kaffir lime can be grown as larger houseplants. Both can reach a height of approximately 3 feet and will be limited by the size of the pot they grow in.
As with most houseplants, always choose a container that is slightly larger than the root ball. Make sure the soil does not become waterlogged since citrus are susceptible to disease and root rot when overwatered. Add stones to the bottom of the pot before adding the soil mix for guaranteed drainage and increased air flow. There are special soil blends created just for growing citrus that have a pH between 6 and 7. These mixtures tend to have a higher loam content and are the preferred growing medium for indoor citrus.
Lemons and limes prefer to be kept in a temperature ranging between 55 F and 85 F with an ideal temperature of 65 F. They like to have airflow around them provided that the air is moist and not dry. Sometimes, in drier climates, it is recommended to use an additional humidifier near the plants to retain air moisture.
These little gems also require at least 8 hours of sunlight but prefer 12 hours whenever possible for good fruit set. Adding a supplemental grow light is recommended, especially in the winter time.
Whenever possible, choose a near-permanent location for your citrus since they do not enjoy being moved once they start to become settled. After the following criteria have been established, citrus are relatively easy to care for and maintain.
The Meyer lemon will produce blooms over the course of a month or two every spring. The fragrance from the small white blossoms is intoxicating and uplifting … like a tropical perfume. As if this weren’t enough of a reason to grow these small bushes, they also tend to produce up to 10 or so dainty, sweet-smelling lemons each year … or fewer if the plants aren’t particularly robust. It takes a long time for the fruit to ripen, so be patient. Once ripe, the flavor is really incomparable to any lemon you have ever purchased from the grocery store.
Kaffir limes are similar to growing Meyer lemons except that in addition to the incredible fragrance you receive from the blossoms and fruits, the leaves are also used as an excellent (necessary) addition to most authentic Thai and Indonesian recipes. It is incredibly satisfying to pick the leaves off of your own tree for use in some delicious home-made tom kha.
Meyer lemons and Kaffir limes can have issues with scale, spider mites, mealy bugs and aphids. All of these problems can be avoided by purchasing healthy stock from a reputable nursery and by being an attentive and watchful gardener. If you notice a problem, deal with it immediately.
With care and patience, citrus can be an attractive and tasty addition to your indoor growing spaces. It’s the little slice of the tropics we can enjoy year-round even here in Washington. As always, happy gardening!
By Eron Drew
Gifting a plant for Christmas? Give it some thought, first – 12/20/2022
Given that December is the darkest time of the year with a little more than eight hours of sunlight, who cannot appreciate the delight of flowering plants? It is satisfying to give and to receive plants this month, but sometimes cut flowers are a wise choice.
Not all plants are equally welcome because they can cause problems.
First, leafy, flowering plants were grown in a greenhouse or in a part of the world that has many more hours of sunlight. It is difficult to mimic that quality of light in your home, so the gift plant’s leaves fade to yellow and began to fall off. Don’t do this to your friends; it will make them feel insecure about nurturing houseplants such as miniature roses or cyclamen.
A second problem with gift plants is that they may harbor pests such as scales, aphids, whitefly or red spider mite. These little critters most likely will infest your other houseplants, and winter will be long and tedious as you attempt to control the insect pests on all of your plants. Most houseplants are tropical plants that thrive in humidity. Our climate is dry, and our heated houses are even dryer, with about 28% humidity. Gift plants often develop brown edges on their leaves because of the dry air.
Orchids are a temptation, but really they should be treated as cut flowers that last for three months and then tossed out. Anemic, straggly orchids are decidedly unattractive.
The safest plant gifts are the old standbys such as bulbs, poinsettias or Christmas cactus. These plants are generally healthy but need to be observed regularly.
Bulbs, such as amaryllis, are dormant when they are gifted, and the recipient has the pleasure of watching the daily growth that culminates in fabulous lily flowers. If the leaves start to yellow, look for pests and be prepared to toss the entire plant, the pot and the soil in the trash.
Poinsettias are fine for a few weeks. If they get chilled or overwatered, they drop the red bracts and green leaves, at which point, they, too, should be tossed out. There is nothing worse looking than a skeletonized poinsettia.
Schlumbergera, such as Thanksgiving or Christmas cactus, are nearly foolproof. The Thanksgiving plant has little “horns” on the edges of the petiole, and the Christmas cactus has smooth leaves or petioles. They do not get insect pests and the greatest problem is overwatering, which causes the flower buds to fall off or the entire plant rots from the base. Many times, these plants bloom more than once a year and they can live long enough to be passed down as heirlooms.
Whatever plants you choose to give as a gift, remember that these all are tropical or subtropical plants. Have the store clerk wrap the entire plant in a large bag. Make sure your car is warm and drive as close to the store doors as possible to retrieve the plant. Twenty seconds of cold air (less than 50 degrees) will kill or maim your gift.
Well, when all things are considered, perhaps a quality garden tool is an ideal gift for a gardener friend!
By Bonnie Orr
Tips for forcing bulbs in pots to achieve that spring “wow” factor – 9/14/2022
One of my favorite times of the year is spring, when everything is coming out of its winter doldrums. Spring bulbs are always one of the early signs that I look forward to; these include snowdrops, hyacinths, daffodils and tulips. The sudden emergence after the snow melts and the vibrant bright colors always put a smile on my face.
The only problem is that it sometimes seems to take forever for that snow to melt and the temperatures to warm enough to start those bulbs on the path to blooming. If you are as impatient as me, there is a way to get an early peek at spring even before the snow melts.
Spring bulbs require a vernalization period before they can start to bloom, basically an extended cold treatment that makes sure bulbs don’t start to grow early before winter is over. The bulbs require temperatures around 35 degrees Fahrenheit for about 15 weeks. After that, warming temperatures will cause the bulbs to start sprouting and will bloom in about four weeks.
This process can be created artificially, which is called forcing, where you plant bulbs in a pot and then force them to bloom early. Who wouldn’t like a small pot of tulips or daffodils sitting on their counter or desk during the winter months?
There’s several steps that are required for forcing spring bulbs to be successful.
The first step is getting the bulbs; they are usually available to purchase starting in late August until early fall. Then you have to decide on when to plant the bulbs and start the vernalization process or simply start the vernalization process and plant the bulbs later.
I like to do the latter because I can place a bag of bulbs in the refrigerator and it takes a lot less room than planting the bulbs in a pot and then trying to find space to start the cooling process. I am usually really busy in September and it’s often too warm to place the bulbs outside yet. So leaving the bulbs in the back of the refrigerator until cool weather arrives is easier for me.
The bulbs need to continue the vernalization process (cold treatment) around 15 weeks total. Part of that can be in the refrigerator; the rest of the 15 weeks will be in a pot.
Using the refrigerator method is handy, but a more gradual cooling over an extended period may give better results. This is possible if you have an extra refrigerator that you can dedicate just to the bulbs, slowly lowering the temperature to 35 degrees Fahrenheit over several weeks. I wait until it cools down outside and then I take the bulbs out of the refrigerator and plant them in pots. I prefer using clay pots and clay saucers versus plastic because the additional weight keeps the pots from tipping over as easy. You can select from a wide range of sizes and types of pots that can be decorated.
I use a general potting mix with a little builder’s sand and perlite to help with drainage. Then I place the pots outside in a place so they are easy to get to when I want to start warming them up to bloom. Remember to water them enough to keep moist but not wet. Think about the possibility of snow when making your site selection, it is hard to dig them up when covered in snow and frozen to the ground.
About four weeks before you want to have the pots blooming, move them to a warmer space. Since these are spring bulbs, a temperature range of 50-60 degrees Fahrenheit usually works best. A cooler space in the garage or basement can work as a growing location. Most home thermostats are set to the upper 60s to 70s and bulbs grown at these temperatures tend to be leggier and the blooms not as robust.
I usually try to stagger out when I start taking the pots of bulbs out of the cold treatment so I can have blooming pots over a longer period of time. After they bloom, forced bulbs can be planted in the ground but they usually don’t do well after the stress and can be just disposed of instead.
So if you want an early flash of color and a sign of spring, go grab some spring bulbs and try forcing them to bloom early this year.
By Lloyd Thompson
Getting the most from your Christmas amaryllis – 12/18/2020
Amaryllis is a much-beloved Christmas flower. The common Christmas amaryllis is in the genus Hippeastrum, which has over 70 species and 600-plus hybrids and cultivars. It is native to eastern Brazil and to the central Andes along the Peru/Bolivia border, but is widely cultivated for its large, showy blooms.
Amaryllis bulbs start appearing in stores and catalogs in October, and are popular gifts. These bulbs are sold ready for forcing. Once potted, placed in the sun and watered, growth will start fairly quickly. The tall flower stalk will usually bloom in five to seven weeks.
Amaryllis can also be purchased already potted, further reducing the care needed to produce a bloom. Amaryllis bulbs are often discarded after the blooms are finished. This is too bad, since a bulb given proper care can produce flowers for at least 20 years. They are expensive, too, up to $30 for a high-quality bulb.
Here is what you can do to keep your amaryllis blooming for years. Once the flowers fade, cut off the stalk. Be prepared for a mess; the stalk is hollow and leaks quite a bit of moisture when it is cut. Place the plant in a sunny location. Keep it watered, but do not saturate the soil. Feed it with a half-strength, water-soluble fertilizer every two to three weeks. During this period, the plant will produce long, lance-shaped leaves. Photosynthate from these leaves will nourish the bulb.
By August, the leaves generally begin to fade. Stop watering the plant, and trim off the leaves as they dry. Once the bulb is thoroughly dry, remove it from the pot. You will find an abundant root mass. Shake off the soil and trim the roots to an inch or two in length. Put the bulb in a paper bag, label the bag with the variety name and the date it was put to bed, and store it in a cool dry place for two to three months. Six to eight weeks before you want the amaryllis to bloom, repot it. Place it in bright light, and water it sparingly until it begins to grow.
Amaryllis will often produce daughter bulbs, which should be removed before putting the mother bulb to bed. You can plant the daughter bulbs, but you will need to be patient with them. It takes three to five years for one of these small bulbs to reach mature size.
I purchased a Magnum amaryllis in 1980 and kept it until 2001, putting it to bed every year and waking it up for holiday blooming. Some years I started early and had a Thanksgiving bloom; some years I started late and had a Valentine’s Day bloom. Sadly, I moved in 2002 and lost track of my bulb. A year had passed by the time I found it, and the bulb had died. I expect it would have lasted many more years if it had not been neglected. For a while I mourned its loss, but I now have a new one that has been producing beautiful blooms since 2013.
In recent years, some producers have been selling waxed amaryllis bulbs. These are as care-free as a plant can be, and will bloom without soil or water; however, they are truly disposable. These bulbs have been soaked in water until they are fully hydrated, then the root plate cut off and the bulb covered with decorative wax. If you receive one of these, do not try to save it. Just enjoy the bloom while it lasts.
By Connie Mehmel
Tips on giving plants as a holiday gift – 12/03/2019
Anthuriums and poinsettias have begun appearing front and center at store entrances. With the holiday season now in full swing, these quintessential holiday plants bring to mind the question: do plants make good gifts? The answer is a definite “maybe.”
On the plus side, they are a way to share your love of plants and to give a potentially long-lasting present that can add beauty and warmth to a home. I say “potentially” because a plant that will do well in my house or garden may not thrive in yours. Plus, while most everyone appreciates the beauty of a plant’s greenery and flowers, not everyone wants the responsibility of caring for one.
Once you have decided that a gift plant would be appreciated, what should you consider when choosing just the right plant?
While flowers are beautiful, some people are allergic to them. Consider a non-flowering plant such as a succulent. Are there young children or pets in the household? If so, be aware that some plants have parts that are poisonous so be sure your gift plant is non-toxic. Research the colors of the plant’s blooms and find one that matches your giftee’s color preferences.
Consider whether to give a houseplant or an outdoor plant. Remember that if you choose a plant that will be go in someone’s garden, it will have to be able to survive indoors until the ground is ready for planting in the spring.
A friend without any houseplants can be a hint that one won’t be appreciated. On the other hand, a person with limited outdoor space for plants may welcome a houseplant, particularly one that would do well inside and perhaps outside on a patio or deck. If your friend has a beautifully landscaped yard, find out what plant would complement those currently in the garden.
Think about the how much time and effort the plant needs to maintain its beauty and whether your giftee has the desire and time to take care of it. At the weekly diagnosis clinic — 1 to 4 p.m. Wednesdays during winter at the Chelan County Extension office, 400 Washington St. — Master Gardeners are sometimes asked to identify a plant someone has been given as a gift and how to take care of it. Consider adding as part of the gift the common and scientific names of the plant and care instructions. If the plant has specific environmental conditions necessary for it to flourish, be sure the person’s house can meet them. For example, a plant that needs direct sunlight wouldn’t be appropriate for a person with a heavily curtained or otherwise dark house.
Don’t forget the plant’s size. One that will grow to 6 feet or taller probably won’t work in most people’s homes. How easy is it to keep the plant at its current size? How often will it need to be transplanted? Knowing the answers to these questions will help you find the right plant.
With all the above in mind, you will find that a myriad of plants is out there to choose from.
So how do you decide? Herbs make a nice gift for a friend who likes to cook. Some people love heavily scented flowers. Think about a plant whose leaves themselves have beautiful color and/or markings. Is the person just beginning to learn about plants and how to care for them? Many plants are perfect for beginners. If you still want to gift a plant but can’t make up your mind, drive to your neighborhood nursery or check out one of the many plant catalogs and buy a gift certificate.
By Casey Leigh
The Christmas poinsettia is queen of potted plants – 12/30/2020
Did you purchase a poinsettia to decorate for the holidays or receive one as a gift? If so, you are in good company. The poinsettia (Euphorbia pulcherrima) is the No. 1 flowering potted plant sold in the United States, even though its usual sales period only lasts for the six weeks before Christmas.
This beautiful plant is native to tropical forests of southern Mexico and Central America, where it grows in the wild as a bush or a small tree. It was brought to the United States in 1825 by Joel Roberts Poinsett, our first ambassador to Mexico and an avid amateur botanist.
What most people call poinsettia “flowers” are really bracts, or modified leaves. The actual flowers, called cyathia, are small yellow structures at the center of the bracts. The plant drops its leaves and bracts soon after the flowers shed their pollen. If you want to keep the colorful bracts and leaves on the plant as long as possible, you need to delay maturation of the flowers. With care, poinsettia bracts can be maintained until Valentine’s Day.
To keep poinsettias flowering, provide them with six to eight hours of indirect light per day. They should not be exposed to drafts or sudden changes in temperature. Daytime temperatures of 60 to 70 degrees F and nighttime temperatures of 55 to 60 degrees are ideal. Do not expose them to temperatures below 50 or above 70 degrees or it will shorten the blooming period. Water them when the soil is dry but do not saturate them. They are very sensitive to overwatering and easily succumb to root rot. Apply a water-soluble fertilizer once a week until the leaves begin to fall off, then reduce watering. The bracts will be the last leaves to fall.
Many people discard their poinsettias at the end of the holiday season. The plants are relatively inexpensive, and they are fussy about growing conditions. But if you have an interest in this unique tropical perennial, you can coax them into bloom in future years.
Once the bracts begin to fall, cut the plant back to about 6 inches high and place it in a cool, dark place for six to eight weeks. Keep it fairly dry, but don’t let it wither. In April, repot it in fresh potting soil, apply a water-soluble fertilizer and place it in a warm, sunny spot to encourage new growth. Water it when the soil surface becomes dry.
Once all danger of frost is past, you can take your poinsettia outside and grow it in partial shade. Poinsettias are attractive to whiteflies and other insects, which should be controlled promptly. Remove any weak shoots and pinch back long shoots to keep the plant bushy.
After the autumn equinox in late September, prepare your poinsettia for flowering. The plant will need full sun during the day, and at least 14 hours of total darkness at night. You can place it in a closet or cover it with a box for the night. A better solution is to put it in a room that isn’t used at night. Unscrew the light bulbs or tape over the switch to avoid accidentally turning on a light. Any stray light can delay or prevent flowering, including a porch light or headlights from a vehicle that shine through a window.
If all goes well, the bracts will begin to color by the end of November, and you can once again display your beautiful poinsettia for the holidays. And even if it fails to bloom, it still makes a lovely foliage plant through the summer.
By Connie Mehmel
Houseplants Appreciate Special Summer Care – 7/05/2021
With all the beautiful flowers and the developing vegetables, berries and fruit in the garden, it is easy to forget our old dependables — our houseplants.
Houseplants sometimes seem to fade into the woodwork. They provide a green essence all year long; we especially appreciate them during the gray winter days. Summer care will ensure that they decorate our homes for years to come.
We live in a very windy place, and most of us dust our furniture every week, but how often do we dust our plants? Now is a good time to go one step further and give the plants a bath. I put my portable ones in a lukewarm shower and let them drip dry. I spread a drop cloth around the big, venerable ones, and wash them thoroughly with warm water. Soap is not necessary.
Plants need their leaves washed to help them photosynthesize in the weaker light in our homes. And clean leaves will not provide a nesting site for pests such as red spider mite or scale insects.
Many houseplants die from overwatering. Those annoying little black gnats on the plant’s soil are a sign you are watering too much. A soil probe that measures water content is an inexpensive purchase that may save your plant’s life. Rather than watering on a set schedule, watering when the soil is dry protects the roots from rotting.
If you have a northwest exposure in your garden, many houseplants appreciate the greater light intensity outside during the summer. Water carefully if there are no drainage holes in the plant’s pot. In the fall, when you bring the plant into the house, stir a little systemic pesticide into the pot’s soil to make sure you have not brought in overwintering pests. Taking plants outside and putting them in the edge of your automatic sprinkler system is a means of maintaining houseplants when you go on vacation.
If you leave for more than 10 days, the houseplants will survive inside provided that the temperature in the house stays cool to prevent excess evaporation. I drench the plant’s soil then tent the soil with kitchen plastic wrap to slow the evaporation from the soil.
Fertilize plants during the summer and early fall. Plants produce whippy growth attractive to sucking pests during winter’s meager light, so between October and April plants do not need to be fertilized.
Remember, if you select a new houseplant from a garden center or other store, place the plant in quarantine for at least two weeks. You do not want to infect your original houseplants with whitefly or scale insects. Keeping the new plant in a separate room is a way to monitor the health of the newcomer.
I hope your houseplants give you as much pleasure as mine do.
By Bonnie Orr
Lawns
Fall Lawn Thatching – 9/1/2017
While most people think of spring as the time to thatch a lawn, fall thatching is equally effective and has the advantage of reducing the spread of weeds with the upcoming winter cold. Thatch removal should not be done in late spring or during the summer.
What is thatch and why is it a problem? Thatch consists of both living and dead stems, roots, rhizomes and leaf sheafs. It is a normal process of lawn development and if not excessive, is beneficial. Healthy thatch is less than ¾ of an inch thick, protecting against soil compaction and the effects of excessive hot and dry weather on grass. Once thatch becomes too thick, it prevents the grass from being able to effectively take up water and nutrients needed for healthy growth and development. A weakened lawn makes it more susceptible to developing weeds and to insect damage. During the hottest part of summer, lawns with too much thatch develop dry spots.
If the thatch is less than two inches thick, it can be removed with a power rake or vertical mower, thereby saving you from having to replace your lawn. WSU has some helpful publications on the process of de-thatching if you choose to do so yourself rather than employing a professional landscaper. By Casey Leigh
How to Care for Your Lawn – 6/1/2014
I love lawns, green lawns; make that a beautiful expanse of a uniform emerald carpet. I like them manicured along the edges for a nice crisp look along a sidewalk and driveway. One problem—the Wenatchee Valley is not located in Ireland, where emerald green grass seems to grow without effort. So the question for each homeowner is: Do you want to make the effort for such a lawn? Or would you rather have a lawn that is a little more on the wild side? It really can be a matter of personal preference. It is possible to have either with a little planning and consistent applications of gardening principles.
All plants need three things to thrive—water, nutrients, and sunshine. All these things need to be in the right amounts for optimum plant health. So how do we get it right for lawn grasses in our area?
Watering
I received my first hint on watering in north-central Washington when I took the boy scouts camping in the early 1990’s at Sun Lakes State Park. The grass we camped on there looked great but I didn’t know when they would water with all the tents and camping equipment that I saw in the park. I asked the ranger when they watered and his reply surprised me, “Tuesdays.” That’s right, a place in the desert with summertime high temperatures near 100°. They water once per week deeply and the grass roots can get water all week long as they grow downward.
I went right home and changed my sprinklers from the 10 minutes every day setting I inherited when we bought our house. I set out empty tuna cans around my lawn and timed how long it took to fill them up. That is how much water a healthy lawn needs in a week. I set my timers for the new, longer watering cycle and changed to once/week. This will de-pend upon your soil texture. Some soils won’t absorb the water all at once and it may need to be applied in more than one cycle of your sprinklers. If water is running off your lawn it is watering something other than your lawn. I had to start this in the spring so it’s not too late to start this year.
Improper watering is a major cause of unsightly or damaged lawns. Light, frequent sprinklings encourage shallow rooting of turf grasses. Shallow rooted turf cannot withstand sudden changes in temperature or soil moisture. Overwatering can cause soggy conditions and may (1) leach plant nutrients, especially nitrogen; (2) encourage weeds such as speed-well, buttercup, and annual bluegrass; and (3) cause oxygen starvation of the grass roots.
Nutrients –
Our soils in north-central Washington are typically adequate in levels for phosphorus and potassium and we usually only need to add nitrogen. Nitrogen is the first number of the three numbers found on every bag of fertilizer. Our turf grasses here need nutrients most in the spring and late summer/fall when they are most actively growing. Nitrogen pro-motes strong vigorous growth of grasses. Use a fertilizer with at least 30% slow release nitrogen, slow release fertilizer since it feeds the grass over time rather than all at once. (You’d rather eat every day than down your whole month’s calorie supply in one sitting, right?) Read fertilizer label thoroughly and apply at the rate recommended on the label.
Weeds –
Weeds don’t cause an unhealthy lawn. An unhealthy lawn causes weeds. Most common causes of unhealthy lawns—under or overwatering, mowing too short, not feeding. We mentioned watering earlier.
I learned some time ago that raising the mowing height promotes a much healthier lawn. The taller grass shades the soil and prevents many weeds from being able to grow. It keeps the soil cooler and that reduces evaporation and the need to water as often. It also keeps more of the green part of the plant that uses the sunshine (abundant in our area) to make food for the plant. It may surprise you that more than 90% of the weight of the grass plant is in the crown and roots. More leaf area means more root growth possible and healthier plants. I also use a mulching mower and leave the grass clippings on the lawn. As they break down they slowly release nutrients into the soil, helping to feed the lawn and keep it healthy. It can reduce fertilizer use by ¼, so you save money as well!
Applying these principles remarkably reduced the weeds in my lawn and now a little spot weeding is all that is needed. If you don’t mind a more varied lawn texture, there are some great seed mixes for lower maintenance lawns that are well adapted to our climate.
If you want more info on healthy lawn practices and options, please contact the Master Gardeners.
By Rob Merrill
Lawn Care & Maintenance – 6/1/2021
The Clinic receives a myriad of lawn questions from spring through fall. In anticipation of that, I re-read WSU’s excellent “Home Lawns” publication (EB0482E). Here are some highlights.
First, what are the best turf grasses for our area? Kentucky Bluegrass works well here either as a monostand or in a mixture with other grasses. Four types of fescues are also appropriate, usually in mixes: red, Chewings, hard, and turf-type tall.
Proper fertilization is key to a healthy lawn. A properly fertilized lawn cuts down on both disease and weeds. Nitrogen fertilizer is the most common need in eastern Washington. A soil test done every 3 years is the best way to find out what your lawn needs. WSU recommends that Washington lawns get 4 pounds of nitrogen per 1000 square feet per year, divided into four equal applications throughout the season. Fertilizers are labeled either quick release or slow release. Soil type, turf grass species, use and maintenance level are factors to consider when choosing which to use, or a combination of the two.
Keeping the blades on your lawn mower sharp and mowing at the correct height for the type of turf grass in your lawn are critical factors in lawn maintenance. Mowing your grass too close to the ground will stress your lawn, making it more susceptible to disease and insect damage. Check the recommended mowing height for the type turf you have.
A common lawn myth is that leaving the grass clippings on the lawn after mowing will cause thatch to accumulate. To the contrary, lawn clippings are good for the lawn by returning nutrients, as long as the amount of clippings isn’t excessive. For aesthetic purposes, WSU recommends mowing the lawn twice a week or more if you don’t re-move the clippings.
Two common lawn maintenance practices are thatching and aeration. Thatch is a layer of old roots and stems that accumulate between the zone of green vegetation and the lawn surface. When it becomes too thick, the lawn thins out. Special machines are available to remove thatch. For best results, thatch in late winter or early spring once the ground is no longer frozen, or in late August. It may be necessary to over-seed if your lawn has become too thin. Aeration is used when your lawn soil has become compacted. When done properly it allows for better water and air penetration. As with thatching, special tools are used for aeration.
By far the mistake we observe most often in clinic is improper watering. On average, turf needs about 1 1/2 inches of water per week or enough to moisten the soil to a depth of 4-6 inches. To measure this, we suggest the tuna can method, which lets you know how much time it takes for a measured volume of water to penetrate your lawn to 4-6 inches. Start by setting out several tuna cans in the spray pattern, then run your sprinkler until the cans have an average of one inch of water. Note the start and stop time. After 24 hours, measure how deep the root zone is moistened. If you run your sprinkler for 30 minutes and the sample you dig is only moistened three inches, then you need to water longer. Or if your soil is very sandy and the soil is moistened beyond the root zone, adjust your watering to less time and more often.
Following the above should result in a beautiful, healthy lawn. By Casey Leigh
Preemergence Herbicides– 3/1/2022
Ahh! March. A month to curl up by a warm fire, sip your favorite warming beverage, and look at seed catalogues as you dream about spring when you will be able to get out into the garden in person. But wait! As you dream about your garden of the future, do you also have nightmares about weeds? Give a weed in inch and they will take a yard. Weeds! Those pesky plants defy our efforts to wipe them out. What’s a gardener to do?
One answer is the use of preemergence herbicides. Preemergence herbicides prevent germinated weed seedlings from becoming established either by inhibiting the growth of the root, the shoot, or both. Preemergence herbicides do not kill the weed seeds themselves. They stay in the soil for a while and prevent the weed seedlings from becoming established. The use of preemergent herbicides may provide a foundation for season-long weed management, along with tilling and other good gardening practices.
The use of preemergence herbicides requires careful thought and planning. Dr. Rebecca Grubbs-Bowling, assistant professor and turfgrass specialist at Texas A & M University, says that timing is the secret. The soil temperature should be in the 50–55-degree range. Exactly when your soil is the right temperature will depend on your local climate, and what the weather is like this season (Bowling, Rebecca (tamu.edu) “Timing is Critical”). Dr. Grubbs-Bowling has published a helpful article entitled “A Homeowner’s Guide to Herbicide Selection for Warm-Season Turfgrass Lawns” that is available through Texas A&M Extension (https://aggieturf.tamu.edu/wp-content/uploads/HerbicideSelection_proof44-1.pdf). Soil moisture will also impact the success of a preemergent. Most preemergent herbicides must receive rainfall or irrigation to work well. In addition, understanding the life cycle of the target weed is a must in order to control the weed that is the bane of your existence. Careful selection of a preemergence product that is specific for the weeds you wish to eradicate is necessary. Preemergent herbicides used to kill weeds in lawns will be different than those used to control weeds in other parts of your garden. Preemergent herbicides that control grasses and a few broad-leaf weeds may injure many ornamental plants. Caution is needed when dealing with all herbicides!
Read the label of the preemergent herbicides carefully and follow the directions exactly. Most preemergence herbicides will last between 8 – 12 weeks. Reapplication may be necessary. Again, timing is the secret. It does no good to reapply a preemergence herbicide after the weed seed has already germinated and gained a ‘root-hold.’ There are many reputable publications focused on specific weeds and recommended methods of control in addition to pre-emergents. As always, be sure the information you turn to comes from reliable sources such as the extension services of schools of agriculture like Washington State, Oregon State, or Idaho State Universities. These extension services offer helpful publications on the control of specific weeds.
With spring only a few short weeks away, we will soon be in weed-tackling mode. Uses of preemergent herbicides can help lessen the burden of weeding later in the growing season. By Pat Beeman
Snow Mold– 2/1/2019
I first heard of snow mold when I was a kid and people with allergies were naming it as the cause for their symptoms. My most recent experience with it was at Rocky Reach Park in the late winter of 2017. It wasn’t widespread and seemed to occur where the snow was the deepest or took the longest to melt away from the lawn. We didn’t apply any treatment other than using the back-pack leaf blowers to “fluff” up the turf and expose the new shoots to the sun and air.
If we finally get a good covering of snow this year, we may get questions in the Plant Clinic about snow mold. Here is an overview that should help with correctly identifying and recommending preventive measures for it.
What is snow mold and what causes it?
Snow mold is a fungus. The two most com-mon are either pink snow mold (Microdocium nivale) or gray snow mold (Typhula incarnata, T. ishikariensis and T. idahoensis). They both like the cool, moist conditions found under deep snow. It is most prevalent when lawns have been fertilized late in the fall or where thatch is present and where snow is present for extended periods.
It presents itself as circular patches on turf grass. These can be irregular and can merge to cover quite large areas. The turf will be matted and when wet you may see the dense whiteish to pink threads (mycelium) for pink snow mold or blueish gray to almost black mycelium for gray snow mold. The following website has good photos of snow mold: https://hortnews.extension.iastate.edu/2010/3-31/snowmold.html
How do you treat snow mold?
The affected areas should be raked to expose the new growth to light and air. It should be noted that this disease rarely kills the grass.
How do you prevent snow mold?
To control these fungi, certain management practices can be followed in the fall that will normally be adequate. Mow as long into the fall as the grass is still growing and keep leaves and grass clippings raked off the turf. Don’t apply too much nitrogen fertilizer late in the fall. Good surface drainage and controlling thatch is also helpful.
Although there are fungicides that can be applied preventively in the fall, WSU does not recommend doing so on home lawns because turf usually recovers once the weather changes. By Venessa Martyn
Why Your Lawn Doesn’t Look so Good – 9/1/2018
It is mid-summer, and our lawns are not looking as good as they did in June. There are many reasons for this. First of all, we have had many days in the 90’s. It is another “cooler” summer because we have not experienced many temperatures in the 100’s; however, it has been really windy all spring and summer, and the relative humidity has hovered around 20 percent. The wind and the low humidity, more than the temperature, influence the evaporation rate. With the conditions we have experienced, some days the evaporation rate has been as high as ½ an inch. So, most likely, there are some dry spots in your lawn. What are the reasons besides Mother Nature?
The most likely reason is uneven water distribution from the sprinklers. It is not too late to put out the string of tuna cans to monitor exactly how much water in a variety of locations is being laid down each time you run your system. You can then adjust your sprinklers. Dry spots could be the result of shrubs or perennials growing in the spray line of a nozzle, so run the system and look for problem areas.
The next reason for a wan lawn is mowing practice. If you mow your lawn at less than 3 inches in height, the crowns of the grass plants can be burned by the hot summer sun. This causes brown patches in your lawn as well.
The most common cause of a weak summer lawn is the underlying soil. The effectiveness of watering and fertilizing your lawn depends on the soil it is growing in. In sandy soils, the water goes straight down and does not spread out to water adjacent areas of roots. So sandy soils can require water more frequently. Clay soils, on the other hand, allow the water to move sideways; however, clay soils may not readily release sufficient water from its reserves for use by the roots due to clay’s natural physical tendency to hold water.
So what other lawn issues have diagnosis clinicians talked about with clients this summer? The classic is crabgrass, which was not controlled with a pre-emergent applied at the correct time in the spring. But, hey, it is at least green! Creeping bent grass is harder to deal with. This invader that grows in tight circles and overwhelms the Kentucky blue-grass is nearly impossible to control unless you are willing to dig out each clump by hand. Interestingly, golfers seems to have more of this in their lawns because bent grass is used on golf courses, and the seeds are picked up in golfer’s shoes and equipment.
Sod web worms, doing their damage unseen at night, eat the roots of grass plants. This creates patches of dead turf that easily pull out of the soil. Sod web worms are larvae of the lawn moth. Hortsense suggests two types of non-chemical management. The presence of birds, ants, spiders, and predacious ground beetles, natural enemies of sod web worms, helps keep them in check. Also, keep your lawn thatched as sod webworms are attracted to thick thatch. Hortsense lists a few pesticides legal in Washington that can be applied at the larval stage to reduce populations.
Of course, the long days and the heat have caused the fescue grasses to go dormant and create some browning. The good news is that the fescue will regrow in September just as the Kentucky bluegrass is beginning to go dormant. September is the best time to put in a new seeded lawn. The soil will be warm enough for long enough for the grass roots to become established. And with the cooler September daytime temperatures, it will be easier to keep the germinating grass seeds moist enough to sprout. September is also time to rejuvenate your lawn by either thatching or aerating the turf.
By Bonnie Orr.
Native Plants
Native plants should have a place in your landscape – 4/28/2022
If you live in the Wenatchee Valley or nearby areas, chances are you have seen some stunning displays of native plants.
The surrounding hills are usually a brilliant yellow in the spring when the arrowleaf balsamroot blooms; it is one of my favorite times of the year. If you are in a riparian area near a stream, the smell of mock orange will greet your olfactory receptors during the late spring. During the winter, the crimson branches of red twig dogwood are visually set off nicely by a fresh snowfall. My personal favorite is the smell of sagebrush after a rainfall. Each of these plants are natives and do well in their own niches but not just anywhere.
Lately, I have been reading a lot about the use of native plants in landscape. Most of the discussion centers on how well native plants do, and the fact that they need less water and labor to survive. In our shrub-steppe environment, most non-native plants require lots of extra water during our hot dry summers; natives, which evolved over thousands of years, are able to thrive in the hot and dry conditions.
To be honest, I’m not the type of person to plant something that takes a lot of extra time and energy for it to survive. The right plant in the right soil and light conditions, as well as a proper location for its mature size, makes for a happier plant and a less frazzled gardener. I give serious thought about what I plant and where I plant it. This takes me a little longer to make sure it’s the right plant in the correct spot, but helps with the overall planting success rate.
From a landscape perspective, if I choose only native plants adapted to the dry climate of East Wenatchee, my selection would include primarily bunch grasses, sagebrush, rabbit brush, arrowleaf balsamroot, yarrow, lupines, penstemons and buckwheats. These are all well adapted for the summer heat and limited moisture, as well as providing critical habitats for other species native to the area.
Our native pollinators — bees, moths, animals and birds — would love to see the use of more native plants. It would not only help them be more successful by bridging the distance gaps between native habitats and local landscapes, but also allow them to move more readily from area to area in search of food and habitat.
Native plants can be supplemented by using non-natives that also evolved in similar climates and are often used in xeriscape-type gardens. While not native, these plants can still thrive in our hot, dry climate and not require as much water as other plants would.
If you are interested in using more natives in your landscapes, there are examples planted in the Natives ‘N More Garden at the WSU Chelan-Douglas County Master Gardeners Community Education Garden along Western Avenue in Wenatchee. You can find information, including plant lists, on our website, wwrld.us/mgprogram.
Washington Native Plant Society, wnps.org, is another great group of people to get information from about native plants. Their mission statement: To promote the appreciation and conservation of Washington’s native plants and their habitats through study, education, and advocacy.
Derby Canyon Nursery is primarily a wholesale native plant nursery in Peshastin; however, they have retail sales on the following dates this spring and fall: May 6-7, June 3-4, Sept. 2-3, Oct. 7-8. You can get more information at derbycanyonnatives.com. You can also email new owner Mel Asher at mel@derbycanyonnatives.com to place email orders for pick-up on the Fridays outside of the dates listed above.
Natives plants have not gotten the recognition they deserve as landscape plants over the years. With the current trend toward hotter and drier summers and less water available for irrigation, perhaps native plants need a closer look to see if they could find a place in your landscapes. They tend to be more suitable for the local environment and take less work and resources once established.
Maybe Mother Nature had a good idea with selecting plants that not only could survive in our local ecosystem, but also could provide food and habitat for a host of other insects and animals. Now, if only we could get Mother Nature to do something about our April snow showers.
By Lloyd Thompson
Find inspiration at Master Gardeners’ Native Plants ‘N More Garden in Wenatchee – 4/1/2020
In 2010, the WSU Chelan/Douglas County Master Gardeners planted the first of several themed educational gardens in the Community Education Garden at the northwest corner of Western and Springwater avenues in Wenatchee. Now named the Natives ‘N More Garden, it contains a mixture of native and non-native plants that can be grown in our North Central Washington climate. Now seems like a good time to highlight some of the native plants you can see growing there.
One of my favorites —and the one that brightens our hillsides with their bright yellow foliage in spring and early summer —is Balsamorhiza sagittata, commonly known as arrowleaf balsamroot.
This plant of the sunflower family thrives in our cold, dry climate. It has long, fuzzy arrow-shaped leaves. Its “flower” is actually made up of numerous tiny florets, like other types of sunflowers. Plant it in your garden to attract native pollinators and add bright color to your landscape.
If you’re looking for a native flowering shrub, serviceberry (Amelanchier alnifolia) would make a beautiful addition, particularly in early spring, when its fragrant white flowers are in bloom, and in fall, when the leaves turn a red to yellow color.
Its mid-summer, red-purple fruits are a favorite of birds and other wildlife. It attracts pollinators such as hummingbirds, bees and butterflies. This medium-sized deciduous flowering shrub generally reaches 12 feet to 15 feet tall. Plant it in a sunny spot with moist, well-drained soils.
Penstemon plants do well in home gardens. These showy perennials, also known as beardtongue, are among the plants recommended by the Washington State Noxious Weed Control Board as non-invasive alternatives to common invasive plants and noxious weeds. The tubular flowers of penstemon plant species grow on spikes that rise out of low green mats from May to July.
Drought tolerant, they can tolerate many types of soil, but do best in well-drained soil in partial shade to full sun. They also do well in rocky areas. Penstemons attract native pollinators such as butterflies, hummingbirds and bees. The Natives ‘N More Garden has a few different penstemon species.
My favorite groundcover is kinnikinnick (Arcostaphylos uva-ursi). About 1 inch to 6 inches high, this native evergreen plant is relatively slow growing. Purple/pink flowers bloom from early spring to early summer. Its summer and fall red berries add color to the ground. Like most native plants, kinnikinnick attracts birds, butterflies and bees to your garden. It does well in sun to partial shade on drier, well-drained soils.
The Community Education Garden, including the Natives ‘N More Garden, is open to the public all year round so you can observe these plants in all four seasons. To distinguish native plants from others in the Community Education Garden, look for the plant signs.
By Casey Leigh
Tips for sourcing native plants for home gardens – 4/29/2020
With spring in full season, many of us are outside in our garden areas getting ready for adding variety to our landscapes.
With an increased interest in integrating native plants, an important consideration is where to get the plants. Do I go out into the hills and collect those I see in bloom? Are local nurseries a reliable source? How do I know plants are truly native to our area? This article addresses these questions.
Although tempting to do so, harvesting plants in the wild is not recommended. First, removal of even individual plants can lead to overharvesting because of the cumulative effects of many people doing so. Second, generally the success rate of re-planting is low. Third, you can unknowingly introduce weeds, disease and unwelcome insects that “hitchhike” on the plant or in the soil. Fourth, plants in the wild are on private or government property and permission is needed to remove plants.
One option, if you have permission from the landowner, is to harvest seeds for propagation. Different plants have different requirements for successful seed propagation, and success rates vary based on the plant, as well as the propagator’s experience. Therefore, it’s not often a viable alternative.
A second option is what’s known as native plant salvaging. Some landowners who have plans to develop their property that will result in destroying native plants will permit individuals to go onto their property and harvest the plants before construction. Although this solves the problem of overharvesting, it doesn’t address the issues of low success rate or unwanted hitchhikers.
A much more reliable option is to buy native plants from local nurseries.
As landscaping with native plants becomes more popular, there are some important questions to ask. First, ask whether the plants were propagated in a nursery. Not only will you avoid the issues associated with propagating from plants harvested in the wild, but the plants will be healthier and you will have a greater replanting success rate. Second, ask if the plants will grow well in your particular garden’s environment by checking on characteristics such as light and moisture requirements. Get the full scientific name for the plants you like and research that they indeed are species native to the area.
Consider choosing a nursery that specializes in propagating and selling local species of native plants. Not only are you more likely to be buying plants grown by an experienced plant propagator from seeds harvested in your area, but also you will have a knowledgeable source to provide advice on what might work best for your garden and how to plant and maintain them.
Many people like to sow wildflower seeds in their gardens from seed packets they find in stores and nurseries. Most seed packets are a mix of different wildflower species. Before buying and sowing the seeds, confirm that the seeds are truly local species. If you can’t tell from reading the information on the packet, resist purchasing them as native plants from other regions can be noxious weeds in our area.
The Washington Invasive Species Council has a wildflower mix for eastern Washington. You can find it at nwcb.wa.gov/bee-u-tify.
It’s a beautiful morning at my house. I have a native plant garden that needs tending, including setting up my watering system. It’s time to take myself outside and spend some time with them. I hope you are out enjoying your garden work as well.
By Casey Leigh
Penstemons will brighten your landscape – 4/16/2019
Hummingbirds know a good thing. Many gardeners do too, although some may not realize exactly how easy these perennials are to grow, especially in xeric-type landscapes.
A lineup of bell-shaped blooms climb penstemons’ upright stems from May into August, just right for slurping by hummingbirds. Bees go for them, too.
Also known as beard tongue, penstemons are native to our mountainous regions, covering most of those in North America and Central America. Many tiny ones have adapted and persist even in the desert. You’ll see lots of them as you hike trails in the Cascades. Reddish-purple ones are prolific, attracting bees and hummers on Johnston Ridge near Mount St. Helens in July and August.
In fact, the majority of some 270 species are native to our West. They range in size from ground-hugging up to nearly 5-feet tall, although many available to gardeners are 1 ½- to 3-feet tall. Petite ones are perfect in dry rock garden settings, while larger ones work well in flower borders.
Well-drained soil and a sunny site are prerequisites, and most thrive on infrequent summer irrigation. Provide them with lean sandy soil and they’ll reward you for several years. Heavy soil and too much water are sure-fire killers.
Deadhead right after they finish blooming and you’ll get repeat blooms, although not as bountiful as the first flush.
Reds and pinks are the most usual colors, although penstemons come in a rainbow of other colors also.
A few non-hybrid garden favorites include P. ‘Blackbird’ with dark purple blooms on 3-foot stalks June and July. With P. digitalis ‘Husker Red,’ one would assume it produces red flowers, but no, they’re white on impressive burgundy foliage. It was named Perennial Plant of the Year in 1997 and it can take more shade and moisture than many others. P. cardinalis is another nice choice, with dark red blossoms and leathery, dark green foliage.
If you haven’t grown penstemons before, this may be your year to try them in your landscape.
Mary Fran McClure
Pests
Plan for the Attack of the Aphids – 4/1/2021
Spring is almost here! We can feel it in the air. While night-time temperatures are still cold, our days are beginning to warm up and as gardeners we are eager to get outside and GARDEN! But wait. It is much too early to be planting vegetables or flowering plants. What’s a gardener to DO? Plan for the Attack of the Aphids. While that may sound like a B-rated horror movie, aphids are horrible. Still, there are proactive steps to help protect our plants and gardens from these marauding insects.
Almost every plant has one or more aphid species that occasionally feeds on it. Low to moderate numbers of aphids aren’t usually damaging. However, large populations can quickly turn leaves yellow and stunt shoots. Aphids can also produce large quantities of a sticky substance known as honeydew. Honeydew often becomes the food source for a sooty mold fungus. Aphids may also transmit viruses from plant to plant on certain vegetable and ornamental plants.
Many aphid species are difficult to distinguish from one another; however, management of most aphid species is similar. Knowing the life cycle of aphids helps determine what needs to be done to take a proactive stance against these pests. Aphids have many generations a year. In our climate most aphids produce sexual forms that mate and produce eggs in fall or winter, producing a hardier stage that can survive harsh weather and the absence of foliage on deciduous plants. They survive winter by laying their eggs in the leaves and dead plant material that is under plants or the mulch used in gardens. Here is where the first step in a proactive attack against aphids starts. Clean up all dead material from around your plants and garden beds. Remove weeds, grass and plants that might be vulnerable to aphids. Preventing places where aphid eggs can be protected through the winter will go a long way to keep aphids from getting a foothold in your garden.
The adult females give birth to live offspring – often as many as 12 per day. In warm weather many species can develop from newborn nymph to reproducing adult in seven to eight days. Because each adult aphid can produce up to 80 offspring in a matter of a week, aphid populations can increase with great speed. No wonder it can seem as if we suddenly have an aphid population explosion over night!
Once it is safe to plant vegetables and flowers outside, the second step to thwart aphids is to select plants that are least susceptible to aphids. Inspect plants that you buy carefully to make sure you aren’t bringing aphids home with you. Check the underside of the leaves where aphids will most likely be found. Keeping the number of aphids out of your garden and yard to a minimum is paramount. When there are only a few aphids present, it is easy to squish them gently against the stems or leaves with your fingers. Later in the season when plants are maturing, a sudden bloom of aphids usually can be knocked off plants with a spray of water. This may need to be done repeatedly over a period of time. Use of a mild soap and water spray can also help. If the aphid damage is on only a few leaves, pick off damaged leaves or prune to prevent further damage. To prevent rapid growth of soft, nitrogen rich tissue which is extremely attractive to aphids, do not over-fertilize with nitrogen fertilizer. Avoid over watering which can cause some plants to grow too rapidly. Protecting beneficial insects such as lady beetles, lacewing larva, soldier beetles, and certain species of parasitic wasps will go a long way to controlling aphid populations.
Most plants can survive a small infestation of aphids but if it becomes absolutely necessary to use insecticides do so very carefully. Use an insecticide that is specific for aphids. Follow the directions on the label. Remember that insecticides will also kill any beneficial insects which can provide natural control of aphids. If in doubt, don’t do it.
Or perhaps you notice a congregation of ladybugs on a rose stalk. Don’t invoke the old nursery saying and ask them to fly away home. Their house is not on fire. Your roses are, with aphids, which the ladybugs are feeding on – and you can bless yourself that they have come to your rescue.” Author: Eleanor Perenyi
By Pat Beeman
Why the World Isn’t Knee-Deep in Aphids 6/1/2023
In late spring, when the light lasts longer and the days and nights warm up, aphids begin to emerge from their eggs. These aphids are all females. Once they reach adulthood, they disperse and begin to reproduce parthenogenetically, cloning themselves without mating. They are viviparous, so instead of laying eggs, their offspring are “born” rather than hatched.
The job of these aphids is to start new colonies. They are very good at what they do! A female aphid can live for about a month, and when resources are plentiful, will produce between 50 and 100 wingless offspring in her lifetime. In warm weather, it only takes about a week for newborn nymphs to reach adulthood, at which point they will also start cloning themselves. Just one adult aphid, then, could spawn a population of billions.
That many aphids could do some serious damage. Aphids eat by plugging their straw-like mouthparts into a plant. They go for the phloem, where liquid sugars made through photosynthesis are under pressure in the plant’s vascular system. They need to ingest a lot of juice from a plant in order to glean enough amino acids and nitrogen to thrive. If enough aphids are present, they can siphon off too much sap from their host, causing new leaves to pucker and curl and reducing the plant’s vigor.
Fortunately for the aphids, they have internal overflow valves for releasing some of the abundance of sap that squirts out of the plant and into their digestive system. Unfortunately for gardeners, the extra plant sap which flows out of the aphids keeps flowing, right onto the leaves of the plant. This sticky mess is called honeydew. Unless you are an ant, honeydew is pretty unappealing in the garden. It can also be a medium for sooty black mold which can block light and prevent leaves from photosynthesizing. It’s a good thing, therefore, that not all of the offspring from those first spring aphids will survive. They are easy prey for a long list of predators. Aphids are wingless, in most cases, until the fall mating generations emerge. Because their mouthparts stay injected into the plant, they are not able to make a quick escape. Their best defense is to secrete a warning pheromone out their cornicles when they are attacked, alerting others nearby to danger. Lucky aphids can fall off a leaf to escape a predator, but they can’t fly, jump, or even run.
The most famous aphid-eater is the ladybug, whose aggressive black and red larvae look and act more like crocodiles than caterpillars. Other natural enemies of aphids include syrphid flies, snakeflies, green and brown lacewings, earwigs, big-eyed bugs, damsel bugs, rove beetles, soldier beetles, ground beetles, praying mantises, and many species of tiny parasitic wasps. Aphids are food for many other animals besides insects, too. Spiders, lizards, frogs, toads, and even small birds feed on them, keeping their population in check.
The main reason aphids reproduce rapidly is to counter the fact that so many animals rely upon them for food. The best way to keep aphid populations low is to provide a healthy habitat for their predators. Using pesticides to kill aphids actually can improve their ability to multiply, since pesticides will also reduce the populations of their natural enemies. Because they have so many offspring, it is much easier for aphids to achieve resistance to a pesticide than it is for other species. In small numbers, aphids do little damage to well watered, healthy plants. Their presence invites a rich diversity of life into our gardens and yards.
By Julie Banken
Resources: University of Kentucky, Aphids, in depth – Wisconsin Horticulture, The Bug Chicks
Earwigs 9/1/2019
In my favorite insect garden book, “Good Bug, Bad Bug”, earwigs are labelled as pests. When they created ragged holes or chew marks along the edges of some of my favorite plants, I tend to agree. But when they munch on my unwelcome aphids and mites, I am happy to see them. Based upon the number of complaints about earwigs that have come into clinic this summer, it seems they have been more of a problem than in some years.
Most of us are familiar with the ¾ inch reddish-brown earwigs with their telltale pincers on the rear end. Females reproduce one generation per year, laying clusters of up to 30 eggs under rocks in the soil. The female actively tends the eggs, cleaning fungi from them and actively guarding and protecting them. The female, along with her newly hatched young, emerge in the spring and start feeding. They feed at night and enjoy a smorgasbord of many of our plants, such as home tree fruits, flowers like marigolds, zinnias and dahlias, and the seedlings of lettuce, celery, beets, and carrots, among other vegetables. However, they can also be beneficial in our gardens, eating pests such as aphids and mites and scavenging dead bugs and plant debris. Earwigs can fly, but rarely do. During the day they rest in moist, shady places and beneath boards and stones.
When feeding, earwigs create ragged holes in a plant’s leaves as well as chew marks around the leaf margins. The damage is similar to that created by caterpillars and slugs so you have to go out at night to see if earwigs are the culprit. In addition, they bore shallow irregular areas into the surface of fruit. Shoot tips fed on by earwigs often fail to develop and can result in stunted growth.
Hortsense does not recommend chemical methods of control. Instead, they suggest keeping your garden free of their daytime hiding places. You can also place rolled newspapers, burlap bags, or flat boards beneath the affected plants for both monitoring and trapping earwigs, as well as purchase commercial traps. Pick the earwigs out from under your “traps”. You can shake earwigs off flowering plants into a box lid or something similar. Biological enemies of earwigs include frogs, toads, predator beetles and duff-scratching birds.
So, if you see what could be earwig damage in your garden and have a bout of insomnia, step out into your garden with a flashlight and see if earwigs have set up housekeeping.
By Casey Leigh
Elm Seed Bug or Elm Leaf Beetle? – 8/1/2018
“Do you know the two insects above? Do you know which one is simply a nuisance and which one damages plants? Or which one is the beetle in the Coleoptera order and which is the true bug in the Hemiptera order? Both of these have been brought into the clinic in the past few weeks by concerned home gardeners. This article will answer those questions and give you helpful information about them in case you encounter them in your home or garden.
The insect on the left is the elm seed bug, Arocatus melanocephalus, a native of south central Europe. Chances are many of you have encountered this diminutive member of the true bug (Hemiptera) order, particularly if elm trees grow nearby. As the name suggests, the primary food of both nymphs and adults is seeds of the elm tree. Adult elm seed bugs emerge in the spring to mate and lay eggs during an extended egg laying. The nymph stage includes several molts, with the wings developing more through each molt until adulthood.
Being seed eaters, the elm seed bug rarely poses a problem in our garden landscapes. However, in July and August they can appear in large numbers outside on decks and patios, eventually finding the way into homes to escape the heat of summer, becoming an “instant” nuisance. This pattern is repeated in the fall when the adults look for overwintering shelter, and again in the spring when they emerge to begin the life cycle anew.
What can be done to deal with this pesky bug? First, monitor for adults and nymphs on the house siding, decks, and patios, or on seeds in the trees or on the ground. When you find adults congregating, vacuum them up as soon as possible preferably with a shop vac rather than your home vacuum because they produce an unpleasant odor when disturbed or crushed. Placing sticky traps on your windowsills also helps. Check to see that crevices and cracks where they can sneak into your house are caulked. In the fall, rake and dispose of elm seeds around the outside of your house. If you or your neighbor has elm trees, be attentive and inspect boxes, pots, firewood and the like before bringing them in the house. A broad spectrum insecticide can be sprayed around the perimeter of the house and at suspected entry sites to try to keep them out of the home.
The other picture is of the more destructive elm leaf beetle, Xanthogaleruca luteola, a member of the order Coleoptera. Approximately ¼” long, their dark stripes against a yellow background are distinctive. Their yellow eggs can be found clustered on the underside of the elm leaves. Similar to the adults, elm leaf beetle larvae are yellowish with black lateral stripes. Both larvae and adults feed on the leaves. Evidence of the presence of larvae is skeletonized leaves, while adults create small holes in the leaves. Serious infestations can cause premature leaf loss, weakening the trees, which opens the way for attacks by elm bark beetles that in turn carry the Dutch elm disease fungus.
Like the elm seed bug, the elm leaf beetle can invade homes seeking a protected place to overwinter. In spring the adults lay their yellow eggs and begin feeding. After feeding for a time, the larvae migrate downward where they pupate on the ground or in crevices near the base of the tree. The second of the two generations emerges a week or two later.
Cultural control options include planting elm leaf beetle resistant elm cultivars or trees such as the Chinese elm and the elm-like zelkovas. (You can find an example of a zelkova, the Zelkova serrata ‘Schmidtlow’, in the utility friendly tree section of the CEG.) The PNW Handbook cautions, however, that many of the cultivars are highly susceptible to Dutch elm disease. Prune dead and dying branches in late fall or winter. Hortsense lists pesticides legal in Washington that can be used to control this beetle.
If you’d like to see examples of each of these insects, we have both in our entomology collection at clinic. If insect identification and control interests you, consider joining our diagnosis clinic team!
*Most of the information for this article came from pnwhandbooks.org.
By Casey Leigh
It’s Time to Treat Scale Crawlers – 6/1/2019
In recent weeks, clinicians have helped gardeners identify and learn how to treat scale. These diminutive insects are a common problem for several species of plants, including pines, fruit trees, maples, willows, lilacs, dogwood, rhododendrons, camellias, and houseplants, among others. Because there are approximately 8,000 species of scale and they attack such a variety of plants, most gardeners either have had or will have to deal with scale infestations.
Scale are true bugs of the Hemiptera order of piercing and sucking insects. They progress through three life stages of egg, immature, and adult, with several generations possible in a single year. During a significant portion of their lives, the insects live under a scale-like covering (hence their common name) that contact insecticides are ineffective against. These telltale scales are usually the evidence gardeners notice on the leaves, twigs, stems and fruit of their plants. However, there is a short window of time when the immature, or crawlers, emerge from the eggs and begin feeding. This is when they are most susceptible to treatment. And now is the time they will be moving around unprotected.
So how best can you monitor your plants for appearance of the crawlers? Check WSU’s AgWeathernet for local Growing Degree Days. When the GDDs reaches 707 based on a 50 degree calculating point, the crawlers should be emerging. Use your hand lens to check plants you think may have scale. You can also place doublestick tapes in areas where you see the hard scale shells to trap them when they emerge. An interesting suggestion by WSU is to put n infested branch in water and leave it outdoors in a shady place where you can check the scale eggs every few days for a hatch. Regardless of the method you use, once you see them crawling it’s time to begin treatment.
The presence of certain beneficial insects in your garden will help prevent an infestation. Birds, lady beetle adults and larvae, mites, and green lacewing larvae feed on the crawlers. Certain minute wasps lay their eggs in and parasitize scale. Because of this, avoid using broad spectrum pesticides. Because we have several species of scale locally that attack different plants, check Hortsense for insecticides specific to the type of scale feeding on your plants.
By Casey Leigh
Keeping Track of Insects and Plant Development: Growing Degree Days – 4/1/2019
Most Chelan/Douglas County Master Gardeners have been to at least one presentation on Growing Degree Days (GDD)taught by Paula Dinius. This article is a refresher on GDDs to remind us how to use this tool to track the timing of plant development and concomitant appearance of insects in our gardens. This knowledge, in turn, can be used to help with garden insect pest management. With spring on the horizon, now is the time to put that information into practice as insects will soon be emerging from winter hibernation.
For many of our plants and insects (both beneficial and harmful), certain stages of life, such as the appearance of flowers or the hatching of eggs, are triggered by a certain number of GDDs. GDDs, a measure of accumulated heat, are defined by the National Phenology Network as “the number of degrees the average daily temperature exceeds a base temperature, or the temperature below which the organism will remain in dormancy.” The base temperature we use here is 50 degrees.
A specific formula is used to calculate GDDs: average daily temperature minus the baseline temperature equals growing degree days gained. For example, if the average daily temperature for April 1 is 52 degrees (high temperature minus the low temperature divided by 2) and the base temperature is 50 degrees, then the accumulation for April 1 would be 2 GDDs. If on April 2, the average high and low temperature is 48 degrees, no GDDs are accumulated so the total number of GDDs on April 2 is 2.
This calculation should be done every day, adding each day’s total to the total of all previous days. So with the above example, if on April 3 the average temperature is 62, 12 GDDs are added to the balance of 2 GDDs from April 2, making the total cumulative GDDs at 14. Fortunately for us, that’s not necessary as WSU’s AgWeatherNet website does so by county at weather.wsu.edu. Look for summary reports, then Growing Degree Days, then Chelan County. For 2019, the accumulated GGDs at the WSU Tree Fruit Research Center as of the date of this writing using 50 degrees as the base temperature are 0. By the time this article is published, it will be significantly more. Using a base temperature of 32, however, the GGDs during the same time period are 119.
So, how can we use the number of GGDs to predict the appearance of insect pests? At this early spring time of year, with GDDs ranging between 1 and 49, it’s time to be checking your plants for insects such as mites, adelgids, aphids, and mealybugs. Inspect leaves for the presence of overwintering stages and last season’s damage and treat with dormant oil as needed. In mid to late spring, when GGDs range from 300-399, the elm leaf beetle larvae will begin to appear. Look for 1/4 inch green or yellow larvae with black stripes and spots. If you see evidence of their presence, check Hortsense for treatment options.
As the winter snow gives way to the warmer temperatures of spring, now is the time to be on insect watch in our gardens. Growing Degree Days are a useful tool to use as a guide, but are not a substitute for being watchful.
By Casey Leigh
Leafhoppers and the Beet Curly Top Virus — 8/1/2019
A few of the plant samples brought into the clinic this week had been attacked by viruses. One that was identified on a tomato leaf was the beet curly top virus. Transmitted by the beet leafhopper, it can infect many of our garden vegetable plants, such as tomatoes, beets, cucumbers, peppers, beans, and squash.
If your plants’ leaves pucker with an upward rolling and twisting, followed by yellowing, you could be dealing with beet curly top. In addition to turning yellow, mature plants have stunted growth, the leaves thicken to either a brittle or leathery texture, and the veins can turn purple. Young plants are more likely to die from the virus than older ones.
Hortsense does not recommend any chemical treatments. Instead, it suggests destroying any infected plants. Shading plants when young can reduce the chances of a viral infection as leafhoppers don’t usually feed on shaded plants. Spinach and beets are hosts for the leafhopper and the virus. Unfortunately, control of leafhoppers is not an effective method for preventing an infection.
I recently read an article on cutting edge research of plant viruses being done at WSU. According to a June 2019 article in WSU’s Insider by Scott Weybright of the College of Agricultural, Human, and Natural Resource Sciences, recent research by a WSU team of scientists led by Dr. Hanu Pappu suggests that artificial intelligence (AI) has the potential to predict which plant proteins a virus will attack.
According to the article, “Viruses attack a small number of proteins in plants, but those attacks are enough to hijack an entire organ-ism. Predicting which protein a virus will attempt to hijack can help in building a defense against the attack. But plants make thousands of proteins, making this kind of prediction very difficult.”
With cotton plants for their experiment, the scientists were able to use AI to narrow the protein targets of the virus that causes cotton leaf curl disease from thousands to two likely ones. They then discovered that one of the critical plant proteins was the one that the virus attacks. By finding the proteins that viruses target within a plant, Dr. Pappu posits it may be possible to intervene and design defenses that would help plants resist viral attacks.
Perhaps in the future, thanks to the work of researchers such as Dr. Pappu, the beet curly top virus and others will no longer be a threat to the favorite vegetables we grow in our gardens.
by Casey Leigh
Meal Moth Control – 4/1/2017
Trivia question: What moth is the only species of the Plodia genus found in the US?
Answer: the pesky Indian meal moth, Plodia interpunctella. This half inch moth and its larvae are most often found in your pantry or kitchen – anywhere where plant based food products such as flour, oatmeal, nuts, bird seed, and chocolate are found. The moth was given its common name by a 19th century NY State entomologist after discovering the larvae in cornmeal, which at the time was known as “Indian meal”. We MGs in the plant clinic were called upon to identify this moth earlier this month.
The adult moth has a bicolored forewing – light gray and reddish-brown. It’s actually very pretty. The moth itself doesn’t do the damage, but does more than its fair share of harm by producing several generations of the larvae that can wreak havoc with your food stores each year. The larvae have a white/yellowish body and a head from yellow to reddish-brown. The larval stage of five instars can last from two weeks to 300 days, the time depending on temperature. At about ¾” long, the larvae work their way through the food, creating a silken web – the evidence of their presence. You may also see frass and pupal cases mixed in.
What do you do if you discover you have a meal moth problem? WSU does not recommend using chemicals to solve the problem. Rather, once you find evidence of their presence, throw out all food sources that are not in tightly sealed containers. Because the larva can eat through plastic bags and thin cardboard, they could be in unopened boxes of food. All stages of the moth are temperature sensitive so can be killed by freezing for a week or heating in the microwave or oven for a short period of time. After ridding the area of the infested and potentially infested food, scrub the area with a mixture of soap and water or vinegar. You can also set up pheromone traps to capture the adult moths.
*The information for this article came from pestsense.cahnrs.wsu.edu; bugguide.net; and Wikipedia.org.
By Casey Leigh
Pine Wilt Disease – 9/1/2021
One of the joys of being part of the plant clinic team is learning something new almost every time we meet. Our clients bring in some very interesting questions. For example, last week a client emailed a photo of a pine tree that was dead and asked what had happened. After discussion, the clinic team needed more information. We emailed the client asked for more information and photos, but one possibility we discussed is Pine Wilt Disease.
Pine wilt disease is a complex disease that is of concern not only to homeowners but to forest managers as well. It is a devastating disease that can kill a tree in as little as three weeks. One of the factors in the development of this disease is high summer temperatures. (We have certainly had that this summer!) In the past, pine wilt disease has not been a big problem in the Northwest. However, with climate change bringing high heat and ever hotter summers, it is feared that pine wilt disease will become a threat to our pine forests.
Pine wilt is caused by the pine wilt nematode (Bursaphelenchus xylophilus) or PWN, a microscopic roundworm. PWN causes rapid wilting and mortality in susceptible host trees, especially pines. The pine needles fade to gray-green or brown and wilt. The needles remain attached to the tree. Often just a branch appears to wilt, but eventually the whole tree wilts and dies.
The life cycle of PWN is complex and involves interactions between the microscopic nematode, its vector beetle, and the host pine. The PWN’s life cycle is short, developing from egg to adult in three to five days. In the early stages of pine wilt, pinewood nematodes feed on plant cells surrounding resin canals or water conducting (xylem) cells in pine trees. As nematode populations increase, they move throughout the tree and interfere with the flow of water and nutrients ultimately causing death of the tree.
Pine sawyer beetle is the vector beetle. Females chew a small hole in the bark of recently dead, dying, or declining pine trees and lay their eggs. Young larvae feed on the inner bark, cambium, and outer sapwood. Older larvae bore into the heartwood and then tunnel back toward the surface creating characteristic U-shaped tunnels. At the last stage of larval development, they form a pupal cell at the outer end of the tunnel near the surface of the wood. After pupation, the adult emerges by chewing a hole through the remaining wood and bark. As adult sawyer beetles emerge from the wood colonized by pinewood nematodes, the nematodes have already moved into the beetles’ respiratory openings and are carried in the tracheal system. Beetles become vectors for the nematodes as they visit healthy trees to feed on bark and introduce the nematodes to the tree through the feeding wounds.
There is no cure for pine wilt disease. The diseased tree must be removed as soon as possible and destroyed by burning, burying, or chipping. Stumps should be removed or ground and buried at least six inches deep. If pine sawyer beetles are thwarted, the PWN will not have a chance to enter trees.
(Much of this information came from the Cooperative Extension Services of Oklahoma State University and Colorado State University and can be found online.)
By Pat Beeman
Rose Galls – 1/1/2020
During the 2018 fall clean-up at the CEG we came across some interesting growths on the Rosa glauca in the Welcome Garden. Upon further inspection, these mossy looking balls on the branches were identified as galls. An easy solution to combat insect induced galls is to simply prune them off, and this is what we did. I placed the galls in a container with a fine mesh lid and tucked it away in an outdoor area protected from sun and moisture. I then promptly forgot all about them until this fall and decided it was time to investigate.
These particular galls were produced by the tiny wasp Diplolepis rosae. This wasp has several common names such as Bedeguar Wasp and Mossy Gall Wasp. Females lay eggs within unopened leaf axillary or terminal buds of several wild rose species in the spring or early summer. The ensuing larva begin to feed on the tissue, chemically inducing its distortion. The mossy galls contain several individual cells, each containing a single larva that feeds, grows, and molts. The larva overwinters in a pre-pupal stage and transforms into a pupa the following February or March. The Mossy Gall Wasp is parthenogenetic, meaning all these offspring will be female clones of their mother. These females will emerge from the previous year’s gall in May through August and begin this process once again.
The full story of the Mossy Gall Wasp is layered with a complex ecology of parasitoids, hyperparasitoids (parasitoids of parasitoids), and inquiline gall wasps (wasps that lay their eggs in the galls induced by D. rosae). Additionally, an endosymbiotic bacteria is likely the culprit behind D. rosae’s lack of (only 1-4%) male progeny. So what did I find in our very own Mossy Galls?
Dozens of Diplolepis rosae wasps littered the bottom of the container. As I sifted through them under the microscope, a couple small wasp figures caught my eye. They were the parasitic Ichneumonid wasp Orthopelma mediator. This means the eggs of this wasp were laid directly into the developing D. rosae larva and then they consumed their host. Specimens of the rose galls, D. rosae, and the parasitoid O. mediator have all been curated into the Plant Clinic collection.
Feel free to take a look the next time you stop by!
By Tawnee Melton
Sequoia Pitch Moth – 5/1/2019
Our article this month discusses an insect whose larvae found on the Hortsmann’s Silberlocke Korean Fir in the Welcome Garden of the CEG: the sequoia pitch moth. In this month’s “Lessons Learned” column you will learn about this discovery, the damage it caused, and options for dealing with the problem and the damage.
This article describes the life cycle of the sequoia pitch moth, trees that are susceptible, the signs and symptoms that alert you to the presence of the insect, and WSU recommended options for prevention and control.
The Sequoia Pitch Moth, Synthanthedon sequoiae, is in the Lepidoptera order. The adult moth is very similar in appearance to a yellow jacket wasp but with clear wings outlined in black. As with most insect pests the larva causes the damage. The larva is about an inch in length with a yellowish body and reddish- brown head. The adult moth, which is seldom seen, lays eggs from late June through July. Eggs are laid in bark crevices, junctions of limbs and boles, and in wounds caused by pruning or another abiotic cause. Larvae bore under the bark and enter the phloem and outer layers of the wood causing pitch masses to form at the site of entry. The pitch is creamy yellow to pink in color but hardens and looks whiter as it ages. The larva pupates for 2 years before emerging as an adult. Prior to emerging the pupa will push most of the way through the pitch, allowing the adult form to avoid the sticky pitch.
In addition to the Hortsman Korean fir, host plants include many pines such as ponderosa and mugo. Douglas fir and spruce are less commonly affected and sequoias are rarely a host. Trees planted on dry sunny slopes are more at risk. Damage is initially cosmetic and localized. However, the pitch can girdle a limb which can kill the branch. Entire trees can be girdled but this usually occurs only in smaller trees. Infestations can be confirmed by finding a larva or pupa within the pitch mass or the pupal skin in the pitch. Infested trees are usually stressed.
Prevention is the key to management. Avoid over- or underwatering plants. Timing of pruning is essential in this regard. Adult moths will be attracted to wounds in the tree caused by pruning. Since they are active June-July, pruning should not be done during this time.
Recommended time for pruning to avoid infestation is October-February.
Control is mainly through removal of the pitch mass. Be sure to dispose of them as they may contain the pupa. Removal will prevent girdling as well as keep the adult moth from being attracted back to the tree. Pheromone sticky traps can help with heavier infestations. WSU does not recommend any home chemical control.
In summary, this pest can be controlled by good IPM techniques including proper initial tree placement, watering and monitoring for signs of stress such as broken limbs and pitch masses.
For further information, here are the resources used for this article:
Pine (Pinus)-Sequoia pitch moth | Pacific Northwest Pest Management Handbooks (pnwhandbooks.org); https://wpcdn.web.wsu.edu/wp-extension/uploads/sites/2086/2014/05/sequoiapitchmoth1.pdf; https://www.fs.usda.gov/Internet/FSE_DOCUMENTS/stelprdb5187550.pdf.
By Casey Leigh
Sequoia Pitch Moth – 5/1/2022
Every so often a visitor to the plant clinic brings us a pine branch with a gummy substance adhered to it. What is attacking my pine tree? Fungus? Insect? The pitch mass does look pretty intimidating.
The culprit is a sequoia pitch moth (Synanthedon sequoia). The Sequoia pitch moth infests pines and select other conifers. The adult moth is clear winged with yellow and black markings resembling a yellow jacket wasp. The larvae that do the damage are about one inch long, yellow in color with a red-brown head.
The moth lays eggs beneath the bark or in branch or bark wounds. The larvae feed under the bark of the trunk or a branch. A large pinkish mass develops at the point of entry. As the pitch masses, the pink tinge disappears and it takes on a hard grey appearance.
The host plants are pines such as Austrian, ponderosa, mugho and shore pine. The moth can also attack Douglas fir and spruce. Feeding is local and damage is usually aesthetic. However, extensive damage to small trees can cause girdling and death of the tree.
Because WSU does not recommend chemical control, maintaining the overall health of the tree is key. Avoid stress from over- and under watering. Don’t prune from March to October as pitch from the wounds attracts the moth. When you see the pitch masses, where possible, remove them and dispose in the garbage as larvae in the pupal stage may be present within the mass.
(This article is based on information compiled by Orv Vanderlin in July 2008.).
By Linda Sarratt.
Six ‘Bad’ Insects and What to do About Them – 5/1/2016
An unseasonably warm spring has all of us out in our gardens early this year. As our thoughts turn to the beautiful blooms our flowers will produce and the bounty from our vegetable and herb gardens, they can’t help to turn also to the age-old question: How will we keep the “bad” insects from destroying all our hard work? And on the positive side, what can we do to encourage the presence of “beneficial” insects? It’s the classic “good bug/bad bug” dilemma. This month we will focus on the “bad bugs.” Next month we will look at the beneficials.
For this article, Keith and I have chosen 6 insects that we get the most inquiries about in the clinic: aphids, stink bugs, squash bugs, root weevils, scale, and spider mites. Let’s start with the aphids, those tiny, soft-bodied in-sects whose piercing, sucking mouths seek out the sap from your plants. Signs that you have an aphid problem are curling, distortion, and discoloring of stem tips and new leaves. You may also notice their “honeydew” excretions that accumulate on surfaces of the plant and attract ants who feed on it. Fortunately, many of our beneficial insects find aphids to be a tasty meal, including lacewings, ladybugs, parasitic wasps, and damsels bugs, among others. You can also flush them off your plants with a strong stream of water from a hose. For those of you who aren’t squeamish, you can hand pick them off if you don’t have a large infestation. Finally, pay attention to your use of fertilizers as high levels of nitrogen enhance aphid reproduction.
Next, the stink bugs, particularly the brown marmorated stink bug (BMSB) which, unfortunately, has made its way to our region. Like the aphids, they are sucking insects. Although they prefer fruit, seeds, and seed pods, BMSBs feed on stems and leaves of some plants. They make their presence known by causing deformities in the fruit, such as dimpling, pithiness, and discoloration. They have the classic stink bug triangular shape with brown and white checks around the wing covers. Adults overwinter in sheltered locations, including our houses! Therefore, keeping cracks in your house sealed is one way of disrupting their life cycle. You can also buy traps to catch them. Once you spot them in your garden, you can pick and destroy eggs, groups of nymphs, and the adults; this will be effective if your infestation is not too bad. You can also shake the plants over a drop cloth and flush them down your toilet.
One of the most common insects brought into the clinic for identification is the squash bug. This 5/8” long dark brown bug also belongs to the piercing/sucking group of insects. Adults lay brown to reddish eggs along the veins of new leaves. Both nymphs and adults like to feed on new leaves, leaving small yellow specks which cause the leaves to turn brown and die. Adults also attack the vines by injecting a toxin that turns the vines black and crispy. A good way to keep down your squash bug population is garden “house cleaning” in the fall as they overwinter in garden debris, as well as sheltered places. In addition, hand pick and destroy the adults, nymphs, and eggs. Check WSU’s Hortsense website for chemical management alternatives.
Root weevils are serious pests for landscape plants such as azaleas, rhododendrons, roses, and strawberries. Signs of weevil damage are notchings along the leaf margins. The larvae feed on roots and can girdle crowns and lower stems. Beneficial nematodes can be applied to kill the larvae once soil temperatures reach 53 degrees. In addition, consider planting root weevil resistant varieties when available.
Scale, which comes in many species, is another piercing/sucking insect that looks like raised bumps on many parts of your plants. They cause leaves to yellow and plants to be stunted. If the infestation is severe enough, they can weaken stems and branches. Like aphids, they produce a honeydew. Since their honeydew attracts wasps, yellow jackets and ants, presence of these insects around the plants can be indicative of a serious infestation. Lace-wings, ladybugs and parasitic wasps will attack the scale. You can clean scale off the plants using a cotton ball soaked in rubbing alcohol or hand squashing them. Once again, avoid over fertilizing as it assists in scale reproduction.
Lastly, the spider mite can become a serious problem for our ornamentals. Spider mites are not insects, but 8-legged arthropods with piercing mouth parts. They are less noticeable than other pests in that they are usually found on the underside of leaves where they create strands or mats of webbing. Damage shows up as yellow or bronze-colored stippling of leaves; dropped leaves indicate severe spider mite damage. Spider mites thrive in hot, dry conditions and high levels of nitrogen in the foliage. Like aphids, mites can be hosed off plants with a steady, strong stream of water. Predatory mites, ladybugs, and green lacewings are natural predators.
For more detailed information on these and other garden pests, WSU hosts two excellent websites: Hortsense and Pestsense. A handy reference I consult often is Good Bug, Bad Bug: Who’s Who, What They Do, and How to Manage Them Organically by Jessica Walliser.
By Casey Leigh.
Slugs – 3/1/2019
Have you ever said to yourself, “I feel like such a slug today.”? A slug, or sluggard, is defined at Dictionary.com as “a person who is habitually inactive or lazy.” Although those adjectives may apply to a person, your garden slug is far from inactive or lazy once March rolls around. In fact, they are awake and active, searching for their first meal of the season.
Slugs belong to the class Gastropoda in the phylum Mollusca. The word “gastropod” is a combination of two Greek words meaning “stomach” and “foot”, earning the slug its reputation as a stomach moving on its foot along self-produced mucus, creating its diagnostic slime trail. Slugs, which feed on a wide variety of vegetables and herbs, as well as some of our favorite annuals and perennials, can eat several times their weight in food per day! Sexually, slugs are hermaphrodites, with both male and female reproductive organs. Mating occurs in fall and spring. A prolific species, one female can lay up to 500 small (1/4”) transparent, white, or golden colored eggs a year in clutches of 3-50.
The gray garden slug, the most prevalent in our area, can live up to 18 months. Consisting mostly of water, slugs search out moist environments. You can find them hidden under boards, stones, leaf litter, and in mulch and weedy areas, often underground. To catch them feeding, your best bet is to go out after dark as they shun sunlight, their worst enemy.
Slugs, although a scourge to most gardeners, play a beneficial role in the environment. They contribute to healthy soil by recycling organic matter. They are a tasty treat for many animals, including frogs, garter snakes, and many of our local birds. Keep this in mind as you realize the impossibility of eradicating slugs from your landscape.
But slugs can be controlled, and early spring is the time to begin your control efforts. Hortsense recommends several strategies. If you have the stomach for it, hand pick and kill slugs, either randomly as you see them or as part of a night-time slug hunt. Use natural baits such as small cans buried in the ground and filled with stale beer. Culturally, keep your garden clean by removing their favorite hiding places whenever possible. Don’t allow tall weeds and grasses to grow up around your garden.
Hortsense lists pesticides legal in Washington that kill slugs. However, they urge using caution as pets can be poisoned. They suggest using iron phosphate baits which are safer to pets. Other options include adding plantings that slugs avoid and placing barriers such as copper strips and diatomaceous earth around your favorite plants.
If you start early to get on top of slug control, you will save time and frustration later in the season when you plan on enjoying the fruits of your gardening labor.
By Casey Leigh.
Varied Carpet Beetle – 3/1/2017
Clients at the Plant Clinic during the cold winter months are few and far between, leaving us time to catch up on research and special projects. But we have had a recurring question: What is this bug I found in my house? Answer: Varied Carpet Beetle (Anthrenus verbasci).
This common tiny insect, 1.7-3.5 mm, looks nondescript to the naked eye, but its beauty is revealed under a microscope or hand lens. Its yellowish brown, black, and white dorsal surface reminds one of the calico coat of a cat. Known as wooly bears, their mature larvae are colorful as well, with light and dark brown stripes along a hairy body. The female carpet beetle lays approximately 40 eggs in the spring to early summer. Favored spots are bird nests and fabrics stored inside your house. In approximately ten to eleven months, the larvae emerge as adults. During that time they go through up to 16 larval stages and one dormancy period. Adults can live up to 44 days, but two weeks is the normal lifespan.
The second questions is: Are they a problem? Answer: Adults, no; larvae, can be. Adults feed on flowering plants. Their larvae, however, feed on organic matter, including all types of textiles, furniture, carpets, food, and even insect collections. Signs you have larvae are the presence of brown, shell-like, hairy skin molts. To reduce the chance of infestation in your home, vacuum regularly; keep fabrics and furniture cleaned; air clothes in your closet or stored in boxes (as larvae like dark, secluded sites); check cut flowers you bring into your house for adult beetles; don’t store foods in your pantry for long periods of time unless they are in a tightly sealed container; and remove abandoned bird and wasps nests from near your house.
In most instances, chemical control isn’t needed. Thoroughly clean the area or article where there is evidence of the larvae and, if necessary, dispose of the infested food, clothing, etc. Remove adult beetles when you see them in your house. Doing these things should prevent the expense of calling in a pest control company.
*Information for this article was taken from BugGuide.net, ipm.ucanr.edu, and ext100.wsu.edu (“Garden Insect is a Household Pest” by Marianne C. Ophardt).
By Casey Leigh.
Propagation
Multiply your bulb-type plants – 1/25/2023
Our garden writers’ enthusiasm about propagating plants is obvious if you’ve been reading our recent weekly columns.
First was how to successfully root geranium cuttings, next came tips on starting vegetable seeds, and last week the column focused on the fun of trying those challenging exotic seeds.
Today, I’m writing about how to multiply those wondrous little packages of underground potential: Bulbs and bulb-like plants. Given their needs of water, soil, sunlight and soil temperatures, most of these plants easily multiply and provide plenty of additional plants.
First, it’s probably best for a quick explanation of the different types of these compact storage units.
Bulbs hold their nutrients in layers called scales — easy to think of an onion and how you can see its layers. True bulbs include tulips, narcissus (daffodils), Dutch iris, camas, scilla and more.
Some bulbs are more prolific at producing new bulblets, while others produce fewer. If allowed to go to seed, many will germinate and slowly grow into producing bulbs, but deadheading those old blooms encourages replenishing the bulb and pushing out new bulblets.
Tulips were planted years ago in our raised beds and multiply each year. Crowded bulbs bloom less or not at all.
Two years ago, I dug them in late summer, dividing bulbs and then replanting them by spreading around the perimeters inside the beds. Fortunately, we have great drainage in our raised beds where we also grow vegetables, or the tulips might rot with summer irrigation. They prefer drier soil once mature.
Corms are hard, little nubs with nutrients held in their centers. Examples include gladiolas, crocus and crocosmia. After blooming, the corm shrinks as new ones grow on top of the old. After top leaves have yellowed, dig down and remove the old corm and replant new ones.
There are two types of tubers; the most usual have large tuberous roots. These include Irish potatoes, dahlias and daylilies.
New roots grow outward from the mother tuber and thicken to become new tubers, developing their individual large, fleshy storage areas. When dividing, be sure to include growth buds at the base of each tuber, not just the swollen tuber itself.
The second type of tuber remains as one enlarged base, and roots grow outward from it.
Tuberous begonias, cyclamen and caladiums fall in this group. Be aware that some of these are annuals. As perennial ones enlarge, they can be cut into sections, each with a growing bud.
Lastly, rhizomes are like tubers but longer, with branching fingers. These include bearded iris, rex begonias, sweet potatoes, lily of the valley, Oriental lilies and cannas. Some can’t survive our colder climate unless stored in above-freezing temperatures.
For example, cannas are hot-weather favorites, but can’t take our cold winters without protection. Some gardeners are satisfied treating them as annuals, while I treat them as tender perennials.
During summer, I grow them in containers or out in the landscape, then allow them to mature until after our first light frost. I cut off their tops then dig the rhizomes without dividing clumps, then pack them closely in large containers of soil to overwinter in the garage.
It is important when digging them to realize how widespread those newly grown rhizomes are and not mistakenly cut some in half.
Cannas in storage need very little water and care; in fact, less is better than none.
One year, a large container of cannas was neglected for four months, and the center ones still survived! I check mine about once a month, adding a little water when needed.
Spring comes and a little new growth may start appearing in those containers. I carefully separate plants, dividing those new healthy rhizomes and giving each an individual pot or grouping some in large containers. It’s still too cool for planting outside, so I keep them in a sunny, protected location; after the soil has warmed, plant them in a sunny spot where they’ll show off their dramatic tropical leaves and blossoms all summer.
By Mary Fran McClure
Tips for starting unusual seeds – 1-18/2023
It is more than magic watching a seed develop into a plant. It is the delightful introduction to life we can share with children, and all of us with green thumbs thrill to the germination of seeds and the promises they hold.
Since my earliest childhood, I have been enchanted by seeds: the size and beauty of them, the collection of them and the incredible transformation when a seed becomes a plant.
It has led to some pretty quirky behavior, I have to admit. I have an urge to grow seeds — the more unusual, the more challenging, the more tempting. As a pre-teen, I started with an avocado seed. I do not count sprouting sweet potatoes and carrots in the same exalted category as seed germination.
In the 1980s, the California Rare Fruit Growers published a journal with instructions of how to grow seeds. That lit my fire. Most of the content was about growing tropical fruit in areas such as California and Florida. Was I deterred by living in the Northwest? Nah.
My first success was a nutmeg. Its delicate, ferny leaves survived for several years. I graduated to dates, and date palms ranged toward the ceiling for about a decade.
A mango tree was next. Satsuma, orange and tangerine were all successes. I germinated and nurtured a coffee tree for 20 years. I never did get the banana seeds to germinate (and anyway commercial banana plants are clones grown from cuttings). Then a peanut, various nuts such as cashew, almond and filbert as houseplants. Growing oaks is a piece of cake, but they are unwelcome house plants because of their size.
Two years ago, I was homebound after surgery and itching to garden, at least in a small way. I bought one of those extravagant dragon fruits, all pink and green, pure white inside with hundreds of little black seeds. This plant is actually sort-of related to Christmas cactus plants. The seeds germinated in just a few days, but only persisted for a few months. Ignorance of their growing habitat caused my failure.
Not to be discouraged, I planted Christmas cactus seeds. One seed pod had developed for the first time on my 15-year-old plant. The seed pod began growing in January from one of the plant’s blooms. The seed pod ripened and fell off in September — did I mention that growing exotic seed takes patience? I planted the five seeds. Three germinated, with one persisting. After six months, the plant began to differentiate some petioles (the plant does not have actual leaves).
The plant, today nearly 3 years old, is something only a mother could love, but someday, maybe this year, it will produce bright pink flowers. Patience, yes, for sure, but not as much as, for instance, a Bonsai!
So, besides patience, what do you need to know? First, the growing climate of the plants. What is its hourly sunlight needs? Believe it or not, we have too many hours of summer sunlight for many tropical plants.
The big determiner is humidity. We live in an area of serious low humidity — especially in the winter with forced-air heat. Generally, the soil mixture is important. Soil-less mixes like Miracle-Gro, which is based on peat moss, are too soggy. Do the seeds need a period of cold dormancy or stratification (nicking the heavy seed coat) before they sprout?
A great resource with careful instructions is Holly Farrell’s book “Plants From Pits, How to Grow a Garden from Kitchen Scraps.”
My current project is a freshly germinated Argon oil nut, and seeds for a caper bush are in soil in cold dormancy in the refrigerator.
What a great way to start a new year!
By Bonnie Orr
Is seed-saving worth the trouble? In a word, Yes – 9/26/2024
“You can count the seeds in a tomato, but you can’t count the tomatoes in a seed,” a friend recently posted on social media. The post included a photo of a slice of a beautiful heirloom Brandywine tomato perfectly sized to be tucked between two pieces of bread accompanied by crispy bacon and fresh lettuce. His 15 years of seed saving from his best tomatoes all but guarantees tasty BLTs each summer.
Seed saving is a straightforward process that anyone can do. By saving seeds from the plants that perform best in your garden, you can grow delicious, healthy food and help these plants adapt to our local climate. This simple practice also encourages ecosystem stability. We’re here to help you get started.
Choose plants that self-pollinate. This means the plant has all the bits and pieces to fertilize itself rather than depending on insects or wind. The seeds produced by a self-pollinating plant will reliably grow to be the same as the parent plant. Examples of self-pollinating plants include beans and peas, tomatoes and lettuce. Self-pollinating flowers include marigolds, sunflowers and cosmos.
And speaking of parent plants, save seeds from open-pollinated or heirloom varieties of plants rather than hybrid plants. This conserves genetic diversity and prevents the loss of unique varieties. Planting seeds from hybrids works, but the results will be like Forrest Gump’s box of chocolates — you never know what you’re gonna get.
When choosing which plants to collect seeds from, select the ones that are the healthiest, most disease- and pest-resistant. Record the traits of the plant, including name, date planted and harvested.
Some seeds, such as tomatoes and peppers, can be harvested when the fruit is ripe. However, harvest other seeds, such as those from peas and beans, when the pods are dry on the stalk. Harvest flower seeds when the flower dries.
To save tomato seeds:
– Scoop them out and mix with warm water.
– Let the mixture ferment for three to four days to kill viruses and other diseases.
– Stir the mixture daily.
– Remove any floating seeds, as these will not germinate.
– Strain and rinse the seeds.
– Allow them to dry for a week or two in a well-ventilated area. Pro tip: Instead of a paper towel, dry the seeds on a coffee filter to avoid sticking.
– Store seeds in an airtight container in a cool, dark, dry place. Be sure to label the container with the genus, species and date. Seeds remain viable for four to five years.
When planting time comes, stop and ponder. You are participating in an activity that had a role in changing the course of human evolution from hunter-gathers to an agricultural lifestyle. You are contributing to plants becoming better adapted to our climate and ensuring your own bounty of garden delights!
By Dana Cook
The many possibilities of backyard plant breeding – 3/29/2017
As we move into gardening season, it’s time to start thinking ahead toward your future goals. Sometimes those goals are as simple as successfully raising your first real batch of home-grown potatoes. Maybe you want to grow enough flowers so that you always have a fresh bouquet to cut every week of the summer. And then some of us are interested in learning something entirely different.
As time moves on and one’s confidence as a gardener grows, it’s good to set your sights on some new challenges. Plant breeding is just such a hobby. This summer, think a little bit about playing around with plant genetics. You might create a new variety in the process.
Maybe plant breeding sounds intimidating at first. You might think “Surely this is a job best left to professionals.” It certainly is possible to get a horticulture degree with a plant breeding focus. But like most things in life, a little tenacity and a life-long love of learning can go a long way toward making up for a formalized education.
It is all but guaranteed that at least one of the varieties you have grown as a gardener is the consequence of the innate curiosity exhibited by a backyard hobby breeder.
The first example that comes to mind is the Green Zebra tomato. Just about everyone who loves tomatoes has at least heard of this variety. What most people don’t know is that it was developed in Everett by backyard garden tinkerer Tom Wagner. I was fortunate enough to take in his talk at the Washington Tilth Conference a few years back. Something that has always stuck with me since that day is how easy it is for backyard gardeners to start delving into the fun world of plant breeding. All it takes is a little background reading, some attention to detail and the passage of time. From there, the sky’s the limit.
So, I have piqued your interest … now what? A great place to start your journey into plant breeding is by reading about it. “Breeding Your Own Vegetable Varieties” by Carol Deppe is step número uno. This book is somewhat technical but well-laid out and easy to understand. It covers basic breeding techniques for many of today’s “garden variety” produce. This book will teach you about pollination techniques, exclusion techniques and seed storing. It will give you some background on how to think like a plant breeder. There are many other books available on the subject but the book by Deppe just happens to be one of my personal favorites.
After reading, the next step is to identify which qualities you are most interested in creating in a new variety. Are you looking to produce a heat-tolerant variety of lettuce? Perhaps you want a tomato that matures a little bit earlier in the season. Maybe you want an eggplant that has a better cold tolerance. You might even have a magic kale plant that seems to be immune to aphids and you want to find a way to propagate it and share it with your friends. All of these traits can be enhanced through careful observation, selection and breeding by a backyard grower.
Happy gardening and have fun!
By Eron Drew
Tips for saving and storing your garden seeds – 10/12/2022
Now that autumn is here, most gardeners are starting to put their gardens to bed. This is also a time to save the seeds from your best flowers, fruits and vegetables. With a little attention to handling and storage, seeds from open pollinated (heirloom) plants can repay your efforts with a satisfying harvest next year.
Unless you are a gambler, avoid saving seeds from hybrids. Hybrid seeds are produced by controlled cross pollination of two different varieties and are usually listed as “F1” in seed catalogs. Seeds collected from hybrids will produce plants that are not like the parent. You may end up with a keeper, but you never know.
Self-pollinating species give the most predictable results. These plants have flowers with both male and female parts. Pollination takes place within the flower itself, without depending on insects or wind. This ensures that the seed will produce plants that are true to type. You can also save seeds from plants that are pollinated by insects or wind, but they need to be isolated from others of the same species to breed true. Some common garden vegetables are both self-pollinated and insect-pollinated. Peppers are one example. If you grow both sweet and spicy peppers next to each other, you may get unexpected results if you save the seeds.
Fruits or flowers must be fully ripe or even overripe before removing the seeds and cleaning them. Seeds that are embedded in damp flesh, such as in tomatoes or melons, need to be removed, washed and dried.
Some seeds (tomato is one example) need to be fermented to remove the gel around them and kill disease organisms. This is a fairly simple process that is described in Suzanne Ashworth’s excellent book, “Seed to Seed.” It’s recommended reading for any serious gardener.
Dry seeds thoroughly before storage or they can get moldy. Lay them out on a screen or a paper plate and turn them over every day. Do this in a warm, dry place out of direct sun. The process will take a week or two. You want final moisture to be about 7%, but that is hard to measure. Try the bend test — use a couple of tweezers and put bending pressure on the seed. If it breaks, it’s dry enough. If it bends, give it another day or two to dry.
Seeds harvested from pods or husks and most flower seeds are harvested when dry. The pods or husks should dry on the vine. Flower seeds are harvested when the flower dries but before the seeds are scattered.
Once your seeds are dry, put them in a small envelope. You can buy special seed envelopes or use the envelopes from your junk mail. Be sure to label them clearly with variety and date. Store your saved seeds in an airtight container (a mason jar works well) and keep them cool, dry and dark until planting time. Save the desiccant packets you have probably received in vitamins, food products or shoes and put them in your seed container to be sure no moisture builds up.
Evaluate good storage conditions using the 100 rule: if the temperature in degrees Fahrenheit plus the humidity in percent equals less than 100, you have good storage conditions for your seeds. For example, my storage space is kept at 50 degrees F and 30 percent humidity, totaling 80.
As a seed saver, you become part of an ancient tradition. Enjoy the adventure of saving seeds.
By Connie Mehmel
How to save seeds – – 9/14/2016
So you say you have never saved seeds before. Well, you are in luck because today is a great day to start. There are a multitude of plants in your garden and landscape that you have the ability to collect the seed from and fall is the time to do it.
Remember that head of lettuce you forgot about in your garden all summer long that is now stretching toward the sky and is covered in white fluff? Turns out that white fluff is valuable stuff and is worth keeping.
Like its cousin prickly lettuce, the more refined culinary varieties are also capable of making seed within the length of a Central Washington summer. And even though many of the varieties available in seed catalogs are labelled as F1 Hybrids — this is not genetic modification but old-fashioned cross breeding often using hand pollination methods — many of the commercial lettuce varieties are very stable hybrids yielding babies that look and taste just like their parents.
So find an old brown paper lunch bag and a scissors or clippers and walk yourself out to that lettuce on your next day off (and preferably before a strong wind blows all of the fluff away!). To harvest, simply clip off the flower stalks of the lettuce and place them seed-head first into the paper bag.
When you get back to your house, use your fingers to gently rub the seeds free from the stems. Discard the stem material into the compost. Allow the seed and fluff to dry for a day or two out of direct sunlight with good air circulation (meaning: don’t overfill the bag). Once they have had a chance to dry, you should be able to rub the fluff free from the seed using your fingers. The seed should fall to the bottom of the bag leaving the fluff on top. Don’t worry about trying to get every last seed cleaned. In the bottom of your bag should be more than enough loose seed to get your garden started next spring.
Pour the seed into a small metal bowl and use a fan (like a blow dryer on the lowest no-heat setting) to blow the fluff away. It will take a little practice to get the technique right but it can be a very effective method for cleaning your seed once you figure out the correct angle to hold the fan. Do this activity outside so you don’t end up blowing all the fluff around inside your house … oops. And to be safe, while you are learning to manipulate the fan, hold the bowl over a cookie sheet or shallow pan so that you can catch any seed you accidentally blow out of the bowl.
After completing this last step, you should now have a quantity of beautiful lettuce seeds that you can keep for next season. Pour the cleaned seed into an envelope. Seal and label the envelope with the variety (if you remember) and the year the seed was collected. The envelope can be stored in the freezer or in a cool and dark location until needed. Typically seed is best if used within the first year or two of saving.
Once you have mastered the art of saving lettuce seed, begin experimenting with other crops. It can be incredibly rewarding to grow food from the seed that you collected yourself. And as time goes on, you can refine your techniques and begin experimenting with selective breeding, creating unique varieties that are well suited to your own personal garden environment.
By Eron Drew
No seeds, no problem – how to asexually propagate geraniums – 1/11/2023
There are really two main types of plant propagation: sexual, which is by seed, and asexual, which can be broken down by what plant parts and methods are used.
Asexual propagation plant reproduction uses roots, stems or leaves of a parent plant, and results in a genetically identical plant to the parent plant. Some common asexual propagation methods include growing plants from tubers, bulbs, rhizomes and stolons so you really just need to divide and move things to new locations. Other asexual propagation techniques include stem cuttings, leaf cuttings, grafting, layering and tissue culture. It’s a group that requires a little more knowledge and assistance.
The first thing to do is a little research on which propagation method is best for your plant and then figuring out how to make it work for your situation. Not taking the time now usually results in less-than-satisfactory results later.
One of my favorite asexual propagation techniques is geranium stem cuttings. I overwinter my favorite geraniums in a pot, then take stem cuttings during the winter. Timing depends on how large you want your plants to be, and a little experimenting to find what works for your situation.
I do my stem cuttings in early January before I start planting seeds. That way I can utilize my domes and heating mats when I need them for seeding.
Using a clean sharp knife, take 3- to 4-inch stem cuttings from the terminal ends of the shoots just below a node. If you cut above the node, it tends to rot up to the next node before it starts to root. Pinch off the lower leaves that will be inserted into your rooting medium.
Most instructions say to then dip the base of each cutting in a rooting hormone. However, I do not use rooting hormone when I do geranium cuttings, as I have found the success rate tends to be lower. I put my cuttings in straight perlite in a standard flat, although you can also use other mediums if you prefer. Pots and flats with drainage holes in the bottom are also suitable rooting containers.
Insert the cuttings into the medium just far enough to be self-supporting. After all the cuttings are inserted, water the rooting medium. Allow the medium to drain for a few minutes, then place a clear plastic bag or dome. I use the taller domes over the cuttings to prevent the foliage from wilting and help maintain a more uniform moisture level in the perlite.
The temperature for starting geraniums is wide, ranging from 50-80 degrees Fahrenheit. I like to root my geranium cuttings around 55-60 degrees nighttime temperature and 65-70 degrees daytime temperature. Increasing the temperature will result in faster growth, but they tend to have leggier growth.
Finally, place the cuttings in bright light, but not direct sunlight. I use two LED tube lights side by side and a heating mat under the flats. The cuttings should root in six to eight weeks. When the cuttings have good root systems, remove them from the rooting medium and plant each rooted cutting in its own pot. Place the potted plants in a sunny window or under artificial lighting until spring. One potted geranium can yield a lot of rooted cuttings to share with friends and family.
This is a good project to do with kids. They love to see the root growth and changes as the stem cutting develops. Using perlite allows for easy inspection of the roots as they form without damaging them. It is an awesome way to encourage future gardeners through an easy hands-on activity that will last all summer.
By Lloyd Thompson
Seed germination – what makes it work? – 1/4/2023
Winter solstice has passed, and the days are getting longer. Now is the time to get out your saved seeds, or order new ones, and prepare to propagate vegetables and flowers for your garden.
Starting plants from seeds is exciting stuff for a gardener, but it has its challenges. Often you will hear someone say, “I never have any luck starting (name your problem seed).”
What makes for successful germination? Good-quality seeds, good starting mix and proper moisture are essential, but often overlooked is the importance of temperature. Germination results from a series of chemical reactions in the seed, and those reactions can only take place if the temperature is right.
Seeds may germinate at a wide range of temperatures, but best success is achieved at the temperature when germination is fastest.
Slow germination increases the likelihood that seeds will rot in the soil, or seedlings will be killed by fungal pathogens. If germination takes too long, seeds may use up their stored carbohydrates before the plants can begin photosynthesis, resulting in plant stunting or failure.
Seventy to 75 degrees Fahrenheit is a good soil temperature for most seeds, though warm-season crops like tomatoes and peppers germinate faster at 80 degrees.
If you are starting seeds in your house, consider investing in a seedling heat mat. These mats cost about $25 and are available from seed catalogs and many garden stores. When placed under a seedling tray, they increase the soil temperature by 10 to 20 degrees above air temperature. If you don’t have a mat, you can try starting seeds on top of your refrigerator and take advantage of the excess heat produced by the motor.
What about cool-season crops like lettuce and peas? The seeds may be able to germinate in soils as cool as 40 degrees, but germination will be slow with all the associated risks. Lettuce and peas germinate most quickly at soil temperatures between 77 and 86 degrees. They grow best in cool air temperatures, from 60 to 65 degrees. When air temperatures warm, these crops go to seed. That is why they are started indoors (in warm soil) for spring planting and harvested before the heat of the summer.
In summer, lettuce and pea seeds can be planted directly into the warm outdoor soil to be harvested as fall crops, germinating in the heat and growing as temperatures drop.
For more information, I recommend you read “The New Seed-Starters Handbook” (revised 2018) by Nancy Bubel and Jean Nick.
By Connie Mehmel
Can you save seeds from your garden for planting next year? –
Which types and varieties do best is often heard when discussing seeds to buy. I wish I had an easy answer, but the truth is, it depends.
There may not be a right answer that fits everyone’s needs, it depends on lots of different things.
Is the hybrid plant variety able to resist a pest or disease better, store better, or does grow better, faster or more uniform fruit than a non-hybrid variety? Does the open pollinated or heirloom variety produce a better tasting fruit that makes up for its longer time to reach maturity?
Then, the question often comes up about keeping seeds of fruit and vegetables to save for next year. The easy answer is that you can keep seeds from this year’s favorites for next year, but make sure they are open pollinated, dried properly and kept in a cool dry location until it’s time to plant again. Be sure to label them so you can remember what varieties they are and when they were collected to prevent using old seed, which is less viable.
The problem is trying to keep track of seeds and what all those names — hybrid, F1 hybrid, open pollinated and heirloom varieties —mean, not to mention terms like self-pollinating, cross pollinating and sterile. If you are planning on keeping seeds, you need to know which seeds you can keep, and which ones you will need to buy next year.
A hybrid is a cross between two known varieties. Hybrids are commonly produced to make seed that combines the best characteristics of its parents — usually regarding its productivity, uniformity, vigor, and pest and disease resistance. F1 hybrid seeds refers to the selective breeding of a plant by cross pollinating two different varieties of parent plants. In genetics, the term is an abbreviation for Filial 1. Hybrid seeds will need to be purchased every year.
Open pollination are plants that will develop seeds that are pretty much the same as the parent plants were. They may be pollinated by insects, wind or animals, or self-pollinate, and produce seeds true to type or more simply “like their parents.”
Heirloom plants are also open pollinated but are plants that have been propagated and grown for at least 40 years, and often handed down from one generation to another generation.
Now the really tricky part starts when you decide to keep the seeds to use for the next growing season. If you are growing hybrids, plan on buying new seeds or plants next year.
If seeds are open pollinated, you can save the seeds for next year’s crop. This requires lots of dedication and effort to assure you end up with viable seeds. Not only do you need to make sure the plant is either self-pollinated or cross pollinated by the same variety of plant, but also that the seeds are harvested and stored correctly so they will germinate the next year. This is a really rewarding experience but there are lots of potential problems that may cause you to question if it’s worth all the effort. The seeds may not germinate because they weren’t stored at the correct temperature and humidity, or they germinate and grow, but you end up with an undesirable hybrid that looks or tastes nothing like your intended goal.
Open pollinated plants that can cross-pollinate and are grown near other varieties can produce a hybrid rather than a copy of the original plant. So you need to grow them isolated, away from other varieties, to prevent cross pollination with other varieties to keep the seeds true to type. It’s awesome when the seeds you saved from last year grow and you can harvest a new crop for your efforts.
By Lloyd Thompson
Get a jump on spring by starting seeds indoors – 2/19/2020
It’s been a mild winter, the days are getting longer, and we gardeners are impatient to get our hands into the soil. But why wait? You can get ahead of the game by starting your seeds indoors.
Advance seed starting has many advantages. Perhaps the most important is a controlled environment for fragile new seedlings. Indoors, you can protect them from damaging winds, heavy rains or hail. Tiny seeds can be more carefully sown in flats than in garden beds. Some plants, like tomatoes or peppers, will not mature at all in northern climates unless started indoors.
The most important consideration before starting any plant is the quality of the seeds.
Poor quality seeds will produce poor quality plants no matter how much care you give them. Parent plants must have good genetics and high vigor. Most of us will purchase garden seeds from nurseries, garden supply stores or catalogs. Be sure your seeds come from a reputable supplier.
Did you buy seeds last year and didn’t get around to planting them all? You may be able to use them this year. It depends on what they are and how they were stored. Kept cool and dry, some seeds may last several years. Beet, squash and tomato seeds may remain viable for four years or more under proper storage conditions. Others, such as onion, parsley and parsnip seeds, generally don’t remain viable more than one year.
Regardless of what they are, seeds that spent the winter in an open package in your utility drawer or garden shed will not give you good results. Even if some do germinate, the resulting plants are likely to be spindly and weak.
The second consideration is your starting medium. Avoid using garden soil. Though it may produce good results in your garden, it tends to contain weed seeds, insects and pathogens that should not be brought indoors. Most garden soil becomes crusty and does not drain well under indoor conditions.
Optimum seed germination will occur in a porous mix. Most commercial seed-starting mixes contain vermiculite, perlite and sphagnum moss. This provides a spongy, friable medium that promotes good root development. Commercial mixes also contain some amendments to provide nutrition for the seedling once it begins development.
Plan to start your seeds six to 10 weeks before planting them in your garden. A plug flat that will accommodate 72 seedlings, a seedling tray sized to accommodate the flat and a clear plastic dome tray cover are useful pieces of equipment for seed starting. This setup costs about $4.50. While you can use a variety of containers for seed starting, proper equipment is well worth the investment.
Place the plug flat in the seedling tray and fill each cell with starting mix and saturate it thoroughly. Place one or more seeds in each cell, planting them to the recommended depth — usually as deep as the seeds are wide. You will probably want to put more than one type of seed in your flat, so be sure to label the cells.
It’s easy to get cells confused, and many tiny seedlings look the same. Place the dome over the tray to keep the environment moist, and place the tray in a warm place. Remove the dome once seeds have sprouted to reduce the risk of damping off. Be sure your new seedlings have adequate light.
After two sets of true leaves have developed, transplant your seedlings into 3-inch pots filled with good-quality potting soil. Here your plants can spend some time developing strong stems and roots, until they are ready to face the outside world.
By Connie Mehmel
Try growing flowers from seed this year – 1/28/2019
This is your year, the one where you are going to try and start some of your own flowers from seed.
For many home gardeners, this is an unexplored and little understood avenue. It is very easy to head to a local nursery and pick from the selection of annual and perennial flowers available for sale there. That is a perfectly acceptable thing to do. However, there is also a down-side. If you have a serious plant addiction like I do, purchasing flowers from nurseries gets expensive very quickly.
Also, when relying on a nursery, you are limiting yourself to a handful of cultivars chosen for their durability in a nursery environment. By starting your own seed, a gardener is able to branch out and add cultivars that might not ever become available locally.
It may seem like January and February are too early to start thinking about growing bedding plants. After all, there is still over a foot of snow in the Upper Valley and the hills around Wenatchee are brown and dormant. But pretty soon, the sun will begin to regain its strength and the world will come alive in bursts of green. Right now is the time to begin purchasing seed and preparing.
The first thing to do is to assemble your favorite catalogs. Flip through the pages and make your wish list. Don’t try and limit yourself to a few items; go ahead and mark whatever looks interesting and fun. Take a week off and then revisit your selections. This is when you make your master list.
I usually try and pick a few new perennials and annuals that I have never grown before and then throw in some tried-and-true annuals that I know I love. I limit myself to about a total of 15 seed packets; enough for there to be more success than failure without over-committing.
After the seeds arrive, sort them in order of planting date. Each packet should give a recommendation of how far in advance they should be sown. Usually the longest period is 10-12 weeks before last frost, with the shortest being 2 weeks before last frost or direct sow. Every week to 10 days, look through your packets and sow the seeds that correspond to the window of time that you are in.
Use a planting method that allows you to sow each seed in its own individual cell. Plant one or two seeds at a time; you can always thin the weakest plant out later. Don’t worry about holding seed back to try again. Those seeds you purchased will never be more alive than they are right now. Use them up!
It is important that you understand the conditions that improve germination. Each variety is different. Some plants, like Echinacea, require a period of cold stratification. Other plants, like Fox Glove, require surface sowing and daily misting to germinate. As long as you follow the directions on the packet, and are a diligent caretaker, germination should be good.
Take care of your flower babies the same way you would care for a tomato or pepper plant.
Then prepare to be amazed! It is incredibly fun to dig up a new patch of ground and plug in 40 or 50 new perennials in a single go — all for the cost of about one nursery-grown plant. If started early enough, even the most tedious perennials will put on a bloom or two in their first year. By year two, they will be full and thriving and ready for cutting.
By Eron Drew
Growing plants from starts can be ‘easy-peasy’ – 8/12/2020
With my little green thumb, I have always enjoyed starting plants. Germinating exotic seeds such as date, nutmeg, mango or coffee delighted me for years.
Then, I met more and more gardeners — many times Master Gardener colleagues — who grew plants to-die-for and I wanted to grow them as well. I started to read about propagation and started adding unusual plants to my garden from starts that friends shared with me.
Many times a plant will hybridize naturally or change its characteristic over the years. You cannot expect an unusual plant to produce an identical offspring from seed. Hence, the popularity of vegetative propagation, which means a new plant is started from the stems or leaves of a growing plant. Chances are your grandmother filled her garden by this method.
The one caveat about vegetative propagation is that you must not propagate a cutting from a plant that is patented.
“Easy peasy” is propagating plants with runners such as strawberries, saxifrage, Ajuga or succulents. You just cover the runner with soil toward the end of the runner-stem without covering the leaves. This will promote root development along the runner. In the fall, cut the new plants from the parent.
The next-easiest method is to stick a broken stem into an opaque glass of water and watch it root. Common plants that easily root are basil and Impatient. The mistake that people make is that they think the start needs lots of roots. Actually, you only need 2-inch roots. Longer roots grown in water do not transplant to soil very successfully.
The next method is “green wood” propagation. Think of a geranium. It has long, thin stems that produce flowers, and lower down are green stems that are thicker and sturdier than the stems that produce flowers. This is green wood. It can be forced to produce roots in water, but usually the stem just rots. Cut a green wood stem. Remove the flower stem. Cut off all the leaves but one. Cut the green stem about 4 inches long. At the bottom should be a joint where you removed the leaves. Cut the stem so it is only ½-inch below the joint. Dip only the very end of the cutting in rooting hormone. Prepare a small pot with seed-starting potting soil. Make a hole with a pencil. Place the cutting in a prepared hole and water it well so the soil is clinging to the start. Cover the pot and the stem with plastic wrap supported by a Popsicle stick. I make “cloches” from wine glasses that my dishwasher broke the stems off. Place in a light spot but not in direct sun. Do not overwater.
Soft wood, which is the part of the stem that is 2 years old and has not yet developed heavy bark, sprouts roots in a few weeks. Cultivate the soil so it is soft and airy. Then, for example, bend a Lavender, Buddleia, Forsythia or Penstemon stem to the ground. Select a rock that is heavy enough to hold the stem on the ground. Stakes can be used, but rocks hold a larger section of stem more securely. Place the rock halfway along the stem, and put some soil on top of the stem. Make sure the top of the stem with its leaves is not covered up. Roots will develop along the stem where it is being held to the ground. Next, spring cut the new plant from its parent and share it with a friend. I have shared honeysuckle, Spirea, roses and Clematis with this method.
There are ways to propagate hard wood with bark and ways to propagate a leaf by cutting it into little sections to make dozens of plants. These methods require more patience and equipment, but can be satisfying to try.
New plants from old — what fun.
By Bonnie Orr
Closing the circle: Growing from seed to seed – 10/7/2020
In autumn, most of us clean up our gardens, put our perennials to bed and wait anxiously for next year’s seed catalogs to arrive. While the catalogs are exciting, other adventures await the gardener curious enough to save seeds for the following year.
In these times of industrial seed production, it is good to remember that the history of seed saving is as old as human settlement. People collected seeds from wild plants, grew them in gardens, and selected individuals that were productive and tasty to grow the following year.
If you grew open-pollinated (non-hybrid) vegetable varieties this year, you can save the seeds and grow them next year.
Avoid saving seeds from hybrids because they will produce plants that are not like the parent. Hybrid seeds are produced by controlled cross pollination of two different varieties and are usually listed as “F1” in seed catalogues. For saving, choose seeds from open-pollinated varieties (sometimes called heirlooms).
Best for beginners are species that self-pollinate, meaning that the flower has both male and female parts. These include beans, peas, lettuce and tomatoes. Pollination takes place within the flower itself, without depending on insects or wind. This ensures that the seed will produce plants that are true to type. Seed can be saved from insect- or wind-pollinated plants but require an isolation distance from others of the same species to breed true.
Save seeds from healthy plants. Allow the fruit to fully ripen before removing the seeds. For beans or peas, let the pods dry on the vine. Once you collect the seeds, let them dry on a paper plate in a well-ventilated area.
There are many varieties of open-pollinated tomatoes, and many gardeners save their favorites. Cut open the tomato and remove the seeds and surrounding gel. The gel prevents germination, so seeds do not sprout inside the ripe tomato. Put the seeds and gel in a container, add two tablespoons of water, and cover it with plastic wrap. Poke a couple of holes in the plastic and put the container aside for three or four days until the surface of the seed/gel mix becomes covered with mold. This fermentation process breaks down the gel and kills many seed-borne diseases. Once the mold has formed, pour the mess into a strainer and rinse with clean water until only the seeds are left. Dry them thoroughly on a paper plate in a warm dry place out of direct sun.
Once your seeds are dry, wrap them in paper or put them in a small envelope. Be sure to label them clearly with variety and date. Store your saved seeds in an airtight container and keep them as cold as possible until planting time. If stored properly, they will remain viable for four to five years. Collect seeds from more than one plant if possible.
As a seed saver, you become part of an ancient tradition. If you want to learn more, I recommend the book “Seed to Seed” by Suzanne Ashworth, published in 2002 by Seed Savers Exchange. You can find detailed information on the science of seed saving, plus instructions for saving seeds of more than 100 vegetable varieties.
By Connie Mehmel
Growing Plants From The Produce Department – 6/2/2021
The year 2020 was a long year by any standard — even longer if you were a student suddenly thrust into online learning. My granddaughters and I ended up in school together, at our kitchen table.
Teachers were suddenly teaching in a format no one wanted or understood; kids were struggling with trying to learn without the engagement they needed. As a former agriculture and science teacher, I was lost in how to help my granddaughters.
One day, we were having a conversation during lunch and my 12-year-old granddaughter found a seed in a lemon she was cutting up for her “lemon” water. She asked some questions about seeds and how they grow and I started talking about planting flowers and vegetables in the school greenhouse. About then, I got the “look,” which from a middle schooler meant she only wanted to know if you could grow a lemon tree from a seed. With her natural curiosity engaged, we started researching it on the internet, and she ended up focusing on seed viability and seed germination.
After doing some research, we decided to expand our project and got more lemons. We went with a range of different types and sizes of lemons. We ordered two of every type of lemon and drank a lot of lemon water while looking for seeds, and felt like we hit the lottery every time we found some seeds.
I ended up as the lab assistant in our experiment, while my granddaughter was chief researcher. She pored over YouTube videos and countless articles about growing lemons. She decided to soak the seeds and see which ones sank after 24 hours, discarding the ones that floated. Then we rolled them up in a wet paper towel and placed them in a Ziploc bag to check seed viability.
A few days later, I heard an excited squeal as she saw the first radicle emerging from a now plump-looking lemon seed. She decided that she would plant them in a fine-blend soil mix when the radicle was 3 mm long. Soon we had a crop of lemon shoots poking up from the soil and she was busy looking at the produce advertisements and noticed that lemons have a citrus cousin called a grapefruit. We ended up adding a few grapefruits on that week’s grocery list.
While she was refining her process on germination with grapefruits, the lemons were busy growing under a propagation dome and on a heating mat. The grapefruit germination was much smoother and more successful as her growing skills improved.
Next, she was busy researching growing limes from seeds. The grapefruit soon moved under the propagation dome along with the lemons while she was busy preparing lime seeds to germinate.
We ran out of citrus at Fred Meyer, and I was sure we would move onto growing something more traditional. I have never considered papayas as traditional, but I found myself busy helping her clean and prepare the seeds for germination; and of course, planting after they germinated. It seemed like everything she touched grew and it inspired her to try more things. Soon we had mangoes, avocados and apples growing.
I learned as much as she did during our adventures in the produce department looking for seeds. She worked on her scientific procedure and learned how to grow plants from seeds. We both learned that one of the joys of learning is doing things you’ve never done before. So if you find a seed in your lemon or any seed in your produce, maybe you should have a little fun and see if you can get it to grow!
By Lloyd Thompson
Planting Dahlia Tubers – Where, When, and How?
Dahlia plants grow from tubers. Some dahlias are grown from seed and new varieties are usually developed from seed. Seed from named dahlias will not produce the same blooms as the parent but will be a mixture of the color and characteristics of the parents of that plant. Therefore, it is necessary to plant a tuber or a cutting of a particular cultivar in order to have flowers of that form and color.
Buy dahlia tubers from a reputable dahlia growers or local dahlia society sale. The quality off the tuber makes a difference. A good source to find a supplier of a certain tuber cultivar you’re looking for is https://dahliaaddict.com/ Buy tubers with visible eyes located at the top of the tuber, called the crown. Unlike potatoes which have eyes all over, dahlia tuber eyes are only found near the end where the tuber attaches to the plant stem. The tuber should have an eye showing. The eyes can be difficult to spot so ask the seller, dahlia friend, or an expert to locate the eye for you. Buy plump, healthy looking tubers with no sign of decay.
It goes without saying that conditions for growing dahlias vary, depending on climate in the growing location. Dahlia growers are dedicated to successfully growing dahlias all over the world, in spite of the natural conditions in any area. In Eastern Washington there are four distinct seasons. Casual growers who use dahlias as part of their landscaping or grow for cut flowers will find that dahlias are fairly hardy, as long as they receive proper watering and sunshine.
First, we’ll talk about the garden plot. The ground should be weed free, warm, and well drained at planting. Heavier soil needs to be amended with organic matter such as aged composted manure, alfalfa meal, or purchased compost to lighten and loosen the soil texture for better drainage. These additives should be incorporated into the soil before planting.
When to Plant: In the NCW area or similar climate area plant tubers once all danger of frost has passed. Normally, this has been mid-April to early May. Soil temperatures should be at about 60 degrees or warmer at 4 to 6 inches in depth, which is the planting depth. An inexpensive soil thermometer to check the soil temperature can be purchased at the local hardware store. For best results, dahlias need a sunny location to thrive. Plant in lightly moist soil in an area that receives 6-8 hours of direct sunlight is best.
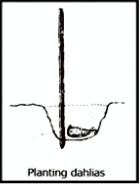 Dahlias that reach 3 feet tall need to be staked. Set the stake before the tuber is planted to avoid the possibility of damaging the tuber or the root system. Stakes need to be 4 – 6 feet tall depending on the height of the dahlia cultivar. Plant the dahlia tubers about 18 – 24 inches apart. Stakes will support the weight of the full-size plant and help support the plant during windy weather. Any staking product will work; metal t-posts, rebar, wooden garden stakes, or bamboo stakes.
Watering in the dry Eastern Washington climate can be tricky. Only minimal water is needed until you see the dahlias sprout through the soil. Tubers are prone to rot from too much moisture, but they do need some moisture in the soil. Young dahlia plants do not need a lot of water. When reading material on how to grow and maintain the dahlia bloom make sure the writer is giving instructions about a similar zone/climate in which you grow.
The American Dahlia Society has helpful information about growing dahlias. Visit this site at: https://www.dahlia.org/growing/dahlia-university
There are several well-versed dahlia growers within WSU Chelan/Doulgas Master Gardeners. Contact our Plant Clinic or ask Marco to put you in contact with someone that can give month to month guidance to growing the dahlia.
By Mona Kaiser
Growing Native Plants From Seed – 10/1/2022
Climate change is bringing many challenges to gardeners: increased heat; potential scarcity as well as increased cost of water; and reduced pollinator populations due to habitat loss. Using native plants lessens the impact of these environmental challenges. Native plants add biodiversity to the garden; they are tolerant of dryness and heat, and they support our pollinators. If you have an interest in adding native plants to your garden, one possibility is to use seeds. By seeding natives, especially wildflowers, one can expand the number of plants at a low cost. You can find seeds for native wildflowers that are unavailable as plants from local growers. Plus, you will learn a lot about seeds, soils, and micro-climates in the process.
I’m no expert, but I can share some of what I have learned by experimenting over the last few seasons. From books and online sources one can find photos and habitat information and be introduced to plants you may not know. I found the University of Washington’s Burke Museum app called Washington Wildflowers especially useful. Knowing the true genus and species of our local natives helped as I looked for seeds. Choosing flowers that I want to grow, evaluating different sites in my yard and addressing soil, sun/shade and water needs are more varied and detailed for natives than for most horticultural offerings. Having a soil test done is a good start. There may be some site preparation needed. Although many natives in our area are adapted to low fertility soils, you may need to add organic matter to your soil. I find adding compost to the planting area is useful when transplanting seedlings or growing “meadow” or riparian area plants. If the plant likes a sandy dry site and good drainage is important, I have added gravel and sand to my sandy loam yard soil in those areas.
Seed growers will give seed preparation and germination information, sometimes very detailed. Often this means stratification and /or scarification of the seed and the depth of planting. If the seed company says to direct seed, this may indicate it germinates readily and/or that the plant’s early days are directed at growing deep tap roots, making transplanting more difficult. In these cases I have had success planting in a 9”W x 24”L x 9“ D container. I could keep track of my seedlings and prevent squirrels from digging them up – I had to use a trenching shovel to get them out of the planter, but it worked out. I haven’t had much success with direct seeding if cold stratification is needed, so I am turning to Outdoor Propagation, sowing seeds in pots, tubes or flats. Mel Asher from Derby Canyon Natives uses a combination of peat moss and vermiculite, planting in tubes. (Use a few seeds per container even 2-3 seeds in the tubes. Natives seem to benefit in early stages by growing in clumps. Thin them later.) Fill the chosen container, moisten medium, plant seed at correct depth, then cover the seed with sand or grit at the same depth as the width of the seed. Even seeds needing light to germinate will benefit from a light dressing of sand. Sand keeps the soil and seed from dislodging in the rain. Sand also helps support young seedlings. Place your seedling container outside in appropriate sun/shade locations. For stratification, plant seeds November to January. Annuals not needing stratification can be started in pots or flats or direct seeded in February/March. If direct seeding a plant that needs seed stratification, you can put the seeds in a stocking and place the stocking surrounded with moist peatmoss in a container and keep it outside with your other pots. This allows you to keep track of just the seed. Add sand to seeds before direct seeding as many are very small to aid distribution . Once seeds germinate in the spring, water as appropriate, adjust the location of your containers as light and temperature change. Some plants will be ready in a few months; for perennials this process may take up to 2 -2.5 years before they are of a size to plant Into the garden. For more detailed information please see references below. Happy Gardening!
SEED SOURCES: Washington Native Plant Society, Native Plant and Seed Sources 2022 www.WNPS.org, Alplains Seed Company www.alplains.com, Thorn Creek Native Seed Farm www.nativeseedfarm.com
INORMATION: University of New Hampshire, Planting for Pollinators, Establishing a Wildflower Meadow, www.extension.unh.edu, University of Maine, Planting Plants from Wild Seed, www.extension.umaine.edu, and referral to www.wildseedproject.net
By Dee Curcio
How to Grow Lupines from Seed – 11/1/2022
Lupines (pronounced loo-pins) are one of the most beautiful spring wildflowers in the Wenatchee Valley and foot-hills. We are blessed with a variety of species of native lupines, including Bigleaf (Lupinus polyphyllus), Broad-leaf (Lupinus latifolius), Silky (Lupinus sericeus), and Sulphur (Lupinus sulphureus) (https://www.wnps.org/plant-lists/list?Chelan_County). Lupines are in the Pea family (Fabaceae); have deeply lobed palmate leaves with five to nine leaflets; grow 1 to 4 feet tall; bloom in the spring; and have conical, spike-like blossoms of many 5-petal, uniquely-shaped flowers characteristic of the pea family. Most of the lupines in our area are purple or bluish purple; even the Sulphur Lupine, which is typically yellow in most of Washington, is purple here (https://www.cdlandtrust.org/trails-access/field-guide/sulphur-lupine Sulphur lupine | Chelan-Douglas Land Trust (cdlandtrust.org)). Lupines are biennial or short-lived perennials. Lupines benefit our native lands by having deep tap roots for stabilizing soil and the ability to fix nitrogen which increases native soil fertility.
Most home gardens do not contain native lupines but may contain commercial, often hybridized lupines that are much easier to obtain than the natives. Native lupine seeds and seedlings are available at many nurseries and seed suppliers in Washington State (https://www.wnps.org/native-gardening/sourcing). Once established, native and commercial lupines cannot be transplanted because of the long taproot. Seeds, however, can be easily harvested after the spring bloom. Break the seed pods off after the flowers have dried out and the seed pods look yellow/brown. Be careful as the seed pods often will break open and disperse the seeds. Place the seeds/seed pods in a paper bag and wait until fall (or spring) to plant them. Seeds from hybridized lupines are rarely collected because the plants grown from them typically do not look like the parent, hybridized lupine. Note that it is illegal to collect seeds from public lands. I’m fortunate in that I have several friends that have offered to let me collect seeds from lupines on their properties in Wenatchee Valley and the foothills.
Most gardeners, especially those planting native lupines in their shrub-steppe backyards, will prefer to directly plant the seeds in late fall or early winter. Lupines seeds require scarification and stratification to germinate. Scarification is the process of breaking the seed coat to allow water to enter the seed. Scarification is accomplished in nature by freezing and thawing during the winter. Scarification may also be done by gently rolling the seeds over sandpaper or a file until the seed coat begins to change color. This should be done right before planting as the sandpaper process can leave seeds vulnerable to infection and decay. Stratification is a cold, wet period that breaks seed dormancy. This occurs during winter in nature. For those gardeners that want to plant seeds in spring, the seeds will need to be placed in the refrigerator in a ziplock bag with a moist paper towel 1 week before scarification and planting. Sow seeds ¼ inch deep and 1 foot apart in loose, well-drained soil with lots of sun. If you can, loosen the soil about 1-1.5 feet deep to allow for optimal taproot growth. Lupines don’t tolerate clay soil and prefer slightly alkaline, sandy, poor-fertility soil. Keep the seeds evenly moist during the spring to encourage germination but don’t overwater once they are established. Seedlings should emerge 15-25 days after planting in the spring. Lupines can be planted in containers, but the long taproot requires a deep container. Once established, lupines require little care. Lupines are deer- and rabbit-resistant and attract pollinators such as bees, butterflies, and hummingbirds.
Enjoy your lupines!
References:
Elysian Fields: Growing Lupine From Seed, James Everly
https://www.seedneeds.com/blogs/seed-needs/growing-lupine-from-seed
Complete Guide to Plant, Grow and Care for Lupine Flowers, Eric Vinje July 13, 2022
By Jeff Martin
How to Overwinter Geraniums – 10/1/2013
Geraniums—at least what we commonly call geraniums, are the workhorses of the summer garden. In full sun they bloom all season. We often find a special one that we wish we could over-winter. Pellegoniums originated in South Africa where they actually grow as small shrubs. Sadly, the first nights of 40 degrees will kill our summer lovelies. So, can geraniums be overwintered?
Here are your choices:
• You can kiss the plants goodbye. Let them die back and compost them.
The advantage of this option is new is better and who knows what is waiting at the garden center next spring. Starting with new plants ensures that they will take off in your landscape ready to make any sunny spot colorful.
• You can bring them into the house and attempt to make them into houseplants.
This is the most problematic option. The plants will need to be transplanted into huge pots, which are bulky and heavy. Most outside plants resent being brought inside, and they will pout. The plants will lose their leaves; they will quit blooming, and the leaves will get smaller and smaller because you cannot provide as much light as the geraniums were accustomed to outside. Even worse, the plants become a magnet for bug infestations. You name it, geraniums attract it: aphids, spider-mites, scale, and white fly. These infestations will travel to your other houseplants. Who knows, the plant’s soil may be harboring some exotic pest such as spiders or earwigs or slug eggs.
• You can bring them into a sheltered space and over-winter them.
Geraniums have been in our gardens since the 1720’s, and they can be surprisingly long lived. My geriatric geranium, is now 32 years old. It goes outside in a pot in the summer, and winters over inside. There are as many over-wintering techniques as there are grandmothers who did this for years. Some of the techniques are more trouble free and more successful than others.
Barerooting:
You take the plant out of the pot and leave on as much soil as possible. Some people hang the plants upside down in the garage. I found no actual reasons for why the plant has to be upside down. Some people put them in brown paper bags. Essentially, the plant is forced into a drought dormancy. You can check on it every once in a while. It needs no light, it but needs a sprinkle of water every once in a while. Store it in a place that is about 45 degrees. This technique is not as successful in NCW as it is in other parts of the country that have higher winter humidity. We are both dry and cold during the winter. Try this technique with plants you have not fallen in love with.
Resting:
Cut the plant back by three-fourths and put it in a 45 degree room with some light. Water only if the plant is really dry. This plant will put out some new growth—be sure to check for insect pests because they can easily kill the plant in a short amount of time.
Watersprouts:
In the fall, take cuttings about 12 inches long and remove most of the leaves and all the flower buds. Put the stems in an opaque container filled with water. Check the water level every once in a while and be sure none of the leaves are rotting in the water. The stems will root. When they have rooted in late February, move the stems into moist potting soil. Put the plant in moderate light so that it can sustain itself until you are ready to plant it out-of-doors.
A serious warning to avoid heartache. After you have spent the winter worrying and mussing about your geraniums, they must be hardened off before they are planted outside. Beginning in mid-April, (this is really labor intensive) move the plants daily outside for longer and longer periods and into more and more intensive light. They must be brought in every night. Generally, the plants are not ready to transplant out into the garden until Mother’s Day because the soil is not yet warm enough. You can tell if it is not warm enough because the leaves develop red leaf margins.
So— maybe option one is a great choice. I personally do option three using water sprouts and resting, heavily pruned plants.
By Bonnie Orr
Propagating Plants Takes Patience, Attention to Detail – 4/1/2023
“Sometimes we get in a rush to hurry-up spring. But you cannot speed up Mother Nature. My friend, neighbor and fellow master gardener, Craig Lawrence, tasted some of my Interlaken grapes and drank some of the juice I made from the Glenora grape, and decided what he needed was a grape vine to create a visual border near his back fence. It was tempting last month when he made the request to take some vine clippings and get growing. But it is all about timing. Fellow master gardeners have expressed their disappointment at the failure of their cuttings to root and thrive. When I have asked when they attempted to start the new plants, I received such answers as “in September” or “in January.” (We all want to garden year-around, don’t we?) To successfully start plants from cuttings, the parent plant must be in a vigorous growth period. For example, I never start new rose plants until the middle of June. If the plant is dormant, it just does not have the “umph” to put out new growth or to root even when hormone is placed on the end of the cutting.
Another error made by eager gardeners is misapplying growth hormone. You know the adage, “a little is good; more is better.” When hormone powder or liquid is spread on both the cuttings stem and base, the plant becomes confused. (That is not a scientific explanation, I know). You want roots to grow from the bottom of the cutting, so that is the only place you apply hormone.
Desiccation is another problem with cuttings. This is dealt with in two ways. The single leaf on the cutting is going to photosynthesize for the new plant. If the leaf is large, cut-ting it in half or even fourths will still provide enough photosynthesis, but the leaf will not dry out because there are yet no roots to draw up water to the leaf.
Besides downsizing the leaf, the other way to prevent desiccation is to use a cloche. A cloche can be anything that prevents water from evaporating from the soil and from the stem and leaf. My favorites are the wine glasses that the dishwasher broke the stems from. A mason jar, a clear plastic cup, a lidded salad box, etc., also work. Plastic wrap is not really a satisfactory choice because it is too thin.
The “soil” should be fine-textured seed-starting mix. This “soil” will hug against the sides of the cut-ting and prevent desiccation. Water with 80 degree water so the cutting thinks it is nearly summer. So as soon as the grape leaf buds unfurl, I will take the cuttings to start the new grape vines.
By Bonnie Orr
Seed Planting – 2/1/2017
Starting your own plants from seed is exciting. It can also save you time and money in the long run. More varietal options are available and the cost of seed verses plants is much less. Some seeds are more difficult to start than others. If you are new to this, start by investing in your equipment and begin with easier plants such as tomato, lettuce or marigold seed. Many long season vegetables like brussels sprouts should be started indoors in order to produce sufficiently. Some annual flowers need a head start indoors if they are to bloom during the season. Be sure to read your seed packet for specific directions.
There are lots of choices for containers. Providing heat is not a necessity but I explain why I think you should. You will need the following –
Pots/containers
Soil
Seed
Heat (optional)
Light
Containers – These can be store bought, made yourself or you can use recycled containers. Store bought seed trays contain individual cells for each seed. Onions and leeks transplant easily and can be started in large flats. You can find pots made from organic material such as peat or shredded ingredients. People use strips of newspaper to make pots. Both are nice for transplanting seedlings whose roots do not like to be disturbed. All reused trays and pots must be sterilized. Remember – all containers must have drainage holes.
Soil – Do not use garden soil which carries weed seeds and pathogens. Begin with a “seed starting” mixture. Fill your containers and water well. Soil will settle, so fill some more and water again. Make labels for each tray, pot, or flat. I don’t need a whole tray of peppers so I have several labels per tray. It is no fun to have what you thought was a cherry tomato plant grow into a massive indeterminate beefsteak! Do not add fertilizer. Seeds have all the nutrients they need to begin their life.
Seeds – Don’t be overly swayed by beautiful pictures on seed packets. Buy only what you need and keep your plans realistic. If you are a new gardener, I suggest you start with new seeds. Older seed have a lower germination rate. Look critically at the available space you have. Can you devote space for 4 months to gar-den plants? A 72 cell seed tray could conceivably produce 65 seedlings which need transplanting into 3-4 inch pots. Will you have the space?
Heat – Vegetables, like tomato and pepper, need warm soil to optimize germination: 80-85 degrees. Plants of the Brassica genus, such as kale, like it cooler: 70-75 degrees. The top of older refrigerators are warm enough. However, to speed up germination and reduce surface pathogens, many gardeners use a heat mat.
Light – Most seeds do not need light to germinate. Once most of the seeds in your tray start to sprout, place them under lights. Plants placed on windowsills do not receive enough light and that light is weaker. This type of light produces weak stems (“leggy”), which are not healthy plants. The most inexpensive lights are T12 florescence shop lights. More energy efficient bulbs are T5 and T8. The “T” stands for tube and the number is the diameter of the tube. Unless you are growing to produce flowers or fruit, you do not need to be concerned with different light frequencies. Make sure you can either lower your lights or are able to raise the containers to keep the seedlings close to the light source. Seedlings need to stay 2 to 4 inches from the light source.
By Emilie Fogle
Roses
Why not grow roses? — 02/13/2024
Roses are the most popular garden flower. They have been giving pleasure for thousands of years. And lucky for us, we live in one of the best places in the world to grow roses.
In North Central Washington, we have the most hours of sunlight in the contiguous U.S. Rose plants are most vigorous and filled with blooms when they grow in full sun. Because of our low humidity, we have minimal fungal diseases. Insect pests are primarily aphids, which are easily dealt with. The Japanese beetle has not arrived in our area.
Roses are easy to care for. Yes, you do not have to diddle with pruning if you do not want to. In fact, you can grow huge roses like Rugosa that never need pruning.
It is a garden myth that roses will not re-bloom if they are not deadheaded. Roses need fertilizer once in mid-spring. They are not poised to survive winter with a late fall fertilizer — in fact, that causes a late spurt of growth that can weaken the plant. Roses are pruned heavily to contain their size and emphasize the blooms, but that is all cosmetic. If you own a gnarly old rose, reshaping it with vigorous pruning will improve the looks of the plant and promote new healthy canes that will bloom enthusiastically.
Roses can be grown totally without pesticides. Dealing with pests is mostly being observant. Aphids appear in spring on new succulent growth. At the first sign of them, rub them off. Thrips cause brown petals and blasted buds and can be controlled by destroying the flowers when they first show evidence of damage.
Both thrips and aphids are parthenogenic — that is one female just keeps laying hundreds of more female insects. Clean up weeds and grasses under the rose plants to eliminate hiding places for the insects and that provide shelter for overwintering adults. Birds, ladybird beetles and lacewing larvae love to munch on aphids and thrips. Be aware that rose systemic pesticides kill these beneficials.
Mildew can be a cosmetic problem until the daytime temperatures reach 90 degrees. Fungicides are not necessary. Cleaning up last year’s debris under the rose plants will eliminate the source of the mildew spores. Again, regular observation is necessary to control mildew. Late every afternoon, wash the affected leaves, top and bottom, with a strong spray of hose water. This washes off the mildew spores.
By Bonnie Orr
Helpful tips for fall rose care — 10/14/2019
In North Central Washington, roses are one of our favorite flowers because they are easy to grow during spring and summer. Winter weather patterns have changed how we provide fall and winter care for roses, but the basics are the same.
Prune all rosehips from the roses. The rosehips consume energy from the plant, and the development of them delays the plant’s ability to go into dormancy.
Prune hybrid and floribunda roses to knee height. Do not thin the canes nor worry where the cuts are made. It is easier to work around the shorter canes, and the snows and winds can snap longer canes clear to the ground. For those who have gardened west of the mountains, do not prune the canes as short as you have in the past. If the canes freeze, you will have nothing to work with in the spring.
Cut the long whippy canes from the climbing roses. Tie additional supports around the body of the rose so the winds will not blow it over and break it.
Generally, shrub roses are dense and compact and do not need any fall care.
Take the roses out of containers or big planters because their roots will freeze and that is the end of the story for that bush. Put the plant in the ground at the same soil level as it was in the pot. The soil will protect the roots. You can also put the container in a garage or other place that stays below 40 degrees and above freezing.
Tree roses need to have a cooling period, so leave the huge container outside when the nights are still in the 20s. When a temperature in the teens is predicted, take that pot into an unheated garage or other space that stays above freezing.
Importantly, sanitize the rose garden. Clean up all the dead rose leaves at the base of the plant because these could be harboring eggs or larvae of white fly, aphids, spider mites, etc. If you had even a smidgen of powdery mildew in June, be sure to pick up all the fallen leaves.
Cut, do not tear off the remaining leaves from the plants to eliminate destructive insect habitat. If it is a sunny fall day, it is a pleasant way to spend an hour or so. I had a 27-rose variety garden, and it always seemed that I set aside the first cold, wet day for this task. Maybe you can plan better. You can do the leaf trimming now or in the spring. The advantage of doing it in the fall is that you have less chance of tearing the undeveloped leaf buds. And you can see the shape of the canes when spring arrives.
Rose care has changed in our area in the last 30 years. Three decades ago, our first snows and freezing occurred at the end of October in the Greater Wenatchee Valley. Distressingly, we have had hard, unexpected freezes in mid-October, no freezes until January, then hard freezes, sudden melts and hard freezes the next week. Whoa! The roses have been decimated by these unusual weather patterns. So how do we prepare for them?
The unexpected freeze patterns usually means the canes will be frozen to the ground. The roots are the most essential. If they are protected, and the graft for the hybrid roses does not freeze, the rose will re-grow. We apply mulch.
There are two approaches to mulching: Apply after the ground freezes to prevent root damage caused by thawing and re-freezing, or apply mulch before the ground freezes to prevent the ground from hard freezing. Because of the recent vagaries of winter weather, I mulch before the freeze.
Mulch is time consuming but not difficult. The materials have to create an airy barrier to frost. Do not put it directly on the canes. Use leaves mixed with straw, pine needles, evergreen branch prunings and grass clippings mixed with straw so they don’t form a heavy mat. Apply around the entire rose bed — remember you are protecting the extended roots.
Think summer blooms!
By Bonnie Orr
Roses on their own rootstocks vs. grafted – 5/25/2019
With spring having finally arrived, planting excitement abounds and lots of appealing roses are pleading for your purchase in local stores and online.
Before succumbing to temptation, let me share some thoughts on grafted vs. roses grown on their own rootstocks. There is more to consider beyond beautiful petal color, fragrance and a catchy name.
Why are roses grafted anyway? The answer: they are cheaper to grow, allowing a fast turn-around time. Grafting a vigorous old rose with plenty of roots to a small cutting makes a saleable plant about a year earlier than patiently waiting for a cutting to develop its own root system.
An exception is a few cultivars that exhibit exotic attributes, yet have poor disease resistance or poor rooting abilities. These thrive better grafted.
Grafted bare root roses are dug and overwintered in cold storage, then shipped dormant in late winter-early spring. Whether they’re viable or not won’t show up until a month or more after planting.
The real headache with grafted roses is suckers that often pop up near the base of the plant and can quickly take over, since they have a more vigorous root system than your above-ground beauty. In addition, freezing temperatures may kill the graft union while that protected root system survives just fine underground and next spring pops up with a wildly proliferous and unbeautiful rose bush.
With a grafted rose, as soon suckers appear near the base of the plant, dig down and cut them off as near the main stem as possible. If you only clip them off at ground level, they’ll persevere and you’ll be forever fighting those suckers.
I’ve ordered non-grafted roses from Northland Rosarium near Spokane and have been pleased. Yes, they are small and do take an added year or so to become a nice-sized rose, but it’s sure a joy to have no ongoing suckering challenges.
More than just roses, this display garden, greenhouse and nursery can be contacted at (509) 448-4968 after April 10, or go online to northlandrosarium.com.
Jackson and Perkins offers roses both grafted and on their own rootstocks, but I’ll bet you need to order the own-rootstock ones. Go online at jacksonandperkins.com or call (800) 292-4769.
Own-root roses are hardier, live longer and have a better chance of being virus free. Oh yes, and absolutely no suckering!
Mary Fran McClure
Give roses a second look for your landscape – 2/22/2023
We have a wide range of rose choices these days — from easy-care landscape roses covered with masses of blooms to the elegant, old hybrid teas sporting those show-stopping single blossoms.
Our dry climate is perfect for avoiding mildew, black spot and other general problems. Roses need good air circulation, a sunny spot and deadheading. Some June cool nights and evening humidity can cause minor spring mildew challenges, but we usually get to warmer weather quickly and that takes care of the problem.
Hardiness is important, as this winter illustrates. Time to wait and see whether your roses have been damaged; perhaps those less-hardy ones have been killed if they didn’t have some protective mulching.
Grafted roses and ones recently planted are more vulnerable to very cold weather. Wait until spring to see where to cut back dark and damaged canes. A grafted rose may die down below the graft, and you’ll start seeing vigorous new growth with very different leaves and disappointing flowers. Your beautiful, grafted rose is now gone; time to dig out the ugly rootstock.
For gardeners on restricted irrigation, roses are not in the drought-tolerant category, although you may value a colorful, beautiful bush or two where you’re able to provide a little more water to them. For instance, how about a large container with an impressive rose where it can make a bold statement?
Landscape or groundcover roses are a newer category of prolific, hardy and disease-resistant shrubs. Their casual style with loads of smaller blooms have gained well-earned popularity. Each individual blossom lacks the elegant look of a hybrid tea, but their profusion and easy care makes up for it.
When we moved to our present home several years ago, a lineup of seven roses bordered the driveway. Many of them were a challenge due to their suckering characteristics. This happens when a less vigorous but beautiful rose is grafted onto hardier and stronger rootstock for better growth. The problem is the vigorous root pushes for more growth than the above-ground beauty can provide, so it keeps sending up suckers just below the graft. If these aren’t trimmed as close to the root as possible, they’ll eventually take over the weaker plant and leave you with a disappointing shrub.
I replaced most of those seven rose plants, keeping a clear red Ingrid Berman that doesn’t sucker. It probably has its own rootstock, or this vigorous plant matches its grafted rootstock.
The other one I kept is the elegant white Honor, a 1980 AARS (All-American Rose Society) winner. Yes, it does sucker, and I cut them back as close to the rootstock as I can. It’s a matter of choice, whether to keep competing with the suckers or just go the easy route and replace the bush.
My other roses are very hardy, growing on their own rootstocks. They were purchased from Rosarium Garden Center near Spokane, an interesting tour destination for gardeners.
Most of my newer roses are color-packed floribundas, multifloras and shrub roses, meaning more blossom production but without those elegant dazzling blossoms of hybrid teas. Floribundas provide clusters of flowers on a bushy, smaller plant. Grandifloras are crosses between hybrid teas and floribundas, with clusters of large flowers on larger shrubs.
Another favorite of mine is a floribunda named Julia Child. The late chef chose her namesake, and it fits her well: flamboyant and vigorous with a bright personality. Buttery yellow blooms literally cover the shrub all summer. This 2006 AARS winner is heat tolerant, disease resistant and offers a mild fragrance and glossy green leaves.
The rose evolution has produced so many practical yet beautiful choices. They’re worth a look for your landscape or patio.
By Mary Fran McClure
Rose propagation isn’t difficult, but requires patience – 6/27/2023
In November, we had freezing weather before many plants had reached dormancy. Roses were particularly damaged. Grafted roses seemed to suffer more damage than the roses grown on their own roots.
Grafted roses, especially hybrid tea roses, are created when a rose producer connects a desirable rose cane onto hardy roots. You can tell when your prize rose has died back to the root-based rose because the leaves are smaller and darker.
The root-based rose is a dark red floribunda and blooms profusely only once in late spring, and then grows long, floppy canes. Then the root, usually a hardy rose called Dr. Huey, sends out numerous suckers that will overwhelm the desirable roses in the garden.
Some roses, such as shrub roses and miniature roses, are grown on their own roots.
Generally, grandiflora, hybrid tea, some floribundas and climbers are sold as grafted plants. Grafted plants are more susceptible to winter kill in our area.
So why not grow a favorite rose on its own roots? Northland Rosarium near Spokane has made a specialty of growing roses on their own roots. It sells a wide variety of roses.
You, too, can make roses grown on their own roots. This is preferable to attempting to dig up an old, old rose, like from your grandmother’s garden. It will take at least two years for them to bloom.
Make sure the plant you want to propagate is not a patented rose. If you bought it in a pot with a label that provides a specific name, the plant is most likely patented. Some of the classic roses, such as Mr. Lincoln and Chrysler Imperial, are now sold as non-patented roses.
It is easiest to create a new plant with ground layering:
- Take a green stem with no flowers on it.
- Bend the stem to the ground.
- Scrape some of the surface of the stem where it touches the ground.
- Hold the stem in place with a rock or a ground-cover pin.
- Put soil over the pin/rock and the scraped stem.
- Water well.
- Be sure the end of the stem still has its leaves intact.
- Within a month, the stem should have rooted. It can be cut from the parent plant at that time.
Also, a new rose can be created with a green stem about the thickness of a pencil:
- Water seed-starting potting soil in a pot.
- Poke a hole 3 inches deep in the soil with a pencil.
- Cut a 6-inch rose stem without a flower or a bud.
- Cut off all but one leaf and the thorns.
- The stem should be trimmed to 1/4 inch below a leaf node. Roots grow out of the nodes.
- Dip only the very end of the stem in rooting hormone.
- Slip the stem into the premade hole.
- Press the soil around the stem and water well.
- Cover with a cloche to keep in the moisture. Use something like a Mason jar.
- Place in light but not direct sunlight.
- Do not water again until the soil surface is dry to the touch.
Be patient.
By Bonnie Orr
Trees and Shrubs
April: A Good Time to Take a Close Look at Your Trees – 4/1/2018
The approach of Arbor Day and trees and shrubs appearing in Sav Mart’s parking lot outdoor garden center remind us in clinic that soon we will be fielding questions about planting trees. So this month we will share tips on planning where to plant trees that will thrive and give you years of enjoyment.
Because lawns require more frequent watering than trees, trees tend not to reach their full beauty and potential when planted in the center of a lawn. But if you still want a tree within a grass-covered landscape, we recommend removing the grass at least 3 feet from the trunk and root collar in all directions, then cover this dirt with a mulch material such as wood chips. The mulch will keep the grass from expanding back under the tree, as well as reduce weed growth.
Be sure to check your surroundings before you plant. First, look up. Are there utility lines above where you want to plant? Because the minimum height of overhead utility wires is 25 feet, the mature height of what you are planting should be less than 25 feet. Check out the Utility Friendly Trees Garden in the Community Education Garden on Western Avenue for ideas of trees that are appropriate for planting under utility lines. Look at the surrounding area as well. Are there structures or other plantings within the canopy area of the tree? If so, make sure the tree, when full-grown, will be compatible with its “neighbors”.
Most trees and shrubs prefer full sun. Check the light requirements for your new trees. Does your landscape provide sufficient sun for the species you have chosen?
Consider whether a tree is the best choice for the spot you have chosen. A shrub can be a good alternative. A shrub with a maximum height of 20 feet can provide similar benefits to trees, such as privacy, while simultaneously preserving view planes.
Now is a good time to take a careful look at your trees. How did they fare through the winter? Any evidence of winter damage? Do any trees need to be replaced? If so, now is the time to plan for removal and replanting.
By Casey Leigh
Small conifers are a good choice, with some planning – 1/22/2013
Small but impressive. That description fits dwarf conifers, especially in winter when we see only the bare bones of a landscape.
This time of year with herbaceous perennials lying dormant, annuals long gone and deciduous trees leafless, these small conifers shine. They’re a perfect fit in small areas, and their needle coloring runs the gamut from blue to yellow and many interesting greens.
They are out-of-the-ordinary plants, offering varied and intriguing shapes. Just be patient while they slowly grow into great specimen trees.
Small, gallon-sized plants look rather tiny at the nursery, but when you think about the years it takes them to grow, buying more mature specimens can be spendy and are most likely not available.
Dwarf conifers grow 1 inch to 6 inches a year, so that means they may reach one foot to six feet in 10 years to 15 years. Then there’s an intermediate sized group, growing 6 inches to 12 inches a year, reaching up to 6 feet to 15 feet in a decade or so.
Choose a small conifer that fits your space at maturity, even though it looks out of scale at planting time. Fill in space with a few short-term annuals or perennials while your little conifer gets going. But don’t crowd it too much. Nothing is more depressing than seeing a beautiful tree or shrub that’s outgrown its space, needing removal.
Dwarf and miniature conifers are perfect for rock gardens, containers and small areas inviting close-up viewing. They’re great for areas where you need low plants for driving visibility, yet look nice and neat throughout the year.
Here’s a few you might consider, starting from tiny-sized to larger.
• Abies nordmannia ‘Golden Spreader’ offers dramatic yellow color with a spreading shape. This fir grows about 3 inches a year, reaching perhaps 2 feet high and slightly wider in 10 years.
• Pinus parviflora ‘Tanima No Yuki’, a white pine also known as Japanese Snow Pine, forms a low-growing mound.
• Cedrus deodora ‘Snow Sprite’ is a graceful cedar sporting silvery white new needles and reaches about 8 feet high and 5 feet to 6 feet wide at maturity.
• Pinus nigra ‘Hornbrookiana’ is a black pine eventually growing 6 feet to 8 feet high.
• Cedrus atlantica ‘Horstmann’ is an Atlas conical-shaped cedar with a definite blue cast and grows perhaps 6 feet high.
• Chamaecyparis obtuse ‘Nana Aurea’ is a Hinoki false cypress with golden tones. Fan-shaped sprays are distinctive on Hinokis. This one reaches more than 4 feet tall and 2 feet wide.
• Cedrus libani ‘pendula Sargentii’ or dwarf weeping cedar of Lebanon, has graceful weeping branches reaching up to 3 feet high.
• Thuja plicata ‘Stoneham Gold’ is a dwarf western red cedar with a dense, conical shape, getting up to 6 feet tall and half as wide, with golden new growth.
• Pinus densiflora x thunbergii ‘Beni Kujaki’ is a pine that might grow 8 feet to 15 feet high and half as wide; it’s very popular in Japanese gardens.
These undemanding small fry need somewhat fertile, well-drained soil, infrequent summer watering once established, and a little annual fertilizer. A mulch around their roots will lessen weeds and protect roots. Another plus — you won’t be out there constantly trimming to keep them within bounds.
By Mary Fran McClure
How To Graft Fruit Trees Using Budding – 8/1/2017
We get so many questions about backyard fruit trees and it turns out that many people don’t have room for the number of fruit trees they would like to grow. There’s a solution to this backyard fruit production problem. It is called budding, which is a type of grafting.
Fruit trees are beginning to go dormant in August. It may not seem evident from their green lush growth, but their bark has begun doing what is called “slipping.” This highly resembles crepe-y skin on your arms if you are over 60. This loose bark is easy to cut and slip in a wedge of wood to create a new variety on a branch. Here’s how it’s done.
Find a branch about as thick as your thumb. Cut off a leaf bud with the leaf attached. Make the cut a canoe shape. Carefully cut off the leaf being sure not to tear the bud. Keep it moist. Then select a lateral branch that you want to have a different variety growing on (recipient branch). Cut a two inch slash about 12-18 inches from the main stem or trunk. Cut so it barely penetrates the bark and the cambium layer is not cut. At the top and bottom of the 2″ slash, make perpendicular cuts so that the bark easily peels back and doesn’t tear. Slip your canoe-shaped bud into the slit of the recipient branch. Make sure the bud is inserted so that bud growth is headed in the right direction; the graft will fail if inserted upside down. Next, wrap the slit securely to cover all open bark. Be sure to leave the bud uncovered.
To create an airproof closure, seal the branch with grafting wax, paraffin, or clear packing tape or wrap it with rubber grafting strips. Then tie a brightly colored ribbon at the terminal end of the recipient branch. This is essential so that in the spring an enthusiastic burst of pruning won’t result in cutting the damn thing off.
It is astounding how fabulously fast the new variety will create a new branch! However, it’s important to note that successful results require specie compatibility once you jump to genera differentials success drops dramatically.
Tim Smith, our emeritus teacher and extension expert, has created pear trees, apple trees, Asian pears with up to six different varieties on each. This method is also effective for trees which need pollinizers. Rather than having two almond trees, I budded two branches of a pollinator donor on my almond tree.
*Some of the information for this article came from Oregon State University Extension Service.
By Bonnie Orr
Coryneum Blight on Stone Fruit Trees – – 6/1/2017
Stone fruits, such as peaches and nectarines, are often grown in small home orchards. In the late spring and early summer, clients ask us what is causing the holes in the leaves or lesions on the branches of their stone fruit trees. Our answer: Coryneum blight or Shothole (Wilsonomyces carpophilus). This fungal disease was diagnosed in France as early as 1853 and is found on most continents around the world.
Like all fungi, water is the best friend of Coryneum blight. After overwintering in dormant infected buds and twigs, spores produce with the rains of early spring. Depending on temperature, spores can germinate in as few as 4 hours of contact with water droplets during higher temperatures to 24 hours in lower temperatures. Temperatures from 70 to 80 degrees F are ideal for infection. Two to four days after germination, lesions can be seen.
On young leaves, the lesions begin as red spots that become purple with white centers as they enlarge, finally dropping off, leaving the classic “shothole” in the leaf. Cankers can be seen on twigs. Early symptoms of infection on the fruit are a scab-like center spot with a reddish halo that can reach 1/4” in diameter. In the last month prior to harvest, symptoms are sunken brown spots up to 1/2” in diameter on the fruit. Leaf infection can lead to fruit infection as spores spread in times of frequent light showers and wind.
What advice do we give? Start with cultural practices. Use low-volume sprinklers, drip irrigation, or sprinkler deflectors for watering. Prune off lower branches to prevent foliage wetting from irrigation. Prune and dispose of infected areas as soon as they appear. Later in the season, after leaf drop, inspect and prune infected buds and twigs.
WSU includes Coryneum blight on its “Suggested Organic Spray Schedule for Home Gardeners”. It specifically states that sulphur products should not be used on apricots, but are fine for other stone fruits. During the dormant/pre-dormant season, apply lime sulphur, a copper-based fungicide, or Bordeaux mix before the buds swell in the spring. During petal fall or shuck, just as dead flowers fall away from the young fruit, apply copper-based fungicides. In the fall prior to rainy weather, apply a copper or sulphur-based fungicide to prevent Coryneum blight.
Following the above advice will help ensure you’ll have plenty of fruit to eat and to bake those delicious stone fruit desserts with!
Information for this article came from extension.colostate.edu – Coryneum Blight – 2.914; ipm.ucanr.edu, “Pests in Gardens and Landscapes: Shot hole or Coryneum Blight” (rev. 1/31/17); naldc.nal.usda.gov, E. E. Wilson, “Coryneum Blight of Stone Fruits”, Yearbook of Agriculture (1953); and ext.wsu.edu, WSU Suggested Organic Spray Schedule for Home Gardeners.
By Casey Leigh
Dormant Sprays for Fruit Trees – 2/1/2022
What a wonderful, snowy winter. It looks like the plants are tucked in and protected from the cold. They are dormant. So are all the diseases and insects that prey on the fruit trees. It is a bit early to apply dormant sprays, but it is not too early to plan.
There is nothing as disappointing as seeing red “pimples” on the apricots, misshapen or rot in the middle of a beautiful peach, or picking stunted plums. The very worst is finding a worm in a cherry or apple! This damage can be eliminated by appropriately applying dormant and delayed dormant sprays that will control insect pests and diseases such as overwintering scales, aphids and mites. These sprays are oil based and smother overwintering fungal spores, bacterial blights, insects, larvae and eggs. These insects cause leaf damage such as leaf curl and leave unsightly and misshapen fruit.
Dormant sprays are applied to a bare tree before the buds show any activity. This is usually in late winter when the days are in the 40’s and the nights are above freezing. The right day to spray will vary depending on what part of NCW you live. Delayed dormant sprays are applied a few weeks later just as the buds begin to show the first green tissue when the daytime temperature is between 45 and 55 and no freezing at night.
You can treat your trees with conventional or organic materials. There are three types of spray schedules: dormant, delayed dormant and growing season. You can get the spray schedules electronically by contacting the diagnostic clinic at chelanmastergardeners@gmail.com. Provide a phone number in the email so we can contact you and answer your questions.
Often fruit trees have grown so large that they cannot be sprayed with a hose-end sprayer. In that case, commercial spraying is the option. The other option is to treat the tree with a chainsaw at the base. Really, isn’t 200 pounds of plums on a backyard tree a nuisance to deal with?
by Bonnie Orr
Heat Stress on Evergreens – 11/1/2021
Whenever there is a heatwave, people are warned to stay indoors, drink plenty of fluids, and watch for signs of heat stroke: headache, nausea, dizziness, weakness, and so on. People can duck into an air-conditioned building, drink a glass of cold water, or stand in front of a blowing fan. But what do trees do to cope with high temperatures like the prolonged heatwave we had this past summer?
Last summer’s heatwave put a lot of stress on all plants, but studies show that many factors over several years have contributed to decline in evergreens. Back in 2011 bigleaf maple trees were noticed dying in Washington and Oregon. Researchers from Washington State Department of Natural Resources, the University of Washington, the U.S. Forest Service, and Oregon State University tried unsuccessfully to discover the cause for the death of these trees (Oregon Department of Forestry). Recent studies now suggest that increased human development, higher summer temperatures and severe summer droughts, made worse by climate change are linked to the trees’ death
Based on reports from people around Washington, scientists fear other Pacific Northwest trees are also experiencing diebacks (Oregon Department of Forestry Forest Health and Resiliency Division), including our beloved evergreens. Over the summer the Plant Clinic received many “why is my tree dying?” questions. Here is what we know.
Trees absorb water from the soil through their roots. They have an amazing ability to move water from their roots throughout the whole tree. Think of the giant redwoods and how far the water must travel to reach the top of the tree and move all the way out to the smallest needle! If there is enough water for the roots to draw in, there is little chance of heat stress happening.
However, when there are drought conditions, the tree cannot draw enough water from the soil to support the entire canopy. When there is not enough water, the tree will begin to slow its biological functions. This allows the tree to go into a dormant state to stop losing water, resulting in a tradeoff because it also reduces the ability to photosynthesize. A delicate balance is upset. Heat stress results.
You may have noticed the needles of your evergreen trees start to change color, going from a healthy medium green to light green, followed by light pinkish-tan before the needles dropped. In initial stages, only the newest growth on branch tips may be affected, but as drought continues, entire branches or whole trees may die. In conifers, one may see entirely red crowns, red tops and scattered red branches. Once a tree has been weakened by heat stress, it is susceptible to attack by insects and disease.
Here are some things people can do to minimize the effects of summer heat and drought on trees and shrubs:
Water early in the morning to reduce evaporation loss. Trees and shrubs need a good soaking of water at least once a week, especially newly planted ones. A rule of thumb is one inch of water per week in heavy soil and 1 ½ inches in sandy soil. The water should be at the root zone, not at the trunk.
Mulching helps conserve soil moisture. Shredded wood mulch to a depth of 2 to 3 inches is best but should be kept at least 6 inches away from the main trunk or stem. Soaker hoses can be placed under mulch. Before watering, check by poking a finger an inch deep into the soil. Dry soil should get water, but you do not want to flood the plant. In times of drought with elevated temperatures and wind, trees may need to be watered more often than once a week.
Do not fertilize during hot and dry conditions, as it can dehydrate trees/plants or burn the feeder roots.
Avoid pruning, transplanting, or digging plants during stress periods.
Herbicides should not be sprayed when temperatures exceed 80-85 degrees, as these chemicals can volatize, drift, and injure desired plants.
Remember that trees can sometimes lose all their needles and still recover. Sometimes not. The best action if a tree is severely stressed and drops its needles, is to wait and see. It may not be able to survive winter, but it also may recover come spring. In the meantime, when you have a sick tree or shrub, keep it comfortable. Water once a week (unless there is adequate rain) until there is a good frost and put down mulch as described above.
Finally, join with others in doing whatever you can to address climate change.
May we get adequate rainfall and snow this winter to prevent severe drought next summer
by Pat Beeman
How Roots Work – 6/1/2018
In mid-April, a few of the clinicians attended the first seminar in this year’s horticultural series: How Roots Work. We learned so much that we thought we would share some of our newfound knowledge with our Sage readers. This article, like the seminar, represents the proverbial “tip of the iceberg”. Hopefully you will find the topic as interesting as we did.
As we all know, without properly functioning roots, plants cannot grow to their full potential. Roots perform four critical functions: absorption, conduction, anchorage and storage. Roots are divided into two ranks: primary and secondary. Primary roots include taps without laterals, taps with laterals, and fibrous root systems. Secondary roots consist of vertical taps that have been choked out, horizontal lateral roots near the surface (within the top 6” to 24”), oblique roots, sinker roots that grow downward from the laterals, and fine (feeder) roots. Each of these root types serve important and different functions.
A common misconception is that all mature trees have tap roots. Trees without tap roots, such as most fruit and shade trees, have a lateral and fine root system. For trees that do have tap roots, for some, the tap roots eventually die, leaving the other roots to perform their work.
When choosing a tree to plant in your landscape, don’t forget to consider the roots – both their depth and spread. Knowledge of depth and spread are important for ensuring proper soil moisture and ensuring the roots don’t outgrow the area picked to accommodate them. Root mass in a Swiss stone pine (Pinus cembra), for example, is two times the 18 foot height of the tree! Conventional wisdom says that to ensure your tree roots get proper watering, water out to the drip line.
Conventional wisdom isn’t always right. For some trees that could work. But for others, the working roots extend far beyond the drip line. The roots of the Swiss stone pine are 35 feet wide, far beyond the drip line. The amount of light the tree canopy gets affects root growth as well. For example, light availability in an oak forest is 5-20% of the light in a clearing, and for a linden forest, only 1-8%.
Paula spent some time going over the basics of the anatomy of roots, of which my understanding is too rudimentary to be able to accurately and successfully explain here. But it was interesting and I did take away a few facts. Root to shoot ratio is important. Plants need to balance root and shoot growth and the plant hormones auxin and cytokinin assist in this process.
Plants have interesting defense systems, including a Casparian strip in the cells that prevents passage of substances through portions of the cell wall. This is particularly important in regards to pesticide absorption and movement. Water absorbed by the roots can carry many types of dissolved substances, including nutrients and pesticides.
Thank you to Paula for continuing to offer us interesting seminars that increase our knowledge base as master gardeners.
By Casey Leigh
Insect Pests Prepare for Winter – 10/1/2019
As summer winds down and cooler autumn temperatures descend upon our landscapes, many of us begin the tasks of prepping our gardens for the winter. This list can include planting garlic, mulching tender plants, cutting back herbaceous perennials, protecting young conifers from hungry deer with netting, or blowing out irrigation systems.
Meanwhile, many insect pests are preparing for winter too. Where do these insects go, and how can our actions in our environment influence this? This is a big question and I’ll focus on just three examples that are relevant this time of year.
I am often asked, “I have an apple tree but don’t want to spray it. How can I keep worms out my apples?” The short answer is, you cannot. However, if you understand the life cycle of the codling moth (the “worm”), you can take several steps to minimize damage. Codling moths can have 2-3 generations per year, but most damage is noticed in the fall when it’s finally time to harvest apples. Adult moths lay small eggs on the apple surface. Once hatched, a tiny larva will begin eating its way toward the core where it will feast on the protein dense seeds until ready to pupate. The moth larva will then eat its way back out of the apple, leaving behind a much larger and messier hole. The caterpillar finds a protected place within the bark of the tree or even in the debris at the base of the tree and pupates. This summer’s last generation of codling moth is doing this right now, and will spend the winter in this state.
The easiest action an apple tree owner can take to stop the cycle is culling all damaged fruit throughout the growing season, but especially in the fall. This means picking any apples with signs of codling moth damage as soon as possible and disposing of them in a sealed plastic garbage bag. Clean up any apples that you do not intend to harvest or that have fallen on the ground. Additionally, a band of corrugated cardboard, stapled snuggly around the base of the tree is a great place for codling moths to pupate. Remove the band in November and dispose of it.
English walnut is another common backyard tree in our area and seeds are beginning to fall from the trees. Walnut trees are often too large and difficult to spray without the help of a professional and can become infested with walnut husk fly.
This fly emerges from the ground mid-summer to mate and lay eggs under the skin of the walnut husk. The maggots feed on the tissue of the husk, which rots into a squishy black area that will stain the surface of the walnut. Mature husk fly maggots drop into the surrounding soil and pupate under ground until next summer. Once again, cleaning up all walnuts and seed husks as soon as they drop will drastically help prevent recurring infestations. Several tarps can be staked under the tree canopy for easier col-lection and serve as a barrier between maggots and soil.
Throughout the heat of August I usually experience a bit of “garden burnout”. It’s just too hot to fuss around in the vegetable garden, and frankly I’ve stopped caring. The best I can do is to harvest what I absolutely need and check that the water system is still running. And then … spider mites
Hot dry weather is when these plant pests thrive and I have the green beans to prove it. They don’t fly. Where do they come from? Spider mites overwinter as mated females within the soil, leftover garden debris, or on perennial plants. As early as March these females are making their way to fresh leaves to lay eggs. Populations often remain small, sporadic, and unnoticed until they explode in late summer. While some pest tolerance is acceptable, especially on an annual crop, a severe infestation can significantly reduce your late summer harvest and blemish your produce.
Thoroughly removing vegetable plants as soon as you’re done with harvest will help prevent this cycle from happening. Additionally, pull any perennial weeds in your vegetable area that may harbor spider mites through the winter. All debris should be hot composted, burned, or otherwise disposed of properly. Females are beginning their transition right now, so it’s time to get out there and be diligent in your fall clean up!
By Tawnee Melton
Irrigation: to Drip or Not to Drip? – 12/1/2019
Some of the horror stories we hear and see at Clinic involve trees and related drip irrigation systems.
The client’s initial intent to use a drip irrigation system to water newly planted tree(s) may have been a reasonable choice at the time. However, they tend to set-it-and-forget-it, thinking it a permanent solution to the tree’s need for its life blood. Often only a couple of drip emitters are placed near the trunk on opposite sides of the tree; then there are multitudes of time-and-volume stories of how they were used. (To clarify the typical scenario, these are growing trees set in landscape berms with no other supplemental irrigation beyond nature and a drip system.)
Time passes, all seems well, then, when the calendar flips to the tree’s 3rd to 5th year after transplant, the Clinic starts to get visited by disturbed clients with woeful stories of distressed trees. At this age, two prominent problems are diagnosed: first is planting depth (but that is another story), and second is irrigation.
With the second problem being the subject of this article, I offer the following side note: Water can be a tree’s best friend or its worst enemy. As the enemy, over-watering is one of the primary causes of tree death. In the case of inadequate water, a tree becomes distressed but salvageable.
So now the client gets the news that their tree has outgrown their simple, care-free, affordable drip-irrigating system. They also learn that if they want to retain a drip style of irrigation system, they will likely experience the need for several more irrigation expansion projects. Many of the clients seem shocked to learn that their tree’s feeder roots grow to reach a much broader area than they had expected to irrigate. (Right tree in the right place???)
Wham! Bam! Sticker shock! Now comes the flood of questions all rolled up in a general topic of, “Now what do I do!?”. Since most of the questions hit upon an inexact science, the Clinic’s response has to be “It depends—”. Here is a sampling of how the Q & A sessions might evolve.
Q. How should I water? A. It depends on the water resources available. Your preference of Drip, Sprinkler, Soaker Hose, Rill or Basin surface water flooding covers most choices. However, in every case, you should consider how to avoid water run-off due to slope of ground and your soil’s percolation capacity (ability to absorb and distribute water).
Q. Where should the water be applied? A. It depends on where the feeder roots are well established, which can be a moving target over time; however, the general target area is a broad band circle of the entire tree from a couple of feet inside the drip line of the developing canopy up to an area beyond the drip line of the canopy that represents a point to where the top of the tree would be if it were to fall over. This practice provides for growing a strong, healthy, expanding root system.
Q. How much water does a tree need and how often? A. It depends on the variety of the tree, the texture make-up of the soil surrounding the tree within the irrigated area, the water holding capacity of the soil, and the time of the year (related to the evapotranspiration rates of the water from the soil and leaf canopy due to temperature and wind). Other issues to consider are the existence of mulches and weed barrier cloths. The definitive amount of water is bound in the word “adequate”, which generally means moist soil to a minimum depth of 12 inches. Moist soil means that a handful of the soil, when squeezed firmly, will hold in a firm clump, but no free water can be wrung from that squeezing. Resupply water when the top 3 inches of soil has dried, which could be as often as weekly, or no longer than 14 days, depending on weather conditions. Established trees prefer deep infrequent watering to allow their root system sufficient access to oxygen. A handy tool to have would be a 24 inch soil core probe for accurate moisture profile testing. Seasonally, the first application of the year will take the longest time to establish the depth of coverage.
Q. What is the best time of day to water? A. It depends on when water may be available due to source restrictions, if any. But, for most efficient use of water, it is best to avoid as much residual evaporation from very warm prior days with a target time between 3 a.m. and 5:00 a.m. This allows for water seepage to reach some depth before the new day’s evaporation begins.
For the answer to the topic question of “Trees: To Drip or Not to Drip?”: It depends’ on your preference, but considering the number of drip emitters and the time required to deliver the volume of water to the depth recommended for heavy users of water, while at the same time fighting evapotranspiration rates of thinly applied moisture, efficiency would imply the latter a better choice.
Love your trees!
By Keith Thrapp
Right Tree/Right Place – 12/1/2018
This is not a scary season just because Halloween was a couple of weeks ago. However, it is the season where homeowners can be tempted to make decisions that will haunt them for years to come.
We have had a radiant autumn. Haven’t the fall colors been beautiful? Susceptible people drive through neighborhoods and see a particularly lovely tree, or an arbor collection and think, “I have got to have it. I have always loved that tree!” Master Gardeners often are called upon to provide solace to a homeowner whose tree most likely should be removed because it is the wrong tree in the wrong place.
The wrong tree in the wrong place occurs for a number of reasons. First is infatuation with a particular tree. Second is the feeling that an empty space must be filled immediately with trees that hopefully will grow very fast. The third reason is the most critical: trees are predetermined by genetics to grow to a certain size, and when mature, say after 12- 20 years, they will have outgrown their space.
The size issue is a big one in NCW. We have so many people who make their living around trees and have mastered fruit tree pruning skills. So people are available to top a tree, or to limb it up or to lower the center of it.
Frankly, this does not alter the final size of the tree. It just makes it cranky because cutting off the top, or the center, or the lower branches causes two problems. The first is that the tree is made vulnerable to disease and insect predation because of large wounds in the wood. Secondly, the tree responds to cutting by creating vast numbers of smaller, whippier branches that are not as securely attached to the tree and can more readily be blown off in a wind storm.
So, the final word is determine how big the mature tree is before planting it in the site that will allow it to grow to its natural size. A number of favorite trees, especially conifers, have been bred to be a smaller or compact size when mature, and these specimens might be a best choice for a smaller yard.
The second most prevalent problem with the wrong tree in the wrong place is the urge to overplant with special species to fill in a newly landscaped yard. One of my friends is facing two dilemmas at the front of his house. Growing in an area 10 by 20 feet are mature Hinoki False Cypress, Western Juniper, Yew and Engelmann Spruce. This forest grows right up against the house and obscures a beautiful rock wall. The trees need to be whacked back to get to the front door. The most serious dilemma is the need to consider firewise landscaping. The conifers grow right under the eaves and would guide a fire up into the attic. Worse, they extend beyond the roof and are 12 feet from the fireplace chimney. These trees were beautiful specimens years ago when they were planted by the homeowner who did not consider the mature size nor the liabilities of the wrong tree in the wrong place.
Infatuation causes people to make unwise tree selections. They do not consider size nor maintenance. Trees really do not thrive in planter boxes. Many of fall’s colorful trees are deciduous. Do you know that a mature maple has over 100,000 leaves? Not all leaves are created equally. Some, like elms or small leaf linden, are small and compost readily. Ash trees drop their leaves and then thousands of little branches. Other leaves like oaks have a waxy coating that takes a long time to compost. In addition, some brown oak leaves persist on the tree all winter until the spring growth pushes off last year’s leaves.
Considering the entire year’s growth pattern is important. Scotch pines spend the entire year shedding vast amounts of pollen, then male cones, then female cones and finally needles. Other messy trees are magnolias that shed flower petals, seed heads and leaves over most of the year.
So when neighbors or friends ask your advice about what tree would be perfect for their landscape, do as we do in plant clinic – teach them about “right tree in the right place”.
By Bonnie Orr
Select and Plant Trees and Shrubs – 3/10/2024
The weather is warming and many people feel the urge to buy and plant woody shrubs and trees. I’d like to address buying and planting woody plants and trees. Consider those urges. Most people know we should not go grocery shopping while you’re hungry, so don’t go to nurseries without knowing what you are looking for. Of course wandering through ogling beautiful plants is enjoyable. However, buying a flat of marigolds or other annuals is not the same as purchasing a tree. One will live a few months and take little care, the other can live for years and may need much more care.
Find out the mature height and width of your potential tree or shrub. What are environmental needs of this plant i.e. – do you have the correct amount of sun/shade, and can you supply sufficient water for its needs? Can it tolerate our ever increasing summer time temperatures? What is the soil type of the location for planting your woody shrub? Is it sandy or clay, rich loam or glacial till? The soil type determines your watering regimen.
Selecting your plants:
It’s important to inspect bagged and burlap potted woody shrubs and trees prior to purchase. There are two important things to look for. You should see the root flare (where the stem meets the roots). As the word suggests, the stem flares out. This is important because soil or mulch should not be in contact with the stem. Planting too deep restricts the amount of water and oxygen to the fine root systems, lowering the trees vitality. Trees planted too deep are also more subject to canker development and wind throw.
In order to find the root flare and see potential problems on the stem, such as stem rot, you may have to gently pull back the burlap and have a look. Reject any potted plant where you can not find the root flare or you find injury to the stem. The same advise for plants in pots that are growing significant amounts of weeds. Weeds indicate the tree/shrub has been in the pot a very long time.
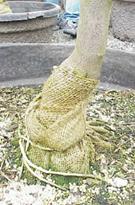
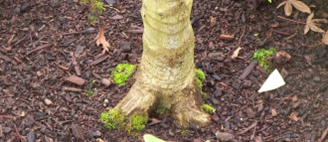
Bare root plants do not have these issues. But they should be inspected to see how many living roots are encased in the plastic wrapper.
Planting Your Plants:
Be prepared to plant soon after purchase. If not, place in a shady area and get back to planting in the very near future. Do not try to plant in the heat of summer or before the soil warms to at least 60 degrees in the spring.
Bagged and potted plants will need to have the roots loosened and the potting media removed prior to planting. All woody plant roots grow outward. Wash off the potting media. Soaking the root mass in water can help loosen this material. Hose off the rest. Once the material is off, inspect the roots. You want to see roots spreading outward, like the spokes of a wheel. Think of roots like branches. If a branch is wrapped around the stem, it will continue to do so. So unwind or cut off that circling root and “J” roots. “J” roots look just like the letter. If you can not straighten them out, cut them off. Circling and “J” roots adversely affect the long term health of the tree or woody shrub.
Here are photos of before and after pruning. The following photos provide better graphics of what I am talking about. You most likely will not encounter such large roots.

Once this is done, it is time to plant. The hole should be more or less a bowl shape, with a slight mound in the center to place the tree on. The root flare will need to be at the surface level. Do not add amendments such as fertilizer, leaves, peat moss or compost to the hole. Plant roots need to grow only in native soil. Fill in around the plant roots with the soil which you removed when digging the hole.
Any remaining soil can be mounded at least 2 feet around the perimeter to hold water. Water well. Do not stomp on wet soil. Good, deep watering will settle the soil around the roots and eliminate air pockets. Check to make sure the soil has not subsided lower than the root flare and the tree is sitting at surface level. Have on hand adequate mulch material to spread at least 4 inch deep around the tree or shrub, but not touching the stem of the tree or shrub. This depth will help prevent weeds from popping up and protect the woody stem from injury from lawnmowers and trimmers.
Bulky wood chips are best. Keep in mind tree roots can eventually extend horizontally one and a half times the height of the tree so avoid placing the plant near your house/garage or driveway. Keeping this area mulched goes a long way in conserving water, keeping down competition, avoiding injury and maintaining cool soil temperatures. Be sure to keep your plant well watered as spring turns into summer. Deep watering is best – fill that mounded area with water. Pay attention to soil moisture and do not let it dry out during the few seasons. This is important even for drought tolerant plants. After a few years, watering can be reduced.
Finally, do not prune off any branches for the first three years unless they are rubbing against each other. It is not true the branches will interfere with tree establishment. Branches and their leaves are what will nourish root growth and therefore improve tree health and establishment. If, in the spring you see a dead branch, it can be removed.
Enjoy your new addition. I hope it bring you years of pleasure. If you have questions, feel free to connect us. “The Garden Professors” is also a great source for information. They have a blog and Facebook presence.
By Emilie Fogle
Spring Pruning Tips – 3/1/2016
Do you have a lilac that only blooms up by the roofline? Was that Forsythia a mass of yellow joy a few springs ago but has a few weak, yellow blooms? Has your Rhodie gotten too big and forgotten how to bloom? All of these garden woes can be corrected by pruning these multi-stemmed shrubs.
Use the correct, sharp, clean tool. Use pruners for cuts ½ inch or less. By-pass pruners allow you to cut closer to a trunk or main stem; anvil pruners are easier to use but cut by smashing the plant tissue. For stems ½-1 inch thick use loppers. For stems over 1 inch thick use a pruning saw that is thin and slightly curved to fit into tight spaces. Forcing a tool not designed for the diameter of the stem causes serious stem tearing and damage and hurts your hands! Have all three tools with you before you start cutting.
Cuts are made at a slight angle – about 20% – so water doesn’t sit on the cut and rot the stem. If the cut is too slanted, the cut cannot heal. Cut about ¼ inch above the bud you want to grow into a lateral branch. Longer “stubs” invite disease and insect damage to the plant.
June is the last time to prune spring flowering shrubs because they begin to form next year’s blooms by the beginning of July. As a general rule, native bushes such as serviceberry, chokecherry or elderberry are not pruned. But the methods below will work to limit the size of these plants.
Pruning is not whacking away at the branches that are too long and in the wrong place. The first step in any pruning job is to take out the broken, spindly, diseased or rubbing stems. When only the ends of the branches are cut back, the pruning technique is called heading back and is used to keep a shrub dense and compact, not necessarily made into a little ball.
Make cuts of different lengths to retain the shrub’s natural look. This pruning is done annually immediately after a shrub has flowered. Only a few inches of plant material is removed to maintain a shrub’s particular size. Deadheading last spring’s flowers is a type of heading back and promotes lateral branches that flower. So deadhead for aesthetics and also for next year’s flower production. Do not head back native plants — it will just make them mad and eager to get even.
So, you have been meaning to cut back that shrub, but there are so many other things to do and the loppers have gone missing. Now after a few years of neglect, the plant must be pruned differently to restore it. Let’s talk about that lilac that blooms so high you can’t see nor smell the flowers. What is to be done?
It will take three years; then you will have a totally new plant that you can head back annually. The technique is called thinning. There are two types of cuts made on the oldest stem (the bark is gray and perhaps a bit raggedy looking).
1. Cut one third of the oldest stems to about 4 inches high. This forces the plant to produce lots of new growth at the lower part of the plant to fill in the “blank” part of the stems.
2. Cut 1/3 of the oldest canes to the ground. This promotes new stems from the roots of the plant. Thinning lets more light into the plant and that promotes more blooms.
The Forsythia that has lost its glamor can be restored with a technique called rejuvenating. This method takes courage, and you may want to enlist the help of a trusted gardening friend to do the deed. Take a saw and cut the entire plant to the ground. Go inside and have a cup of tea.
The plant will recover—this season—and likely will be filled with blooms next year. (This works really well in early spring to keep Buddleia under control.) Use this technique as a final solution because some shrubs will pout for a year before they think about blooming again.
Spring blooming shrubs that would appreciate your attentions with the pruners this week are:
Forsythia, Viburnum, Weigela, Lilac, Azalea, Rhododendron, Ninebark (Physocarpus), Mock Orange, Beautyberry (Callicarpa), Carolina Allspice (Calycanthus), Red-twig dogwood, Spiraea Fairy Dusters (Kerria), Rose-of-Sharon (Hibiscus syriacus), Flowering quince, Smokebush (Cotinus), and Pussy Willow.
By Bonnie Orr
To Mulch or Not to Mulch – 11/1/2017
To mulch or not to mulch — that is the question.
First of all, what is the purpose of fall mulch? Mulch will help preserve groundwater for the winter so a plant’s roots will not desiccate as rapidly. In addition, an application of mulch on bare soil will slow down or eliminate erosion from water movement or heavy rains. Mulch will prevent the growth of annual weeds in early spring. Finally, the most common use of mulch is to protect tender roots on newly planted trees or shrubs.
Timing of when mulch is applied is up to the gardener. To protect the soil and to prevent desiccation, the mulch should be applied before the temperatures fall into the 30’s and before winter storms arrive. We have always anticipated snow storms, but with the new weather patterns, we are experiencing winter rain more often than before.
Two theories posit when to apply mulch. The first says mulch should be applied before the ground freezes to keep the ground from freezing. When the ground freezes, small roots can be broken by the frost heave. Or, the mulch can be applied after the ground freezes to prevent it from freezing and thawing a number of times since this causes roots to break. There is no clear consensus on which way is best. Preventing rapid fluctuations in soil temperature is the bottom line. Often the choice between before and after is based on what your dad or grandmother did in the fall in the garden.
What are mulching materials? Evergreen branches work well and can also provide harboring areas for small birds and rodents. Straw, chipped leaves, wood chips and ground bark are the most common materials used in this area. We do not often see people who mound dirt around roses, for example. If there is enough loose soil in your garden, you can use the soil mounding technique. The application process is critical. All mulches should be placed 6-8 inches deep and TWO inches away from the stem or trunk of the plant. Mulch will be removed in early spring. Most organic materials will have broken down somewhat and added organic materials to the soil structure.
By Bonnie Orr
Tree Borers – 11/1/2019
A recent addition to the plant clinic insect collection is the locust borer Megacyllene robiniae. This particular specimen was found wandering inside the Cooperative Extension office. A log of black locust resting against a file cabinet with tell-tale signs of borer damage was soon discovered as its origin.
Chelan County is home to many species of tree boring beetles. Some of these beetles target a single species of tree, while others will reproduce in a hand-ful of similar hosts. For example, the red headed ash borer, Neoclytus acuminatus, favors ash trees but will also attack oaks, hickories, or almost any stressed hardwood.
In fact, most tree boring beetles are only attracted to stressed or dying trees and often cannot survive in a healthy thriving tree. Adult beetles lay their eggs on the bark of target trees. Larva emerge and begin feeding underneath the bark and usually overwinter in this phase. In the springtime they will continue to feed and tunnel through the sapwood and hardwood until they pupate and emerge as an adult beetle. Depending on the species there can be multiple generations per year, or a single larva can spend years within the tree before pupating.
Here are the key ways to protect your trees from tree boring beetles:
Plant trees properly in suitable locations and maintain tree health and vigor with adequate water. Avoid other stresses such as root damage or soil compaction.
Plant tree varieties that are more resistant to the tree borers that live in your area.
Avoid pruning or making large cuts to trees during the months the adult beetles will be active, as this will attract them to your tree.
Watch for signs of infestation and treat with the recommended pesticide. Signs of infestation can include exit holes in the bark of your tree, tunneling patterns when bark is pulled back, weakened limbs with dieback that break off easily in the wind, woodpecker activity, and sometimes trees can display suckering on the trunk below borer activity.
If you’d like to see some borers up close and personal (and no longer living), drop by the office and check out our insect collection.
By Tawnee Melton
Viburnums: Big and Showy Shrubs – 3/1/2013
Last month my column discussed the little guys–dwarf conifers. This month I’m delving into bigger shrubs — specifically viburnums; showy and vigorous with many attributes.
There are plenty of viburnums hardy enough for our climate. Take your pick as to what’s important — masses of spring flowers, summer berries, fall color, textured leaves. In addition to these pluses, they are nice for screening unsightly areas and great as back-of-the border shrubs. Most of them need plenty of space; they’re not known as being shy and refined. Come fall, birds will appreciate those berries, but generally viburnums are not self-fertile, so with just one shrub, you’ll get flowers but not necessarily berries.
In our climate most are deciduous, although a few really hardy ones like the hybrid ‘Eskimo’ might over-winter in a semi-evergreen state.
We planted a Viburnum plicatum tomentosum ‘Mariesii’ near our backyard fence, and late spring its impressive display of white lacecap flower heads sprinkled along horizontal branches is simply stunning. No berries on this one though. Most gardeners call this group just doublefile viburnum rather than by its Latin moniker. In addition to this dramatic spring performance, it screens out the background, as it grows six or more feet tall and even wider. Being deciduous, bare branches don’t do a lot for winter screening, but summer is really when screening is most important anyway.
Ours gets full sun, a bit of fertilizer in the spring, and is on our regular border irrigation system. I cut out crossed or dead branches, but otherwise pretty much let it do its own thing. Pretty trouble free as far as I’m concerned.
Spring is a good time for planting shrubs. Dig a hole no deeper than the container, and one or two times wider. Trim off or untangle any roots going around the pot, situate it in the planting hole with its best side forward, then tamp in soil and water in.
V. carlesii or Koreanspice viburnum, is known for wonderful spring fragrance when those pink buds open into white flowers. It’s ideal with a little light shade during our hottest months.
There is an evergreen viburnum that can tolerate our cold, V. rhytidophyllum or leatherleaf viburnum. It has a somewhat coarse look and can grow quite tall and wide. It sports long, narrow deeply-veined leaves and has less impressive flowers than most in this group, and takes more shade. In cold weather the leaves droop, much like rhododendrons, and leaves become tattered in cold winds.
V. opulus or cranberry bush is extremely hardy, vigorous and sports great fall coloring. If you’re searching for a large shrub or two and viburnum’s attributes strike your fancy, do a little homework to select just the right cultivar for your landscape.
By Mary Fran McClure
Watering Tips for Your Garden and Lawn – 8/1/2016
During the summer months, a common problem we see are plants suffering from either over or under watering. Many home gardeners adopt a set watering schedule that doesn’t accommodate their soil type, the varying root structures of their plants, or changes in air temperature and humidity.
It’s important to keep in mind that plants that are over or under watered will be more likely to suffer insect damage and be more susceptible to disease as the summer progresses. Stress from poor watering practices can also have a negative effect on winter hardiness. This article covers the ins and outs of watering home gardens, turf areas, and ornamental plants.
Factors to consider when planning your garden’s watering schedule include soil type, air temperature, time of exposure to sunlight, and the specific needs of your various plants. Clay soils take longer to absorb water than sandier soils, but dry out slower. The converse is true for lighter soils.
Hot, dry air increases water evaporation from the soil and transpiration through the plant’s leaves. Plants in a sunny location will lose water faster than those that get more shade. So also will those planted near the house and with southern and western exposures. I was surprised to discover that a large tree can lose hundreds of gallons of water in one summer day!
An effective way to ensure adequate watering is to water the root zone thoroughly and re-water after the soil partially dries out. Be sure your watering covers an area that goes to the outer edges of your plant. Keep in mind that shrubs and trees have deeper root systems than smaller or more recently planted plants. Therefore, you can water them less often. Gardeners have to do their homework to know how long it takes to completely moisten a plant’s root zone and how deep you need to test the soil for drying out before re-watering. Unfortunately, a “one size fits all” motto doesn’t work in your garden!
While drip type irrigation is recommended for ornamental plants, overhead sprinklers work best for turf areas. Because deep roots create healthier turf and can better withstand drought, it’s important to water a lawn thoroughly and before it begins to dry out. A sign that your grass needs watering is that it stays flattened when you walk on it, rather than springing back up. In addition to the factors above that affect watering, the amount of thatch in your turf area has an impact.
As a rule, avoid frequent shallow watering as it leads to shallow roots which are more susceptible to drought stress. To conserve water, the best times of day to water are at night or early morning. Place plants with similar water needs in the same area. Learn your soil type and your plant’s water needs. Watering correctly will make for happy plants and a happy gardener!
The information for this article came from WSU Publication EB1090, “Watering Home Gardens and Landscape Plants”. It is informative and easy to understand.
By Casey Leigh
What’s Wrong with my Dogwood Tree? – 7/1/2017
It is July and our most common question is: ” What is wrong with my dogwood tree?”
Dogwood trees that are native to the Southeast grow as an understory tree. In Georgia, in March, there is nothing more beautiful than the white blossoms peaking through the overhanging branches of the Lob-lolly pine. It grows as an understory tree.
Here in NCW the dogwood is one of the most popular ornamental trees — and people have planted a wide number of Cornus floridia varieties that grow pink bracts from very pale to deep, deep pink, and some people appreciate basic white.
Nearly all the dogwood questions are exactly the same. All the samples have leaf scorch. The edges of the leaves are crispy brown and a line inside the scorch has turned deep burgundy. The reason that we see so many clients with questions about their dogwood tree is that nearly all of the trees are planted as a landscape focal point dead in the center of the lawn in full July sunshine. This understory tree is trying to protect itself and does so by limiting the amount of leaf volume it has to support.
The critical information that we share with our clients is that you cannot apply more water to stop the leaf scorch, and there is no way to revive the affected leaves. The tree’s leaves are affected because the tree does not have the physiology to take up enough water to each of its leaves to keep them hydrated. Many well-meaning homeowners actually cause serious damage to their trees by applying surplus water to their lawns, hoping to keep the tree from drying out. The most serious result is that root rot will occur.
When you drive around Wenatchee, you can spot the lawn-centered trees that have been overwatered and have some degree of root rot. The evidence is the dead branches sticking up at the top of the tree.
So what do we tell our clients? We tell them to relax in the shade of the dogwood tree and have a glass of lemonade. For there is nothing to do to bring back to life the scorched leaves. The problem will not even be noticeable next spring when the bracts burst forth and the leaves unfold.
By Bonnie Orr
Why Fall Leaves Didn’t Fall – 2/1/2023
Why did the leaves stay on my trees this fall?” This is a common question we have been fielding from both clients and Master Gardeners. That question gave us the opportunity to learn more about the actual process that trees go through when they shed their leaves in autumn. Here’s what we found out.
When temperatures begin to drop in autumn, leaves stop producing chlorophyll. Simultaneously, they begin to develop “abscission” cells that are responsible for shedding of the leaves and sealing up the stem attachments. In deciduous trees, abscission of the leaves is dramatic, turning trees from their full -bodied shape into the stark beauty of their winter skeletal form.
Abscission also occurs in evergreen trees, but much more gradually throughout the year. These abscission cells develop at the base of the petiole, creating an abscission zone or layer of thin-walled cells. As daylight decreases in the fall, chemical changes cause the abscission cells to separate, weakening their bond to the branches. Before long, their own weight, wind blowing through the trees, or rain causes the leaves to fall to the ground. Leaf scars left behind on the branches form a protective layer.
So, what happened this fall? The most likely explanation is the weather. A severe cold snap can cause the leaves to die and turn brown before chlorophyll production decreases and the abscission process begins. Similarly, warm temperatures that linger well into the fall and early winter prevent leaves from producing abscission cells.
Without these thinner cells designed to weaken the leaves’ attachment to their branches, they hang on long past normal. Fortunately, the trees will still produce new leaves as longer periods of daylight and the warmer temperatures of spring reappear. The old leaves will still fall off, adding the autumn chore of raking leaves to the spring list!
For more information, on the process of abscission, see “Tree Leaves Didn’t Drop in Winter: Reasons Why Leaves Did Not Fall Off a Tree”, www.gardeningknowhow.com; “Abscission in Plants”, Abscission in plants: Current Biology (cell.com).
By Casey Leigh
Vegetables
Fall gardening starts now – 8/19/2024
July’s high temperatures slowed down most people’s gardens. We can look forward to fall gardening because there is less heat stress.
The soil is warmer so seeds germinate in a few days rather than 10-14 days in the spring. The air temperature will moderate through August, and the traditional spring crops will thrive. Even more interesting, the short-day plants will grow vigorously and not bolt — that is, go to seed — because the hours of daylight are decreasing. This is the perfect time to plant cilantro and spinach which require fewer hours of sunlight to continue to grow leafy greens.
Greens that thrive in fall are lettuce, kale, endive, radicchio, and many herbs such as arugula. Cut chives in late August, and they will re-grow and produce the edible flowers by October. All these plants will grow until the heaviest of frosts that seem to be occurring near the end of November these last few years. The growth of greens, such as spinach and Swiss chard, will slow down and then re-grow in March and April before they bolt, so early spring greens are possible from the fall garden.
Keep the garden irrigated until frost. It is particularly important to keep the top 2 inches of the soil moist as the seeds germinate. It might mean that you water briefly every morning.
This is definitely the time to plant garlic in Central Washington. The garlic will grow until the soil cools to 40 degrees and then will start growing again in the spring when the soil reaches 40 degrees. Garlic is harvested in late June when the green leaves of the plant turn brown.
Plant the individual garlic cloves about 3 inches deep and 3 inches apart. Be sure the pointy end is facing up. The plant will grow if the clove lies sideways or upside down, but it will not produce a large head of garlic.
Root crops will grow until the soil temperature reaches the low 40s.
Root vegetables are the foundation of my fall and winter garden. I actually harvest something from my garden for the entire calendar year. For me, there is such pleasure to dig through the snow and the mulch to reveal the fragrant soil containing frost-sweetened parsnips, beets and carrots.
Winter storage of vegetables in the soil takes some preparation and some work, but it is well worth it to have the fresh root vegetables. Besides, at the end of January when the inversion layer has been hanging over the Wenatchee Valley for eight weeks, and it is dark and cold, digging in the garden and releasing spring soil scents is positively inspirational. You know in your heart that the winter will end.
Mulch will preserve the greens and the root crops. Generally, even in a cold year, the soil does not freeze deeper than 8-10 inches. The goal is to prevent the ground from freezing. You can’t get frozen veggies out of the ground, and the roots are inedible once they freeze.
Heap straw and chopped leaves over the plants. Make the pile high and wide — at least 18 inches deep and 10 inches wider than the row of veggies. Mark the beginning and end of the row where, for instance, beets are growing, with a 3-foot stake. This way you can find the veggies after the snow has obliterated all the garden landmarks. Dampen the mulch to prevent it from blowing away. Then when the snow begins accumulating, heap snow from other areas of the garden to create an even more effective frost barrier.
Enjoy gardening in the cooler weather.
By Bonnie Orr
Tips for growing that inner-gardener – 2/8/2017
My husband hated to garden because as a child his only contact with gardening was weeding; he detested the back-breaking hoeing.
My parents believed that gardening was a family activity. My mother first took me and my sisters out to the garden when we were 2. And I have a distinctive memory of scooting on my rump in the garden and patting the potato starts into the silty soil and singing each potato a lullaby — my mother was very creative, wasn’t she?
I very strongly believe that gardening is a family enterprise that provides a strong sense of togetherness and accomplishment. If my husband could have actually gardened, his attitude would have most likely been different.
One of the ways to create a satisfying gardening experience is to grow vegetables that thrive. Wouldn’t we all like that? The truth is that some vegetables are harder to grow than others, take more maintenance and are subject to more insect infestations. But many, many vegetables grow relatively carefree.
Vegetables can also be planted in succession so as one crop finishes another one is coming on. This carefully planned planting helps all gardeners sustain their interest in the garden.
Plant what the family eats — with a few new introductions. There is nothing as discouraging as throwing out foot-long cucumbers and yard-long zucchini. Consider how much each plant will produce before planting the entire packet of seeds. (Thinning seedlings is an essential task and is not necessarily much fun.)
Mulching between the rows or clusters of plants will eliminate weeding. The mulch should be kept about 3 inches to 4 inches deep and can be leaves or grass clippings that have not be treated with a product like Weed and Feed.
At the beginning of the season when the soil is still cool, lettuce, spinach, carrots, beets and radishes flourish. They germinate rapidly and readily provide garden snacks. Plant sunflowers and green onions as well. Radishes and be replanted at least once before the soil becomes too warm in late June.
Oh yes, and don’t forget potatoes. Purchase actual seed potatoes for best results. There is no garden activity so satisfying, in my opinion, than the treasure hunt of digging out potatoes. The first little potatoes can be harvested as soon as the plants have finished blooming.
Often gardeners are disappointed because they plant and the seeds don’t come up and they replant and still the soil seems barren. Actually, most of the time the seeds rot rather than germinate because the soil is too cool and eager gardeners want to plant the entire garden right now!
As the garden soil warms to about 70 degrees, it is time to plant beans, carrots and to put out cherry tomato plants. Climbing beans take less space, and if you are really enthused, you can intermix the beans’ supporting stakes with sunflower plants. The beans will climb the sunflower stalks as the sunflowers lengthen. If you are over-the-top wildly enthusiastic, plant the beans and sunflowers in a circle, and then create a teepee hideaway for the child gardener.
Cherry tomatoes are great for snacking and really have far fewer insect and cultural problems than larger tomatoes grown for paste or canning as tomato sauce. Cucumbers, especially some of the smaller varieties that seem to ripen in a day or the small, round lemon cucumbers can also be grown on a trellis. I like the later-producing Armenian cucumber that extends its season until frost. Each fruit develops and ripens in about 4 days in August and September.
At the end of July, plant the fall garden. Put in kale, more spinach, lettuce and peas for September and October garden treats.
Avoid growing corn unless you have a really huge garden because corn must be planted in large blocks. Although many parents think that a child would like to grow his own pumpkin for Halloween, pumpkins — unless tied up to a supporting trellis — take lots of garden space, and these plants are particularly subject to squash bugs, which without being controlled, can kill the plants in a few days. And if they are not killed by the insects, then the mildew will damage the leaves. Corn and pumpkins are why God created farmer’s markets!
It is too early to plant seeds even indoors, but it is not too early to make a family garden plan.
By Bonnie Orr
It’s now or never for planting your fall garden – 8/17/2016
Recently, I have been feeling the pull of fall. The days are starting to shorten noticeably now. My late-producing blueberries are nearly ripe and my flower garden is rapidly transitioning into its final phase of blooms.
There are still numerous seeds, however, yet to be sown in the vegetable garden and it is quickly becoming a now-or-never situation. Over the course of the next two weeks, we are given one last opportunity to plant crops.
As we transition into fall, we begin to change course, veering back again to the vegetative greens that thrive in shorter days with cooler temperatures. We are also allowed the opportunity to plant crops that are sensitive to lengthening days but thrive as the days become shorter.
If you love cilantro, this is the time to try sowing it again. It is possible to grow this tender herb all summer long but it is really in the spring and the fall that cilantro comes into its own. Cilantro loves cooler temperatures and shortening days. Instead of spindly bunches of bolting, leathery leaves we are graced with luscious growth, deep green foliage and the overwhelming fragrance that is classic to this salsa staple. For continuous harvest, cilantro can be sown from now until the end of September every week to 10 days.
Daikon radishes are another quintessential fall crop. As the days shorten, daikon begin to put their energy into creating deep, sweet tap roots that can be harvested well into the late fall and early winter. Daikon are rapid to grow and can be harvested at any time in their maturity. They are excellent stir fried, sliced thin for salads or fermented into kimchis and krauts. Once the green tops are removed, they store exceptionally well in cool conditions and are an excellent crop for root-cellaring and cold storage.
Depending on the type of fall we are granted, it is possible to try for one more bed of peas or beans. This one is not a guaranteed success but can be a fun addition to the fall vegetable garden. Usually, these crops should be sown at the end of July, but sometimes it is possible to still sneak in a planting through mid-August. The yield will be smaller than the early-season sowings so be prepared for more plant and less harvest.
Finally, continue sowing all of the greens that you feel you just haven’t gotten enough of. Salad mix, spinach, arugula, baby kale and chard, mustard greens and bok choy all do well as late-season producers and will continue to be harvestable well into the late part of fall.
Remember that regular watering is still critical with late-summer planting, especially when trying to germinate pea and bean seed. Essentially you are “forcing” these plants to grow during the time of year when they would normally be considering dormancy. Watering will help to keep the soil cool and will hasten germination. It is especially critical to continue regular (sometimes two times a day) watering during germination since any seeds that germinate during the heat of the day will need that extra water to keep young roots from drying out and shriveling up while they position themselves in the soil. You may also want to seed a little heavier than normal since some of the seed sown this time of year will likely succumb to rot if we experience another heat wave during germination.
Fall vegetable gardens can feel incredibly satisfying when they begin to produce so don’t be afraid to give it a try.
As always, good luck and happy gardening!
By Eron Drew
Garden Mysteries: The Case of the Missing Cucurbits – 9/16/2024
Normally, by the middle of July, the zucchini in my garden would be producing by the basketful. This season, well into August, I was still waiting for fruit. I decided to investigate.
Although the cool weather in May slowed their growth, the plants were growing vigorously. They had long main stems and were thick with dark-green leaves. Diligent egg patrol had paid off; squishing the clusters hidden on the undersides of the leaves had done a little superficial damage but it kept the squash bug population under control.
Not only were the plants healthy, they also had plenty of bright-orange flowers. Oddly, however, there was no insect activity around them. Assuming the absence of fruit could only be due to an unfortunate lack of pollinators, I sat down at the computer to look up how to hand-pollinate zucchini.
Like pumpkins, cucumbers, melons and other cucurbit relatives, zucchini squash is monoecious. In other words, it grows two different kinds of flowers on the same plant. One is male and the other is female.
It is easy to tell male and female zucchini flowers apart. Male blossoms attach directly to long, lanky stems. Female blossoms, meanwhile, are short and connected to their stems by a swollen base which resembles a miniature zucchini. This part of the flower is the ovary; when enough pollen from the male flower is transferred to the stigma in the female flower, its seeds will be fertilized, and the ovary will grow into a full-sized fruit.
It takes at least 10 visits from a pollinating insect to fully pollinate one zucchini flower. Without their help, hand-pollination is necessary to create fruit. Manually transferring pollen from a male to a female flower is not difficult. What makes it successful is timing.
Female cucurbit flowers are only receptive to pollination for less than one day. Blooms open at dawn and will be closed by late afternoon. If pollination doesn’t occur in that crucial window of time, the ovary will shrivel, the blossom will fade, and the flower will drop off. The next opportunity to create fruit won’t come until the plant makes a new female flower.
With concern for my crop as well as the health of my neighborhood bee population, I headed to the garden to pollinate the zucchini myself. There were the male flowers, all closed up at the ends of their long stems. To my surprise, female flowers were nowhere to be seen.
It turns out that zucchini plants produce male flowers first, possibly to attract the attention of the foraging insects that they will rely upon later. Plants only develop female flowers when they are well-established and have water and nutrients to spare. Making fruit is an investment, so any environmental stress will cause the plants to play it safe and delay the formation of female flowers.
Mystery solved. Zucchini plants like full sun, but in excessive heat, they stick to producing male flowers. I didn’t have an issue with pollinators; my zucchini plants were just too hot.
Now that I know all the conditions that are necessary for successful pollination, the fact that my plants are finally producing feels like a small miracle. If I had to pollinate them all myself, the story would be much different. Thank goodness for the insects that do the work for us, and for a climate that makes pollination possible.
How to help the pollinators in your garden
Extended periods of hot weather can affect pollination in plants of all kinds. High temperatures can dry out pollen, making it inviable. It can also slow insect activity, as bees and other insects prefer to forage when the thermometer stays below 90 degrees.
While no gardener can control the temperature, there are some things you can do to help the pollinators at work in your garden. Prune back old leaves so flowers are visible to flying insects. Take care not to use overhead irrigation during the critical morning window when flowers are open for business, as insects won’t fly through the water and wet pollen won’t transfer well. Choose heat-tolerant varieties of plants. Most importantly, keep your yard chemical-free, as insecticides and even herbicides have both lethal and sub-lethal effects on pollinators.
By Julie Banken
Extend your gardening season with cold – 9-16/2024
It is not too early to think about how to harvest greens most of the winter. Starting seeds in a cold frame while the soil is still warm will give the plants a healthy start to survive the winter.
Who wouldn’t want to harvest arugula, spinach, kale, lettuce, radicchio, lettuce, dill, parsley and chives? The delight of winter salads! And, best of all there are no insect pests nor weeds. Most of the plants will be cold-tolerant such as you plant in early spring. For example, tomatoes are too big and not cold tolerant.
This is the time to build a cold frame, which is a small greenhouse. A cold frame captures sunlight and creates a micro-climate. The internet has dozens of suggestions for building plans. One example from Iowa State University Extension can be found at bit.ly/isucoldframes. You can use repurposed materials of old window glass, Plexiglas or heavy-gauge clear plastic to make the lids. The lid frames can be PVC or wood. Cold frames can also be purchased.
Here are some considerations:
– The location should be on a south or west wall. The wall of either a fence or your house provides an important warming feature to the north side of the cold frame.
– South or west sunlight is the strongest in the winter.
– The cold frame is a bottomless box and should extend 16-24 inches deep into the soil. The soil retains heat. Also in the Wenatchee Valley, the ground seldom freezes deeper than 8 inches.
– Whether you make the frame from brick, wood or straw bales, mulch or soil piled up on the outside of the frame provides more insulation for the cold frame.
If the outside temperature is 40 degrees or higher, be sure to lift the cold frame’s lid a few inches so the sunlight does not cook the plants. Then lower the lid when it cools to keep in the heat overnight.
Another use for the cold frame is to cold stratify seeds that need a month or two of chilling before they germinate. It is also possible in March to start seedlings of your garden vegetables if you do not have a space in your house to grow seedlings.
Rather than building a structure, many gardeners have found that they can stratify seeds, especially seeds of native plants, and germinate other slow growing plants in plastic containers such milk jugs with holes punched in the bottom and set slightly into the soil. These types of containers are usually seeded in December. There is not a chance of them overheating because the lids are not placed on the milk jugs.
Raised beds can be made into a type of cold frame for at least part of the winter. A hoop or lid for the raised bed can be made from PVC and heavy gauge clear plastic, or one that fits the raised bed can be purchased.
Enjoy an enhanced garden season.
By Bonnie Orr
Options for enjoying your fresh veggies this winter – 11-2/2016
I grew up in a home that had a root cellar carved into a hillside. It smelled of earth and potatoes and carrots and cabbage and onions and was chilly year around. It was close enough to the house to walk through the snow to open the heavy wooden door and select the vegetables for dinner.
Very few of us have root cellars anymore, and there is very little need to set aside food for the winter since grocery stores are numerous and close-by. But for a gardener wishing to prolong the pleasure of eating garden produce, storing vegetables during the winter is a joy, albeit, a bit of work.
So what would you want to store for winter treats — potatoes, carrots, beets, onions, cabbage, turnips, parsnips? Select veggies that are not broken or cut or diseased. Do not wash them.
Of course many gardeners also store their summer-blooming bulbs and tubers in the same places they store the vegetables. Apples cannot be stored in the same place as the vegetables since the ethylene gas exuded by the fruit eventually will cause the vegetables to either sprout or rot.
Temperature and humidity are the most important features of storage. That chilliness I recall from the root cellar was 40 degrees — pretty much the soil temperature below the frost line during the winter. This is the ideal temperature for vegetable storage.
Some people have a basement they can partition off to keep the storage area at a steady temperature of not more than 40 degrees and not less than 32 degrees. An outside wall on the north side of an unheated garage is also a possible site to store veggies and summer flowering bulbs.
Most veggies need a bit of humidity. Onions and garlics need a dry environment.
For the last 20 years, I have stored potatoes, carrots, beets, parsnips and turnips in the garden during the winter. In his book “A Very Small Farm,” William Paul Winchester introduced me to the concept of clamping, which involves digging a deep hole and storing vegetables in the bottom of the hole. Here are the basics:
♦ Dig a wide, 3-foot deep hole in your garden site where the soil is soft and readily dug.
♦ Place the veggies in net onion sacks or gunny sacks so the tops of the sacks are covered with about 5 inches of soil.
♦ After you have placed the veggies in the hole, place a long pole or stake to mark where the hole is. Believe me, when the entire garden is covered with snow, it is really difficult to find the exact spot where the veggies are tucked away.
♦ Then, on top of the soil over the hole, place 8-10 inches of chopped grass and leaf clippings. This mulch will prevent the surface of the ground from freezing.
On a frosty January night, I love to go out into the garden, push aside the snow, paw down through the mulch and reach into the soft, fragrant garden soil. The aroma is a reaffirmation that spring will come again. I take out the veggies I want to cook for dinner that night and maybe for one more day, and then seal up the hole with the soil and mulch and snow.
Clamping works until early March when the soil temperature starts to rise. At that point, the veggies will either start to grow or will rot.
OK, for those of us who think this sounds like too much work, here is an easier way to store carrots, beets, turnips and parsnips. The easy way does not preserve the potatoes.
♦ Make sure the veggies are not poking out of the soil — if so, add soil around the tops of the veggies.
♦ Grind up leaves, mix them with straw and snuggle the mulch around the rows of veggies.
♦ Cover the veggies completely with the mulch. You need enough mulch so the surface of the soil does not freeze.
♦ Put a stake at the beginning and end of each row so you can find the row sleeping under the snow and mulch cover.
The carrots, beets, turnips and parsnips are sweeter than in the summer, crisp and delicious.
By Bonnie Orr
Don’t give up on those green tomatoes – 11-11/2024
Let’s extend the taste of summer — those glorious tomatoes don’t grow for enough months to satisfy me! There are many ways to store green tomatoes to ripen them for Christmas dinner. I have even succeeded in serving garden-grown tomatoes for Valentine’s Day, though the flavor had diminished by then.
It has been a tough tomato season, with excessive heat, early onset of cool nights and those pesky stink bugs.
Store only the green tomatoes that have a “matte” finish. When the shiny tomato skin fades to a flat, lighter green, it means the tomato is beginning to ripen. These are the fruit that will finish ripening in storage. Be sure there are no insect bites or bruises on the fruit you store.
Do not wrap tomatoes individually in newspaper sheets and store them in the basement as your Aunt Evelyn used to do. Most people abandon the effort for it is too time consuming to unwrap each tomato to check for rotting and ripening every third day and then re-wrapping each fruit.
Some people pull up the entire plant and hang it upside down in the garage in a dark space. This works best for cherry tomatoes, but you’ll likely also be bringing in bugs and dirt. You still should pull off all the green shiny tomatoes because they will not ripen.
Store tomatoes in a box lined with six pages of newspaper. Never store the tomatoes more than two deep in the box. This arrangement makes it easier to check the fruit for ripeness and prevents bruising.
My most successful means of ripening tomatoes is using an apple box and the purple cardboard trays that apples in the box are packed on. The tomatoes do not touch one another since each fits into one of the hollows designed for apples. The 88’s are great tray sizes for tomatoes. The best part is the ease of checking for ripening and rotting. You merely take the top off the apple box and lift out each tray to visually inspect the fruit.
Many of the tomatoes will begin to ripen immediately. To heighten the color and the sweetness, bring a few tomatoes into the kitchen and put them in a bowl in a sunny spot. Add an apple to hasten ripening.
If all else fails, delight by cooking green tomato recipes. Green tomatoes make as good a salsa as tomatillo, which is a plant cousin. Green tomato pie is as good as an apple pie made with Granny Smith apples. Green tomato mincemeat is a delicious condiment or a base for a winter pie.
After the frost, plan for next year. If your tomatoes developed mildew or any other diseases, do not compost the vines. Cut off the plants at the base and rake the ground around the plants to clean up dead leaves. Leaving the roots in the ground enriches the organic matter in the soil and protects the soil structure. If you have not rotated your tomato plants in your garden plot, plan a new garden design for next year so the tomatoes are as far as they can be from the ones that have grown in the same spot for years. This also will disrupt disease and insect infestations.
Enjoy fresh tomatoes for another few months and begin dreaming of next year’s fresh tomatoes.
REMINDERS ABOUT FORCE-RIPENING TOMATOES
– They do not need light until a couple of days before you plan to eat them.
– The temperature cannot vary below 50 or above 60 degrees. If they are stored below 50 degrees for more than 24 hours, tomatoes will never ripen.
– Store them so the individual fruit do not touch each other.
– Do not take off the green calyx and trim stems very short.
– If your plants developed fungal disease this year, dip the tomatoes one by one in 1 gallon of water with 1 tablespoon of bleach. Don’t let them soak in this solution.
– Never store tomatoes in the refrigerator because the tomatoes’ sugars are diminished into a tasteless fruit … think store-bought tomatoes.
— Bonnie Orr
Successful squash plant pollination could require you to work – 7/11-23
Squash plants, a staple of home vegetable gardens, put forth many large, lovely flowers in early summer. But most of these flowers will never develop fruits because, for all their beauty, the flowers are botanically imperfect.
Perfect flowers have both male and female parts. The male parts (anthers) produce pollen and the pistil (female part) receives pollen that fertilizes the ovule so fruit can develop. Tomatoes, peppers and eggplants have perfect flowers, so every flower can fertilize itself and produce a fruit.
The imperfect flowers of squash plants are either male or female. A male flower produces pollen, which must be transported to a female flower for fertilization.
Home gardeners often wonder why so many flowers on their squash plants die without producing fruit. While there may be a problem with lack of pollination or abortion due to excess heat, most likely the dying flowers are males that have already done their duty.
Most squashes produce about 50% male flowers. Frequently they produce more males early in the season, frustrating impatient gardeners. Bees must do the work of pollinating squashes.
Honeybees often visit squash blossoms, but native squash bees (Peponapis and Xenoglossa) are more efficient. They start early in the morning, before honeybees are active, and may get the job done before honeybees arrive. Before honeybees were introduced to the Americas, squash bees were the primary pollinators of squashes.
A close look will tell you if a flower is male or female. If the base of the flower is a straight stem, then it is male. Female flowers are usually larger than males and have a swollen base with a bulb that looks like it could develop into a squash fruit.
If you look inside the flowers, you will see other differences. Inside the male flowers are several stamens that hold pollen. By contrast, inside the female flower is a large central structure, which is the pistil.
To be sure that squash flowers are pollinated, avoid using insecticides during the flowering period.
Squashes are in the genus Cucurbita, which includes summer and winter squash, pumpkins, zucchini and gourds. All of the species in this genus can cross pollinate, so if you plan to save your squash seeds for planting in the future, it is a good idea to hand pollinate your female flowers. Otherwise, the busy bees may cross your zucchini with a pumpkin, or your butternut squash with a gourd.
You can use a small brush to move pollen from a male flower stamen to the tip of a female flower pistil, then cover the female flower with a fine mesh bag until the fruit has set. Squash blossoms are edible, so you can fry your early-season male flowers with chili and cheese if you don’t need them for pollination.
By Connie Mehmel
How does your garden grow?: Direct seeding vs. transplanting – 1/22/2024
Now that the days are getting longer, it’s time to think about the flowers and vegetables you will grow this year. Will you plant seeds directly into your garden soil? Will you buy plants that are already started and transplant them into your garden? Will you start your own seeds indoors, tend them until the weather is right, then transplant them outdoors? It all depends on what you want to grow.
If you plan to grow heat-loving vegetables like tomatoes, peppers and eggplants, they must be started indoors. These southern vegetables require high temperatures to germinate and long growing seasons to produce fruit. The only way they will reach maturity in our northern climate is if they get a head start indoors.
If you grow cool-season crops like Brussels sprouts, mizuna and kale, the calculation is different. Although these plants grow best in cool air temperatures from 60 to 65 degrees, the seeds germinate best in soil temperatures from 77 to 86 degrees. How do you solve this conundrum? In spring, you can start your seeds indoors, keeping them warm until they germinate. Once they emerge and have true leaves, you can plant them outside.
Another approach to cool-weather crops is to grow them in the fall. They can be direct seeded into the garden in late summer when the soil is warm and they will germinate quickly. Then the plants will be growing as the weather becomes cooler. Kale will continue to grow into the winter until the days become too short (less than 10 hours of daylight).
Transplanting is more reliable than direct seeding because you have better control over the plant environment. You can provide ideal germination conditions, protect your new seedlings from wind and cold temperatures, then set your plants out once the weather is suitable. Transplants also have a head start on any germinating weeds.
Despite all its advantages, some crops are not suitable for transplanting. It is almost impossible to transplant root crops such as carrots, parsnips or beets without damaging the root.
Other plants, including squash and cucumber, are sensitive to root disturbance but can be transplanted with care. They germinate and grow fairly quickly, so it’s important not to start them too early. They will be ready to transplant three to four weeks from the time seeds are started. If they are kept in the pot too long, roots will fill the pot and it will be difficult to transplant them without root damage.
If you decide to buy started plants for your garden this spring, you can find a great selection of tomatoes, peppers, garden vegetables, herbs and flowering plants at the Master Gardeners plant sale at Pybus Public Market on the last Saturday in April. I hope to see you there!
By Connie Mehmel
Gardening in a warmer, dryer climate comes with challenges – 11/14/2023
Gardeners have been thinking and mulling over and talking about how much they have noticed the changes in our growing season.
Keeping a gardening journal is one way of noting changes in nighttime and daytime temperatures, precipitation and bloom times. Another source is WSU AgWeatherNet (weather.wsu.edu), which gives climate information in an area near you.
The number of frost-free days in Wenatchee has risen to 196 in 2023. The last day of frost, which used to be May 15, now occurs in mid-April. The first frost of the season varies widely. In 2022, it was Nov. 30. This year, it was Oct. 28 in my East Wenatchee garden.
The longer growing season would encourage us to grow figs, sweet potatoes and okra, and other Southern delights. But not so fast. There are more frost-free days but growing temperatures have not increased as much as we could anticipate.
This year, the day and night temperatures remained cool, so my garden soil did not reach 70 degrees — the optimal temperature for vegetable seed germination — until May 17. Then, the nighttime temperatures fell below 60 as early as August 19. This affected the growing of tomatoes. Tomatoes are so fussy that they only want to thrive and produce fruit in the narrow range of 60 to 86 degrees.
Another downside was disappointment for the little gang of backyard fig growers in the greater Wenatchee area. The earlier cooler nights stymied the ripening of the figs the past two years.
These are my personal observations from my gardening journal. Can you tell that my father was a meteorologist?
The next big change is the precipitation. In the early 2000s, we still received 9 inches of snow/rain for the year. As I write this on Nov. 1, our total precipitation for the year has been 4.18 inches. All that snow we had last winter evaporated rather than melting and soaking into the soil. The soil in areas not regularly irrigated is very dry.
We need to consider what we plant in our landscapes. Dogwood and beech tree leaves will be more summer-crisped than ever. Plants need to be more drought tolerant.
Select new plants that have an American Horticulture Society heat zone rating of 7 because we have had an increasing number of days each year where the temperature is above 86 degrees.
Mike Hammer shared this information with his fellow WSU Chelan-Douglas Master Gardener volunteers earlier this year:
From 1994/2003: we had 13 days over 95 degrees and 31 days over 90 degrees.
From 2004/2013: we had 16 days over 95 degrees and 33 days over 90 degrees.
From 2014 /2023: we had 24 days over 95 degrees and 45 days over 90 degrees.
Note: Information is from the WSU AgWeatherNet station at the WSU Tree Fruit Research and Extension Center in Wenatchee.
The heat affects the growth of lawns and many garden plants, especially tomatoes and blueberries. It is now more important to use mulches to preserve the soil moisture and keep the soil cool. Lawns should be cut 2 1/2 to 3 inches high to prevent the grass crowns from being damaged by the heat — more water will not protect the crowns.
We receive little precipitation during the frost-free six months. Irrigation in home gardens needs to be run less often and for longer periods of time to ensure that the water reaches the plants’ roots. The days of the ineffective practice of 10 minutes of water twice a day are long gone. Email the Master Gardeners at chelanmastergardeners@gmail.com for advice for effective turf watering.
Changing irrigation practice is only one way to garden more effectively with increased heat and drought. Placement of plants close together and applying 3 to 4 inches of mulch will keep the garden areas more productive.
Start planning your new, improved garden now.
Bonnie Orr
The value of heirloom varieties sometimes goes beyond the science – 7/21/2022
For years, I have been growing, harvesting and watching plants while trying to figure out which varieties perform the best.
The biggest discussion and change I have noticed in the last 10 years or so has been the interest in heirloom varieties and their availability. I see claims that heirloom varieties of vegetables and flowers have better production, better flavor, more nutritional value, better fragrance and a host of other claims.
The issue I have is finding reliable research data supporting the claims being made. I see lots of discussion about the benefits from growing heirloom plants but not much information to back up those claims.
To be sure, there are real benefits from using heirloom plants. Heirloom vegetables and flowers have been around at least 50 years in order to even be considered an heirloom variety. If these plants didn’t have something going for them, people wouldn’t have been saving the seeds every year so they can replant them again next year.
If we lose those heirloom plants, we lose a vast library of genetic potential and diversity. The traits that an heirloom plant variety contains may be the genetic solution for a future pathogen or adverse growing environment that would otherwise be lost. Hybrids are crosses between two different varieties and depend on the use of heirloom, or open pollinated plants, for their genetic diversity and hybrid vigor. Fewer open-pollinated heirloom varieties reduces the possibility of potential beneficial hybrids in the future.
The biggest reason I like heirloom plants is the chance to discover a plant I like better than what I can get in the produce department at the grocery store. Open-pollinated plants tend to be a little slower to mature, and even on the same plant the crop may not all ripen at the same time. This is tricky if you are a farmer trying to harvest a crop because the cost of going back over the field to harvest multiple times is more expensive than using a hybrid, which shortens the harvest window and allows the crop to all be ready at the same time. It saves both time and money for the grower. As a home gardener, I like the wider window so I can enjoy the vegetables, fruit, or flowers for a longer period of time.
But perhaps the best part of enjoying heirloom plants is the story behind them. I have a rhubarb plant I got from my dad, which he got from my grandfather, which he got from my great-grandfather some 60 years ago. That’s as far back as I know on the history of that particular plant. I tell the story every year as we enjoy homemade rhubarb crisp that my wife makes, using a recipe she got from her mother nearly 40 years ago.
We inherited a beautiful peace rose, an heirloom flower, when we bought our house in 2014. The rose was planted by the former owner, who resided in the house since the 1960s. She recently passed away, and lived well into her 90s.
The fragrance and blooms from the rose plant are amazing, but, again, it’s also the connection to the past that I find rewarding. The story behind the plant connects our family to the previous owner’s family. One of my sisters had the former owner’s sister as a teacher in the second grade. My other sister went to school with her grandchildren. I picked up scrap steel from her son-in-law’s business to use for teaching welding at Eastmont High School.
The story goes on, but the point is heirloom plants can connect generations together as it takes generations for a plant to become an heirloom variety. So while I didn’t find the research I was looking for when writing this article, I think I will talk my wife into making me a rhubarb crisp while I cut some roses for the dining room table.
By Lloyd Thompson
Intermix small veggies and herbs in your landscape and containers – 5/03/2022
Seeing rising sky-high prices of food, maybe it’s time to step up and grow some of your own produce this year. You don’t need raised beds (although they’re great), as many smaller varieties of vegetables and herbs fit nicely in containers or tucked into your landscape.
These smaller vegetables and herbs are popular, with new ones coming out every year. Before running out and buying some little starts, here are a few basics to consider.
First, most need good soil and drainage, space to grow, proper fertilization, required watering and at least six hours of sunshine. Whether in a container or in the ground, good planning and preparation equals success.
Herbs generally take drier conditions and less fertile soil, while tomatoes need very constant moisture and fertile soil. Leaf lettuce will take more shade this time of year and are fast growing — you can begin harvesting a few leaves from each plant within a month of planting and they’ll keep producing. They do best in cooler months and don’t take baking in the heat of mid-summer.
Master Gardener columnist Connie Mehmel says, “I’ve planted lettuce as late as the end of June, but it gets tricky when the weather warms. I start it indoors where I can keep it out of the heat and put shade cloth over the bed. I love salad greens. There have been years when that was the only vegetable I grew.”
An outstanding little basil is Finissimo Verde a Palla, originally from Italy and grows into a perfect globe shape about 10 inches in diameter. Also known as Greek basil, leaves are very thin and small yet pack a strong scent. A nice fit in a window box, container or in your landscape handy to the kitchen. Give it 12 to 18 inches of growing space.
For compact tomato plants, consider Bush Early Girl. Fruit has excellent flavor, globe shaped with about 4 inches in diameter. This hybrid grows about 18 inches high and needs spacing of 24 to 36 inches. Harvest is estimated 63 days from planting.
Another compact and early producing tomato is Bush Champion II. This slicer produces big, meaty fruits. Plants reach about 24 inches high and need spacing 24-36 inches apart. Plants may do best with staking or in a cage. Harvest is rated 65 days from planting.
If grape tomatoes are a favorite, consider Fantastico Grape, an early maturing, high-yielding winner. Seed catalogs say up to 12 pounds of little fruit, each up to an inch in size. With a mounded, spreading habit, space plants 36 inches apart. This early maturing fruit is 50 days to harvest.
For beefsteak tomato lovers, consider Summerpick, with large fruits averaging about 11 ounces. This vigorous hybrid adapts well to containers and produces ripe tomatoes in 70-75 days, needing 24 inch spacing.
Other compact plants include Patio Baby eggplant; a dwarf hybrid with a 45 day harvest time. Find a sunny spot and tuck in Italian flat parsley, oregano, chives or rosemary for picking a few fresh sprigs when cooking.
In addition to proudly harvesting your own fresh-picked produce, I predict you’ll enjoy getting outside, spending less on groceries, and adding a bit more beauty and interest to your landscape.
By Mary Fran McClure
Succession planting can help you maximize your garden space – 5/6/2022
Succession planting is a way to make the most of your garden space, growing two or more crops from the same area. It requires planning and careful timing but you may find it worth the effort, particularly if your space is limited and you love your home grown produce.
There are two strategies you can use when planning for succession.
The first strategy is to plant an early maturing cool-weather crop followed by a later-maturing warm-weather crop. For example, you could start by planting peas in late April. While you wait for the peas to mature, start your pepper seeds indoors. Your peas will be ready to harvest in late June, and by now your pepper plants will be large enough to transplant into the space where peas were growing. Your peppers will be ready to harvest in late August. Now you can plant kale in that space and it will be ready to eat in mid-October. As a cool weather crop, kale can survive the winter and give you a spring harvest as well.
The second strategy is to plant small quantities of the same crop every week or two. You can start leaf lettuce indoors in early April and plant the seedlings in the garden two weeks later. As they start to grow you can plant seeds between the rows. You can do this every week or two until summer heat arrives. Lettuce seeds germinate best when the soil temperature is about 75 degrees Fahrenheit. At hotter temperatures, germination slows, and at 85 degrees it stops altogether. If you want to have lettuce in the summer, you will need to start the seeds indoors where the temperatures are cooler. Be sure to give your seedlings shade once you put them in the garden. You can continue to plant lettuce through the fall. Plants can survive temperature as cold as 20 degrees Fahrenheit, so if you leave lettuce plants in your garden over winter you may be able to harvest some leaves from them in early spring.
If you love garden carrots, you can plant an early variety like Yaya at the beginning of May to harvest in mid-June, followed by a storage variety like Bolero to harvest in mid-September. You can follow these with kale or spinach for a late fall harvest.
Experiment and develop your own strategy for succession planting.
By Connie Mehmel
Avoid Frustration by Choosing Plants That Thrive Locally – 3/13/2018
One of my favorite catalogs of the season has arrived. It’s already dog-eared and crinkled and completely broken in from flipping between pages. It’s like my version of a candy store. Inside, its covers are an assortment of hard-to-find perennials collected from around the globe. From sub-tropical bananas to “Lost Crops of the Incas,” the Raintree Nursery catalog has it all.
Without a doubt, many of these plants are not well-suited to North Central Washington. And although I wish I could grow a banana tree, I know that my efforts are best spent elsewhere. This year, my wish list of must-try plants includes several varieties of berries that are popular in other cultures but are underappreciated here in the U.S.
Last summer, I planted a test plot of lingonberries in my perennial garden. There are no less than seven different varieties available for purchase that do well in zones 3-8. Related to blueberries (both are in the Vaccinium phylum), these tart red berries are a staple in Scandinavian jams, jellies and sauces. With a flavor similar to a cranberry, they form a dense perennial ground cover over time.
Most plants reach a mature height of under 6 inches, making lingonberries a good choice for squeezing into underutilized spaces within or between other plantings.
I decided to plant mine along the outer edges of my established flower beds. Already within the first season they nearly doubled in size. They required very little care other than a thorough amendment of peat moss turned into the soil before planting, regular watering and an occasional thorough weeding.
This berry seems to really enjoy the climate of the upper Wenatchee Valley, enough so that I have every intention of doubling the size of my planting this season.
Lingonberries are cute little plants which remind me a bit of the ever-ubiquitous boxwood. The plants did produce a small number of berries in the first year and I expect a larger crop to follow in the years to come. With any luck, I will need to purchase one of those special lingonberry harvesting rakes sometime in the near future.
The currant is another underutilized perennial berry. Both red and black currants do very well in our region and are suited to backyard production. These bushes are of a moderate size, usually maturing to a height of 4 to 5 feet in height with a width of around 3 feet. They are great foundational plantings in landscapes and can be used as hedgerows. They are good for attracting wildlife and make great nesting sites for smaller birds such as robins and thrushes. Their delicate and short-lived flowers are a favorite nectar source for hummingbirds.
Most currant berries mature sometime during mid-July. There is no real stagger to the harvest season for currants, so it is best to be prepared to deal with the abundance all at once. Even small bushes can be loaded with fruit.
The berries are often used for producing juice, which can be turned into flavorful syrups, sauces and jams. Black currants are frequently dried and used for flavoring baked goods such as scones. Both berries are high in nutrients including potassium (twice that of bananas) and antioxidants (twice that of blueberries) such as Vitamin C.
Many currants are self-fertile or partially self-fertile, meaning that it is possible to own only a single bush and still enjoy fruit. With more than 30 varieties available commercially, picking out a favorite may be the greatest challenge.
If you are looking to squeeze a little extra fruit into your yard, consider adding one of these unique specimens. And, as always, happy gardening!
By Eron Drew
Helpful tips for increasing the odds of a bountiful gardening season – 2/8/2023
Where is the best place to grow vegetables? The answer: Anyplace that can meet the needs of the vegetables.
Plant needs include adequate moisture, sunlight, nutrients, proper temperature, drainage and a good soil in which to grow. The trick is to find out how to best meet these needs to maximize your garden’s productivity.
Another issue is the need to rotate where you grow certain crops. Multiple years in the same spot can become a big problem over time. Perhaps one of the most overlooked things to consider is whether the location is convenient or not. If it’s not easy to get to or out of sight, you may not spend as much time caring for the garden as you would if it were more accessible.
There is a lot of useful garden information on the Chelan/Douglas County Master Gardeners website, bit.ly/ncwgardening.
Moisture in our area will require irrigation, so an adequate and convenient water source for the garden is essential. If good water isn’t close enough to the garden, chances are the garden will not be successful. I prefer to apply water from drip emitters rather than sprinklers to reduce the fungal issues from water on the plant’s leaves.
Sunlight is a major consideration, since most vegetables require at least eight hours of good sunlight to be successful. Rows running north to south with taller plants toward the east side allows for better sunlight utilization.
Nutrient availability will determine how productive your garden will be. Soil tests will let you know what nutrients you need to supplement. There are some soil test companies that have been mentioned in past articles. You can check our website, or you can email the Chelan-Douglas Master Gardener plant clinic at chelanmastergardeners@gmail.com.
Drainage can be a big factor, as it’s usually an issue with clayey soils. Few plants like their roots wet or cold, so if you have poor draining soil, growing in raised beds or pots may be more successful.
Good soil is a blessing and trying to “fix” poor soil is a daunting task that requires years of effort. Using compost can help the nutrient and moisture retention ability in our areas of sandy soils. This will be an ongoing task, as the organic material breaks down and needs to be reapplied.
Temperature is the hardest requirement to control in the garden. When we extend the growing season, protection against cold is the most common temperature control. This is usually done by protecting transplants or seedlings from frosty mornings in the spring or covering mature plants in the fall to help extend the growing season and protect them from an early cold snap. This is usually done by using a cloche (a cover) over the plant, or some type of cold frame. The use of masonry or rock to create a heat sink to hold heat at night, can also extend the growing season. Growing plants in a more protected area or using mulch can also help.
I try to incorporate caring for the vegetables and fruits into my daily routine. However, time away for camping and travel tends to interfere as the summer season progresses. This year I am going to try more plants, such as tomatoes in pots, and use the garden space for more early and late season crops that can be harvested when I am not so busy traveling.
The answer to the question of where is the best place to grow vegetables is dependent upon your ability to meet the plant’s needs. The process of growing good vegetables takes lots of time and effort to perfect, and even then, many things will still be out of your control. But with thoughtful planning and problem-solving, the rewards of a bountiful harvest will be well worth the time invested.
By Lloyd Thompson
Micro-greens can help brighten your winter – 12-10/2018
It is dark and cold. Is your green thumb languishing?
Here’s a winter garden project that will meet many needs: fresh, homegrown greens for Christmas dinner, Christmas gifts for hard-to-please people, hours of entertainment for children and adults, and a means of clearing out that box of half-opened vegetable seeds that you have never planted but meant to.
Have you considered micro-greens? Micro-greens are essentially sprouted seeds that grow only to 3 inches tall. You harvest and eat the cotyledons, which are the first two little “leaves” that appear when a seed germinates. They are tasty and can be added to everything from omelets to sandwiches to salads.
What leftover seeds do you have? Select vegetable or herb seeds that have not been treated with chemicals like fungicides. In my box of saved seeds, I have packages of lettuce, kale, spinach, beets, Swiss chard and mesclun mix. You can use peas, mung beans or wheat as well, but they take a few more days to germinate. Arugula and radishes will provide zesty sprouts.
The seeds will germinate in a warm room very rapidly. My radishes came up in 48 hours, and they were ready to eat in six days. Most of the micro-green sprouts will be ready to eat within 2-3 weeks.
You can make growing micro-greens as complex and expensive as you wish or you can do it easily and economically. All you need is a source of light — a window in winter in NCW will not provide enough light. You need a container and a means to cover the container for a few days to keep the humidity high.
You can use a soilless method or seed-starting mix. I like the soilless mix because it is not as messy. I use those green floral blocks. You can use vermiculite or coconut coir — anything that will support the seeds and provide a place for the roots to attach. The easiest medium to use is the very fine seed starting mix that is sold at garden centers. My greatest success has been with clear plastic boxes with lids that salad or small fruits are packed in. The container does not have to be more than 3 inches deep because the seed is not going to grow long enough to develop a large root system.
The seeds are planted very densely — dozens of seeds in a 3×5 container for example. You will be using up all those old seeds stored in the box in your closet!
The key to success is moisture — not too much and not too little. If the germinating seed dries out even for a few minutes it will cease to grow. Too much water will rot the seed before it has a chance to germinate.
Once the seeds have grown a few inches of stem and the cotyledon has swelled, it is time to use scissors to harvest the plants. If you harvest the entire pot of plants, you can store the unused sprouts in a container in the refrigerator for a few days. After harvesting, stir the roots out of the growing medium, discard them, and plant again.
Happy winter gardening.
By Bonnie Orr
Start now if you want a fall and winter garden – 7/24/2018
Do you remember the fragrance with the odd name “Christmas in July”? My mother wore this perfume in the 1950s; I think of my mother at this time of year because I plant my fall and winter garden in July and enjoy its produce for Christmas meals.
It seems that summer has just started, but it is time to think of the next gardening cycle. The first step: hurry to the store before they pull all the seeds off the shelves.
The last week of July or the first week of August is the perfect time to plant the garden. The soil is warm, so seeds will germinate in a few days rather than in 10-15 days. The air temperature will moderate through August, and the traditional spring crops will thrive. Even more interesting, the short-day plants will grow vigorously and not bolt — go to seed — because the hours of daylight are decreasing. This is the perfect time to plant cilantro and spinach which require fewer hours of sunlight to continue to grow leafy greens.
Other greens that thrive are lettuce, kale, endive, radicchio and many herbs such as arugula. Cut chives in late August, and they will re-grow and produce the edible flowers by October. All these plants will grow until the heaviest of frosts that seem to be occurring toward the end of November during the last few years.
Peas are an essential in my garden and an essential treat for Thanksgiving, and I plant several rows at the beginning of August. If the weather cools too soon, be sure to use the pea blossoms in salads.
The best time to plant both hardneck and softneck garlic is in the fall. They continue to grow and are harvested at the end of June.
Root crops will grow until the soil temperature reaches the low 40s.
Root vegetables are the foundation of my fall and winter garden. I actually harvest something from my garden for the entire calendar year. For me, there is such pleasure to dig through the snow and the mulch to reveal the fragrant soil containing frost-sweetened parsnips, beets and carrots.
Winter storage of vegetables in the soil takes some preparation and some work, but it is well worth it to have the fresh root vegetables. Besides, at the end of January, when the inversion layer has been hanging over the Wenatchee Valley for eight weeks and it is dark and cold, digging in the garden and releasing spring soil scents is positively inspirational. You know in your heart that the winter will end.
So here is how to create a winter miracle dinner.
After the killing frost, the peas will be finished, but the greens such as spinach and Swiss chard growth will slow down and then re-grow in March and April before they bolt, so early spring greens are possible from the fall garden.
Mulch will preserve the root crops. Generally, even in a cold year, the soil does not freeze deeper than 8-10 inches. The goal is to prevent the ground from freezing. You can’t get frozen veggies out of the ground, and the roots are inedible once they freeze.
Heap straw and chopped leaves over the plants. Make the pile high and wide—at least 18 inches deep and 10 inches wider than the row of veggies. Mark the beginning and end of the row where, for instance, beets are growing, with a 3-foot stake (make sure the stake does not have a pointy top).This will help you find the veggies after the snow has obliterated all the garden landmarks. Dampen the mulch to prevent it from blowing away. When the snow begins accumulating, heap snow from other areas of the garden to create an even more effective frost barrier.
Whenever the hunger strikes you, dig through the mulch and the loose soil to retrieve some veggies. Dig a week’s supply each time you uncover the pile. Re-assemble the pile before you hurry in with the garden gems.
Enjoy every bite!
By Bonnie Orr
Getting veggie seedlings garden-ready makes a difference – 5/13/2020
Now that Mother’s Day has passed, it is time to think about vegetable seedlings — what to grow and how to plant them into the real world of the outdoor garden.
Those of us who don’t have time or space to start our own seeds may be venturing out to local plant sales, nurseries or garden stores for tomatoes, peppers, eggplants or broccoli to feed ourselves, our families and friends. What should you be looking for as you peruse the stock on hand?
It is essential to start with vigorous seedlings. Even if you manage to keep a stressed plant alive, it will never produce as well as one that got off to a good start.
Wherever you go for plants, the seedlings should look well cared-for: no yellow leaves or signs of insect or disease. The presence of damaged or neglected seedlings should tell you to shop elsewhere. A bigger seedling is not necessarily better. Look for sturdy plants with healthy leaves. Tall, spindly seedlings have probably been grown without sufficient light or have been in the pot too long. Avoid plants that are starting to bloom. These have stopped putting energy into root growth and will be hard to establish in the garden.
Once you bring your seedlings home, be ready to keep them protected for a while before planting into your garden. Many of our favorite vegetable plants cannot tolerate freezing temperatures. When they are young and tender, just a light frost may be enough to damage them, and even frost-tolerant plants such as kale are sensitive until they become established.
The process of preparing indoor-grown seedlings for the garden environment is referred to as “hardening off.” It helps the plant to become firmer and more resistant to the challenges of wind and weather. Hardening off should begin one or two weeks before setting unprotected plants out in the garden.
An easy way to harden vegetable starts is to put them outdoors on warm days in a shaded area out of the wind, and bring them in at night. The outside temperature should be at least 45 degrees Fahrenheit. As the days go by, gradually increase the amount of sunlight plants receive. Reduce the frequency of watering but do not allow the plants to wilt. You want plant growth to be slowed but not stopped.
Plants can be hardened off in a cold frame outside once nighttime temperatures stay above freezing. Vent the frame during the warmest part of the day, gradually increasing the length of time the frame is left open. If you are not able to tend to the frame during the day, try to time the onset of your hardening-off period with cloudy weather, and start by venting the frame just a crack, gradually increasing the open gap each day.
Some commercial plant protectors will allow you to plant greenhouse seedlings directly into the ground while hardening off. The most effective protectors have double walls that can be filled with water. These will warm up during sunny days and keep the plant insulated at night, and are heavy enough to avoid blowing over during windy days. It is important to remove them once the hardening off period is over, since plants can overheat once summer temperatures arrive.
Be aware of expected frost dates for your site. In Chelan County, average last frost dates can be anywhere from late April in Wenatchee to mid-June in Plain. Your particular garden spot may differ from average depending on slope and aspect. Choose varieties that you can grow successfully, so you can look forward to an abundant harvest.
By Connie Mehmel
Do’s and don’ts for container vegetable and herb gardening – 5-19/2020
Most any vegetable or herb grown in a traditional garden can also be grown in a container suited to your available space, whether it’s a windowsill, apartment balcony or even by your doorstep.
Plants grown in a container need the same things as those grown in the ground: healthy soil, light, sufficient water and fertilizer.
Once you have determined the space, choose a container that fits it. Almost anything will do, from a planter to a bushel basket to a hanging basket. Be sure the container has drain holes and add coarse gravel in the bottom to ensure adequate drainage. Then choose vegetables and herbs that will grow successfully in that limited space. For example, most herbs, green onions, radishes and lettuce will grow well in 6- to 10-inch containers.
Tomatoes, peppers, carrots and beets need a container equivalent to a five-gallon bucket or larger, particularly if you plan to grow more than one plant in an individual container. Check for varieties that have been developed for container gardening.
Do not use garden soil when container gardening. Instead, buy a good quality potting soil that includes material such as peat moss and vermiculite that help retain moisture and add air space necessary for healthy root growth.
You can plant seeds directly into your containers or transplant seedlings. Proper spacing is important. For spacing, follow the seed packet’s recommendation for row spacing. If possible, consider planting more than one type of plant in a container as closer spacing increases yield at harvest time.
As with other plants, different vegetables and herbs have different light needs. Although most prefer full sunlight, some can tolerate shade better than others. Check your seed packet or catalog for light requirements. One advantage of container gardening is that your plants are mobile and can be moved to take advantage of sunlight or shade as needed.
Proper watering is critical to successful container gardening. Container grown plants often need daily watering, particularly during the heat of summer. If you’re not using a water meter, your finger becomes your water gauge. Poke it gently a few inches into the soil to check for moisture. If it’s dry, it’s time to water.
Herbs will tolerate more dryness than tomatoes and many quick-growing vegetables. It can be difficult to re-moisten potting soil once it’s too dried out so be vigilant in checking. Keep the soil evenly moist after planting seeds until they are well-established seedlings.
Your vegetables and herbs will also need fertilizer to replace nutrients as they are used up by the plants, especially as their soil is limited in the container. Liquid, dry and time-release fertilizers are available. Choose the one that works best for your situation and follow the directions on the label.
Weeds can find their way into container plants just like in gardens. The best way to control them is to pull them out whenever you see them pop up. WSU does not recommend using herbicides in containers.
Check your plants regularly for evidence of disease or insect damage. For advice on the best options to handle these problems, contact the WSU Master Gardener Plant Diagnosis Clinic. Our phone and live clinics are not being held currently due to the coronavirus pandemic.
As with in-ground gardens, container gardens can produce fresh, healthy, delicious vegetables and herbs, as well as the satisfaction of knowing that they have flourished under your tender loving care.
By Casey Leigh
We’re lucky to live in tomato-growing heaven – 5/25/2020
Fresh-picked, home grown tomatoes can’t be beat. Provide a sunny spot out of wind, in fertile, well-drained soil and add ample water and you’re in business.
If you’ve started them indoors from seed in February or March, keep them in pots protected in a sunny spot until soil warms before planting them out. They’ll do best if pots are moved indoors at night when temperatures dip down. When ready to plant out, soil temperatures should be at least 50 degrees F — probably about now and sometimes even early June in cooler regions. To give them a head start, put a cage around them and secure clear plastic sheeting to the circle.
Raised beds with plenty of organic soil are perfect for tomatoes, as these vigorous plants prefer at least 4-square feet of space per plant. Good sized containers with at least 18 inches of depth work well for smaller-sized plants, often called patio tomatoes.
Fertilizer is important, as these plants grow quickly and can produce a huge amount of fruit. That is, as long as you don’t go overboard on nitrogen, then you’ll have lush greenery and little fruit. Typical tomato fertilizers are in the 5-10-10 range.
Tomatoes are one of the few plants that do well sinking the stem partway down in the soil when transplanting. Remove low leaves before planting and new roots sprout from the submerged stem. They do best with some sort of support, whether a hefty stake pounded into the ground next to the plant and adding twist ties as the plant grows, or an encircling wire cage.
Watering is important. Tomatoes like fairly constant moisture, so beware of periods of dryness. If you start seeing ugly black patches at the bottom of your tomatoes, it’s a mineral uptake deficiency most likely caused by uneven watering.
When selecting tomatoes, you may be confronted with terms such as paste tomatoes, determinates, indeterminates, heirlooms and hybrids. Determinates are generally smaller plants that stop growing earlier and put energy into ripening fruit. Indeterminates get rambunctious, while producing over a longer time but with more spotty production.
Heirlooms are the old tried-and-true favorites; they are very tasty and seeds can be saved from year to year. Brandywine, Green Zebra, Black Krim are popular ones and all indeterminates. Hybrids are crosses that blend the best features of two parents. Early Girl, Lemon Boy, Super Fantastic and Celebrity are top-rated and determinates.
Paste tomatoes have less juice and are used for canning, freezing and drying — perfect for making spaghetti sauce or soups. San Marzano is an heirloom indeterminate, while Supremo is a hybrid determinate.
Cherry types are the pop-on-your-mouth ones, such as Sun Gold, Sweet Million and Juliet. Although small fruit, plants are usually hybrid indeterminates and outgrow their allotted space.
Container-friendly plants include hybrid determinates Patio Choice, Bush Champion and Tiny Tim.
Whatever your growing space and preferences, there are tomatoes just right for you.
By Mary Fran McClure
Tips for having garden lettuce all summer long – 6/8/2020
An early season joy for any gardener is a freshly harvested green salad, but this joy can be short-lived because salad greens are cool-weather crops.
Lettuce can germinate in soil as cool as 40 degrees F. It germinates best at about 75 degrees, and above 85 degrees it will not germinate at all. Once the plants have emerged, the optimum air temperature for healthy growth and good flavor is 60 degrees.
As spring turns to summer, your tender lettuce, spicy arugula and other greens start becoming tough and bitter. Eventually, they bolt in response to warm temperatures. But there are techniques to extend your salad harvest into the summer season.
First, be ready to plant a short row of lettuce every week or two to keep the greens coming.
If you want to grow head lettuce, such as Bibb or Butterhead, it must be planted early. Head lettuce will take 40 to 52 days to reach full size. For ease of harvest, most home gardeners plant leaf lettuce, which develops faster and can be cut as soon as the leaves are an acceptable size.
Plant breeders have put considerable work into developing lettuce varieties that retain good flavor and texture during warmer temperatures and are slow to bolt. Choose these varieties for later plantings.
Once you have planted, do not let the soil dry out. Regular irrigation will help keep greens from wilting or bolting.
As temperatures start rising into the 80s, find a shady spot to plant new lettuce. You can also use shade cloth to keep lettuce from overheating. This woven material reduces incoming sunlight by 30 percent to 50 percent, depending on the fabric. Shade cloth must be supported by a frame or by hoops.
It is easy to make hoops by cutting lengths of three-quarter-inch plastic irrigation pipe and slipping them over rebar stakes you have pounded into the ground.
By midsummer, Eastern Washington soils are often too hot and dry for lettuce seeds to germinate, but you don’t need to give up on your garden salad. You can start lettuce indoors in flats where you can control the temperature, and transplant the seedlings into your garden. In this way you can continue harvesting lettuce into the fall.
Keep leaf lettuce growing with cut-and-come-again harvest. Use sharp scissors to cut the leaves you want, leaving about one half inch of the plant behind. You can get two or three harvests this way before the leaves start to become tough. Do your cutting in the morning, since leaves wilt quickly in the heat of the day. Clean the lettuce, remove any damaged leaves, and store it in the refrigerator in a plastic bag. Properly prepared and stored, lettuce will keep for at least one week.
So, don’t just plant lettuce once. Seek out varieties that can tolerate our summer temperatures. With determination, you can have tasty salads to the very end of the gardening season.
By Connie Mehmel
It’s time for some summer planting for autumn harvest – 8/3/2020
It’s midsummer, and vegetables are ripening in your garden. Tomatoes are blushing, onions are beginning to dry down, pumpkins and squashes are swelling with fruit. But you are thinking ahead to the crisp days of autumn. What can you plant now that will thrive?
Some vegetables can be started now for fall harvest, and they often face fewer pest problems this time of year. There are two types of plants you may consider for midsummer planting: plants that tolerate frost, and plants that mature quickly enough to avoid early frost.
Crops planted in summer take longer to mature than spring plantings because the days are shorter. As fall approaches, cooler temperatures will also delay development. One way to circumvent these problems is to start seeds indoors and plant the started seedlings in your garden.
Kale is a particularly good choice for summer seed starting indoors. You can plant your kale seedlings outside in mid-August have a delicious fall harvest. Kale will tolerate frost and keep growing even when temperatures drop. It reacts to cold by producing sugars that make it even better tasting when grown late in the season. You can harvest summer-planted kale starting in October by clipping leaves from the bottom up. As winter approaches, regrowth will be slow, so you should plant kale abundantly in the summer. I have managed to harvest kale as late as the end of December if temperatures do not drop too suddenly. Plants often survive the winter and produce more leaves in spring.
Lettuce is another cool-weather crop that can be started indoors in summer and harvested in the fall. It is not as frost-tolerant as kale, but with care you can have garden salads until early October in Plain or as late as mid-November in Wenatchee. If you add a protective row cover, it can extend your lettuce harvest by several weeks.
Radishes and spinach are quick-maturing crops that can be direct-seeded in early August. They will be ready to harvest before the first hard frost. You should be aware of germination temperatures for the seeds you plant in summer. Spinach germinates best at temperatures from 60 to 68 degrees Fahrenheit. Radishes have a wider temperature range, germinating best between 55 and 75 degrees. As long as summer heat continues, you will get better germination and growth if you provide shade over your rows.
Enjoy these midsummer days with plans to harvest in cooler weather!
By Connie Mehmel
It’s nearly time to plant garlic for harvest next summer – 9-07/2020
Autumn approaches, and our gardens are filled with vegetables to harvest. But if you crave tasty garlic for next year, now is the time to prepare for planting. Garlic requires vernalization -a period of cold temperature -before it can initiate growth. In North Central Washington, the best time for planting garlic is September or early October.
Garlic (Allium sativum) is in the same species as onions, but unlike onions it rarely produces seeds. “Seed garlic” advertised in catalogues is a garlic bulb. The bulb will contain 10 to 20 cloves enclosed in a parchment-like sheath and arranged around a modified flower stem. Each clove can produce a new garlic bulb. While any garlic clove can be planted, seed garlic from a reputable grower is more likely to be vigorous and disease-free than garlic purchased as food in a grocery store.
There are two subspecies of garlic: hardneck (var. ophioscorodon) and softneck (var. sativum). The most obvious feature that distinguishes the two is the “scape” of the hardneck variety, which rises from the leaf cluster and forms a coil which later straightens into a hard stalk. Many gardeners harvest young scapes to use in salads or stir fry.
Hardneck garlic is more cold hardy than softneck, though both varieties grow well in our region. The cloves of hardneck garlic are fewer and larger than softneck, and many people consider them more flavorful. However, the shelf life is shorter than softneck varieties. Because of its hard central stalk, hardneck garlic cannot be braided, making it less suitable for ornamental uses. Softneck garlic doesn’t form scapes, and the stalk is pliable.
Prepare seed garlic for planting by separating cloves from the bulb. This should be done the day of planting, taking care not to damage the basal plate where the roots will emerge. Larger cloves will produce larger bulbs, so save the small ones for eating.
Garlic should be planted on a site that receives at least six hours of sun a day. It does best in well-drained soil high in organic matter. Plant cloves 6 inches apart and 2 to 3 inches deep, and cover with 2 to 3 inches of mulch such as weed-free straw. This will help prevent the cloves from frost-heaving.
When choosing a planting date, the objective is to get maximum root growth without initiating top growth. Garlic will grow roots in the fall until the ground freezes, at which time it becomes dormant. Garlic planted too late will get off to a slow start in the spring. Garlic planted too early will begin top growth which can sometimes result in winter damage. Late September or early October is a good time for planting in Wenatchee or Chelan, while early September works best in Leavenworth or Plain.
For more information, take a look at Ron Engeland’s classic 1991 book, “Growing Great Garlic.” Ron grew garlic in Okanogan County for many years, and the farm he started is still in operation. His book is not only a complete guide to garlic from planting to marketing, but includes garlic history, garlic artwork and garlic poetry.
By Connie Mehmel
Get an Early Start on Vegetable Gardening – 3/24/2021
Many vegetable seeds do well sown directly into the garden, but results are often improved by starting seeds indoors.
Starting indoors has several advantages. Perhaps the most important is a controlled environment for fragile new seedlings. Indoors, you can protect them from damaging winds, heavy rains or hail. Tiny seeds can be more carefully sown in flats than in garden beds. Plants like tomatoes or peppers that require long growing seasons will not mature at all in northern climates unless started indoors.
Once you have selected your seeds, the important considerations for successful seed starting are starting medium, containers, temperature and light.
A light, porous starting mix will give you the best seed germination. Do not use garden soil. Though it may produce good results in your garden, it tends to contain weed seeds, insects and pathogens that should not be brought indoors. Most garden soil becomes crusty and does not drain well under indoor conditions. Commercial starting medium is a soilless mixture of vermiculite, perlite and sphagnum moss, with some amendments. This provides a good environment for germinating seeds.
If you want to try making your own mix, the basic recipe is two parts sphagnum moss, one part perlite and one part vermiculite. Amendments could include oyster shell, worm castings or compost in equal parts with sphagnum moss. Oyster shell will increase the pH of the mixture, counteracting the acidity of sphagnum moss. Worm castings and compost will add micronutrients, but they must be sterilized. Place moist worm castings or compost in an oven-proof container, cover it and place it in the oven at 250 degrees. Periodically check the temperature of the mixture with a candy thermometer. When it reaches 180 degrees, cook it for an additional 30 minutes.
A convenient container for seed starting is a plug flat with 72 cells, a tray sized to accommodate the flat and a clear plastic dome tray cover, available at many garden stores and nursery supply businesses. While this equipment is preferred by most gardeners, almost any container can be used as long as it drains, is deep enough for seedling root development and is clean and sanitary prior to use. It is best to grow seedlings in individual cells since it reduces root damage during transplanting.
When you are set up and ready to start, place one or more seeds in each cell. Plant them to the recommended depth -usually as deep as the seeds are wide. Label the cells clearly, then cover the flat with the dome cover to conserve moisture until the seeds germinate.
Most seeds germinate best when soil temperature is about 70 degrees Fahrenheit, so find a warm room for seed starting. Many garden supply stores sell heat mats that can be placed under the seedling tray. When plugged in, the mat will raise the temperature of the root zone 10 degrees to 20 degrees Fahrenheit above ambient room temperature.
Once seeds have germinated, remove the dome cover and unplug the mat. Too much humidity after germination can encourage certain fungal diseases, and too much heat can cause seedlings to become spindly. Keep the lights on them and watch them grow until it’s time to put them in the garden.
By Connie Mehmel
Winter Gardening Can Provide Fresh Vegetables During Coldest Months – 8/21/2021
Do you long for fresh-harvested vegetables during the cold days of winter? Some vegetables are suitable for winter gardening in Washington, but low temperatures and short days require special strategies.
Some crops can be planted in late summer or early fall, usually under some type of row cover for temperature moderation and protection from heavy snow. These crops can be harvested throughout the winter.
Vegetable seeds germinate best when the temperature is about 70 degrees Fahrenheit, but once the plants are established some are quite tolerant of cold. The hardiest vegetables can withstand air temperatures below 28 F. These include spinach, leeks, rutabaga, broccoli, kohlrabi, kale, cabbage, Brussels sprouts, corn salad, arugula, radish, mustard and turnip.
Semi-hardy vegetables can withstand air temperatures in the range of 28 to 32 degrees. These include beets, carrots, parsnip, lettuce, chard, pea, Chinese cabbage, endive, radicchio, cauliflower, parsley and celery. For beets, carrots and parsnips, the tops will die but the roots will tolerate lower temperatures.
Protection for your winter crops can be provided by high tunnels, low tunnels or cold frames. High tunnels are often used by commercial growers, but they are expensive and take considerable maintenance.
Most home gardeners will use low tunnels or cold frames.
Low tunnels are made with metal hoops covered with fabric to protect from severe frosts in fall, then transitioned to greenhouse film as the days become colder. Tunnels need to be sturdy enough to withstand heavy snow. Cold frames can be purchased or made at home. They generally consist of a wooden frame with a glass or plastic lid that serves as a small, solar greenhouse. Gardeners who are fortunate enough to have greenhouses can use them for growing winter vegetables.
My earliest experiment with winter vegetables consisted of two long rows of carrots that I planted in mid-summer. I covered the rows with straw bales in the fall, which kept the soil from freezing. Throughout the winter I was able to remove the bales and dig up carrots. The tops were not attractive, but the carrots were delicious.
Short winter days will eventually stop the growth of vegetables like kale and Brussels sprouts. This happens during the “Persephone period” -the time of year when days are less than 10 hours long. This period is named after the daughter of Demeter, Goddess of the Harvest in Greek mythology. In Washington state, the Persephone period lasts from about Nov. 1 through Feb. 10. Plants can still be harvested during this period, but will not resume growth until the days lengthen.
Winter gardening is not a simple process, but it provides the opportunity to extend your harvest and have a source of fresh vegetables during cold months. If you would like to know more about winter gardening, I recommend Eliot Coleman’s 2009 book “The Winter Harvest Handbook.”
By Connie Mehmel
Garden Dreams? The Snow Will Be Gone Before You Know it – 1/26/2022
January is a time to reflect on last year’s garden: what went well, what do you want to change, and what new things do you want to try. Maybe you want to try some vegetable or herb you haven’t grown before, or maybe it’s time to try a new cultivar.
If you love growing a salad garden, try out some new lettuce varieties. The butterhead variety Milagro (Spanish for “miracle”) has a large, upright, dark green head with good resistance to powdery mildew. Truchas is a mini dark red Romaine variety that matures in 45-55 days. An even more exciting Romaine is Flashy Trout’s Back, an Austrian heirloom sporting dark green leaves with maroon speckles. My personal favorites are the leaf lettuces that can be harvested many times. This year I want to try Shirane Sky, a new red leaf variety that is slow to bolt and can be grown throughout the season.
Carrots are a staple of many home gardens. They can be planted in early spring to harvest in summer, planted in early summer for fall harvest, or kept in the ground through the winter under heavy mulch and harvested as needed in cold weather. Orange is the color we usually expect in a carrot, but what about red, yellow or purple? Carrots have been cultivated for over 1,000 years, and early carrots came in many colors. Interest in multi-colored carrots has been revived in recent years. How about planting a row of Rubypak, Yellow Moon, Purple Sun or White Satin?
Tomatoes are the most popular garden vegetable in the United States. The varieties are nearly endless, so if you enjoy growing tomatoes why not try a new one this year? If you like big beefsteak tomatoes, take a look at Captain Lucky. Bred by an independent breeder in North Carolina, it ripens green with red streaks. If you prefer cherry tomatoes consider Apple Yellow, an All-America Selections winner in 2020. It bears bright yellow apple-shaped fruits in abundant clusters. For a new red cherry tomato, try Sweet Aperitif. Introduced in 2013, fruits are smaller than a dime, prolific and very sweet.
Last but not least, consider some new herbs. Have you tried growing stevia to sweeten your desserts or anise for its licorice-flavored seeds? Another interesting garden herb is cutting celery, a variety of vegetable celery but easier to grow. The leaves are used to flavor soups and stews or added to salads. They can also be dried for winter use.
It’s always a good idea to keep a garden journal, especially when you try something new. How many times have you tried a new variety or new technique, then forgotten what you did by next year?
The snow will be gone before you know it, and your garden will be calling. Best wishes for 2022!
By Connie Mehmel
Hot Gardening Tip: It’s Time to Plant Your Fall Garden – 7/19/2017
Every time it comes around to writing about fall planting it always feels a little bit on the early side. “Really, Fall planting already?,” you say. Yes, time to think about fall planting now, in July. It is hot and sunny and the days are long but summer disappears all too quickly and if you don’t act now, you’ll miss your chance to create a beautiful fall garden full of abundance and variety.
So why do we start planting now? There are several answers to this question. Day length is one of the most important factors that affects plant growth as we move into the fall.
Pretty soon here, our days are going to start to shorten noticeably. The plants notice this too. As the days shorten, plants start to batten down the hatches in anticipation of making it through a long winter. This is especially true if they have not yet produced seeds. For those crops, many have biological mechanisms that allow them to remain alive even when the temperature dips into the single digits.
A great example of this is the humble carrot. As the day length decreases, carrots begin to ramp up sugar production in their root. This acts as a natural anti-freeze and is one of the reasons that carrots harvested after the first frost taste so good and sweet. Fall gardeners use this fact to their advantage, planting carrots now in anticipation of a delicious, late-fall harvest.
Another obvious reason to start your fall garden now is the change in overall day and nighttime temperature as we move out of summer. Even though it doesn’t feel like it right now, it will start cooling off again.
In the Pacific Northwest, we reach a point sometime in early to mid-September where it almost feels like Mother Nature has flipped a switch and all of the hot days begin to dwindle in favor of more moderate temperatures. For a plant, this is another signal that the growing season is coming to an end. Garden crops begin to slow down in their overall growth. It can take over a third longer for crops to reach a harvestable size during the fall shoulder season. For this reason, it is a good idea to take advantage of some of these summer days to get a jump start on fall planting.
Many crops will still burst out of the ground when planted now and will eventually start to taper into production just in time for the weather to make its switch. Although it is harder to get some plants to germinate when started in the heat of summer (ex: snap peas), once germination occurs, growth is rapid and the overall harvest is nearly as bountiful as a spring-sown crop.
There’s one final bonus to planting a fall garden. Namely, weeds are frequently easier to control in fall crops. Many of our native weed seeds are programmed to forgo germination until the spring rains return. For the gardener, this often means that there are fewer weeds to pull in August, September and October.
Also, by tending a fall garden, it gives the gardener a chance to do some thorough garden clean-up before moving into winter. This is actually a blessing since a garden that is continuously weeded will eventually exhaust the stockpile of weed seeds within the soil. Although the weeds will never fully disappear, there will be fewer of them to combat in the future. A weed with a seed head pulled today is the equivalent of pulling about a 1,000 baby weeds in the spring.
As always, have fun and happy gardening.
By Eron Drew
How to Mulch Your Garden – 12/1/2014
– Mulching is a year around project. Traditionally, we apply mulch in the fall to protect roots from frost heaving. Now it is done to protect plants from drying out. Our weather has changed in the last 25 years; we receive less precipitation in the winter. Until recently, NCW received the majority of its precipitation as snow. As you will recall, the last few winters have had relatively little snow and not very much rain. Most people who rely on irrigation water for their gardens do not apply water during the five months from October to April. That is a long time for no or very little moisture to be given to plants. Last year, we had only 2 inches of precipitation during the winter.
The soil dries out because conifers and other evergreen plants such as rhododendrons and laurels pull water from the soil for the needles and leaves. When the ground is not frozen, water evaporates from the soil on sunny days. As well, the surface of the soil is dried by the winds
Mulch applied about five inches thick will prevent the soil surface from drying out. It will also provide a bulky mass to absorb the available precipitation and release it slowly into the soil. Water generally runs off bare soil rather than soaking in. Mulch keeps the soil cool. It prevents the soil from warming prematurely. Warming might encourage the roots to think that spring is near and urge the plants to begin developing flower buds and leaves. And finally, mulch keeps the soil frozen once it freezes to prevent the cycle of freezing and thawing that can heave roots out of the soil and break them. Apply the mulch evenly over the flowerbeds. Keep mulches about four inches away from the trunks of trees and large shrubs to prevent mold or rot developing. Mulch protects the roots not the stems of plants, so the plants do not need a collar of mulch next to their bark.
Inorganic “mulches” are decorative substances such as rock, brick or landscape cloth. These are permanent mulches that are difficult to remove or alter without totally digging out the plants and the mulch. They are seldom applied deep enough to provide the protection of mulch.
Organic mulches do lovely things to the soil! During the growing season, mulch’s primary purpose is to cover the soil to prevent weed seed germination. Then it acts to slow soil water evaporation. It breaks down during the season to enrich the soil. What are organic mulching materials? They can vary as widely as a bunch of randomly placed conifer boughs (not very effective) to composted garden waste.
Most kinds of leaves can be mulched. English walnut leaves are a mulch material. Do not use black walnut tree leaves that contain a growth inhibitor. Rose leaves can be problematic because the thorns can take years to break down, and you want to avoid puncture wounds in the garden. During the summer, grass clippings can be spread out to dry and store to be mixed with chopped leaves in the fall. Most garden materials chopped up in a shredder can be used as mulch combined with other organic materials such as straw. It is best not to use hay since the grass seeds could germinate in the flowerbed
Large leaves, and leaves with waxy surfaces such as oak or sweet gum leaves, should be chopped up. Chopping leaves with the lawn mower makes the leaf surfaces smaller so they compost more rapidly. In addition the smaller particles of leaves do not form big, gooey mats and they do not blow around as large, entire leaves do.
Pine needles and cedar and fir needles are perfect mulch since they don’t matt down and leave air spaces that modify the soil temperature. And, no, they will not acidify your garden soil. The most important fact to remember is that depth is more critical than material. Mulch needs to be applied five inches deep to suppress weeds, maintain soil moisture and prevent frost heaving. Sometimes, the mulches break down rapidly and need to be reapplied during the season. Fortunately, last winter, I had stored extra mulch made of ground-up straw, leaves and grass clippings under a tarp. The weather last winter was warm, so the micro-organisms broke down the mulch. On a sunny February day, I re-applied the mulch back to its five-inch protective depth.
Happy plants means happy gardening!
By Bonnie Orr
Strange-looking Fruits and Veggies – 10/1/2021
– Every now and again our gardening eye is caught off guard: My, what is this? Mike Adams shared one of those moments with all of us when he emailed the strawberry picture here. Indeed, his strawberry did look other worldly. The phenomenon is known as vivipary (from the Latin, “live birth”). This happens when seeds germinate prematurely while they are still inside or attached to the parent plant. It is more com-mon in corn, tomatoes, peppers, pears and citrus fruit – rather rare in strawberries.
So why does this happen? Seeds contain a hormone that represses germination until conditions are favorable for the seed to germinate into a new plant. But sometimes the hormone is tricked into thinking conditions are right. And that’s what happened to Mike’s strawberry! He could have harvested and planted those seeds to see if a new plant would grow, then eaten the strawberry itself as its taste and texture were not likely affected.
Another interesting plant growth phenomenon is plant fasciation. The Pacific Northwest Pest Management Handbook describes fasciation as “a distortion of a plant caused by an injury or infection that results in thin, flattened, and sometimes curved shoots.” Abnormal flattening of the plant organs, usually stems, resulting in ribbon like, coiled or contorted tissue. The growing tip or apical meristem, which normally produces cylindrical tissue, be-comes elongated – oops plant mistake! According to Hortsense, leaf shape is not usually affected, although they may be smaller than normal.
Some suggested causes of fasciation include hormonal, genetic, bacterial, and environmental (physical injury). As long as the fasciation isn’t bacterial, trim it out and garden on. Or keep it as is as a unique plant form. If it is disease-based, proper sanitation protocols are called for.
Fasciation is fascinating! By Linda Sarratt
Successful Squash Plant Pollination – 7/1/2023
– Squash plants, a staple of home vegetable gardens, put forth many large, lovely flowers in early summer. But most of these flowers will never develop fruits because, for all their beauty, the flowers are botanically imperfect. Perfect flowers have both male and female parts. The male parts (anthers) produce pollen and the pistil (female part) receives pollen that fertilizes the ovule so fruit can develop. Tomatoes, peppers and eggplants have perfect flowers, so every flower can fertilize itself and produce a fruit.
The imperfect flowers of squash plants are either male or female. A male flower produces pollen which must be transported to a female flower for fertilization. Home gardeners often wonder why so many flowers on their squash plants die without producing fruit. While there may be a problem with lack of pollination or abortion due to excess heat, most likely the dying flowers are males that have already done their duty. Most squashes produce about 50% male flowers. Frequently they produce more males early in the season, frustrating impatient gardeners. Bees must do the work of pollinating squashes. Honeybees often visit squash blossoms, but native squash bees (Peponapis and Xenoglossa) are more efficient. They start early in the morning, before honeybees are active, and may get the job done before honeybees arrive. Before honeybees were introduced to the Americas, squash bees were the primary pollinators of squashes.
A close look will tell you if a flower is male or female. If the base of the flower is a straight stem, then it is male. Female flowers are usually larger than males and have a swollen base with a bulb that looks like it could develop into a squash fruit. If you look inside the flowers, you will see other differences. Inside the male flowers are several stamens that hold pollen. By contrast, inside the female flower is a large central structure which is the pistil. To be sure that squash flowers are pollinated, avoid using insecticides during the flowering period. Squashes are in the genus Cucurbita, which includes summer and winter squash, pumpkins, zucchini and gourds. All of the species in this genus can cross pollinate, so if you plan to save your squash seeds for planting in the future it is a good idea to hand pollinate your female flowers. Otherwise, the busy bees may cross your zucchini with a pumpkin, or your butternut squash with a gourd. You can use a small brush to move pollen from a male flower stamen to the tip of a female flower pistil, then cover the female flower with a fine mesh bag until the fruit has set. Squash blossoms are edible, so you can fry your early-season male flowers with chili and cheese if you don’t need them for pollination.
References:
*Bush, Michael and Combe, A.K. Growing Squash in Home Gardens. WSU Extension Fact Sheet FS087E, 2013.
*Cane, Jim. Squash Bees. Pollinator of the Month. USDA Forest Service, https://www.fs.usda.gov/wildflowers/pollinators/pollinator-of-themonth/squash_bees.shtml
*Porter, John. Sex and the Single Squash. Garden Professors blog, 2018, https://gardenprofessors.com/sexysquash/
By Connie Mehmel
Systemic Pesticides in Fertilizer – A Cautionary Tale – 6/1/2022
In April during a planting demonstration at the CEG, concern was raised about the use of a fertilizer that contained a systemic pesticide and the effect it might have on pollinators, mainly bees. A similar issue arose in 2021 in the rose garden. These experiences prompted us to do some research on the problem.
Bees are important pollinators in home gardens and to the local fruit industry. Many factors have contributed to declines in the bee population. The main cause of this has been the Varroa mite (Varroa destructor) which was introduced to the U.S. in 1980’s. However, research has shown that use of systemic pesticides is also contributing to the decrease of these important pollinators.
Systemics are the most widely used pesticide because of their low toxicity to humans and animals and their ability to move through the plant. They are soluble in water, absorbed by a plant and moved around in its tissue. Because they are usually applied to the soil, some fertilizers also contain a systemic pesticide. Some systemics contain a group of chemicals called neonicotinoids (“neonics”). This group of chemicals affects the nervous system of insects that come in contact with them. In bees, high enough concentrations can cause death. They can also have sub-lethal effects such as affecting the bees’ ability to navigate back to their home, making it hard to groom themselves, increasing their susceptibility to disease and mites, and weakening their immune system. Of these chemicals, imidacloprid, thiamethoxam, clothianidin, and dinotefuran are very toxic to bees while acetamiprid and thiacloprid have a lower toxicity level for bees.
Since bees visit many different flowers throughout a day of foraging, they can be exposed to a combination of pesticides that may pose a varying degree of risk. Further research is being done to determine how these chemicals and/or combination of other pesticides are affecting our pollinators. One WSU publication suggests that although their re-search showed that the bee colonies they studied did not have chronic expo-sure to neonicotinoids, people should be careful when using them to avoid the risk of acute exposure. In addition, they should not be used when plants are flowering.
If a pesticide is necessary, use a systemic only if necessary and not on flowering plants. Check the la-bel on a fertilizer before purchasing it to see if it contains a pesticide. Use a product with the lowest toxicity to bees and follow all the instructions on the label. Spot spray the pesticide and never spray flowers or buds. Also look to see if beneficial insects are present and wait to see if they will control the problem pest. Spray when bees are not active such as at dusk or early morning and control drift. Consider adding native or eco-appropriate plants that are a good source of nectar and pollen for bees and do well without the need for pesticides. Regardless of the pest, remember to follow the principles of IPM.
By Diane Lee & Casey Leigh
When and How to Harden-off Seedlings -5/1/2023
-You have put in the work to start your seeds and have trays of beautiful seedlings waiting to be planted in your garden. What next? You and your seedlings need to go through one more step — hardening off.
Hardening off is the process of toughing up your seedling so it’ll be able to adjust to life outdoors. Although it’s not difficult to do, it involves planning. You don’t want to start too early, or you will run the risk of cold temperatures damaging your plants. If you wait too long, your plants may suffer from becoming root bound.
Hardening off acclimates indoor-grown plants to outdoor conditions. The difference between indoor and outdoor temperatures is the primary reason for hardening off seedlings, but not the only reason. Wind is another natural phenomenon the seedlings need to be able to tolerate as well as full sunlight. Humidity levels also differ between indoor and outdoor areas.
An essential plant organ is the cuticle, the thick waxy outer layer that protects plants from harmful UV rays. The waterproof cuticle also helps the plant maintain its internal moisture levels. If you skip the hardening off period, you weaken the seedling’s ability to tolerate changes in temperature and withstand the sun’s UV rays, which results in less immunity to disease and pests.
Give your seedlings at least two weeks to make the transition to their new environment. Know when your average last frost date is and you can start transitioning the seedlings one week before that date. Find a lo-cation that is protected from animals, insects, and birds. An ideal location would be on an elevated location such as a table. Choose a location that offers dappled sun or partial shade. Then towards the end of the first week, expose your plant to full sunlight. Your seedling will need to acclimate to wind and airflow, also. If the day is particularly gusty, don’t put seedlings outside or use a wind block. Reduce the watering frequency to slow plant growth before transplanting. Get into the habit of watering deeply two to three times a week rather than daily. Allowing the soil to just barely dry out between watering will encourage a stronger root system and your plant will transplant better.
Begin thinking about hardening off once the plant has developed its second set of “true leaves.” As seedlings mature, they produce leaves that are typical of the species. These leaves usually come three to four weeks after germination. Once the true leaves appear, it is time to start the hardening off process. This process can take up to two weeks.
Step 1. Place seedling trays outside for a couple of hours with indirect sunlight. Bring back indoors before evening temperatures drop.
Step 2. Leave seedlings out a little longer each day, working up to six hours of direct sunlight and a light breeze.
Step 3. Leave plants outside overnight after risk of nighttime frost has passed.
Now plants are ready to transplant to their permanent locations.
For additional helpful information, read the WSU publication Propagating Plants from Seed
By Diane Lee
Winter Vegetable Gardening – 9/1/2013
It can be done without a lot of hassle, expensive equipment or taking up much space.
With a little protection such as cold frame or clear plastic hoop tunnel, cool season crops do just dandy when positioned for maximum sunshine with southern exposure. With a bit more warmth and protection, plants pretty much just take care of themselves–just about forget watering, hardly an insect around, little maintenance. Wow, a slower pace than summer gardening!
Emilie Fogle of East Wenatchee reports great results growing spinach, lettuce, kale, mustards and broccoli.
She made a compact hoop frame by pounding 1 foot pieces of rebar in the ground, spaced every 1 1/2 feet on the sides. Lengths of 1/2 or 3/4 inch somewhat flexible plastic pipe forms an arch and is anchored by pushing each end over the rebar. Fogle’s hoop house is five feet long, four feet across and only one and a half feet high. She covers it with a winter weight plastic row cover held secure with clips made for this purpose (clips were her largest expense for the entire project).
She also has a small cold frame…she says it was cheap and bends out of shape easily. She would invest in a stronger one if she were doing it again.
Sources for row covers, clips, cold frames and such include Territorial Seed Company, Grower’s Supply, Charlie’s Greenhouse and many other easily found on the Internet. Rebar and pipe are available locally from many sources.
Hurray to Fogle for keeping a detailed year to year journal, including planting and harvesting dates, soil and air temperatures, varieties planted and what was good or bad.
“I’ve always had great results with Bloomsdale spinach but any variety would do well. Same goes for kale and mustards,” she says. “I’ve planted Winter Red kale and Winter Density lettuce.”
“I like ‘Calabrese’–sprouting broccoli because it gives me numerous side shoots which allows me to use a few at a time in salads, etc.” says Fogle.
A freeze or two improves flavor of parsnips and carrots, as their starches change into sugar.
September is the time to set about preparing for overwintering vegetables. Our average frost date is mid-October, so count back from the days needed for your particular crop to mature, including seed germination time. Some plants will do best trans-planted rather than starting from seed.
Radishes are among the fastest to mature–30 days plus a week or so for seed germination, while broccoli and many brassica crops will germinate in a week or two but then require two to three months to grow enough before cold slows them down. Sprouting broccoli takes more time, also tolerates more cold, and must overwinter before forming a head in late winter. After the center is cut, side shoots just keep providing more broccoli.
Peppery arugula, hardy corn salad, mesclun — all are easy, dependable greens for winter months. Even a lettuce variety named Drunken Woman Frizzy Headed! Might be worth a try just because of its name!
By Mary Fran McClure
Clamping: Storing Veggies Underground – 11/1/2016
I grew up in a home that had a root cellar carved into a hillside. It smelled of earth and potatoes and carrots and cabbage and onions and was chilly year around. It was close enough to the house to walk through the snow to open the heavy wooden door and select the vegetables for dinner. Very few of us have root cellars anymore—and there is very little need to set aside food for the winter since grocery stores are numerous and close-by. But for a gardener wishing to prolong the pleasure of eating garden produce, storing vegetables during the winter is a joy—albeit, a bit of work.
So what would you want to store for winter treats- Potatoes, carrots, beets, onions, cabbage, turnips, parsnips? Select veggies that are not broken or cut or diseased. Do not wash them. Of course many gardeners also store their summer blooming bulbs and tubers in the same places they store the vegetables. Apples cannot be stored in the same place as the vegetables since the ethylene gas exuded by the fruit eventually will cause the vegetables to either sprout or rot.
The most important features of storage are temperature and humidity. That chilliness I recall from the root cellar was 40 degrees- pretty much the soil temperature below the frost line during the winter. This is the temperature that is ideal for vegetable storage. Some people have a basement that they can partition off to keep the storage area at a steady temperature – not more than 40 degrees and not less than 32 degrees. An outside wall on the north side of an unheated garage is also a possible site to store veggies and summer flowering bulbs. Most veggies need a bit of humidity. Onions and garlics need a dry environment.
For the last 20 years, I have stored potatoes, carrots, beets, parsnips and turnips in the garden during the winter. I read a book, A Very Small Garden. William Paul Winchester introduced me to the concept of clamping. Clamping is the process of digging a deep hole and storing vegetables in the bottom of the hole.
– Dig a wide three foot deep hole in your garden site where the soil is soft and readily dug.
– Place the veggies in net onion sacks or gunny sacks so that the tops of the sacks are covered with about 5 inches of soil.
– After you have placed the veggies in the hole, place a long pole or stake to mark where the hole is. Believe me, when the entire garden is covered with snow, it is really difficult to find the exact spot where the veggies are tucked away.
– Then on top of the soil over the hole, place 8-10 inches of chopped grass and leaf clippings. This mulch will prevent the surface of the ground from freezing.
On a frosty January night, I love to go out into the garden, push aside the snow, paw down through the mulch and reach into the soft, fragrant garden soil. The aroma is a reaffirmation that spring will come again. I take out the veggies I want to cook for dinner that night and maybe for one more day, and then seal up the hole with the soil and mulch and snow.
Clamping works until early March when the soil temperature starts to rise. At that point, the veggies will either start to grow or will rot. Ok. So this sounds like work. There is an easier way to store carrots, beets, turnips and parsnips. The easy way does not preserve the potatoes.
• Make sure the veggies are not poking out of the soil—if so, add soil around the tops of the veggies.
• Grind up leaves, mix them with straw and snuggle the mulch around the rows of veggies.
• Cover the veggies completely with the mulch. You need enough mulch so the surface of the soil does not freeze.
• Put a stake at the beginning and end of each row so you can find the row sleeping under the snow and mulch cover.
• The carrots, beets, turnips and parsnips are sweeter than in the summer, crisp and delicious.
Enjoy your garden all year around.
By Bonnie Orr
Weeds
A Closer Look at Weeds – 5/1/2021
“Yee-oow!” I hear a yell of pain from outside my kitchen and pause my dishwashing, “Is everything OK?”
Our nephew Michael, a solid 13-year-old visiting from Oregon, holds out his hand to me. “Look what I stepped on!”, his eyes wide in disbelief. I glance down, half expecting to see a bee missing its stinger. Instead, I see a rather good-sized pointy thorn familiar to anyone who lives in eastern Washington. “Oh, sweetie, that’s a goat head, it’s a weed we get around here.” Michael looks at me appalled by my obvious lack of concern. “What?! This is a weed?!” At that moment I realize Michael has never been a victim of the infamous puncture vine.
Most anyone who has lived, or visited, eastern Washington has at least one memory of stepping on a bur from the puncture vine or goat head as they are commonly known. My husband, not so fondly, tells of the time he went over his mountain bike handlebars straight into an area covered with “goat heads.” Luckily, he landed on his hands instead of his face. Lucky? Not so lucky? My brother-in-law, also from Oregon, says the bur “hurts way more than it should.” I too, remember stepping on a bur that had lodged itself in the carpet and managed to dislodge itself into my foot in the middle of January. No season is safe from those little buggers!
As spring begins in the beautiful Wenatchee valley it is time once again to prepare for the nemesis of all gardeners, weeds. A weed is generally defined as any undesirable plant that competes with what we want to grow in a particular area. One year my Grandma decided her abundant Hollyhocks were a weed and wanted every one of them gone. She felt the tulips were suffering and preferred those to the Hollyhocks. Weeds pull nutrients from what we want to grow and quite frankly sometimes appear to grow in Superman mode. Or is that only in my garden? Oxalis, Prostrate or Spotted Spurge, Crabgrass, ugh Crabgrass, are but a few plants considered weeds in our area, as well as Purslane and that disreputable Puncture Vine.
Weeds are really kind of amazing. Pause for a moment the next time you lean down to pull one out of your garden. Notice how many are in the space where you are working. How fast they seem to grow, one day you walk by and tell that unwanted plant, I will get you tomorrow my pretty! The next day you find the plant brought in reinforcements. Weeds produce an abundance of seeds and have a hasty reproductive cycle. They are adaptive and ambitious in their growth. Weeds also like to grow in disturbed soil, or soil that is doing poorly, or soil that is healthy, or soil that has not been disturbed, basically any soil that can or can-not grow anything will surely grow a weed.
Oxalis, or creeping woodsorrel, is a weed that I struggle with in my strawberry garden. It is a low growing, spreading plant with shamrock-like leaves, similar in appearance to clover. The leaf color varies from green to reddish-purple. Oxalis is a broad-leaf perennial.
It is widely adaptable and commonly grows in landscape areas, yards, containers, orchards, flower beds, ground covers, fields, generally anywhere you do not want to see it. Oxalis also grows year-round in some areas and produces a cluster of yellow flowers. A tiny and cute blossom until you realize that when the seed pods from this plant mature, they rupture, think explode when dry, and can expel seeds up to 10 feet away. Since the seeds are rough, they pretty much stick to anything which provides easy transportation to say, your strawberry garden? Did I happen to mention their expansive root system? Or that they should be considered toxic because of the oxalates? Your best bet for getting rid of Oxalis is good old-fashioned pulling, rototilling, and hoeing. Something we gardeners are all to used to doing. In addition to hand controls, try to catch this weed before it flowers and sets seeds. With an exploding seed pod, you will want to stay ahead of Oxalis spreading.
I never considered how many weeds were toxic until I sat down to write this article. I have a gravel driveway and battle spotted spurge every year. The first time I saw spotted spurge it reminded me of the puncture vine. Spotted spurge grows close to the ground forming a dense mat, much denser than the puncture vine though. It grows from a central tap-root and a single plant can span up to three feet across, trust me I have seen this, and it is not pretty.
Broken stems of spotted spurge produce a milky, poisonous sap that is an eye and skin irritant, toxic to some animals, and highly toxic to sheep. Hortsense describes it as having “hairy stems and hairy, dark green leaves with a purple spot on each leaf.” This summer annual likes full sun and of course, “produces seed quickly and prolifically.” Each plant can produce thousands of seeds and wouldn’t you know it, like to adhere to most surfaces. Your control methods for spurge are to remove the plant as soon as you see it. Gloves are recommended as the sap is a skin irritant and it is also sticky making it hard to wash off.
I do not know about you, but I also like to wear gloves when I am pulling the crabgrass out of my vegetable garden. Crabgrass germinates in spring and grows quickly throughout the summer. Right around the same time as your garden, landscape plants and manicured lawn begin to ramp up. It is an annual grass with “flat leaf blades which are relatively broad, long and sometimes hairy” but can also be smooth. Crabgrass “is prostrate and may form mats.” I am not sure how crabgrass looks on your property, but it thrives on mine and left to its own devices grows a thick mat. With our gravel driveway, fruit trees, yearly pumpkin patch, and lawn it seems like we have every desirable attribute for weed growth. While it may seem tempting to mow over the crabgrass in your lawn, it is not recommended. Even if you mow it short, say a ¼ to ½ of an inch, it can still produce seed. Those seeds can also remain viable waiting for the right moment to creep up through the soil when you least expect it, most usually for me under my zucchinis.
Last year my Mum and I were weeding my zucchini garden when we came across purslane. It is an annual broadleaf with “fleshy red stemmed succulent with green leaves.” Purslane looks like a little jade plant with yellow flowers. It feels slightly rubbery and to me, always feels slightly cooler to touch. Purslane has blunt leaves and can also form a mat. Purslane produces tiny seeds, but stems can re-root when broken, much to the chagrin to those of us who garden. If you plan on pulling purslane, be sure to grab all those broken fragments laying around and watch out as those stems “are brittle and break easy.” Purslane is edible and has uses as a vegetable, but high oxalates can be toxic. When Mum and I were pulling purslane out of my garden she told me that my grandparents used to prepare it as a tea. It also has uses in salads and is said to be comparable to spinach. Due to the oxalates care should be taken when ingesting. Purslane also grows in healthy soil as well as dry, it is also drought tolerant so once again a “weed” that is highly adaptable.
Another weed that can grow in dry areas is the puncture vine commonly known as a goathead. It is an annual broadleaf that grows from a taproot. The trailing stems can grow up to six feet and “are green to reddish color.” The puncture vine has small yellow flowers, and the spiny burs are separated into sections. Leaves of the puncture vine also grow opposite to one another on the stem. The spiny burs are sharp and can puncture skin as well as bike tires and even vehicle tires.
The burs are shaped so that one sharp point is always facing up. Therefore, it can always impale itself into everything from your feet to your car and because of this the puncture vine is able to travel distances. The leaves are toxic to animals, especially sheep and it can spread quickly. The puncture vine dies at the onset of winter, but the seeds start new plants come spring. It can start flowering within weeks of germination and flowers can bloom from late April until October. Due to its difficulty to control along with its destructiveness the puncture vine is listed as Class B noxious weed. The B classification means it is a non-native species and infestations are a high priority. Hand pulling is recommended and contained hoeing can be done in spring. Care should be taken if the seeds have already fallen to prevent continued infestation. Be sure to wear gloves and check your clothes as well as your shoes to prevent those goatheads from impaling and spreading.
I know for me, even despite the challenges from various weeds I love my gardens. Weeds are like a side note for me, yes, I get them, but did you see how good my garden looks? Plus, there is something invigorating in knowing what plants I am battling for garden space and on our property. Oxalis in the strawberries, spotted spurge up the front of the driveway, crabgrass and purslane near the zucchini, and puncture vine behind the garage. I am so much more knowledgeable than when I planted my first tomatoes. While I do not relish the idea of possibly finding a new variety of plant attempting a hostile takeover in one of my gardens, part of me feels like, bring it on! I got this! Admittedly I do not say it too loud as I would not want the seeds of weeds to hear me.
“In every gardener there is a child who believes in The Seed Fairy. ” — Robert Breault
by Lucia Eilers
Best Practices for Fighting Weeds – 8/1/2014
Weeds are diligent and determined, thus seed production is amazing. An annual bluegrass plant can produce viable seed within 24 hours of pollination. Have you ever cut a Salsify, those giant “dandelions puffs”? If you do not discard the plant, its severed head filled with merely flower buds, will skip the flower stage and immediately produce a large seed puff.
Area residents are asking master gardeners questions about eradication of rogue violets, mare’s tail, purslane, black medic, oxalis, and puncture vine. Have I mentioned your special nemesis yet?
In the spring, annual weed seeds germinate to grow madly to produce seed before they dry out in August.
Biennials started as a little cluster of leaves last summer, and this year an extended bloom stalk has grown. (Think of knapweeds and mullein.)
Perennials are those plants that have evolved massive root systems often with thick rhizomes deeply underground. You can kill the vegetation, and it will grow back almost before your very eyes. (Think of field bindweed/wild morning glory and horsetail.) These weeds are in your garden now; their seed producing capacity is awe-inspiring. Not only do the plants produce hundreds of thousands of seeds, the seed can remain dormant in the soil for years, and every time you distribute the soil by digging it, you expose more seeds to the light. Moreover, tricky plants such as violets can produce seeds underground without the benefit of flowers. In addition, oxalis and violets spread by underground stems.
Anyway, herbicides are not very effective on plants with narrow, hairy or waxy leaves. Annuals can be mown before they bloom — it is probably too late for that this year as well. If you cut or mow weeds and let the flowers lie on the ground, the decapitated plant can still produce seed that will haunt you for years to come.
For biennials you can just cut off the flowering stalk because the rest of the plant will die by fall anyway. This is best; if you pull the plant, you will disturb the soil, and any latent seeds will germinate to form a leaf roseate, which will set seed next year.
Don’t let the perennials bloom. And treat the plant with herbicide in the spring and fall. It is too hot now to apply herbicides. The Master Gardeners can tell you which products are most effective to use on any perennial weed.
What do you do with those weedy, seedy plants once you have cut them or pulled them? DO NOT compost them. DO NOT just leave them on the ground. Gather all the cut materials—seeds, flowers and stalks, and put them in a large plastic bag that can be sealed. Put the bag in the trash.
Or after you have filled the bag with the weedy material, add two cups of water, seal the bag and place it in a very hot and sunny spot. With the summer’s heat, the seed material will boil and be rotted in the bag. After a couple of weeks of heat treatment, this slurry can be added safely to your compost pile. There should be no recognizable plant parts in the smelly slurry.
A final word. After you have eradicated the weeds, apply at least a 3-inch layer of mulch over the bare soil to prevent new seeds from germinating and to slow down next year’s crop.
by Bonnie Orr
How to Control Puncture Vine – 6/1/2015
Puncture vine, also called goat head, is a painful weed because of its hard, spiny seeds. The plant’s botanical name is Tribulusterrestris; tribulus means “to tear” in Latin. The seed can tear open people’s feet and cause annoying punctures in bicycle tires and inflated balls. Have you ever stepped on one that got walked onto the carpet of your house because the seed hitched a ride on the bottom of a running shoe? The seeds can damage animals’ mouths, feet, eyes and digestive systems. This plant originated in the Mediterranean and was distributed across the Western U.S. by livestock, shipped hay, and the wheels of railroad cars. Having been seen in Washington since 1923, it is high time we got rid of this noxious weed in NCW.
The plant is an annual. The seeds sprout in sandy, dry soil beginning in May and form a flat rosette of leaves from which long branches grow. These branches produce yellow flowers that each produce a seedpod that contains up to 4 seeds. A single plant can produce hundreds and thousands of seeds. The record producer grew in California with 576,000 seedpods — and if each pod had 4 seeds that means that the one plant could produce over a million seeds! Ouch!
If everyone would pull these plants, which are just now blooming and setting seed, we could begin the process of knocking back this weed. It is important to pick up any seeds lying on the ground as well because the seeds can sprout for up to nine years in the ground.
Most of the plants grow on dry soil along roads and trails—anywhere the soil is disturbed by people or dogs walking along. The seeds need light to germinate, and the scuffing of the soil is one of the ways the seeds are brought to light. One means of slowing the spread of puncture vine is to stay on trails and paths.
It is easy to pull the plants up. You roll all the branches together to the center of the plant and then give the entire plant a twist. The entire root should come up with the plant. If using a claw hammer, wrap the claw in the center of the plant, twist, and the plant will pop out of the soil. It is not overly important to get the entire root since this plant is an annual and the root will die without its leaves. Be sure to gather up any little seeds that you knocked off as you gathered the plant. Some people use paint rollers; others find that carpet samples help pick up the seed.
1. Wear gloves and carry a heavy plastic bag that will not break and inadvertently distribute the seeds.
2. Look for the plants around your neighborhood. Great locations are under mail boxes on postal driving routes because the seeds get caught in vehicle tires. Look in alleys as well because the garbage truck’s tires also spread the seeds. Check the sides of parking lots.
3. Go out on the Apple Capital Loop Trail, especially on the eastside, and gather as much as you can.
Walk along roads that have gravel edges and pull up the plants.
Dig any rosettes, — little plants — that you see. Puncture vine seeds germinate every time it rains during the summer. So inspect your cleaned target areas all summer long for new plants.
by Bonnie Orr
How to ID and Fight Thistles and Knapweeds – 7/1/2016
This time of year weeds often take front and center as we struggle to keep them from overtaking our garden beds and lawns. However, not all weeds are the same in terms of their threat to our gardens, pastures, cultivated fields, and native ecosystems. Interestingly, almost half of our noxious weeds are “escapees” from gardens!
In this article we will focus on two sets of weeds that are on the Washington State Noxious Weed Control Board’s noxious weed list: the knapweeds and thistles.
Two species of thistle are commonly found in the Wenatchee Valley: bull thistle (Cirsium vulgare) and Canada thistle (Cirsium arvense). As Class C weeds, they are widespread throughout Washington. Bull thistle is the larger of the two, growing from 3 to 7 feet tall. It is a biennial with only one upright branched stem. It spreads through seeds. Canada thistle is a perennial that grows up to 5 feet tall and has slender grooved stems that branch only at the top. The leaves of both plants are alternate, but the bull thistle leaf is coarsely lobed, while the Canada thistle leaf is lance shaped. Bull thistle flowerheads are larger than the Canada thistle’s, 1.5-2” in diameter vs. ½ to ¾”. Both have purple flowers, but the Canada thistle’s can also be pink and occasionally white. Bull thistle blooms July through September. Canada thistle has a longer flowering season – June through October.
Bull thistle can be controlled by rototilling or hoeing/hand-pulling. Because Canada thistle is a perennial with an extensive root system, cultivation is not recommended. Instead, you can cover the infested area with an inorganic mulch, then cover the mulch with a thin layer of soil or organic mulch. Glyphosate can be used for both species as a spot treatment only. See Hortsense for other chemical management options.
Knapweeds are another noxious weed common in our area. Most are Class B weeds, meaning they are widespread in some parts of the state. The Bighead, however, is Class A, a relative newcomer that hasn’t yet gained a firm foothold in our region. Landowners have a legal responsibility to eradicate Class A weeds from their property.
Of the knapweeds on the noxious weed list, five are perennials: Bighead, Black, Meadow, Russian, and Brown. Diffuse and Yellow Starthistle knapweeds are annuals, while the Spotted knapweed is a biennial. Each has a taproot, ranging from woody to fleshy, except Russian knapweed which has a horizontal root system. Leaves of the Bighead, Black, Meadow, and Brown knapweeds have lance-shaped leaves. The lower leaves of the Diffuse are divided with narrow and elliptical upper leaves; Russian knapweed lower leaves are long and lobed with smaller toothed upper leaves. Young Spotted knapweed leaves are deeply lobed, turning to elliptical with age. Yellow Starthistle lower leaves are deeply lobed as well, with smaller, pointed upper leaves. Most of these knapweed species have rose, pink, or purple flowers. The Bighead and Yellow Starthistle have yellow flowers. Diffuse and Spotted can have white flowers.
Telling knapweeds apart can be difficult, but management is similar for all of them. According to the Noxious Weed Board, finding and controlling the knapweeds early is key to preventing an infestation. The most effective control is done through a combination of mechanical, chemical, cultural, and biological controls. Cultivation through rototilling or hoeing/hand pulling will reduce the population. As with the thistles, use glyphosate products as spot treatment only. Consult Hortsense for other chemical options.
(The Noxious Weed Board’s website is an excellent resource and the one I used for writing this article. Some of their educational materials are available on the table outside the conference room at the WSU Extension office on Washington Street. I also used information from Hortsense.)
by Casey Leigh
Virginia Creeper: Plants Gone Wild – 8/1/2022
In a recent clinic meeting, we discussed a somewhat desperate e-mail from a client who was seeking advice about removing a large, unidentified plant in her yard that had given her a rash. Her photos revealed a lush (and yes, expansive) hop plant. This led us to a bigger question: what are some plants that serve a good purpose but can quickly grow out of control?
Hops (Humulus lupulus L.) are an excellent first example. Though our client had an unfortunate experience with them, they can be used medicinally, ornamentally, as a supplement in livestock feed, and even as a preservative, according to OSU Extension. And, of course, hops are probably best known for the role they play in brewing beer. However, they can be difficult to control given that they are rhizomatous. Left to themselves, the bines (stems) usually grow up to 15 to 20 feet (sometimes higher), not to mention their ability to spread out along the ground.
Virginia Creeper (Parthenocissus quinquefolia), a member of the grape family, is another example of a plant that can become “too much of a good thing.” According to Susan Mahr with the University of Wisconsin-Madison, Virginia Creeper can cover trellises and chain link fences, help with erosion control, and provide food with its berries for songbirds and other wildlife during the winter. However, much like a hop plant, it can quickly become a problem in a garden. It grows with extraordinary speed (up to 20 feet in a year!), and Mahr warns that it can stifle other plants, particularly in a small garden. Additionally, the berries it produces are moderately toxic to many mammals (including humans) due to their dense concentration of oxalic acid.
It’s also worth mentioning that there is a False Virginia Creeper (Parthenocissus vitacea), which is on the Washington State Noxious Weed Control Board’s monitor list. Its leaves look very similar to Parthenocissus quinquefolia, so you’ll have to look closely to tell the two plants apart. For example, True Virginia Creeper leaves are a more muted green color; additionally, there are hairs on the underside of the leaves and on the veins. False Virginia Creeper leaves, by contrast, have no hair and are a vibrant green. However, the most helpful things to look at are the plants’ tendrils. True Virginia Creeper has tendrils that terminate in small, sticky discs, which allow the plant to latch onto things. While False Virginia Creeper also has tendrils, they divide into fewer branches than a True Virginia Creeper’s and they don’t have any discs.
By Jacqueline Sykes
Weeds in May – 5/1/2017
One of the most common questions in the clinic in May is how to get rid of weeds. People want to know what to spray — what is an easy way to get rid of weeds? Many people are sure that the weeds are coming in the irrigation water.
The real question should have been,“ How can I prevent weeds from over-running my garden, flowerbed, etc.?”
Prevent weeds such as purslane, oxalis and spotted spurge by rubbing them out with a hoe when they first appear and before they go to seed. These weeds mostly occur on road verges and on the edges of flowerbeds and lawns — that is until they truly get established. There is a pre-emergent designed for this evil trio, but it is not registered for use in Washington State.
In late July we will start getting questions about crabgrass because people have missed the window to apply pre-emergents. It has been hard to judge this year because of the cool soil and late spring. On April 6th my Forsythia sprang into bloom about two weeks later than normal and nearly four weeks later than last year. We suggest watching for Forsythia bloom because that indicates the soil is 50 degrees. Dandelions bloom at 55 degrees — and that is when crabgrass seed germinates as well.
Needless to say, noxious weeds must be eliminated before they flower.
Weed seed arrives during our windy springs and during the late summer winds. It loves to land on deep compost or nestle between rock mulch sitting on wind-blown soil collected weed barrier fabric. If an irrigation system, especially drip or mister systems, has effective filters, weed seeds cannot arrive via irrigation water. I have never found weed seeds in my filter. I once washed out the filter at the end of June, dried the residue, and did not find even fine seeds.
We suggest that gardeners weed well in early spring.
The solution to weeds is mulch, mulch, mulch. Weed seeds need light to germinate. I weed my flowerbeds once in early spring, mulch, and never weed again all season.
In the clinic we try to convince people of the power of 3-4 inches of mulch that will pretty much ease their problems with weeds. Of course, many people come to us when the oxalis has totally covered a flower bed and violets have filled up the lawn. Then we ask them to live with it because many weeds once they are established are next to impossible to eliminate without totally tearing out the landscape.
By Bonnie Orr
Effective strategies for dealing with weeds – 5/1/2017
Perennial weeds can be a stubborn challenge for gardeners. These weeds come back year after year, seemingly with more resilience, turning our peaceful gardening hobby into all-out war. This past winter’s lack of snowfall and warmer temps reinforced the army of perennial weeds such as field bindweed (wild morning glory) and horsetail.
Knowing what you are up against can better prepare you for the battle. Perennial weeds spread by seed and persist by large root systems. They store energy in their underground structures, allowing them to regenerate even after being cut back or pulled. This is why effective weed control requires a combination of strategies and diligence!
Prevention
As with any health problem, prevention is the best method. Here are several methods:
Mulching: Applying a thick layer of organic mulch in your planting beds can suppress weeds by blocking light. Mulch also improves soil structure, which helps your desirable plants outcompete weeds.
Planting ground covers: Bare soil is a welcome mat for weeds. Ground cover plants, such as clover or creeping thyme, form a dense mat that can crowd out weeds.
Proper soil preparation: Ensure your soil is fertile and well-draining to support your desirable plants. Consider no-till gardening to minimize soil disturbance, which brings weed seeds to the surface.
Physical Removal and Suppression
Once weeds are established, mechanical control is necessary.
Hand weeding: Some may consider this labor intensive, although hand weeding can be a meditative garden activity. Whenever I have a life problem that needs sorting, I grab my weeding tool and get to work. Hand weeding is most effective if done early in the season when weeds are small.
Solarization: Something to consider for next summer, solarization involves covering the soil with clear plastic for 4-8 weeks during the hottest part of the summer. This process heats the soil to a temperature that kills many weed seeds and roots.
Mowing or cutting back: Regularly cutting back weeds prevents them from flowering and setting seed.
Chemical Control
If you are losing the weed war, it may be time to consider using herbicides. Use a selective herbicide that is targeted for the weed you are battling. Non-selective herbicides will kill all vegetation and need to be applied directly to the leaves of the weed. Most importantly, follow the instructions listed on the package.
Some resources to help you make herbicide decisions are Pesticide Information Center Online (PICOL) at https://picol.cahnrs.wsu.edu/, and Hortsense, a WSU platform that contains fact sheets to help home gardeners with many plant problems. Find it at https://hortsense.cahnrs.wsu.edu/.
Finally, take advantage of the WSU Master Gardeners plant clinic, which is available year-round. You can email questions to askamastergardener@chelandouglasmg.org.
Long-term Management
Patience and persistence are your most effective weapons in the weed war. Regular monitoring with a combination of prevention, physical and chemical methods provide the best results.
Also, keep in mind that some plants considered “weeds,” such as dandelions and clover, are beneficial to your garden by being a food source for pollinators or having deep taproots that help break up compacted soil. Certain weeds, in moderation, can coexist in a balanced ecosystem without causing significant harm.
By Dana Cook
Why we need to eliminate the Tree of Heaven – 6/02/2024
The United States has had all types of migrants since the first European settlements. Dandelions and angle worms were introduced, as well as many invasive and noxious weeds and insect pests.
In the 21st century, the world is truly a global economy, so our migrants have changed to insect pests hidden in shipments of goods from other parts of the world for which we have not yet developed sure means of controlling them.
In the last 20 years, gardeners in North Central Washington have seen the eruption of the spotted wing drosophila, a fruit fly that damages ripening fruit, and the brown marmorated stinkbug that eats nearly anything organic and has become a scourge on the East Coast, and the Asian hornet or northern giant hornet.
Now there is a new pest that we hope we can control in the West before its population explodes. The new pest, the spotted lanternfly, Lycorma delicatula, is actually spread by using another inadvertent plant pest, the Tree of Heaven, as a host.
The Washington Invasive Species Council wants to have these unwanted and unloved trees eliminated from the landscape because that is the most effective means of preventing the spread of the spotted lantern fly, which like the tree comes from China.
The spotted lanternfly uses the Tree of Heaven as a host. The lanternfly sucks the sap from stems and new growth of ornamental trees such as maple, oak, pine and willow and fruit trees, including apples and grapes. It lays its eggs on the smooth bark of the Tree of Heaven. It is a remarkable-looking insect that is brightly colored, but we do not want to see it in Chelan and Douglas counties.
Did you ever read the book or see the classic movie, “A Tree Grows in Brooklyn?” The tree featured in the book is Ailanthus altissima, a tree brought to the U.S. from China for its “beauty.” Nothing was known about how aggressively this plant spreads.
The tree is casually known as a “trash tree.” People seldom plant it in their yards. It grows in uncultivated places, in disturbed land, near abandoned buildings, and in cracks in sidewalks. One tree in a neighborhood can produce enough seeds and suckers to populate several square blocks.
So what is a short-term management of this pest? Before the trees bloom and send off up to 350,000 seeds per tree, cut down the trees that live on the north and east side of your property since trees in other areas of your yard provide your shade. It is best to kill the tree with herbicide before you cut the tree down or the tree will send up lots and lots of suckers up to 50 feet from the tree.
If you cannot cut them down or arrange to have them cut down, kill them with herbicide. There are a number of techniques. You can spray the leaves or the basal bark. You can hack the stems and squirt herbicide in the cut. July is the time to treat the tree with systemic herbicide.
Generally, it takes two years to totally eliminate the tree. After you have killed the tree and have selected not to cut it down, there are several options. First, it can become a snag tree for cavity nesting birds. Or if it not too close to your house, you can plant rapidly growing vining plants to climb up the dead branches. Wisteria, native clematis and climbing roses, will bloom colorfully. Even ivy, kept in control, can create a sense of green on the dead branches of the Ailanthus.
If you would like assistance with managing your Tree of Heaven, contact the Chelan County Noxious Weed Control Board or The Douglas County Weed Management Task Force. These organizations can offer site-specific recommendations for a tailored management plan that best fits the location and extent of the problem. Email the WSU Chelan-Douglas Master Gardeners (chelanmastergardeners@gmail.com) for additional information and lists of herbicides to control this pest tree.
By Bonnie Orr
Common bad guys – 3/15/2023
These three weeds are common bad guys:
Common purslane (Portulaca oleracea) can produce 240,000 seeds per plant and the seeds can stay viable for up to 40 years. It mostly grows at the edges of the lawn, in sidewalk cracks, next to a driveway. One way to contain it is to alter your watering patterns so bare soil is not watered. Seeds can continue to ripen after the plants have been pulled. Any part of the plant can resprout. The seeds sprout when the soil temperature is near 70 degrees and the air temperature 70-80 degrees. Three inches of mulch will prevent the seeds from germinating. Pre-emergent chemicals are effective if applied before the seeds sprout.
Spotted spurge/prostrate spurge (Euphorbia maculata) seeds germinate when the soil temperature is 60 degrees and the air temperature 75-85 degrees. It can regerminate throughout the summer in weak areas of turf.
Oxalis or woodsorrel ( Oxalis stricta) germinates when the soil is about 50. When ripe, the seeds can be cast up to 16 feet away from the parent plant. Oxalis is a perennial and grows from underground stems or roots. This plant is controlled with specific, broad-leaf herbicides.
By Bonnie Orr
Tips for Limiting the Weeds in Your Lawn – 3/15/2023
For the last eight years, we have experienced an increasing number of days higher than 86 degrees. Do you remember the “heat dome?” That period of 100-plus weather lasted nearly a week in June 2021. Vast swaths of turf burned out. And because the grass leaves were dead, the soil was exposed to light. The various weed seeds hidden in the top few inches of soil germinated. Some people noticed splotches of weeds growing in their turf by late summer 2021.
A frequent question fielded by WSU Master Gardeners in 2022 was, “Where did these weeds come from and what can I do?” Most people did not realize how serious the infestations of spotted spurge, prostrate spurge, oxalis and purslane had become.
These weeds flourish in weak, drought-stressed areas of turf.
The tardy identification of the problem most likely will cause the infestations in 2023 to be much more severe since last summer’s plants created a new seed bank. Each of the devilish weeds described in the accompanying sidebar story can produce hundreds to thousands of seeds per plant.
March is the time to apply pre-emergent products, which will stop many of the seeds from germinating. They must be applied before the seeds start to grow. Usually, the soil is 50 degrees. For example, dandelions sprout when the soil is 50 degrees and bloom when the soil is 55 degrees.
So, what to do?
Most importantly, create a healthy lawn with minimum amounts of thatch. Water regularly and deeply, and apply fertilizer in spring and early summer. A healthy lawn will out-compete broad-leaf weeds.
The weed seeds most likely did NOT arrive in the irrigation water. The seeds are spread by wind. Or worse, the weed seed might be introduced by your lawn care service that has picked up the seed in the mower’s wheels or other equipment.
Be prepared to walk your lawn, specifically the edges, to monitor the first appearance of the weeds.
Consider pulling by hand those first offenders rather than spraying them. Have a bag with you as you survey your property so that you can remove the weed and put it in the trash.
Weed seeds can continue to develop even after the plant is pulled. Never leave piles of wilting weeds in a pile to pick up later. Have you watched a dandelion plant go to seed almost before your very eyes? If you hoe out weeds on the edges of the lawn or along the street, make sure to trash all the bits you have scraped up.
If you choose to apply chemicals, there are a number of pre-emergent chemicals sold at garden centers. Be sure to read the label to determine if your target plant is listed as controlled by a particular product. Post-emergent chemicals can be applied to lawns to kill broad-leaf weeds.
The WSU Master Gardeners can help you identify the weeds and offer suggestions of chemicals that can be applied to control them.
Consider a different attitude about your lawn. How often do you use your lawn, say, to play croquet? Is the only time you are on your lawn is when you are mowing it? Have you considered the ecological and financial cost of a monoculture turf lawn? If the lawn is green, keeps the dust down and is copacetic, why not tolerate some green broadleaf plants in your lawn?
Because of the increased number of hot days, we need to garden differently.
By Bonnie Orr
April showers bring May flowers; June heat produces weed flowers – 6/06/2023
You intended to scrape out those little weeds when they first appeared at the end of May. Now these flowering weeds are setting seeds. Often, they thrive in areas of low soil fertility and irregular water.
Weeds are diligent and determined. An annual bluegrass plant can produce viable seed within 24 hours of pollination. Have you ever cut a salsify, those giant “dandelion puffs?” If you do not discard the plant, its severed head filled with merely flower buds, will skip the flower stage and immediately produce a large seed puff.
Currently, area residents are asking Master Gardeners questions about eradication of rogue violets, mare’s tail, black medick, oxalis (yellow shamrock), Russian thistle, purslane and puncture vine — did I mention your special nemesis?
In the spring, annual weed seeds germinate and then grow madly to produce seed before they dry out in August.
Biennial weeds started as a little cluster of leaves near the ground last summer, and this year an extended bloom stalk has grown. Think of knapweeds and mullein. Parsley is a biennial, as well.
Perennials are those plants that have evolved massive root systems often with thick rhizomes deeply underground. You can kill the vegetation, and it will grow back almost before your very eyes. Think of field bindweed/wild morning glory, whitetop and horsetail.
These weeds are in your garden now; their seed-producing capacity is awe-inspiring. Not only do the plants produce hundreds of thousands of seeds, but the seed can also remain dormant in the soil for years, and every time you distribute the soil by digging it, you expose more seeds to the light. Moreover, tricky plants, such as violets and oxalis can produce seeds underground without the benefit of flowers in addition to spreading by underground stems.
So, let’s deal with these weeds. The annuals could have been treated with a pre-emergent last spring, but it is too late now. It is really a waste of chemical product to spray them with herbicide since they have wimpy root systems and can be easily pulled or scraped from the ground. Anyway, herbicides are not very effective on plants with narrow, hairy or waxy leaves. Annuals also can be mown before they bloom. If you cut or mow weeds and let the flowers/seed heads lie on the ground, the decapitated plant can still produce seed that will haunt you for years to come.
For biennials, you can just cut off the flowering stalk because the rest of the plant will die by fall anyway. This is best, because if you pull the plant, you will disturb the soil, and any latent seeds will germinate to form a leaf roseate, which will set seed next year.
Don’t let the perennials bloom. And treat the plant with herbicide in the spring and fall. It is too hot now to apply herbicides. The Master Gardeners recommend products which are most effective to use on any perennial weed.
What do you do with those weedy, seedy plants once you have cut them or pulled them? Do not compost them. Do not leave them on the ground.
Gather all the cut materials — seeds, flowers and stalks — and put them in a large plastic bag that can be sealed. Put the bag in the trash. Or after you have filled the bag with the weedy material, add two cups of water, seal the bag and place it in a very hot and sunny spot. With the summer’s heat, the seed material will boil and be rotted in the bag. After a couple of weeks of heat treatment, this slurry can be added safely to your compost pile. There should be no recognizable plant parts in the smelly slurry.
The final word: After you have eradicated the weeds, apply at least a 3-inch layer of mulch over the bare soil to prevent new seeds from germinating and to slow down germination of next year’s crop.
By Bonnie Orr
Getting it right: pre-emergent herbicides and fertilizer – 4-01/2024
It is time to apply pre-emergent herbicides. Pre-emergents are products that are spread on the lawn to prevent germinating seeds from growing. In lawns, crabgrass is one of the primary targets.
The timing of the application is essential. In our area, pre-emergent is applied when the forsythia blooms or when the redbud tree is just beginning to bloom. These are indicators that the soil is 50 degrees at 2 inches depth. Forty-five days later, another application can be applied at half-strength if your lawn is spotty and not very vigorous. Lawn weed seeds grow best where the turf is thin and sunlight can reach the soil. Healthy turf is the best way to get rid of crabgrass.
Pre-emergents for spotted spurge and purslane are applied later because those seeds germinate when the soil is about 65. WSU AgWeathernet (weather.wsu.edu) will tell you the soil temperature in your area. You can set up a free account.
Why do you need a fertilizer? Have you ever had a soil fertility test done on your soil? How do you know what amendments you need to add? Often people bring their soil test results for Master Gardeners to advise and interpret. And many times, the soil has an excess of either N, P or K — Nitrogen, Phosphorus or Potassium. N, P and K are the most common macronutrients in a bag of either lawn or garden fertilizer. Our native soils in Eastern Washington contain sufficient phosphorous. Excess amounts of phosphorous or nitrogen can cause as many growing problems as low levels of fertility in addition to contaminating the ground water and the rivers. You are wasting money buying and spreading product that the soil does not need. It would be a good idea to get a soil test done before this year’s gardening season starts.
Do you use organic or conventional fertilizer? The bottom line is that the plant does not know the difference. Organic nitrogen or synthetic nitrogen is going to provide the same benefits to the plant. Nitrogen is Nitrogen — the same with other supplements. A gardener makes the choice based on how he or she wants to deal with the soil and with the fertilizer residues in the soil.
Using fertilizers seems to be problematic. The adage “more is better” is truthfully detrimental to your plants and to your soil. Read the directions on the package. These directions are not merely suggestions; directions are based on the company’s research before marketing their product.
Many people mistakenly believe that compost is fertilizer. Compost has very low fertility — usually less than 3%. Compost’s function is to help the soil retain water, create more loft in heavy soils and provide insulation from high or low heat. Worms and other organisms break down the compost during the growing season. Research varies on the volume of compost to add to the soil. The percentage varies from 5% to 15%. It is such a little amount that it does not make much of a visual difference in the soil. Too much compost will hinder plants’ growth.
Organic supplements such as rabbit, llama, chicken or cow manure must be totally rotted down before being added to the garden for two reasons. The first reason is the amount of salts in the manure that can accumulate in the soil. The second reason is that some manures are very high in nitrogen and will negatively affect the growth of your garden. The two most common problems are huge, lush plants and no blooms or fruit production and blossom end rot in tomatoes and peppers.
By Bonnie Orr
Hoary Cress is a devilish weed with bad intentions – 6/15/2022
Hoary Cress, also called White Top, Cardaria draba, is another pernicious weed from Europe that probably came in animal feed. It has been found in Washington state since the early 1900s.
The plant is 2 feet tall and the roots can be up to 10 feet deep.
It is common on waste land and disturbed soil — such as adjacent to building sites or fill-soil from an area there.
The plant grows rampantly. It can out-compete nearly everything not only because of its prolific seeds and determined roots but also because the plant produces a chemical that prevents other plants from growing near it. This is not a weed you want in your neighborhood.
Hoary Cress is a perennial — and that is the rub. It is very difficult to eradicate because of its fast-spreading, thick, rhizome roots. The roots can spread from 2 feet to 5 feet per year.
This devilish weed can spread by seed as well. Each plant produces from 1,200 seeds to 5,000 seeds that can lie in the soil for up to three years before sprouting. Seeds are ripe and blown about by midsummer. Seeds can be transported also by hiking boots, car tires, animal fur, and contaminated hay and crop seed.
So how do you prevent your landscape being overrun with Hoary Cress?
Cutting off the plant or attempting to pull it is not effective. The roots reacts to the plant being mowed by putting up additional shoots.
If you attempt to dig it out and leave even a slip of a root, the plant feels it has permission to take off again.
The truth is you must control this plant when you first see the young roseate that sprout in the early spring. It is one of the first plants that appears when the soil begins to warm.
Herbicides are the control. They are applied to the roseate and before the plant blooms. Email the Douglas County Weed Task Force at dwhaley@wsu.edu. or the Chelan County Weed Board at noxious.weeds@co.chelan.wa.us for information for chemical controls. You can visit the Chelan County Weed Board website at wwrld.us/noxweeds.
I know from experience that it may take two to four years to totally get rid of the infestation on your property.
I ordered some top soil, and the next year white top appeared in my flower bed. I cut it off the first year. The second year there was more, so I began the process of digging it. It took another year of digging for me to totally eradicate it. I also worked to out-compete it by planting many perennial grasses and spreading flowering perennials so that there was no light getting to the soil. I succeeded in eradicating it because I attacked it early in the infestation.
By Bonnie Orr
Attack weeds this fall to reduce next year’s impact – 08/31/2022
It is nearly Labor Day, which means it’s time for the county fairs and time to organize our fall garden tasks.
We think about planting trees and shrubs in the fall and harvesting our garden’s bounty. One of the tasks we often do not think about in the fall is weeding because we are just so tired of dealing with weeds and wish they would go away.
Three to four inches of mulch makes an effective germination barrier for annual weeds.
Different strategies are needed to beat back perennial weeds. Fall is an optimum time to kill perennial weeds rather than just pulling them out to keep them under control. The reason that fall is the time to deal with these weeds is that the plants are still growing vigorously. They have large root systems, often with storage roots to sustain plants through winter.
It is nearly impossible to dig out these root systems. I have tried and succeeded with morning glory, but it was hours of work and took three years! Most of us have better things to do with our time. Herbicides and patience to the rescue!
An herbicide is drawn down into the storage roots and weakens the perennial weed and eventually kills it.
So this is the perfect time to use an herbicide of your choice. First, read the instructions on the package and make sure it is labeled to kill your target plant. Then decide on the delivery of the herbicide to be sure you do not damage desirable plants. The WSU Master Gardeners can help you make decisions about herbicide, or you can visit the website PICOL: Pesticide Information Center OnLine, picol.cahnrs.wsu.edu/. It is a label database that helps you target a weed and select an herbicide that kills it. WSU Hortsense will also recommend weed control.
After you have applied the pesticide, check in a week to 10 days to see if another application is needed to knock back the growth. If the weeds have been persistent for several years, it may take more than one season to eliminate the plant. That means that herbicide is applied in the fall, the next spring and the succeeding fall before you notice a major diminishment of the plant.
The most pernicious garden weeds are horsetail (Equisetum arvense), field bindweed or wild morning glory (Convolvulus arvensis), quack grass and dandelions. All of these weeds respond to herbicide applications. But the product must be very carefully applied to prevent damaging desirable plants. Be conscious of heat over 80 degrees that can cause the product to volatilize — that is, turn into a gas — and affect nearby plants. Also, even a breath of breeze can move the product to nearby plants.
Other Washington state-listed noxious weeds on uncultivated and disturbed lands — such as Canada thistle, Dalmatian toadflax and Kochia — should be cut back to eliminate their seed heads (which need to go in the trash). Then treat the remaining stems and leaves with herbicide.
You can continue to treat perennial weeds until a frost kills the tops or until the ground temperature is 50 F, at which point most plants stop growing.
A word about annuals: Don’t forget to deal with real “baddies” such as Russian thistle and the knapweeds before they distribute their seeds. These are annuals or biennials, and you can begin to control them by cutting the weed to the ground and stuffing the stems and seeds into the trash. Then in the spring, grubbing out the new plants in the roseate stage will eliminate the weed’s new generation.
Look forward to a more weed-free life next year.
By Bonnie Orr
Yellow nutsedge is one of the world’s worst weeds – 10/08/2019
Of all the weeds we find in yards and gardens, the worst are those that are on the state’s noxious weed list.
Canada thistle was the first plant that Washington targeted as a weed that needed to be eradicated or at least controlled — this was in 1881. Fast forward to the late 1960s when a more comprehensive law was passed, dividing noxious weeds into three classes: A, B and C.
Class A weeds are those recently introduced, so the goal is to eradicate them before they become established.
Class B weeds are widespread in only some parts of the state. The two goals for Class B weeds are to prevent them getting into new areas and to keep them from getting out of control in infested areas.
Class C weeds are those that are often widespread and are of special interest to the agriculture industry.
For some Class B and C weeds, landowners have a legal obligation to control them on their property by keeping them from reproducing. The Washington State Noxious Weed Control Board has created a list of Class A, B and C weeds that you can find on their website (nwcb.wa.gov).
This article highlights a Class B noxious weed that has been reported in the Wenatchee area that clinicians at the Master Gardener Plant Diagnosis Clinic have recently been asked to identify: Yellow nutsedge (Cyperus esculentus).
This creeping perennial is highly aggressive and resembles a grass. You can tell it from grass by its triangular stems. It grows from 6 inches to 30 inches tall with yellowish-brown flower spikelets at the end of thin stems. A single plant can produce over 90,000 seeds!
Fortunately, seeds are not their primary means of reproducing. However, they also spread through an extensive underground network of creeping roots and small underground nutlets. These nutlets are so persistent that they can stay dormant for several years before developing into new plants. The tubers themselves have been known to grow inside potato tubers. Once established, yellow nutsedge is extremely difficult to eradicate.
As of now, the Chelan County Noxious Weed Control Board requires landowners to control yellow nutsedge. So what should you do? Familiarize yourself with what yellow nutsedge looks like and make it a point to keep any eye out for it in your landscape. As soon as you see one, dig it out, being sure to get the whole root and any nutlets.
Yellow nutsedge prefers moist soil and does not like shade. Overwatering can create conditions favorable to its growth, so be sure you are watering appropriately. Provide competition by maintaining healthy, high-density plantings and turf. Chemical controls are limited.
For more information on herbicides, contact the Master Gardener Plant Diagnosis Clinic.
Fast forward from 1881 to present day. Have we successfully controlled Canada thistle? Unfortunately, no. It is on both the state and Chelan County’s noxious weeds lists and, as with yellow nutsedge, property owners in Chelan County are required to control it.
By Casey Leigh
Weed control is fairly easy this time of year – 05/28/2019
It’s weed season again. Weeds not only are unsightly in your garden, driveway or pastureland, but when they proliferate, they destroy hundreds of thousands of acres of rangeland and native plant habitat.
An annual weed sets seed and dies and grows the next season from seed — common examples being cheatgrass or goathead.
A perennial weed persists from year to year and re-grows from the same roots — think of white top.
A biennial weed grows from seed the first year and then the second year blooms, produces seed and dies.
Now is when the roseate — the group of leaves at the base of the plant close to the ground — can easily be pulled out or killed. It is important to control the weeds at the early stage before they bloom and set seeds.
Weeds grow so successfully because each plant can produce hundreds or even thousands of seeds. The seeds are spread by the wind, hidden in dog fur, stuck to the bottom of your walking shoes, in the wheels of your off-road vehicle, the tires of your bicycle. It is easy to create new weed infestations in previously clean areas because we help to distribute weeds seeds.
Everyone has heard of the efforts to stop the spread of some of the 400 types of knapweed. One of the most difficult knapweeds to control is diffuse knapweed. This plant is especially insidious. In 1907, it was accidentally introduced mixed into alfalfa seed in Eastern Washington. This plant can grow as a perennial or biennial depending on the soil type and the moisture available. It can be difficult to control — except at this time of year when all the plants have a roseate of leaves that can easily be removed.
Diffuse knapweed, Centaurea diffusa, easily invades roadsides, disturbed land or recently plowed land. A serious concern for our area is that it easily establishes itself in recently burned areas. It thrives in open land with very little water and eliminates competition from other weeds by producing a plant toxin that prevents other weeds from germinating.
This pest is one of the shorter knapweeds, growing only to 2 feet tall, and it can be very bushy. The white or pale pink flowers produce a seed capsule that is “spiny” and rough to the touch. The roseate leaves are a complete stem of finely cut parts. Each plant can produce 12,000 seeds, and the plant is only spread by seed, not plant parts.
Diffuse knapweed is listed as a class B Noxious by the Washington State Noxious Weed Control Board, and homeowners are required by law to control this plant on their property.
By Bonnie Orr
An explainer on Washington’s noxious weed laws – 01/10/2020
Every gardener knows the challenge of trying to keep weeds from overtaking their lawn and garden. While all weeds are obnoxious, not all are noxious, or at least not legally so.
State law defines a noxious weed as a “plant that when established is highly destructive, competitive, or difficult to control by cultural or chemical practices.” A noxious weed can be either terrestrial or aquatic.
To control the spread of these weeds, the Legislature created a state Noxious Weed Control Board and authorized counties to establish their own weed boards. Chelan County has a weed board, but Douglas County does not. Instead, it has a Weed Management Task Force.
The state board has created a statewide noxious weed list that you can find on their website, nwcb.wa.gov. Noxious weeds are divided into three classes: A, B and C.
Class A weeds are newly introduced species into Washington and therefore are relatively rare. The goal is to completely eradicate them. Because landowners have a legal obligation to eradicate Class A weeds on their property, it is important to learn what those weeds are and be able to identify them.
Because Class B weeds are widespread in only certain parts of the state; the goal with them is to prevent their spread into new areas and to control them in established areas. Check out the Chelan County Noxious Weed Board’s website at https://www.co.chelan.wa.us/noxious-weed to find out what Class B weeds landowners have a duty to control. The law defines control as preventing “the dispersal of all propagating parts capable of forming a new plant, including seeds.” In other words, don’t let it reproduce.
Class C weeds are spread throughout the state or have an impact on agriculture. Although the state weed board doesn’t require owners to control these weeds, county weed boards might if they believe the weeds threaten agriculture or natural resources. Therefore, it’s important to check the Chelan County Weed Board’s website to see if any weeds on your property are on their list.
Another list created under the state Noxious Weed Law is the plant quarantine list. Maintained by the Washington State Department of Agriculture (WSDA), this list contains plants that can’t be transported, bought, sold or offered for sale in the state.
In addition, it is illegal to sell, offer for sale or distribute seed packets, flower seed blends or wildflower mixes of these plants. Check the WSDA website at agr.wa.gov to view their list. The state weed control board has posted on its website pictures of quarantined weeds with information that can help you identify whether the weed in your yard or garden is on the list. This is particularly helpful when you don’t know the name of the weed.
If you fail to meet your legal obligation to eradicate or control listed noxious weeds on your property after you have been notified to do so, the county weed board can enter your property or hire someone to control them and bill you or they may issue a monetary penalty of up to $1,000. The bill for controlling the weeds constitutes a lien on your property. Failure to pay the penalty is a misdemeanor.
If you have any concerns about plants on your property that may be on the state or county’s noxious weed list or quarantine list, contact your county weed board. The people there are knowledgeable and, because part of their responsibility is to educate the public about noxious weeds, they are often able to visit your property to help you identify noxious weeds and make suggestions for eradicating or controlling them.
By Casey Leigh
Flowering rush is a plant we want dead in the water – 1/15/2020
I am betting flowering rush is a weed you have never seen. And hopefully, you never will see it. The only way to stop the spread of noxious and harmful weed is to be able to identify it and to change our outdoor habits.
As many other noxious weeds, flowering rush, Butomus umbellatus, was introduced on the East Coast as an ornamental for people’s private ponds. With attractive pink flowers, who wouldn’t want this growing in their pond? The problem with introduced plants is that their natural controls are missing in the new environment — and people are usually unaware of the growth habits and misbehavior of a lovely new garden plant!
Rushes are distributed worldwide on the banks and in the shallow water of flowing streams and rivers — remember the biblical story of Moses being hidden in a basket in the bulrushes on the banks of the Nile? The reason that rushes occur so widely is that they evolved several ways to distribute their seed and to expand their territories.
The flowering rush produces seeds that float on the surface of the water and can be carried by the wind. The flower stalks also produce little bulblets that break free and float away to form more plants. More insidiously, the plant is anchored in the soft muddy shallow water with long, tough rhizomes (specialized roots that store food for the plant). In addition, more bad news, the rhizomes produce little bulbs that break free when the roots are disturbed and float along the bottom of the water until they lodge in a place where they can root themselves.
So why are we concerned about this plant invading our waterways? The flowering rush can compete with native wetland and shoreline plants, and it can crowd out native species. Worse, the rush provides hiding places for Northern Pike, a fish that lies in wait and ambushes salmon and other fish species.
According to the Washington Noxious Weed Board, Public and private landowners are required by state law to eradicate this plant when it occurs on their property. Flowering-rush is a Class A Noxious Weed in Washington due to its limited distribution in the state and the potential for significant impact to state resources.
The plants have a cylindrical stalk, up to 5 feet tall, ending in a flat-topped flower cluster with individual flower stalks originating from a common point of 20 to 50 light pink flowers. Flowers have three sepals, three petals, nine stamens and pink pistils.
It has a rhizome — a thick root — that produces thin, upright leaves that may be twisted in growth and reach 3 feet or more in length. They can be emergent, submersed or floating. Leaf bases are triangular in cross-section.
It is the bulblets that break free when the rhizomes are disturbed that allow the plant to infest areas downriver.
About a dozen of these plants have been found in the Orondo boat launch area and Turtle Rock, which is downstream of the Orondo infestation. They were removed in four successive years at a cost of nearly $8,500. Divers have been hired to remove the plants and use a suction hose to ensure that they have captured all the bulblets. Then a type of bottom barrier was secured to prevent any new germination of rhizome pieces. Boat surveys coordinated by WSU Extension, the state departments of agriculture and ecology, and the Chelan County Noxious Weed Board have been conducted annually to search for new infestations.
By Bonnie Orr
Beware the Dalmatian toadflax – 4/18/2018
It has such an appealing appearance — radiant yellow flowers on a long stalk and a long bloom period. It looks like a three-foot-tall snapdragon on steroids, BUT, do not be sucked in. For under the ground are the most pernicious, aggressive tap and horizontal, perennial creeping roots you have ever tried to dig out.
Dalmatian toadflax (Linaria dalmatica ) is listed by the Washington State Noxious Weed Control Board as a weed that needs to be mandatorily controlled. It has run over pasture land and might be harmful to livestock.
This invader came from the Balkans, probably in animal feed or in treasured garden seed brought to new homes by immigrants.
I have seen it growing in the Balkans. There, it is well behaved and mixed in with other native plants. Unfortunately, it has claimed a boothold here in open lands with no real competition except from grasses struggling in over-grazed soil. And its natural predators are not native here.
It was first seen in Washington state in the mid-1920s.
The reason that this plant’s spread must be controlled is that it damages rangeland and pastures. The plant out-competes native grasses.
A single plant can produce 500,000 seeds; its roots can be 6 feet deep and up to 10 feet wide. This growth habit influences the means of eradicating the plant.
Mowing a field with Dalmatian toadflax can actually do more harm than good. Mowing can be a temporary control measure to prevent seed production, but will have to be repeated as new stems begin to flower, and it will not kill the plants.
Mowing machinery can actually spread the plant to other fields because seeds can stick to various parts of a tractor.
The plant can be killed with selected herbicides applied at the correct time of year, in the correct weather conditions.
As always, if you select to deal with this weed with an herbicide listed to control this weed, be sure to follow application directions precisely.
The Chelan County Noxious Weed Board (509-667-6669) and the Douglas County Weed Task Force (509-745-8531) can provide information on what types of herbicide to apply.
One of the most effective means of controlling this weed is the release of toadflax stem weevils. The adult insects eat the leaves and flowers and the larvae kill the stems by eating out the center. The weevils are approved for use on toadflax because this insect eats only toadflax and will not attack other plants.
By Bonnie Orr
Controlling the spread of the noxious Scotch thistle is a priority – 6/03/2020
Scotch thistle. Do you have visions of the “Bonnie Banks o’ Loch Lomond,” or the enticements of peat-infused liquor, or is the name a dirty trick that the English are blaming their northern neighbors for a scurrilous invasive weed? Despite its name, it has nothing to do with the actual thistle, Cirsium vulgare, that is used as the emblem of Scotland.
Onopordum acanthium most likely came from the droughty Mediterranean areas. The mature plant is covered with stiff white hairs and is sometimes called cotton thistle.
Because it does have a lovely purple “flower,” the plant was brought to America as an ornamental — what is it about bringing pests into the U.S.? It has escaped and thrives in disturbed soil on range lands, near streams, in shrub steppe and on roadsides. Especially near creeks and streams, huge thickets of the plant restrict people or livestock from approaching the banks of the water.
The Washington State Noxious Weed Control Board has a web page, wwrld.us/scotchthistle, that contains details about Scotch thistle, including images.
Douglas County has made the control of this weed one of its priorities this year according to Ryan Lefler, natural resources specialist for the Foster Creek Conservation District. It is a Class B weed in Washington, which means that it will most likely not be totally eradicated, but its spread needs to be controlled. It is best controlled when you take advantage of its growth habits.
The thistle is usually a biennial, a plant that produces seed the second year of its growth and then dies. The first year, the plant grows flat to the ground and establishes a huge root system and then the second year grows to 10 feet tall and puts on the thistle “flower.” It can produce 8,400 seeds to 20,000 seeds per plant that can remain viable in the soil for up to 20 years. The plant only reproduces by seed. The seeds need light to germinate so that is why the plant is often seen on disturbed soils.
The rosettes can be as big as 1 feet across. They easily can be dug up at the rosette stage. Or, the time to control this plant with herbicides is when it is in the rosette stage. Because the leaves and stems of the mature plants are covered with dense white hairs, herbicide treatment is not very effective.
There are at least five types of thistle growing wild in Washington, including a native species. Be sure to identify this plant correctly before attempting to eradicate it. Other thistle can be annuals or perennials and must be dealt with in different manners.
By Bonnie Orr
Herbicide Resistance Is Changing How We Suppress Weeds – 4/16/2021
You have heard that some antibiotics have lost their efficiency because of overuse and misuse, and medical conditions that once were cured with these antibiotics no longer are. The pharmaceutical companies are scrambling to develop new antibiotics to be approved for use.
Agriculturalists and home gardeners are facing a very similar problem. Because of misuse and overuse of herbicides, weeds are developing resistance to a wide variety of products. You may feel this topic does not concern you, but if you use herbicides, it may indeed concern you. There have been no new classes of herbicides developed and approved for use in 30 years.
Herbicide resistance is the inherited characteristic of an individual plant to survive an herbicide application that would normally kill it. As homeowners, we can easily create these genetically different plants by overusing herbicides. Years of application of the same product creates the environment for herbicide resistance.
What plants in our area have developed herbicide resistance? Some of the best-known ones are kochia, Russian thistle, prickly lettuce, common ragweed, horseweed, Italian ryegrass and some grasses such as cheatgrass.
Herbicide resistance is also created with the misuse of the product. I have heard people say, “If a little is good, more is better.” The directions on the container of product indicate exactly how much product to use. More product does not kill more rapidly nor more thoroughly. In addition, herbicides do not work effectively on perennial plants with large root systems such as whitetop.
Applying product at sites not listed on the product’s label is a misuse of the product. For example, if gravel driveways are not listed, you should not be spraying your driveway each week with herbicide. Spraying the product on plants not listed on the label and hoping for the best is a misuse of the product.
Herbicides are only one tool in the toolbox of weed suppression. Weeds grow where there is not competition. Weed seeds need sunlight to germinate and to grow. Bare ground can be covered with a 3- to 4-inch layer of mulch that is renewed halfway through the growing season.
Plants can be placed so they grow so close together that light does not reach the ground for weed-seed germination.
Digging perennial weeds and scraping out young annual weeds is effective before a large outbreak occurs. It is particularly important to scrape out annual weeds before they go to seed. Besides vigilance and muscle power, 20% or 30% vinegar can be applied to large outbreaks of annual weeds.
Why should the homeowner be concerned about herbicide resistance that develops from the misuse of herbicide? Weed seeds travel on tires, trailers, with birds and with the wind. Seeds can easily arrive in that field of wheat or up on the plateau. Grass seeds can overwhelm the edges of the roads.
Be conscientious.
By Bonnie Orr
Wildlife
Tips For Attracting Birds To Your Yard – 6/09/2021
In North Central Washington, more than >300 species of birds have been seen in various habits: riparian, sage/steppe, mountain, agriculture, urban backyards. I can’t promise that you will attract all these birds to your backyard, but you can create an environment that lures dozens of types of birds.
The three most important considerations are water, food and a safe environment.
In our dry climate, water will attract birds, especially running or dripping water. Birdbaths need to be shallow, about 2 inches, or have rocks in the bottom of a larger birdbath for the little birds to stand on to drink and bathe. Birdbath water gets dirty fast because of fecal material and algae. Birds tend to defecate in the water as they finish their bath. They do this to lighten the load; the wet feathers are extra weight and can endanger the bird’s ability to get airborne. Clean the water every day.
The birdbath also needs to be near a large shrub or hanging branches of a tree. Birds need a place to shake off the extra bath water and also a place to flee if a predator swoops into the area. I especially like to grow a plant with large leaves that grows at least 4 feet to 5 feet off the ground, such as a tree peony, a climbing rose or a hydrangea. After my irrigation water finishes its cycle, often little black capped chickadees, ruby crowned kinglets or hummingbirds will take a “sponge” bath by rolling on the wet leaves.
Normally, birdfeeders are used in late fall after a heavy frost, during the winter and in the very early spring. The rest of the year, your garden can provide the feast for the birds. Gentle or no use of pesticides allows for a bird buffet. Remember, 95% of insects are beneficials; most insects cause only cosmetic damage and do not kill plants. The Master Gardeners can share with you lots of ways to eliminate unwanted insect pests without resorting to pesticides.
Your arachnophobia does not give you a free pass to kill spiders. Spiders are generally beneficials and provide a juicy protein picker-upper for a parent bird-feeding famished chick! I wipe off excess aphids, but their sweet, juicy bodies are relished by everything from hummingbirds to song sparrows.
Besides insects, growing plants that provide fruit and seeds throughout the season create nearly all the food birds need. Plants with berries — such as currant, sumac, elderberry or mountain ash — provide sugars and proteins. Birds will eat some of your raspberries and strawberries, but I feel that is payment for the insects they are prying out from under the leaves. Seeds and nuts provide fats and proteins.
I grow Zinnas — lots of Zinnas. At least 10 species of birds lap up any insects on the flowers. Pollinators love these plants, and hummingbirds drink the meager amounts of nectar. But the best part is that I leave the seed heads for Zinnas, Cosmos, Sunflowers and Coneflowers uncut in late summer. All winter long, goldfinches, chickadees, red-breasted nuthatches and juncos balance carefully on the seed head to extract the large, black seeds.
A safe environment means that Fluffy must be an indoor cat, and you must resolve to clean the cat box. It does not make sense to create a bird environment and then set up a lethal feline trap.
During the winter, you will see small hawks pick up birds from your feeders; that can be lessened if you put your feeders in protected areas such as branches of a tree or near a bushy shrub such as Oceanspray or Cotoneaster rather than having the feeder out in the open. Feeding birds on the ground is unsanitary and makes the birds an open target for hawks and cats.
Enjoy creating a “birdy” habitat.
By Bonnie Orr
Tips for dealing with garden marauders of all forms – 6/12/2018
– Gardeners are the most optimist people in the world. They know the seeds they pat into the soil will fulfill their dreams of fresh vegetables, herbs and fruit. It will just take a bit of time, sunshine, water and nurturing.
Unfortunately, dreams sometimes fade to nightmares when marauders skulk among the beans or under the zucchini leaves. Garden marauders are sometimes mammals — squirrels, chipmunks, gophers or deer; feathery marauders are all types of birds; insect marauders arrive as adults or larvae and ready to nibble.
What to do, what to do in order to savor the fruits of your labor?
In the fruit and vegetable garden, barriers are the way to keep out mammals. Sometimes this can be a fence around the sides and top of your garden. In Europe, fruit cages are very popular because they keep out birds and small mammals.
Since most small fruit is produced on shrubs that are not moved or rotated, cages work well. It means that you may have to redesign and transplant your small fruit into an area that can be fenced with half-inch hardware “cloth,” which is a small-gauge wire mesh. The cage is more humane than netting and is more permanent. Netting kills birds that become trapped in the fibers. The reason the bird wants to be in your garden could be more than looking for a sweet snack to feed its young. Often birds are effective cleaners of insect larva and eggs that would otherwise damage your fruit.
If you have trapped birds in netting before the fruit is ripe, it would be a sign that you need to be more diligent at watching for insect pests. Research done on fruit damaged bird by birds concluded that most of the stomach contents of the bird is filled with protein-rich insects and that the fruit is a bit of dessert.
The annoying aspect is that birds snack on many piece of fruit rather than filling up on just one juicy orb. I feel that my fruit production is plentiful enough for me and for my feathered friends because they do a super job keeping insect pests at bay.
There are two types of mammal marauders: miners and munchers.
The miners are the diggers such as gophers, squirrels or chipmunks. These furry rascals dig in the soil to snack on roots or to bury some treasure for later retrieval. Mostly, the miners cause damage by uprooting plants and exposing their roots to the drying air.
The munchers are squirrels, chipmunks and deer. These guys eat the crops when they first germinate or wait until there is a foot of succulent leaves to chomp. The best way to keep these marauders out is not necessarily a fence. The fence has to be 18 inches into the ground and 7-feet tall to keep out the deer and the digger.
To keep deer away from the garden, install six feet of pig wire spread on the ground surrounding the vegetable garden. You can mow over this, and it is tidy. The deer will not cross it since they are afraid of getting their feet caught in the mesh.
Floating row cloth secured to the ground with long staples works to keep our squirrels and chipmunks. A hoop house covered with floating row cloth is even better. Keeping the enclosure tightly closed is what makes this system work. It also keep birds and flying insects out. The disadvantage is that it must be un-staked to harvest the crops or to inspect for insect damage. Fifty-foot rolls are available at garden centers or online.
Insects are also marauders. The best defense against this pest is vigilance. Most insect pest populations start small and then multiply rapidly. If you are consistent with daily observation of your garden, you can stop the pests when they first appear. It is easy to rub the eggs from the bottom of leaves or to smoosh the first few adults such as squash bugs or aphids.
May all your gardening dreams come true.
By Bonnie Orr
Wildlife garden pests require constant vigilance – 8/25/2020
– Although often not as common as insect pests, wildlife find their way into our gardens to feast on our ornamental plants, turf and vegetables. This column looks at some of those critters — rabbits, moles, voles, pocket gophers and deer — and what can be done to discourage them from sharing your garden space.
Rabbits look cute hopping around in our backyards, reminding us of childhood stories of Peter Cottontail and the Easter Bunny. Unfortunately, often they view our gardens as their own personal restaurants, feeding on grass, clover, flowers, garden vegetables and small fruits. How can you tell they have been feasting in your garden? When they clip off flowers, they leave a clean, angled cut.
Look also for gnaw marks on woody plant stems, berry canes, fallen twigs and branches. They keep grass and similar lawn matter cropped to about an inch or two above the ground.
To control rabbits, plant rabbit-resistant plants and erect fencing, either in a particular area or around individual plants. Tree guards of hardware cloth, burlap, or aluminum foil can be wrapped around young fruit trees to prevent damage. Reducing rabbit shelter areas, such as brambles, brush piles and low overhanging limbs, helps keep rabbits from hanging out in our yard or garden.
Because moles, voles and pocket gophers all dig and live underground and are rarely seen, the best way to tell if they have invaded your space is to know their above-ground signs. Moles leave conical mounds from their tunnel excavations, while voles leave what look like runways through the grass, as well as open, shallow tunnels. Voles have been known to use the tunnel systems of moles. Pocket gophers mounds are fan-shaped with a soil plug at one end of the mound.
Plant parts are not a significant part of a mole’s diet so their damage is more aesthetic. Voles, on the other hand, find grasses and forbs to be delicious. In addition, they cause “invisible” damage over the winter as they feed on underground bulbs and roots. Much like voles, pocket gophers eat parts of plants they find during their underground digging. They also eat vegetation growing around their tunnel entrances and have been seen pulling entire plants into their tunnels.
Controlling populations of these underground critters can be frustrating. Suffice it to say, controlling populations rather than eradication is a more realistic goal. For advice on what to do and what not to do, check out the Washington Department of Fish and Wildlife’s (WDFW) “Living With Wildlife” series available at wdfw.wa.gov.
Last but not least are deer. They particularly love the new shoots and leaves of plants such as roses, small berries, fruit trees, and a variety of flowers and shrubs. Unlike rabbits that leave clean edges when they feed, deer damage is ragged, looking like they chewed on the stems. Adding deer-resistant plants such as blueberries, dahlias, rhododendrons and azaleas to your garden can help offset other plant losses.
If you have the room, construct a deer fence at least 7 feet high around your garden. For single young trees, place a fence around the trunk at a sufficient height and diameter to prevent the deer from being able to browse. WDFW has detailed information on its website about other deterrents such as deer repellents and what they call “scare tactics”.
As with other pests, constant vigilance is necessary so you can tackle problems caused by your unwanted mammal visitors before they get out of hand.
By Casey Leigh
Birds could use a little help this winter – 12/10/2019
– Observing birds’ behavior is particularly satisfying when the birds are at close range. Consequently, hundreds of people in this region provide water and food for them, as do about 65 million other Americans.
Birds need to fly into protective cover to avoid predators such as sharp-shinned or Coopers hawks or your neighbor’s cats. Grow evergreens as well as dense brushy shrubs such as cotoneaster or oceanspray to provide refuge and cover from the cold. I also make a large brush pile from my fall prunings and place it near the feeder. We have watched juncos, goldfinches and white-crowned sparrows drop into the pile to avoid a predator. One day last winter, the sharp-shinned hawk stood on top of the pile and stamped his feet to try to frighten the birds out of their sanctuary.
Providing water is the most effective way to attract birds to your winter garden. I use a little electric water-heating element in my metal birdbath; others use a heated dog dish placed on a pedestal and filled with a few small rocks so the water is not more than two inches deep. Birds only drink a teaspoon or so at a time, but they do need water. On warmer days, birds will bathe. They need to bathe to maintain their feathers ability to insulate. Please change the water at least once a week so bacteria don’t grow in the birds’ drinking water.
During the summer, I grow various small-seeded sunflowers that the migrating birds eat. By leaving seed pods on various other flowering plants, birds will forage until the snow gets really deep.
Here are some good flower seeds for birds in our area: Cosmos, Bachelor Buttons, Gayfeather, Allium, Zinnas and daisies. The expensive nyjer/ thistle seed is actually the seed from a composite family flower that is related to Echinaceas or Coneflower. If you prune the early summer perennials when they have finished blooming in July, they will put out another, lighter bloom in early fall. The birds will land on the seed heads and actually kick light snow away from the seeds that have fallen to the ground. My garden includes grasses such as millet, sea oats and wheat.
Berries on shrubs and trees also attract birds because the fruit provides sugar and the seeds provide protein. I grow Hawthorn, Mountain Ash, Viburnum, Oregon Grape, Elderberry and Dogwood for the fruit they produce. I always leave a portion of the black and red currants, grapes, fall raspberries and rose hips. These will be eaten when the snow is deep.
This is all good gardening advice, but what if you want to feed birds this winter?
- Provide ice-free water.
- Buy seeds appropriate to the birds of this area. In winter, we do not usually have large-beaked birds so avoid buying seed mixtures that include milo — the hard, round red seed that piles up under your feeder. We are lucky to have a Birds Unlimited store in Wenatchee that sells seed mix designed for our region.
- Don’t put out bread or cookies or table scraps. These just attract vermin such as raccoons, rats and mice and encourage cats and dogs to eat at your bird feeder.
- To prevent a hundred sunflowers from germinating in the spring, buy chopped and seed sunflower parts. Black oil sunflower seeds are twice as high in fat and protein as striped sunflower seeds.
- To prevent millet and other bird seed from growing in the spring, heat the seed in the oven at 225 degrees for 30 minutes — stirring it once or twice. Heating the seed prevents germination but does not lessen the food value of the seed.
- Suet feeders in the Wenatchee area are not visited as often as they are in outlying areas such as Leavenworth. Red shafted flickers and other woodpeckers are the most common birds that eat suet. Never use bacon grease or other meat fats.
- Discard moldy seed.
- Make a bird feeder by mixing peanut butter, cornmeal, raisins, apple chunks nuts, meal worms, sunflower and other bird seed, and smear the mixture between the bracts of a pinecone and hang this from a tree.
If you are really keen and want to see more birds, the Audubon Christmas Bird Counts in our area are held in December.
By Bonnie Orr
Minimize Or Eliminate The Threat From Garden Pests – 12/27/2017
–
Your garden is beautiful, and you are ready to harvest the tomatoes. You greet the sunny day humming to yourself … until you look outside. Your garden has been devastated; the tomato plants are flattened, the fruit is either missing or stomped and half eaten. Who could do this to you? The answer isn’t who, but instead what — pests.
Many pests can damage your garden, and once they find your garden they can dine all year long. What to do? What to do?
Regularly, the WSU Master Gardeners hear the wails of defeated gardeners. The most common concern is stopping deer browsing. Many of us live in that interface area where urban development overlaps or borders undeveloped grassland or forest. Naturally, deer are going to be pests.
During a winter with heavy snow, the deer will enter neighborhoods to snack on arborvitae hedges and any succulent low-lying branches. When the Demonstration Garden was established on Western Avenue in Wenatchee, winter deer damage was extensive. The WSU Master Gardeners have since developed a specialized deer-resistant garden, not deer proof. Know that all plants will be nibbled if the deer is starving. But deer do not like to press their lips to plants that have fuzzy or waxy leaves such as gray yarrow or bearded iris. They also would prefer not to eat plants with irritating sap such as milkweed, Hellebores or Euphorbias.
Planting a garden with plants undesirable to deer is the best solution, and there are many lists available that include hundreds of these plants.
It is better to plant wisely than to spray repellants or install motion detector sprinklers, and it’s also less expensive than 7-foot fencing. The most effective fencing is the 7-foot black plastic fence that deer cannot see clearly and fear jumping over. Chicken wire fencing can be laid on the ground for 10 feet out from an area you want to protect. The deer are shied away because they fear their feet will get caught in the wire; they cannot jump more than 10 feet laterally.
So maybe you will reduce the deer predation but what about the other animal pests?
Cats seem to make people see red because these charming fur balls dig in the flower and vegetable bed to hide their excrement. The most effective way to keep cats from your garden is not repellants such as orange peel or egg shells. Planting your garden so there is no bare ground for the feline to scratch in is the most effective method. Plant your flowers cheek-to-jowl so there is not enough room for a feline derriere. Put down 3 inches of mulch that remains moist such as grass clippings until your plants grow large enough to touch one another. I have used this method even to grow catnip in my flowerbeds. Usually, cats will roll all over the plant and break it, but when they cannot get close enough, they don’t try to roll in it.
Except in interface areas, we have few problems on our side of the mountains with gophers or moles. Trapping these pests seems to be the best way to deal with them.
Rats, mice, voles and raccoons are marauders looking for food sources. If they are raiding your compost, it could be that you are not turning your compost often enough for it to work hot and fast. Or you are not mixing enough brown material with the kitchen vegetable scraps.
Brush piles are great hiding places for these pests, who sleep during the day and feast at night. Wild cat and coyote urine are sold as deterrents but only work in areas where you don’t wash the scent away with irrigation. I found that dog hair was really effective in keeping raccoons out of my grapes. Since my home is dog-less, I went to a pet grooming shop to get their piles of shorn dog fur.
Eliminating these pests requires neighborhood cooperation. If you clear your property of hiding places and keep debris and food waste from your garden, and your neighbors are not as considerate, you will still get wandering rodents. This winter might be a great time for a get-together with neighbors to build a plan.
The bottom line for dealing with these animal pests is man’s best friend: dog. Dogs leave a scent that frightens rodents and cats. They are effective in barking away the deer.
Portable deer fencing can help protect your garden this winter – 11/11/2020
–
Colder weather brings deer down to lower elevations with an eye for any good forage in our landscapes. A row of arborvitae borders our driveway, separating it from our neighbor, who owns the trees.
A few years back he was ready to jerk them out because the deer kept chomping on them, especially the little ones out on the vulnerable end. They just couldn’t regrow in time for the next winter’s deer onslaught. I’m not a fan of arborvitae, but they were planted and provide a nice privacy border between properties.
My husband Pat and I figured out an easy, temporary electric fence used only in winter when needed and then put away come spring. This is about the fourth year for our fencing project and both we and our neighbor are pleased with its success.
The fence borders each side of the arborvitae and around the end, protecting the whole row.
This method could protect roses and other deer-vulnerable plants also. Deer are habitual, so once they realize they best avoid an area, they are less likely to venture back, fence or no fence.
We bought square concrete blocks and steel fence posts, attached them by mixing concrete and anchoring one upright post into each block. That provides adequate weight for holding up the fence, even with a dump of snow on the lines.
We estimate a post is needed about every 10 to 12 feet, perhaps closer in curved areas.
The first year, we bought a small, solar panel fence charger, available at farm supply stores that sell electric fencing supplies. It worked adequately, but not as well as we wanted, with our roughly 300 feet of fencing multiplied by three conductive tapes at various heights. A solar panel should work well in a smaller area, though.
The following year Pat added an electrical outlet plus an on-off switch on our adjoining wooden fence. These past two or three years have been even better at keeping the deer at bay and not even nibbling those plants when snow lowers the fencing tapes.
We built the electric fencing with three lines of woven tape that conducts electricity. They were vertically placed about 12 inches to 18 inches apart, along with insulating clips that hold them on the posts. It’s simple, and where you purchase your supplies should have knowledgeable folks to guide you. Warning signs are offered along with the electric fencing supplies, so they can be hung incrementally along the fence line.
Snow can laden down the fence and make it sag, and monitoring after a snowfall is easy. You’ll want to flip the switch to off before you gently remove the snow!
At the end of deer threats, we roll up the woven tape and store it. Each block with a fence post is moved out of sight until next fall.
If you happen to touch the fence while it’s powered up, it’s not dangerous but really, really gets your attention. Same thing happens with the deer; they learn quickly to head to other plants.
By Mary Fran McClure