This page will cover the tools and methods for tapping and sap collection at scale for commercial production. The guidance on this page assumes basic knowledge and experience with tapping maple trees to collect sap. If you’re new to tapping or want a refresher, visit the Sugaring Guide for Beginner’s and Hobbyists.
If you’re interested in starting a commercial bigleaf maple sugaring operation and would like technical assistance, contact Patrick Shults (patrick.shults@wsu.edu).
The process of tapping a tree doesn’t change with scale, but the tools and materials you use may. For instance, using stainless steel spiles is likely too costly for operations with hundreds or thousands of taps. Furthermore, the vast majority of commercial operations will utilize a tubing system that collects sap from multiple trees and drains it to a single location, versus collecting sap from individual trees with buckets or bags.
Tapping with Vacuum
Many commercial producers will utilize artificial vacuum via electric pumps to enhance their sap yields (this is discussed more in later sections). Improper tapping can be a source of vacuum leaks, making it more important to be consistent and precise when drilling. When tapping with vacuum, drill level at a 90-degree angle from the bark and avoid moving the drill in and out of the tap hole (i.e. reaming). Drilling at an angle and/or reaming can create an ovoid tap hole that will allow air into a vacuum system. Vacuum leaks are cumbersome to locate and fix, especially when a tap hole is the source, so taking your time and/or investing in better tools to tap properly is a worthy investment.
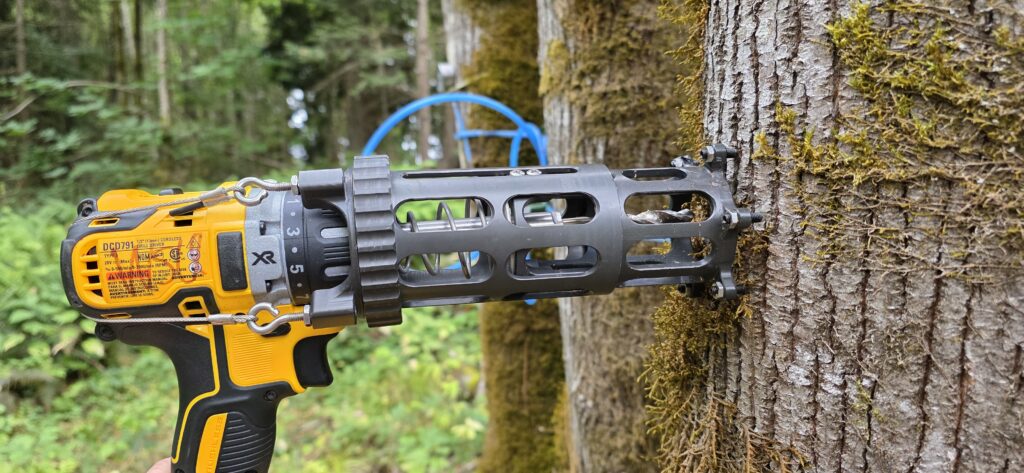
Precision tappers are a spring-loaded metal frame that fits onto a cordless drill and ensure a clean, circular tap hole for vacuum systems. Although they can be a bit pricey, they allow producers to tap easily with minimal error. The spring-loaded function makes backing the drill out easier and increases the speed of tapping.
Spiles
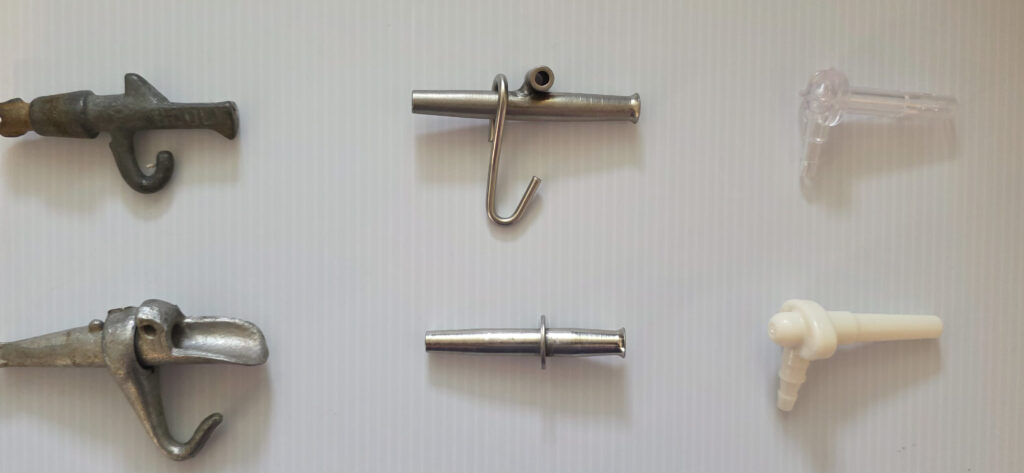
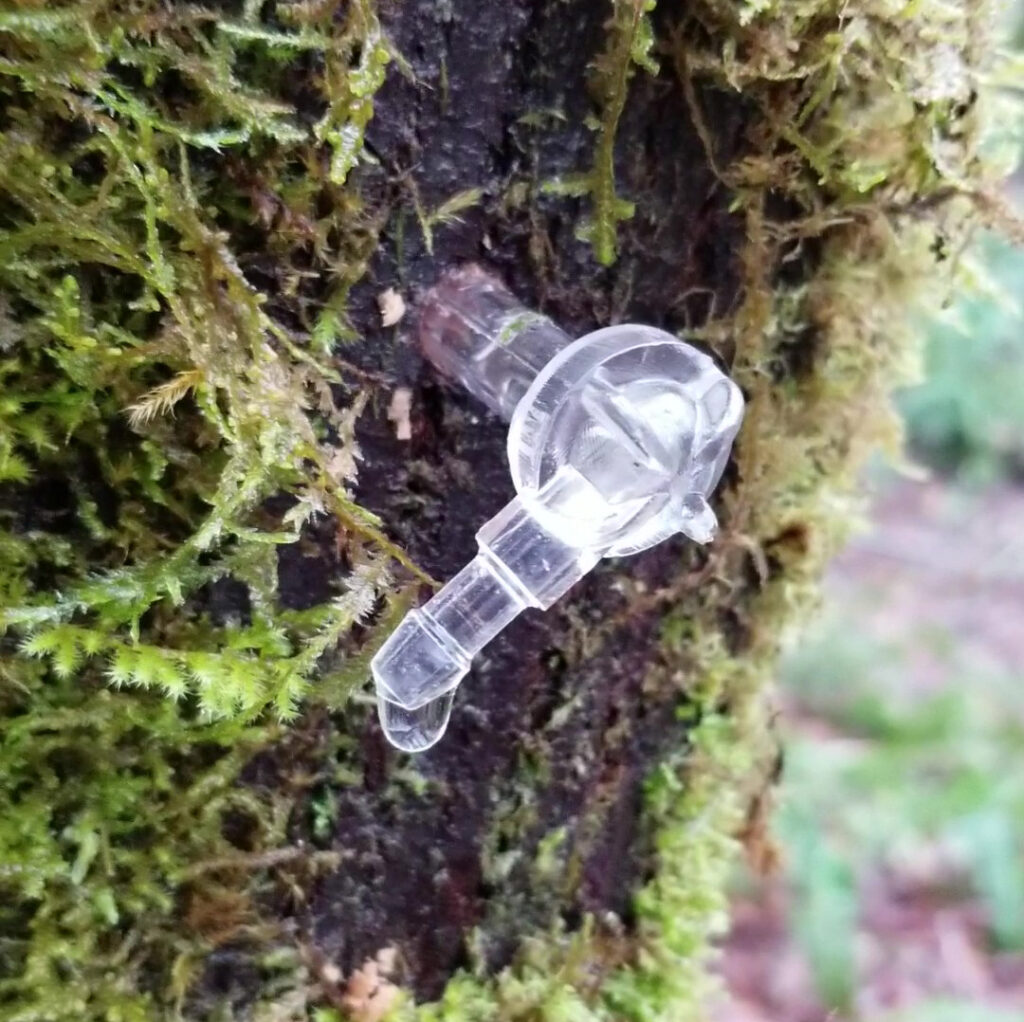
Almost all commercial sugaring operations use plastic spiles because they are a fraction of the cost of stainless steel and are designed to fit tubing systems. Plastic spiles come in different sizes, colors, compositions, and functions. For instance, some spiles have “check valves”, a small ball and chamber at the end of the spout that prevents sap from being reabsorbed into the tree from the tubing system during freezing nights.
The most important consideration when buying spiles in bulk is whether you intend to use 5/16-inch or 3/16-inch tubing, as they are specially designed with barbed fittings to fit the two tubing sizes. See the next section on tubing to learn more about the difference in tubing sizes.
Retapping
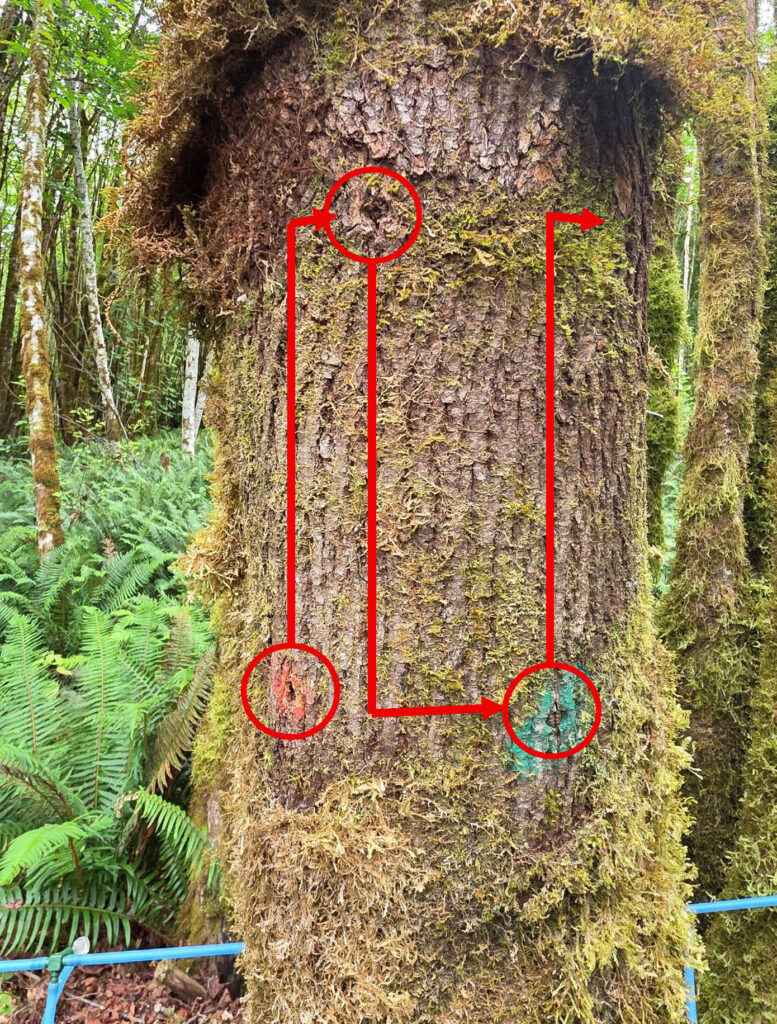
The decision on when or if you should retap within a sap season takes on more importance when selling syrup commercially. A fresh tap hole will yield more sap, which means more syrup. So, if the conditions align for a strong a sap flow, it may be worthwhile to retap, even if your current taps are only a few weeks old. This is a decision every syrup producer has to make, sometimes multiple times a season, based on the forecast and production objectives. Producers using vacuum pumps can prolong the viability of a tap hole by keeping vacuum on even when the sap isn’t flowing (but still turning off during freezing conditions).
As a commercial syrup producer, your trees are valuable assets. Following sustainable tapping and retapping methods will ensure their long term health and productivity, while also ensuring they continue to provide a suite of ecological benefits (e.g., soil health, wildlife habitat, carbon sequestration). With each new tap, follow the standard retapping pattern (see “When and How to Tap a Tree” section of Sugaring Guide for Beginner’s and Hobbyists for a refresher). Marking previous taps with logger paint can help you keep track of the pattern and your previous tap hole.
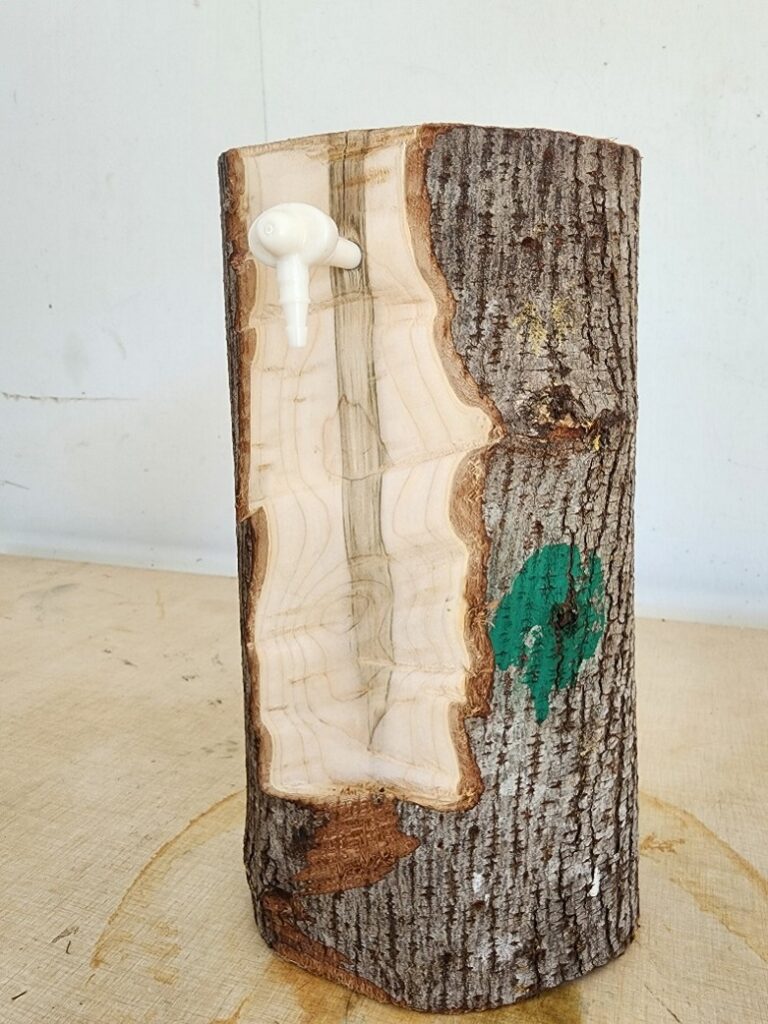
Small-scale commercial operations may elect to continue to use buckets and bags to collect sap from trees individually, especially if they are incorporating an agritourism component, but it’s generally not feasible for commercial production. The vast majority of sugaring operations utilize tubing systems to make sap collection easier and maximize yields. Below are some special considerations when using tubing systems for commercial-scale sugaring.
Tubing Basics
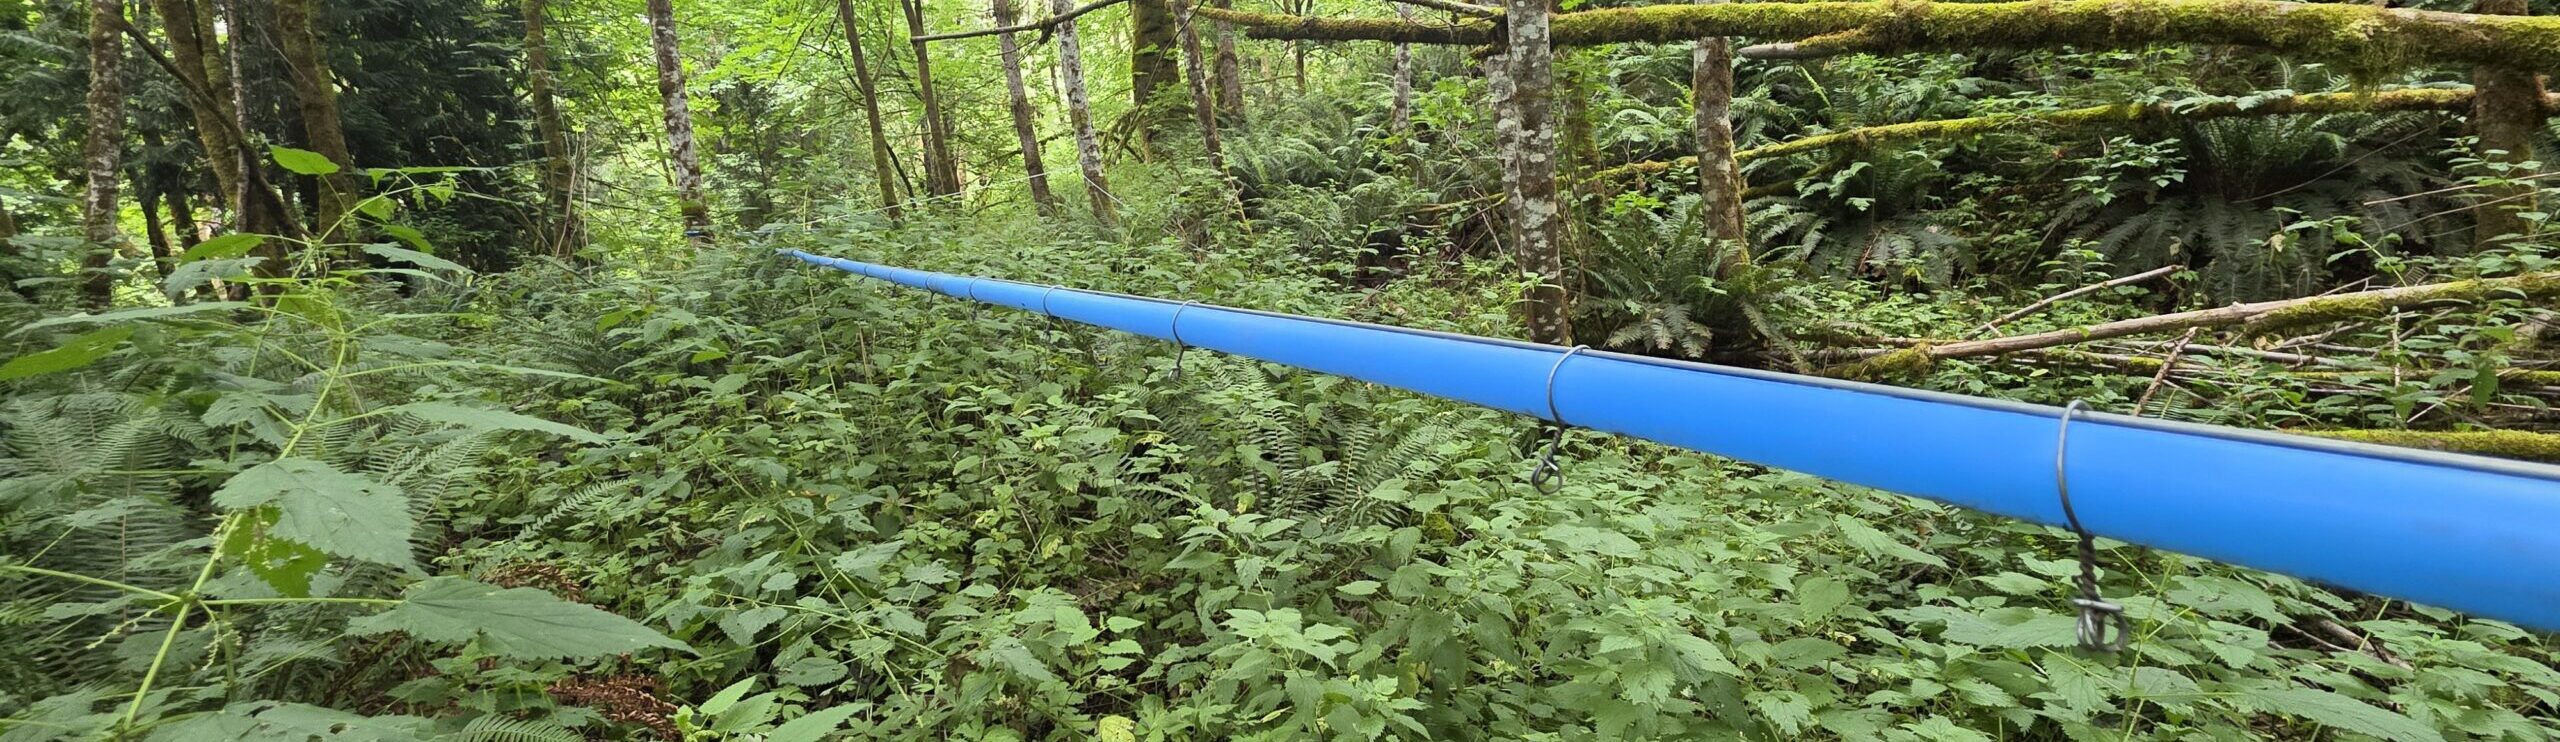
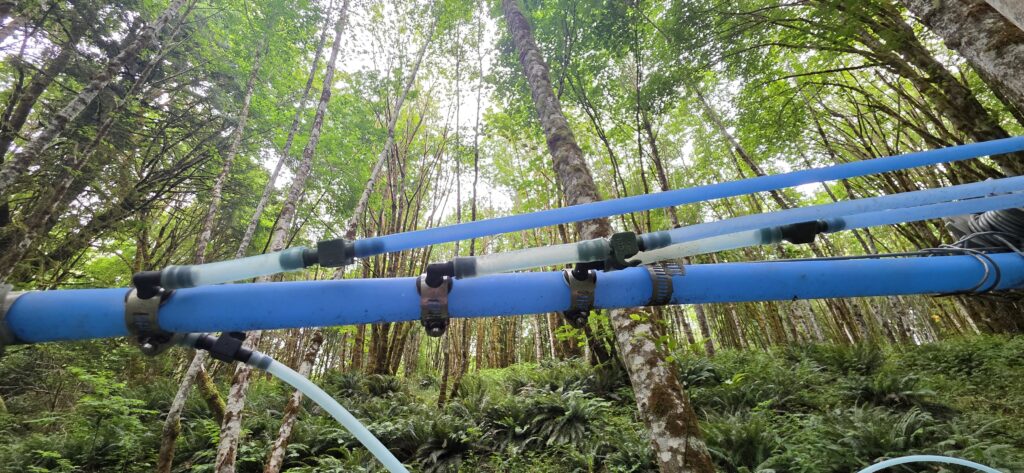
Tubing systems utilize food-grade plastic tubing to connect all taps into a single plumbing system that drains sap back to a central location for transport or processing. These systems consist of drop lines, lateral lines, and mainlines. The figure below shows a scaled tubing system and the different components. A short section of small-diameter, flexible tubing is used for drop lines, which connect to a spile on one end and the lateral line on the other through a “T” fitting. Lateral lines also use the flexible tubing, which is strung through several trees and held up by tension to connect multiple droplines and taps. Most tubing systems also utilize larger diameter (0.5-3 inch) rigid plastic pipe referred to as the “mainline”, to connect multiple lateral lines. Mainline is heavier and typically requires running high tensile wire along the projected path and then connecting the pipe with wire ties. Mainline may be optional for small operations, but in most cases it is the most efficient way to drain sap to sugarshack, which are often several hundred feet or more from the sugarbush. It also allows producers to use vacuum and improves syrup quality by moving sap from tap to tank faster and minimizing spoilage.
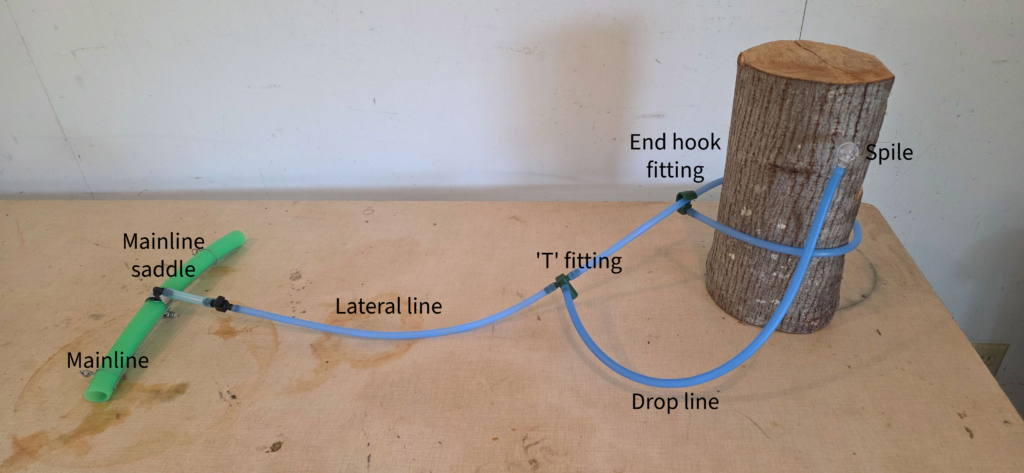
These systems are designed to use elevation changes and gravity to move sap through the system. A grade of 3% or more is ideal to sufficiently drain sap and avoid pooling where sap can collect and spoil. Sites with greater elevation can benefit from the natural vacuum that is created as sap drains down lateral lines on a slope, which pulls additional sap from the tree (this is only true when using 3/16 inch tubing). On flat sites, artificial vacuum can help to overcome the insufficient grade. Topographic or LiDAR maps and phone apps (e.g., Google Earth, Avenza, onX) with mapping functions can help you design the general outline of your system while a clinometer or rangefinder can be helpful to determine the exact grade in the field. These tools are particularly important where there is minimal slope.
Tips for Setting up Tubing Systems
- Slope, tree density, sap collection tanks, understory brush, water features, trails, and many other variables can factor into optimization of your mainline route. Studying other’s setups and gaining experience will help as you grow your system, but because mainlines are one of the largest investments of time and expense in your operation, you want to try as best you can to get it right in the beginning.
- Before ordering supplies, go out and sight the path of your mainline from the sugarshack to the sugarbush to find the quickest path with the best grade, ideally with a clinometer or rangefinder. This will help you understand how much tubing you need and any obstacles you may need to address (e.g. crossing a stream or road).
- Lay out the optimal mainline route with bright nylon string first. It’s much harder to move high tensile wire and maple tubing without kinking it than it is to move string when you have to pull it back to try different routes.
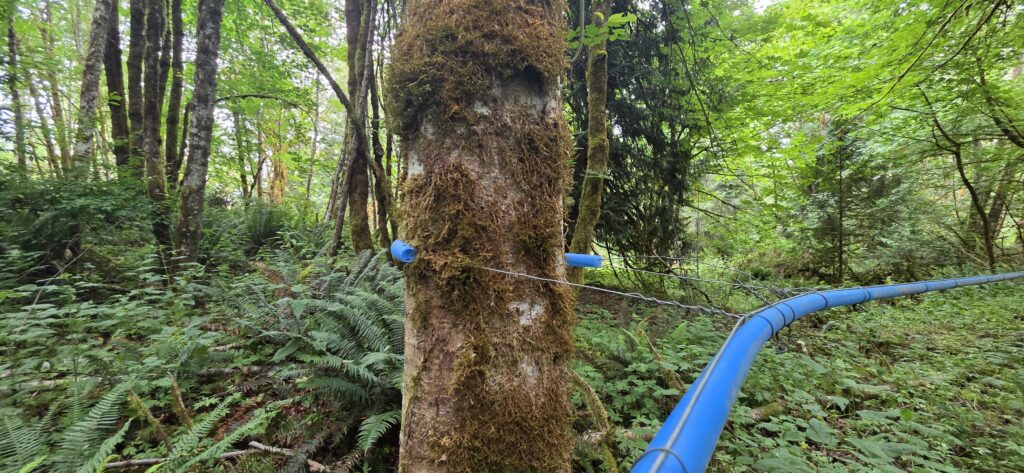
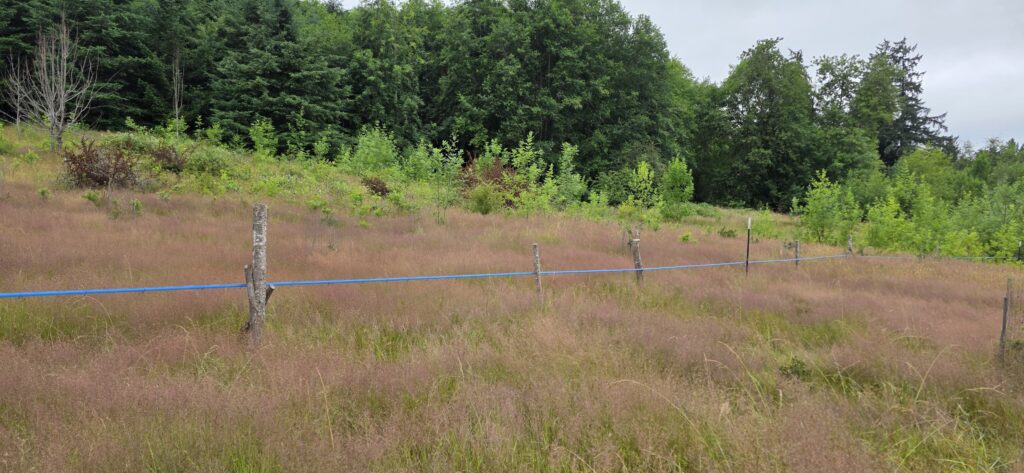
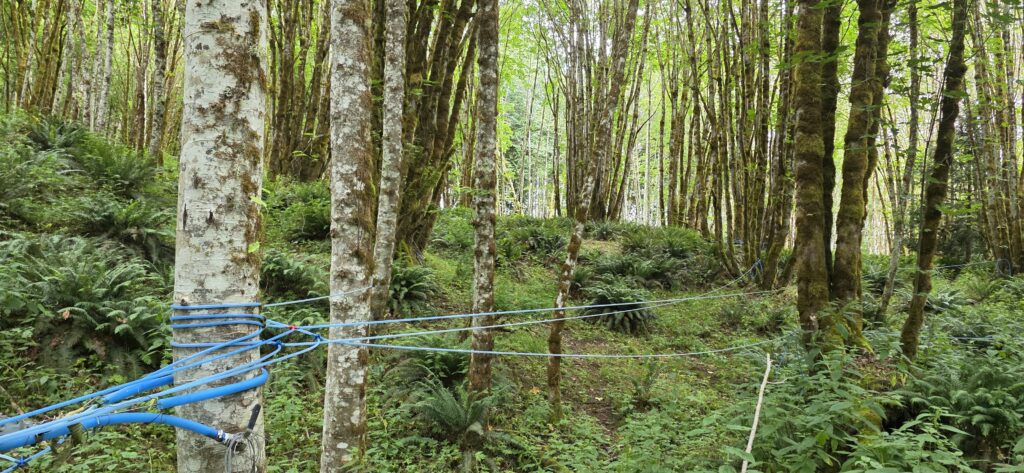
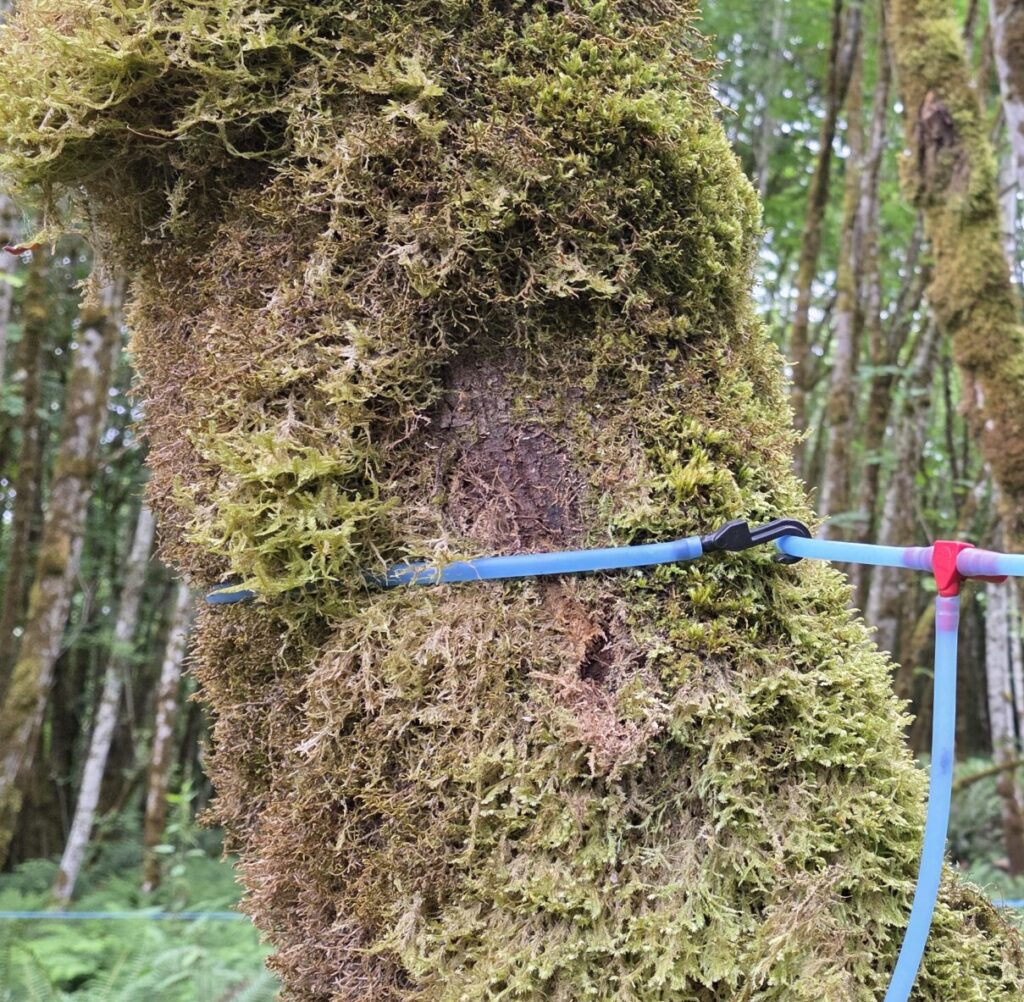
- Use a high-tensile wire to hang your mainline (12 gauge is common). Lay the wire along the path you determined, then tension it. Remove any remaining sags by using side ties to nearby trees or supporting the line with posts (see photos). Use a long-level to determine if the mainline is properly sloped.
- When using trees as anchors or side ties, slide the wire through a bit of the rigid, mainline tubing to ensure that the wire doesn’t partially girdle the tree once it’s under tension.
- Set up the mainline and lateral lines ahead of the sap season, then wait to set up drop lines until you tap so that you ensure you include enough tubing length to reach the area you want to tap. Add enough tubing to be able to work around the face of the tree in subsequent years.
More Lateral Line or More Mainline? Two Approaches.
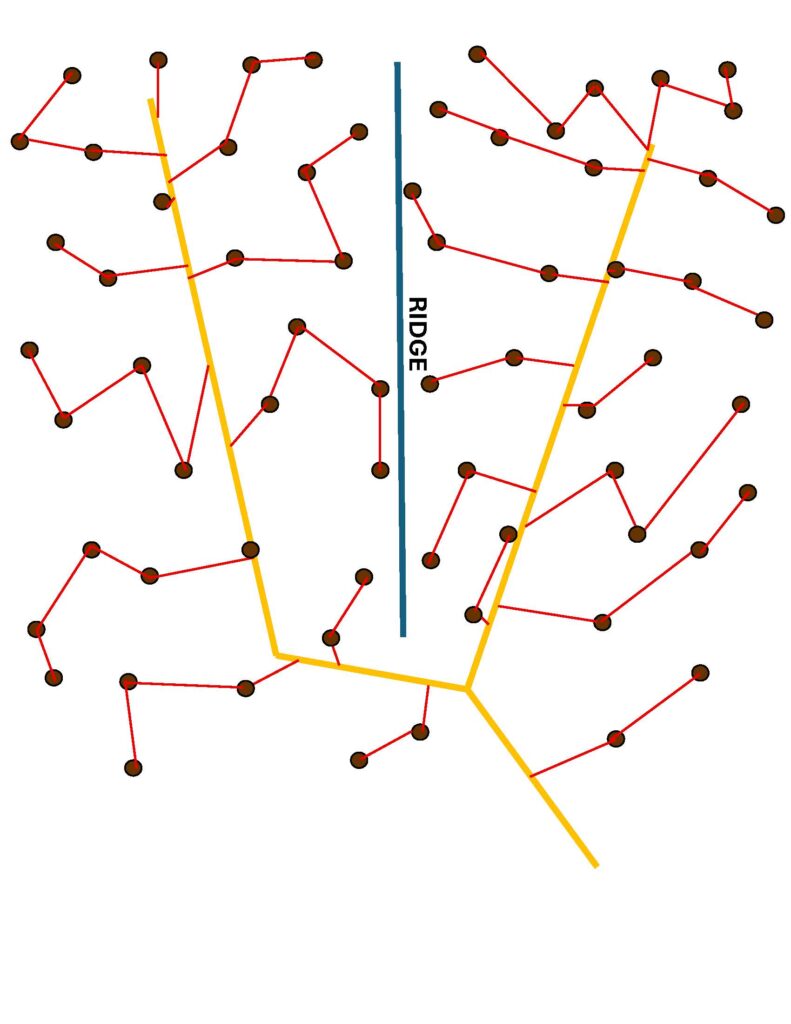
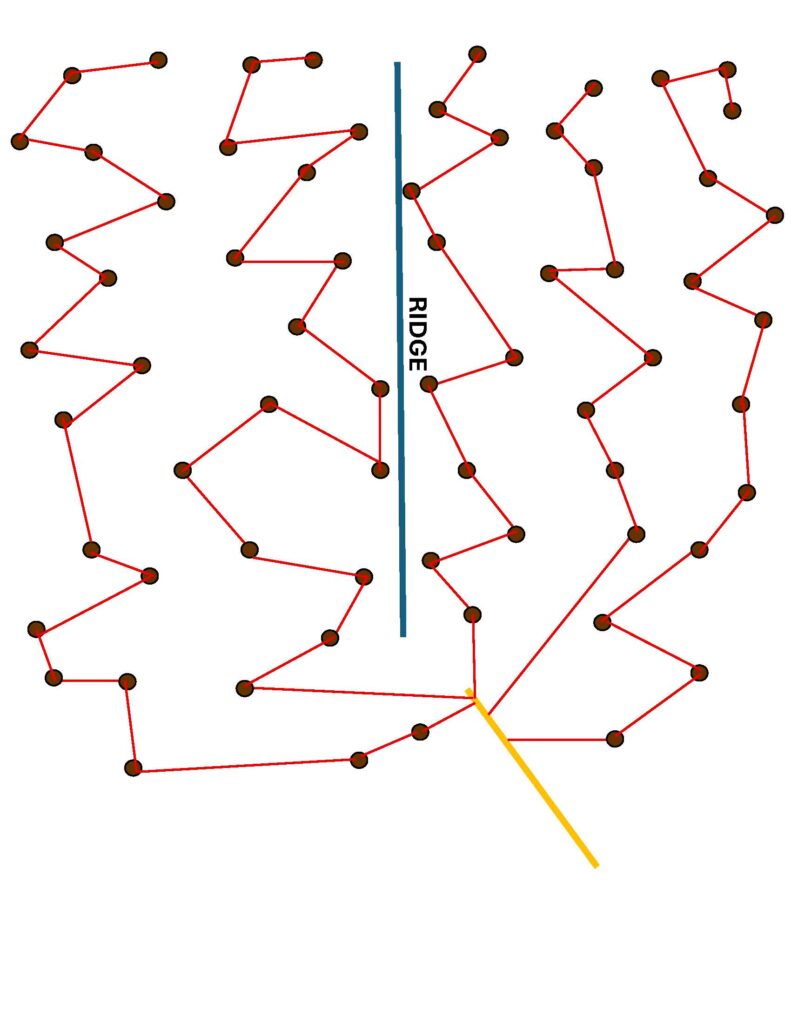
As you planning or installing your tubing system, you’ll likely need to decide between two approaches – one relying on more mainline and one relying on more lateral lines. Mainline is more expensive than lateral lines and using more of it with shorter lateral lines requires more mainline saddles (connection points between laterals and the mainline) which add to expenses and can be sources of vacuum leaks. However, sap moves faster through mainline, which mitigates contamination and spoilage. So, avoiding long zigzagging lateral lines that connect a lot of trees by extending mainline trees can greatly improve the quality of your syrup. It also improves sap yields in vacuum systems, while making tubing maintenance and identifying vacuum leaks much easier.
The type of tubing you use is an important deciding factor in these two approaches. If using 5/16-inch tubing, it’s better to have shorter lateral lines with around five trees per line (but not more than 10). However, if you are using 3/16-inch tubing and trying to create natural gravity benefits, having more trees on a line will help ensure that the column stays full with sap and maintains the siphon effect as it flows down hill.
The graphics below demonstrate the two approaches in a situation where a tubing system is being installed on either side of a ridge (mainline is yellow, lateral lines are red, and trees are brown circles).
Tubing Gear
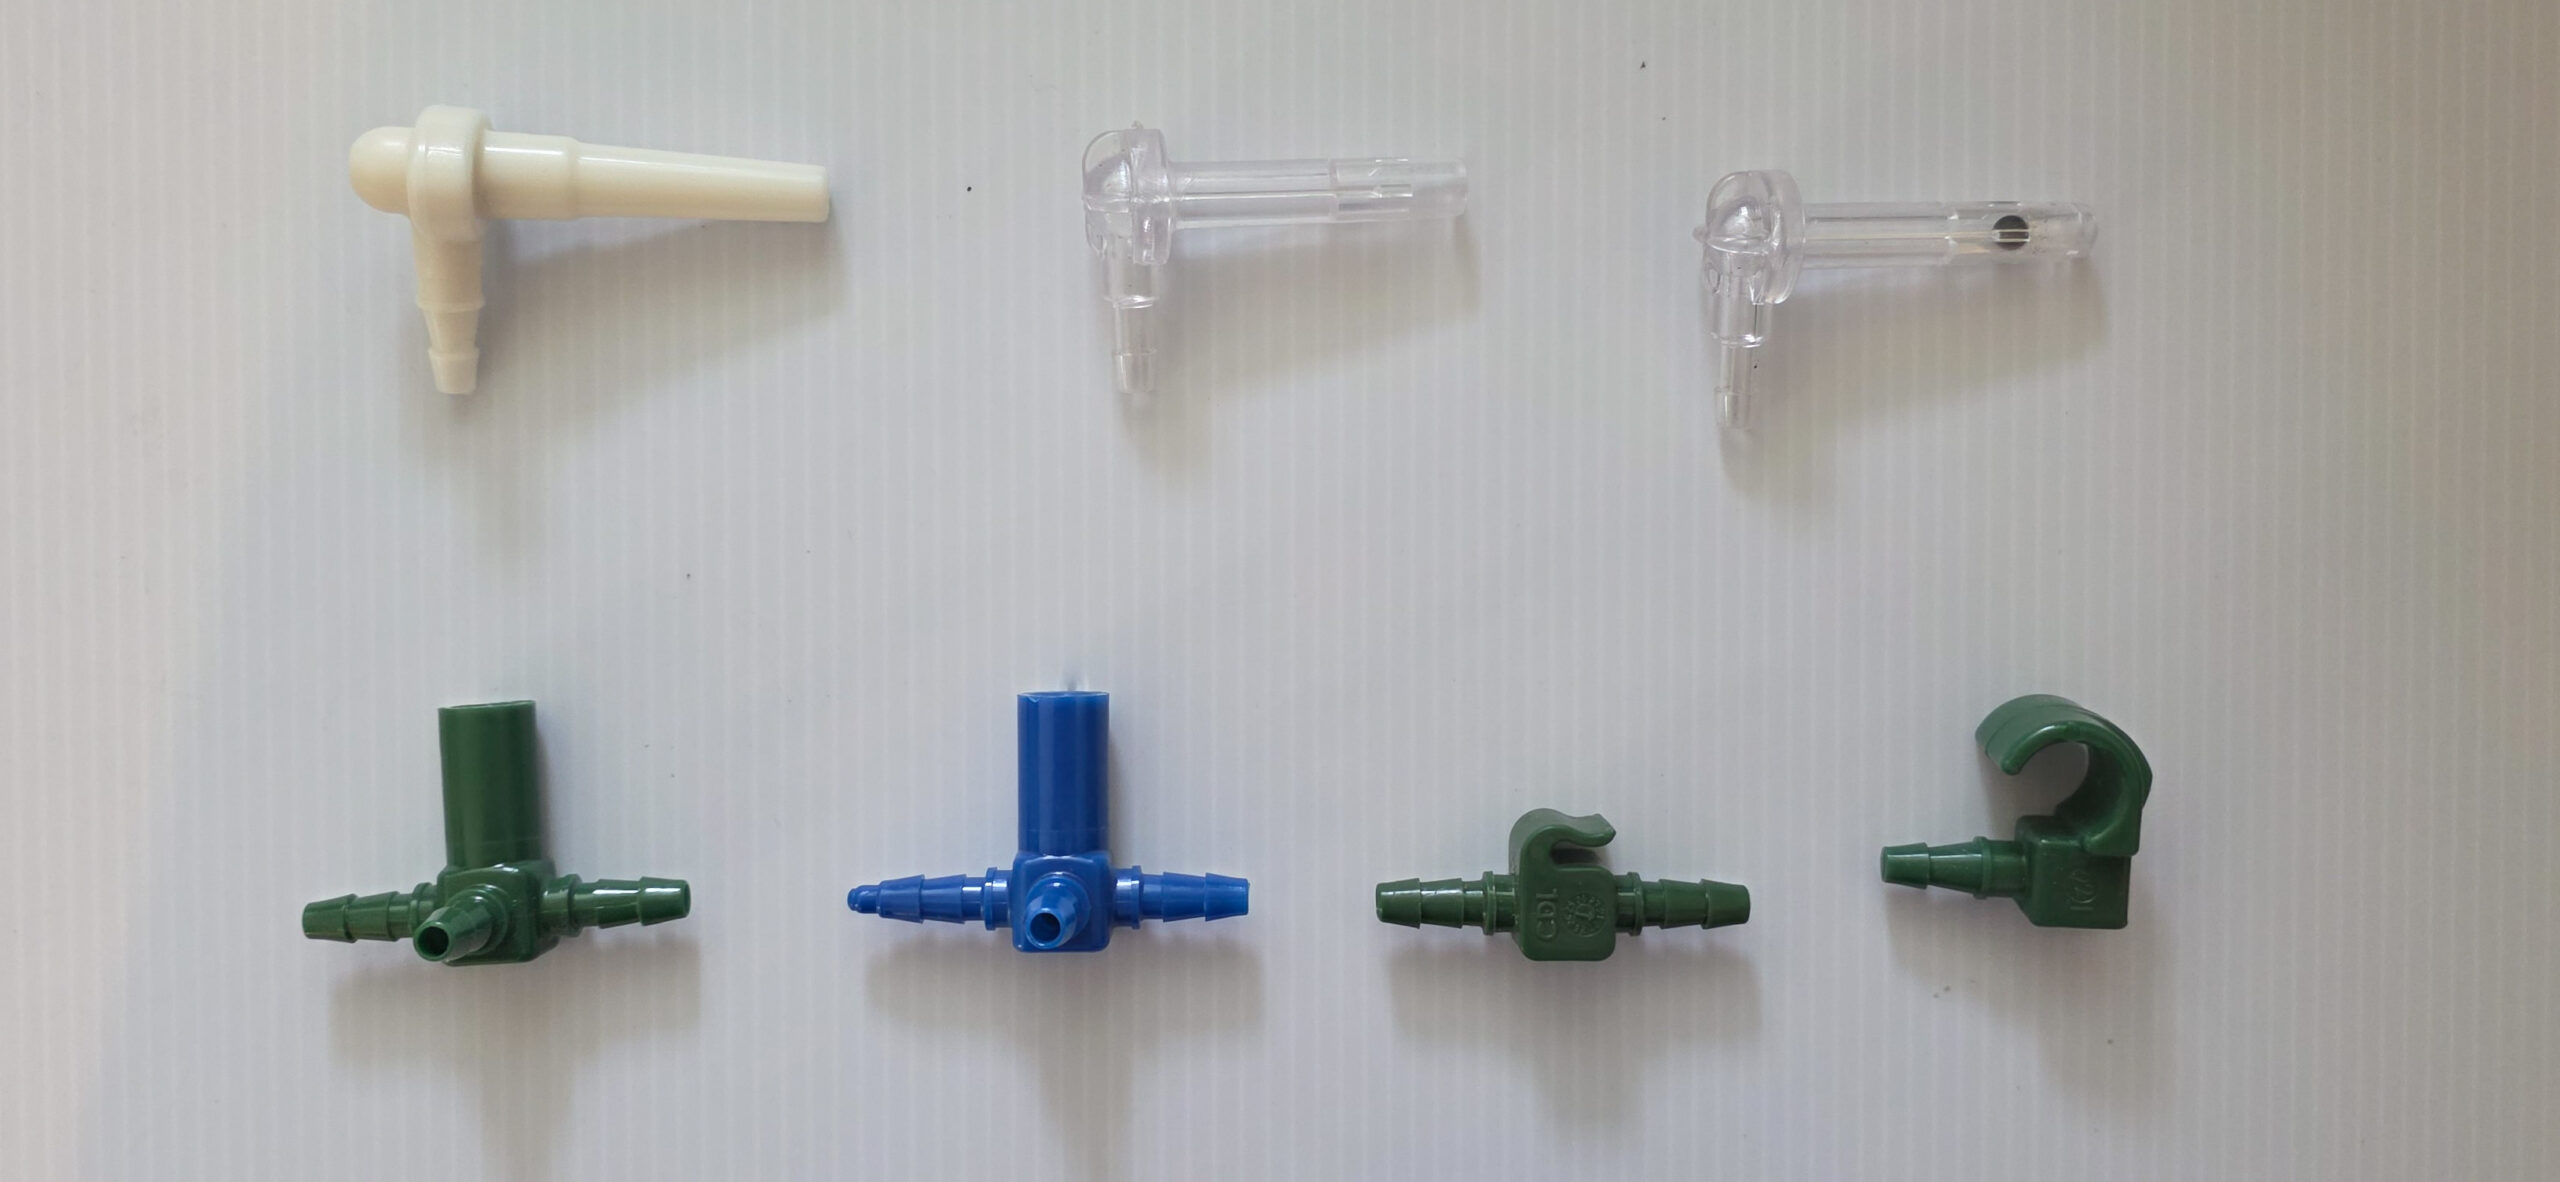
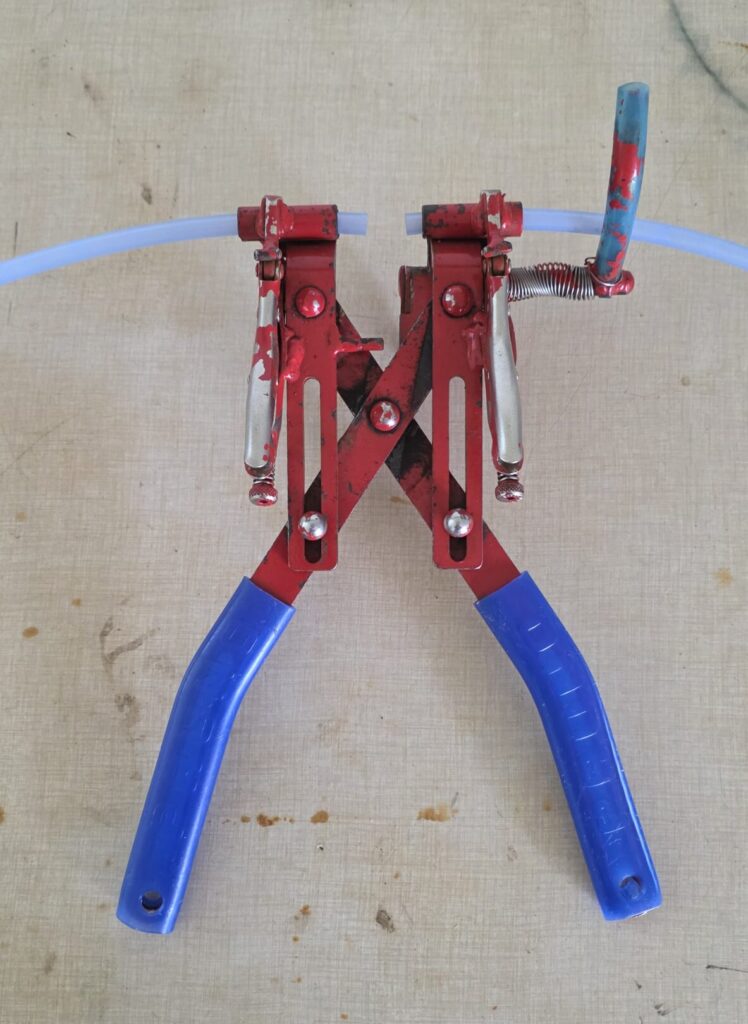
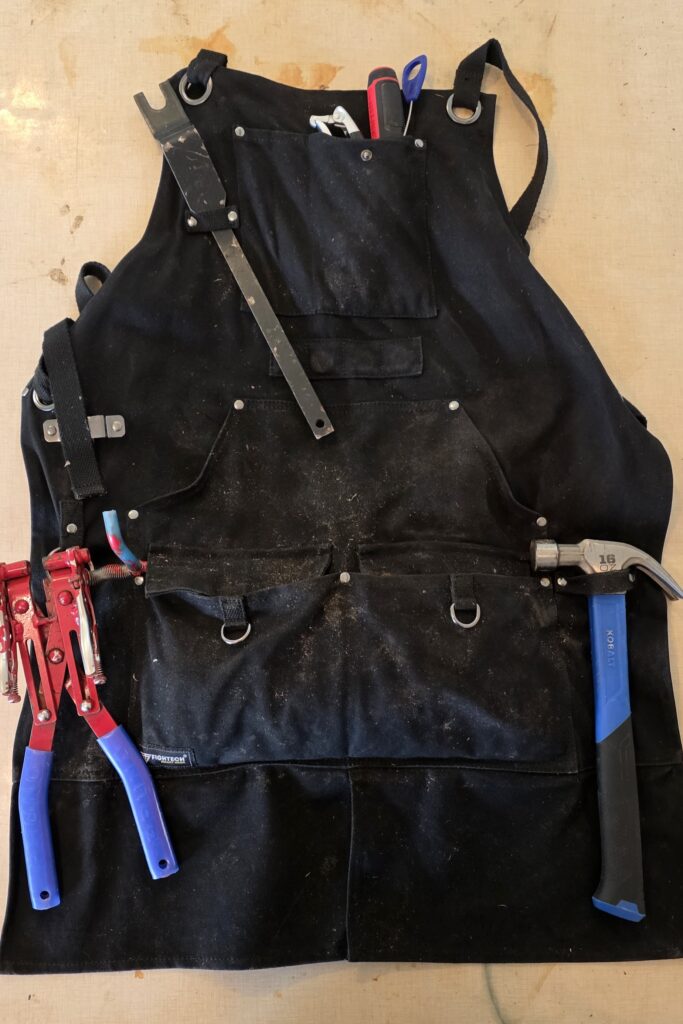
Setting up a tubing system is a bit like plumbing the forest. Like plumbing, there are a wide variety of tools and fittings available to ease setup and adapt to different scenarios in the field. A work apron or toolbelt is a worthwhile investment to help you carry these through the woods.

Tubing Size
Mainline tubing comes in a variety of sizes ranging from a half-inch to three inches in diameter (inner diameter). With more taps, a larger mainline is required. A 3/4 or 1 inch mainline can handle up to 1,000 taps and is likely sufficient for most producers in Washington State, but larger producers may opt to go with 1.5 or 2 inch mainline to leave room for growth. Particularly large operations may use more than one size of mainline, with the size getting smaller as it extends up the system into the sugarbush.
The flexible tubing for lateral and drop lines only comes in two sizes: 5/16 inch and 3/16 inch. The 5/16 inch tubing is considered standard in maple sugaring, while 3/16 inch is a newer innovation. The narrower diameter makes it possible to completely fill the tubing with sap which, as it drains down a slope to a lower point, creates a natural vacuum in the tubing that pulls additional sap from the tree (similar to how a siphon works). However, the narrow diameter also means that it can get easily clogged with wood shavings or bacteria build up over time. As result, 3/16 tubing requires more maintenance both during and between sap flows, and will likely require replacing more frequently. Still, it can provide a good option for achieving some the benefits of vacuum on sites where adding artificial vacuum isn’t feasible. By comparison 5/16 is the standard for the industry, requires less maintenance and replacement, and is versatile to all types of artificial vacuum systems (discussed in the next section).
| 3/16 vs 5/16 | 3/16 inch tubing | 5/16 inch tubing |
|---|---|---|
| Pros | Yields enhanced by natural vacuum Cheaper than 5/16 Can be used with low-power vacuum pumps | Can be used with low and high-power vacuum pumps Requires less frequent cleaning and replacement Less sensitive to vacuum leaks |
| Cons | Reduced yields after first year Requires slope to achieve natural vacuum benefits Requires more frequent cleaning and replacement Clogs easily, requires tap hole maintenance to clear wood shavings More sensitive to vacuum leaks | More expensive than 3/16 Diameter is too large to provide natural vacuum benefits |
Cleaning Tubing Systems
Because maple sugaring requires boiling and syrup has a low active water content, food safety is not a significant concern during tapping and sap collection. However, keeping tubing systems clean will reduce the exposure to natural yeasts and bacteria, mitigate sugar conversion and spoilage, and ultimately improve syrup flavor and quality. Over time, a “biofilm” of microorganisms can develop on the inside of the tubing. Syrup made from systems that are not well-maintained may have acrid or sour flavors that put off consumers and have negative effects on the industry as a whole.
Currently, the most common approaches for cleaning tubing systems include:
- Bleach (sodium hypochlorite) – A food grade bleach (sodium hypochlorite) can be used to clean and sterilize tubing. A concentration of 200ppm-600ppm should be used depending on how dirty the lines are (higher concentration for dirtier lines) and a minimum contact time of thirty minutes up to several hours. Bleach has a mild smell and flavor, so a post-rinse is required to avoid effects on syrup taste. In the environment, it breaks down into water and salt. Salt can attract squirrels, which chew on the tubing and can create maintenance headaches. A food-grade calcium hypochlorite alternative (e.g. Drytek) can help reduce damage from squirrels.
- Hydrogen peroxide – A food grade hydrogen peroxide is also effective at cleaning tubing systems. A 3% solution is recommended. Concentrated hydrogen peroxide can be purchased and diluted with care and proper personal protective equipment (PPE). A contact time of 20-30 minutes is recommended. Hydrogen peroxide breaks down into water with little or no flavor, so rinsing may be optional.
- Water – Regularly flushing with water before and after sap runs may help maintain lines and reduce the need for chemical sanitizers. However, using water alone will not kill any microorganisms and won’t break down any biofilm that has developed on the inside of the tubing, so more frequent flushing would be necessary to clean out sugars and prevent microbial growth. Hot water, if available, will have a greater effect. In either case, using enough water so that each section of tubing is flushed for 30-60 seconds is recommended.
- Nothing – If doing nothing is the best or only option available to you, focus your efforts on designing and maintaining your tubing system to minimize the time between the sap leaving the tree and reaching your sugarshack for processing. This means ensuring there are no sags where sap pools, ensuring there is sufficient grade to move the sap quickly, avoiding long, zig-zagging lateral lines, and investing artificial vacuum to help pull sap quickly. Use 5/16 inch tubing instead of 3/16 and replace tubing where build-up is obvious. In systems where no sanitation is used, it’s particularly important to process sap quickly as it will have greater exposure to microbes in the tubing.
Chemical sanitizers may only be necessary at the beginning and end of the season, while a flush with water may be sufficient before and after sap runs. When cleaning any sap collecting equipment, including tubing systems, it’s important not to use any fragrant cleaners that could be concentrated and affect the flavor of your syrup.
| DryTec Granulated Weight (g) | 200ppm | 400pm | 600ppm |
|---|---|---|---|
| 14g (0.5 oz) | 9 gallons | 6 gallons | 3 gallons |
| 28g (1 oz) | 19.5 gallons | 13 gallons | 6.5 gallons |
| 85g (3 oz) | 58.5 gallons | 40 gallons | 20 gallons |
The best method for sanitizing tubing systems is site dependent, but generally requires either working up or down the system. For example, one method is to fill your sap tank with water or a cleaning solution and then use a well or garden pump to pump the solution up the tubing system. Alternatively, you can go to the “top” of the system and inject a cleaning solution through the top of the lateral lines and/or through each drop line using a backpack sprayer or other portable tank.
Vacuum and tubing system management can also help with sanitation. For instance, using artificial vacuum and keeping it on throughout the season, even while the sap is not flowing (but turning it off during freezing conditions), will help pull microbes down the system. This has an added benefit of mitigating contamination of the tap hole, which keeps them fresh and active for longer, reducing the need for retapping. Capping off spouts at the end of the year while vacuum is on will help keep the system fresh between seasons. Replacing spouts every year and drop lines every 4-5 years will also help with quality. These approaches, combined with chemical sanitation can help maintain tubing systems for years or decades.
In eastern states, syrup producers generally don’t bother with sanitizing tubing systems. But in the Pacific Northwest, where we have long periods of warm weather (i.e. above freezing) between sap runs, sanitation can significantly improve syrup quality. However, sanitizing lines can be time consuming and logistically difficult, especially for large operations with several hundred or thousands of taps. Oregon State University is currently researching scaled solutions for line maintenance, as well as methods for sap sterilization and filtration during collection.
Other Maintenance
A tubing system will require annual maintenance outside of cleaning. Squirrels are known to chew on the tubing, causing leaks and breaks. Downed trees and branches from windstorms will fall on tubing throughout the year. Tubing also has a lifespan and may need be replacing just because it has degraded. It’s good to visit your sugarbush throughout the off-season to assess any damage that has occurred and plan accordingly, including ordering any necessary supplies ahead of the next season. October and November are good times to go out and do some maintenance just ahead of the next season.
Tubing System Guides and Resources
Vacuum is a tool that used to increase syrup production by creating negative pressure at the tap to extract more sap from trees and extend the length of sap runs. It can more than double sap yields without negative impacts on trees. It can also help overcome issues with grade (e.g., transporting sap across flat areas) and reduce spoilage by reducing the amount of time sap spends between the tap and tank. Most commercial maple sugaring operations utilize some type of vacuum, even in the Pacific Northwest where the operations are much smaller.
Vacuum is measured in inches of mercury (Hg). Every additional inch in mercury results in a 5-7% increase in sap production. The types of vacuum typically break down into 1) natural vacuum, 2) low power vacuum, and 3) high power vacuum.
Natural vacuum was previously discussed in the tubing section, because it requires using the narrower 3/16 inch tubing for lateral and drop lines. This narrow diameter ensures a solid column of sap during a run, which creates a natural vacuum as it drains down a slope. The larger the drop in elevation from the top of a lateral line to the bottom, the better the vacuum. One foot of elevation drop is equal to a little less than one inch mercury (0.88 Hg) in vacuum, but the upper limit achieved with natural vacuum is typically 15-22 Hg. When relying on natural vacuum, keep in mind that 3/16 inch tubing requires regular cleaning using chemical sanitizers or replacement to sustain these yield benefits. Otherwise, a biofilm develops on the inside, which narrows the tubing further and reduces yields significantly after the first year.
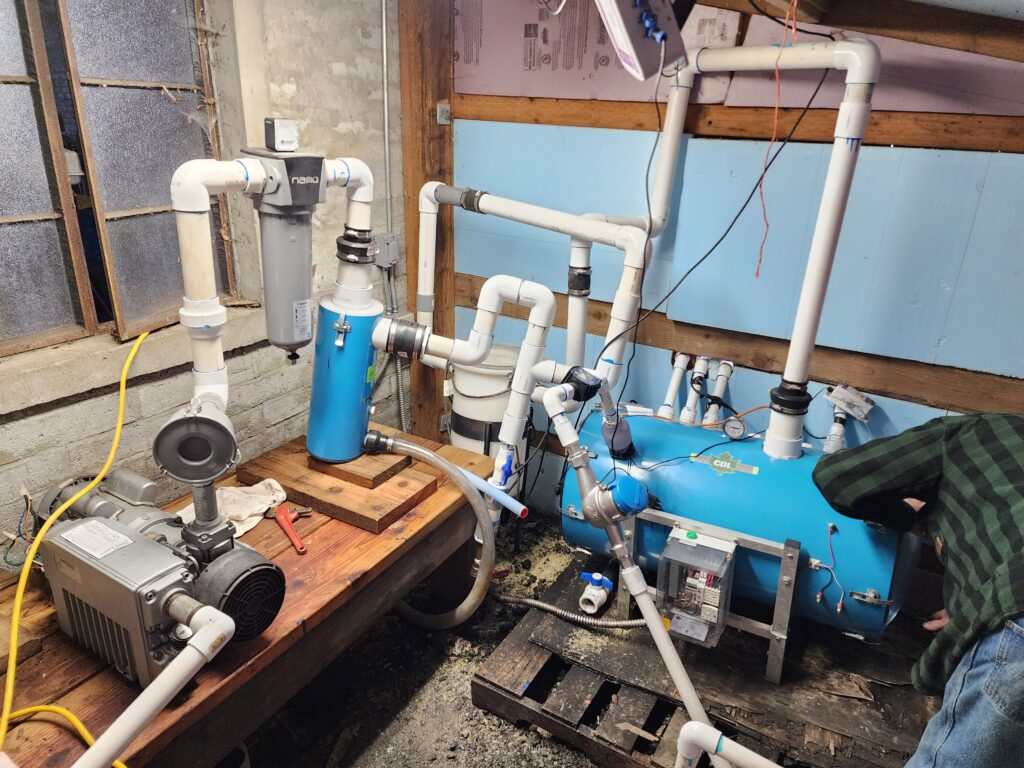
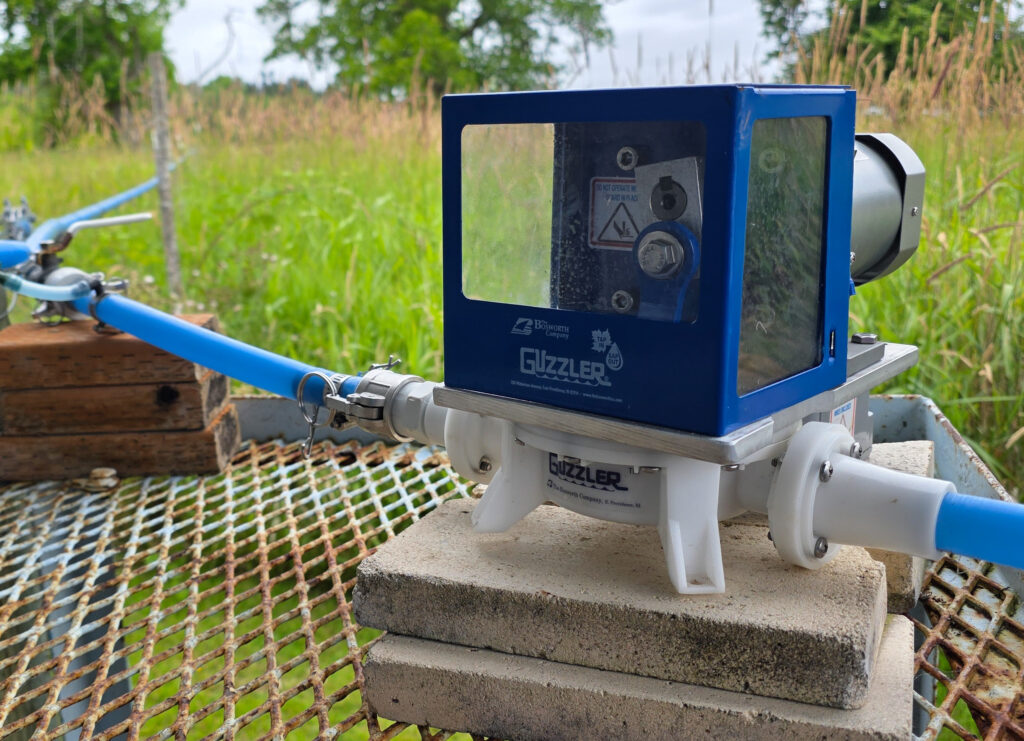
Low power and high power vacuum refer to vacuum created by connecting the tubing system to an electric pump that artificially creates a negative pressure in the system. Low power vacuum typically ranges from 18-22 Hg, while high power vacuum maintains levels of 25-28 Hg (for reference, 29Hg is the maximum possible vacuum that can be achieved on Earth). Low power vacuum is typically achieved with basic diaphragm pumps. These are relatively low-cost and easy to operate, often only requiring a standard 120-volt outlet. High power vacuum pumps are more costly, more complex, and usually run on 220-volt energy. They consist of a pump and a releaser with a float valve. The pump creates an intense vacuum in the tubing system that draws sap into the releaser, which acts as an airlock. Once the releaser fills with sap, the float triggers it to pump the sap out quickly to a tank without losing any vacuum in the system. High power vacuum can even extract sap without freezing conditions to start the sap flow, although the sap quality is usually lower in this scenario.
Tips for Operating with Vacuum:
- Keep your tap holes clean. The vacuum drawing sap away from the tree reduces contaminants in the tap wound and creates a sealed environment. This slows the trees healing process and and keeps tap holes viable longer, which reduces the need to retap and mitigates stress on the tree. You can maintain this by sterilizing your drill bit and any tool you use to clear out wood shavings between taps, and never use your mouth to blow in the tap hole.
- Keep your drill level when drilling a new hole. Drilling at an angle will create an ovoid hole that may result in vacuum leaks. Also, avoid reaming out the tap hole and do your best to drill it in one in-and-out motion. Using a specialized tapping bit and a precision tapping guide for your drill can create consistent tap holes and help you move faster.
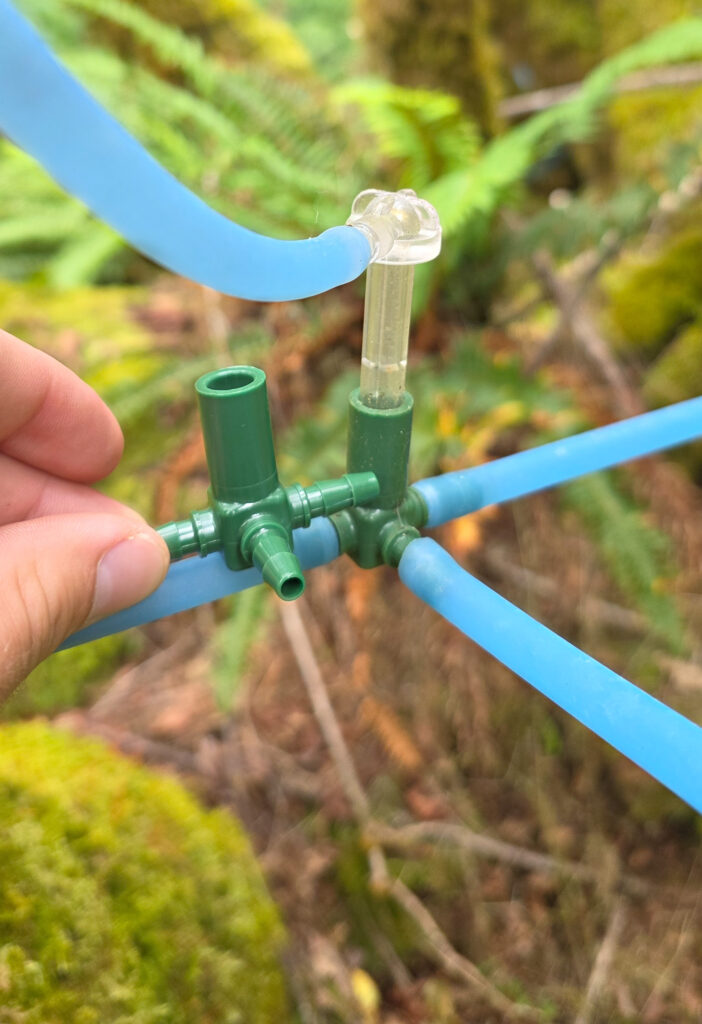
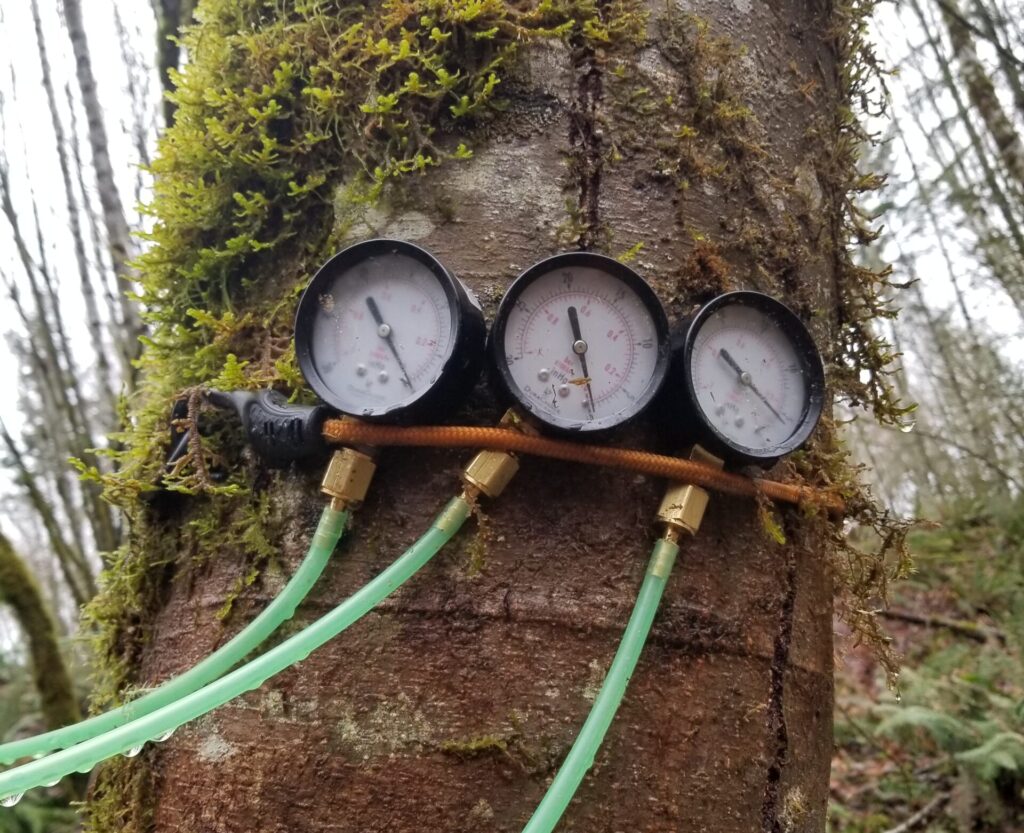
- Monitor vacuum levels consistently. This will help you determine if you have vacuum leaks. There are many ways to do this, but a low-tech option is to buy analogue vacuum meters and retrofit them with barbed fittings to fit into your tubing system (see photo). It’s good to have a meter in front of your vacuum on the system, as well as at the end of the mainline, and at the top of several lateral lines. Keep in mind that vacuum will naturally be slightly lower in the sugarbush than right next to the vacuum. Maple syrup equipment suppliers also sell digital systems that allow you to monitor vacuum from your phone or computer.
- If you think you have a vacuum leak, start by looking at where the lateral lines meet the mainline. These connections are often the sources of leaks themselves, but this also allows you to get an easier look at how sap is moving through the lines. If sap is moving unusually fast in a line, or it is empty, the leak is likely somewhere along that line. Common reasons for vacuum leaks include squirrels chewing through lines, blockage from wood shavings, branches or trees falling on tubing, tapping into a tree cavity, and connections coming loose.
- Keep lots of spare parts around, whether that’s extra diaphragms for diaphragm-based pumps, or a host of fittings and connections for high power vacuum. Maintaining vacuum is an on-demand job and the sap waits for no one. If you’re caught without the part you need, it could mean missing out on a sap run.